

Introduction
In this article we will see how to implement SuiteBarBranding Delegate Control.
SuiteBarBrandingDelegate: This delegate care about top left site logo and text. Facilitates us to override the left-top corner text for the site. This text can only be replaced by overriding SuiteBarBrandingDelegate Delegate Control with custom control created using Visual Studio. Normally, there’s a text reading "SharePoint", so we can replace it with the title of our own site:
SuiteBarBrandingDelegate Control will look as follows in SharePoint Page.
Header before

Step 1: Create one empty SharePoint Project and provide the Solution Name and choose the Solution Path. Then click OK.
Step 2: Deploy the Solution as Farm Solution. Provide the Url in next screen and validate the connection.
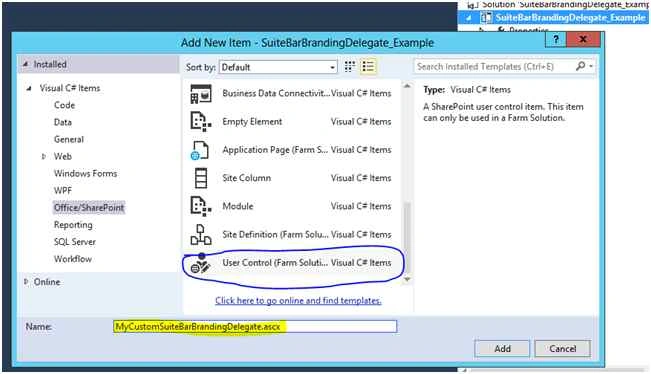
Step 3: Add New UserControl to the Project from the Templates and provide a Name to it. In our case it is “MyCustomSuiteBarBrandingDelegate”
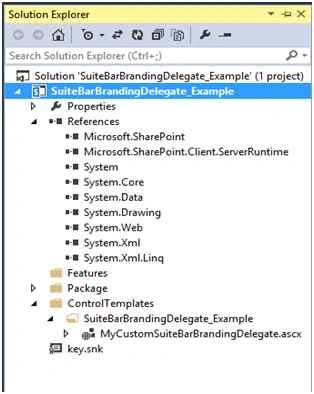
Now our Solution Explorer looks as follows,
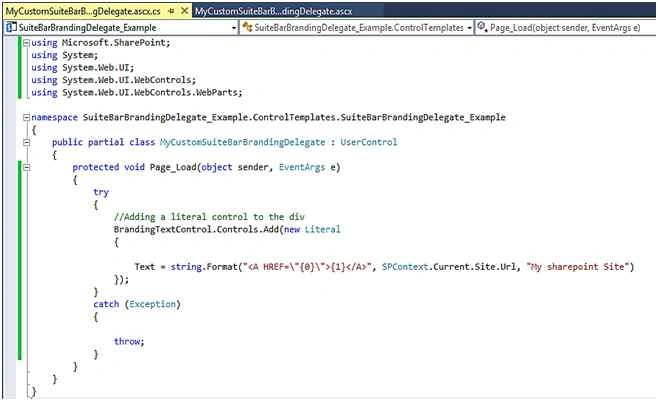
Step 4: Now open the “.ascx” of the User Control and paste the following code.

Step 5: Code snippet for the ascx.cs file.
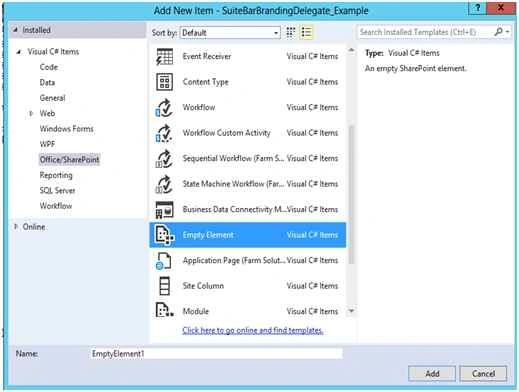
Step 6: Add Elements.xml file to the Solution, provide the name and click Add.
Step 7: Click on elements.xml file and paste the following code snippet inside the elements tag.
- <?xml version="1.0" encoding="utf-8"?>
- <Elements xmlns="http://schemas.microsoft.com/sharepoint/">
- <!-- Adding DelegateControl reference to our custom SuiteBarBrandingDelegate Control -->
- <Control ControlSrc="/_controltemplates/15/SuiteBarBrandingDelegate_Example\MyCustomSuiteBarBrandingDelegate.ascx"
- Id="SuiteBarBrandingDelegate"
- Sequence="1" />
- </Elements>
The final outcome will be as in the following screenshot,

Santhakumar MunuswamyPosted Nov 28, 2015, 2:39 AM
Nice share
Ajay GandhiPosted Nov 25, 2015, 8:20 AM
Nice One
Raja TPosted Nov 25, 2015, 1:20 AM
Nice, Thanks for sharing
Banketeshvar NarayanPosted Nov 24, 2015, 12:42 PM
Good One