

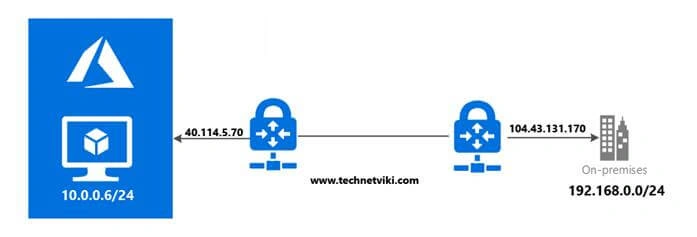
Before this demo, we must configure the Virtual Networks and Virtual Machines as per the following configuration.
- Our Azure IP: 40.114.5.70
- Vnet IP: 10.0.0.0/24
- On-Premises IP: 104.43.131.170
- LAN IP: 192.168.0.0/24
Introduction
Site-to-site VPN is a type of VPN connection that is created between two separate network locations. It provides the ability to connect geographically separate locations or networks, usually over the public internet connection or a WAN connection.
Step 1 - Verify your Virtual Networks
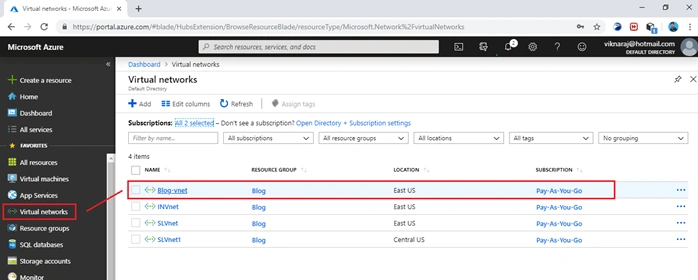
In the Azure Portal, click the “Virtual Networks” and open “Blog-vnet”.
Step 2 - Creating a Gateway Subnet
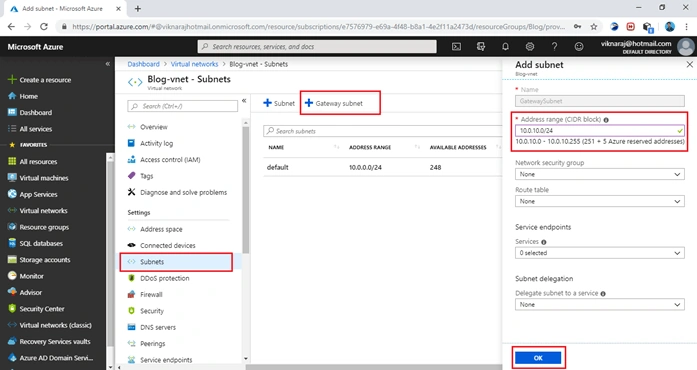
Now, we have to create a Gateway subnet. So, select “Subnets” and then click “+ Gateway Subnet”.
Now, we need to enter the address range (CIDR block) and click “Ok”. The Gateway Subnet is an internal gateway in this network that Azure can use to route traffic back to your on-premises environment.
Step 3 - Creating Local Network Gateway
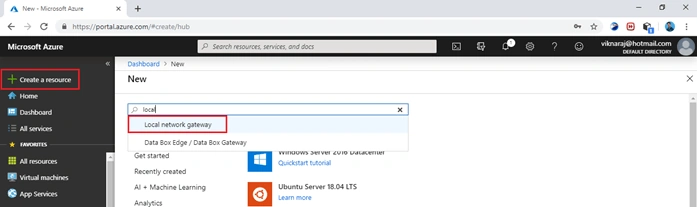
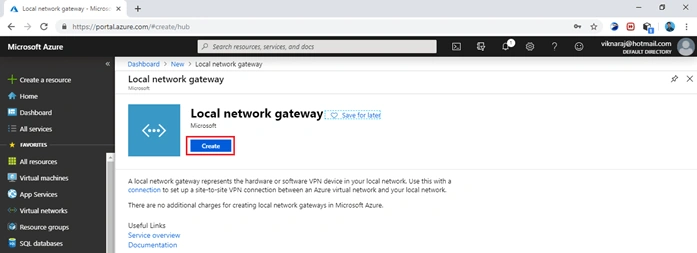
In this step, we need to create a “Local Network Gateway”. This represents our local on-premises networks. This Gateway shows our on-premises information so that Azure knows where our on-premises are running.
Go to “+ Create a resource”, start typing “Local network gateway”, and select it to begin configuring.
Step 4 - Creating Local Network Gateway contd.
The Local Network Gateway basically defines our on-premises IP address information, so click the “Create” button.
Step 5 - Configuring IP Information in the Local Network Gateway
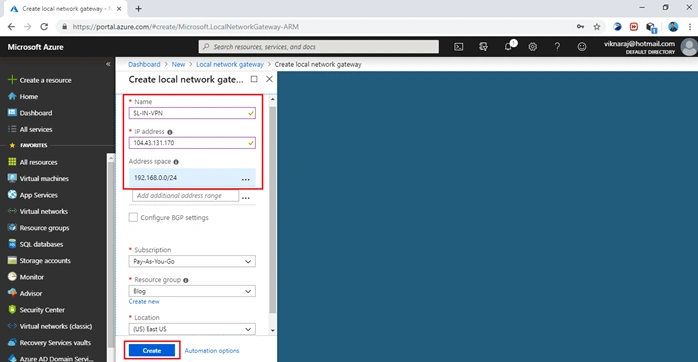
Now, we need to fill our correct information.
- Name: SL-IN-VPN
- IP Address: 104.43.131.170 – Azure IP Address
- Address Space: 192.168.0.0/24 – LAN IP Address Range
Enter the other necessary information and click “Create”.
Step 6 - Creating Virtual Network Gateway
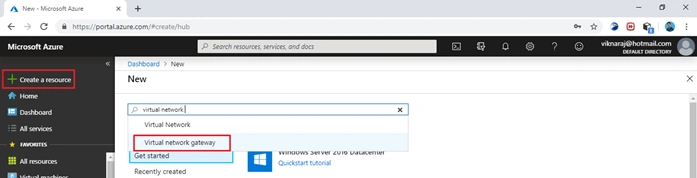
We need to create a Virtual Network Gateway that will become the endpoint to your connections.
Go to “+ Create a resource”, start typing “Virtual network gateway”, and select it to begin configuring.
Step 6 - Creating Virtual Network Gateway Contd.
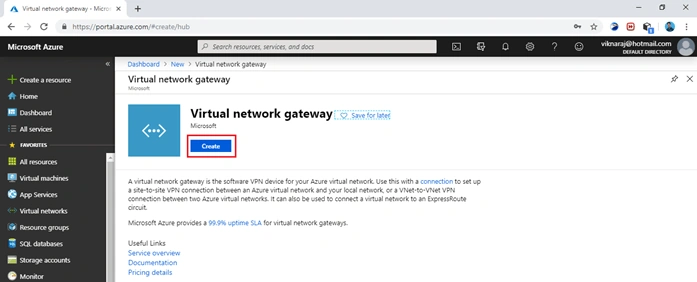
Click the “Create” button to configure the Virtual Network Gateway.
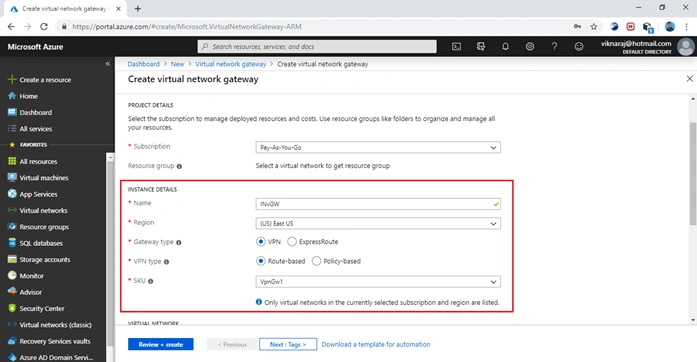
Step 7 - Virtual Network Gateway Instance Details
Now, we need to fill the instance information.
- Name: INvGW
- Gateway Type: VPN
- VPN Type: Router-based
- SKU: VpnGw1
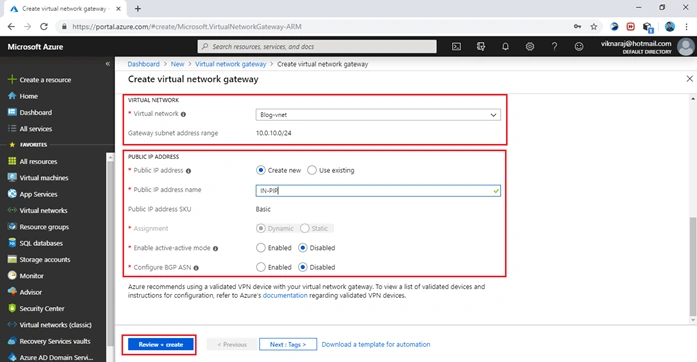
- Virtual Network: Blog-vnet (Our Azure Local Virtual Network)
- Public IP Address: Create New
- Public IP Address Name: IN-PIP (In the demo, we can use this name as our Public IP)
- Enable Active-Active mode: Disable
- Configure BGP ASN: Disable
Click the “Create + Review” button to start the process. It will take more minutes to finish the process.
Step 8 - Creating a Connection
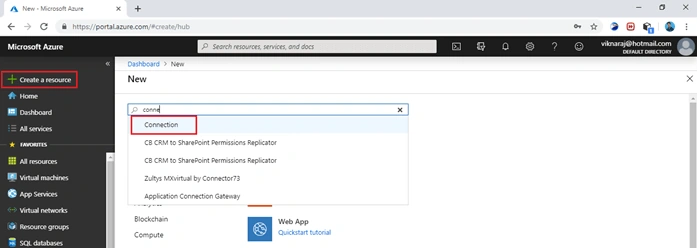
The connection is represented to connect Virtual Network Gateway and Local Network Gateway.
Go to “+ Create a resource”, start typing “Connection”, and select it to begin configuring.
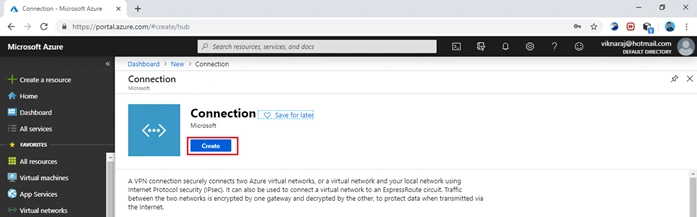
Step 9 - Creating a Connection Contd.
Click the “Create” button to configure the connection.
Step 10 - Connection Basic Information
- Connection Type: Site-to-Site (IPsec)
Click the “OK” button to finish the basic information.
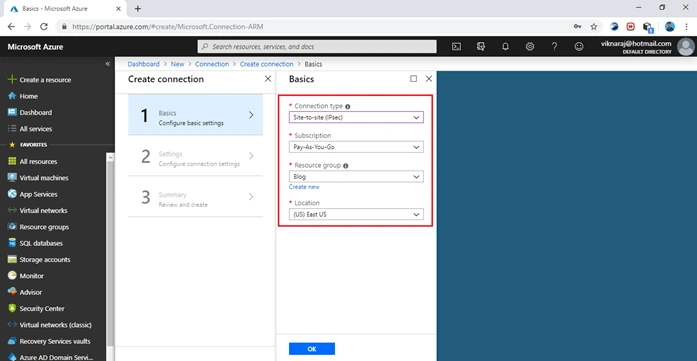
Step 11 - Connection Settings Information
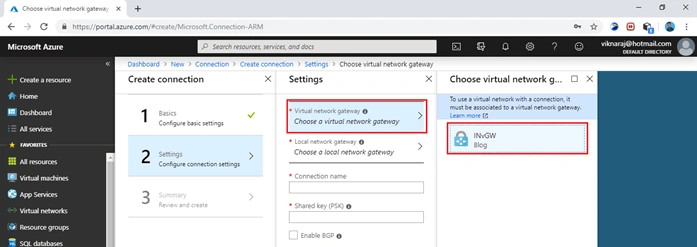
In the Virtual Network Gateway, choose the Gateway that we have already created, so click “INvGW".
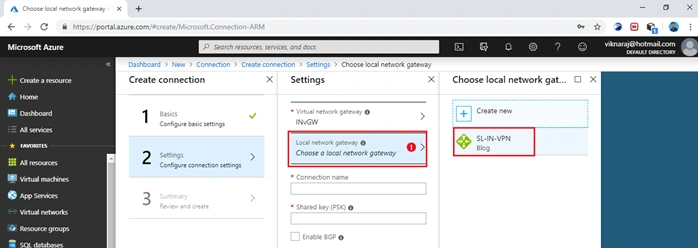
In the Local Network Gateway, choose the Gateway that we have already created. Click “SL-IN-VPN”.
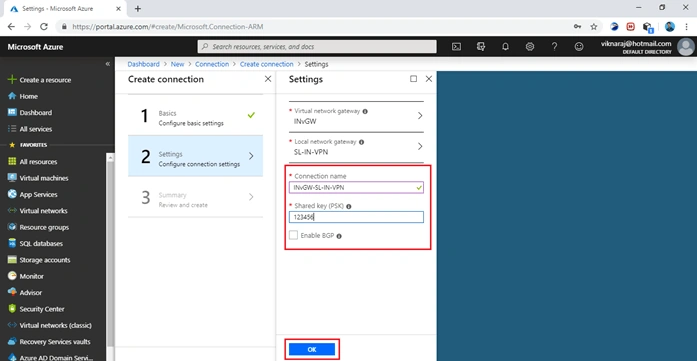
In the Connection Name, it assigns the name itself. If we need to change the name we can do it. Now, we need to assign the Shared Key (PSK) for Secure VPN connection, so our PSK is “123456”.Click “OK" to configure the connection.
We have successfully configured Azure Site-to-Site VPN Configuration.
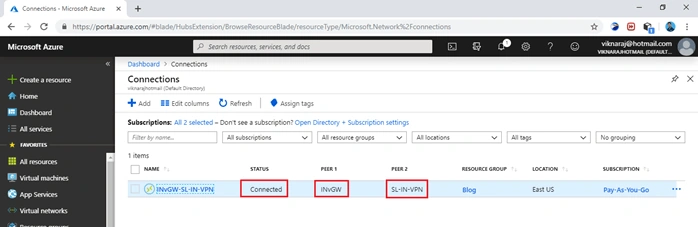
Now, we can verify our VPN status in the Connection settings.
Now, our VPN Status is “Connected” and we can verify the Peer 1 and Peer 2.
Summary
In this demo, we learned how to configure Site to Site VPN in Azure. In our next demo, we will learn how to connect our On-Premises Server to Azure using Site to Site VPN. If you have any clarification, feel free to comment.
Hadshana KamalanathanPosted Aug 23, 2019, 1:06 AM
Well done..