

This is my second article on C# Corner. In this write-up, we are going to see about MasterDetailPage with TabbedPage. Seems unusual but it is certainly not. Many popular apps out there have the same architecture, for example, C# Corner, Paytm, Google’s Play Store App, and many more. Have a look at the following C# Corner app screenshot with the blend of MasterDetailPage & TabbedPage.
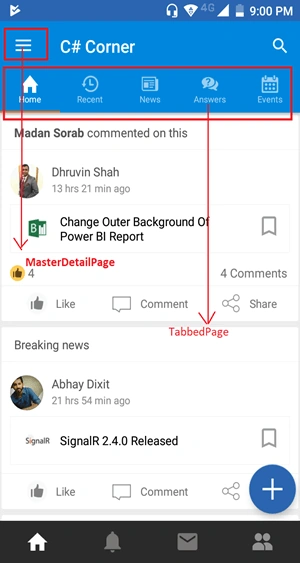
MasterDetailPage
Requirement
- Microsoft Visual Studio Enterprise 2017(VS Community as well can be used) Along with installing the latest version of Xamarin.
- Windows 10 & macOS Mojave machine in order to see the output in for both Android & iOS (Mac is not mandatory).
Implementation
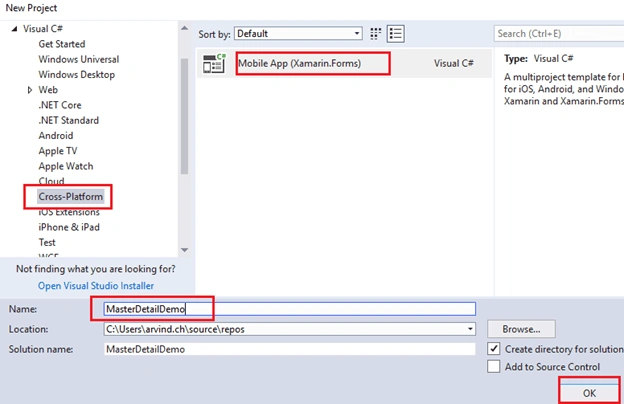
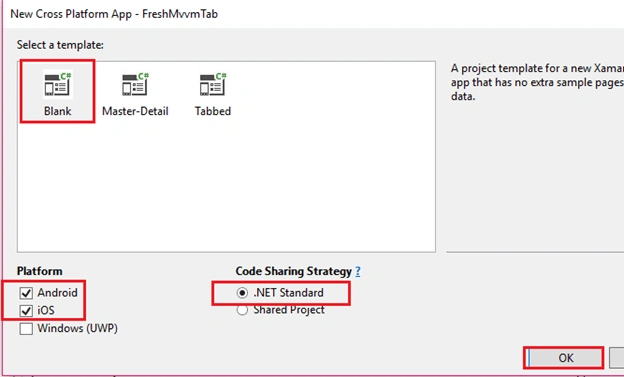
Above, in the Platform menu, I am including Android and iOS options. If you wish to select all three options, you can do so. It doesn’t take anything extra.
Right-click on the Shared project and add a View folder. Right-click View, go to -> Add -> New Item. The following window will appear.
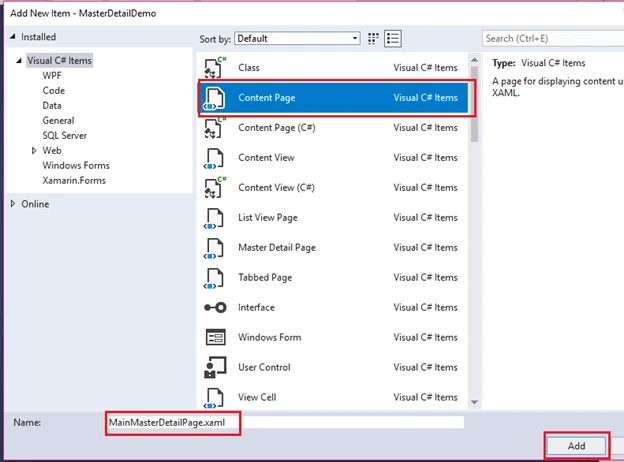
In View folder, add the below Content Pages with either the same names or your preferred names.
- MainMasterDetailPage.xaml
- HomeTabbedPage.xaml
- MoviePage
- GamePage
- MovieListPage
- SettingPage
After adding the above pages, your project will look like this.
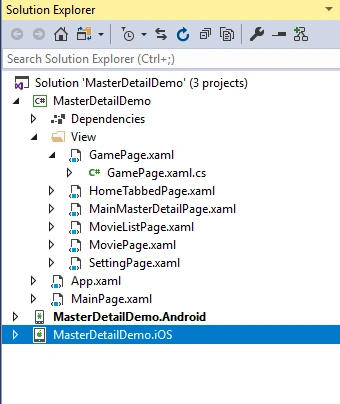
When you open your MainMasterDetailPage.xaml file, it will look like this.
- <?xml version="1.0" encoding="utf-8" ?>
- <ContentPage xmlns="http://xamarin.com/schemas/2014/forms"
- xmlns:x="http://schemas.microsoft.com/winfx/2009/xaml"
- x:Class="MasterDetailDemo.View.MainMasterDetailPage">
- <ContentPage.Content>
- <StackLayout>
- <Label Text="Welcome to Xamarin.Forms!"
- VerticalOptions="CenterAndExpand"
- HorizontalOptions="CenterAndExpand" />
- </StackLayout>
- </ContentPage.Content>
- </ContentPage>
MainMasterDetailPage is of type ContentPage. We can change this to MasterDetailPage as MasterDetailPage is the first page of our application associated with TabbedPage. So, we would write this code.
MainMasterDetailPage.xaml
- <?xml version="1.0" encoding="utf-8" ?>
- <MasterDetailPage xmlns="http://xamarin.com/schemas/2014/forms"
- xmlns:x="http://schemas.microsoft.com/winfx/2009/xaml"
- xmlns:local="clr-namespace:MasterDetailDemo.View"
- IsPresented="False"
- x:Class="MasterDetailDemo.View.MainMasterDetailPage">
- <MasterDetailPage.Master>
- <ContentPage Title="☰" BackgroundColor="Red">
- <StackLayout BackgroundColor="#B2EC5D">
- <StackLayout Margin="25,10,25,0" Padding="0,15,0,15">
- <Image Margin="10" BackgroundColor="Accent" Aspect="AspectFill" Source="Enrich.png"></Image>
- </StackLayout>
- <ListView x:Name="navigationDrawerList"
- RowHeight="60"
- SeparatorVisibility="None"
- ItemSelected="OnMenuSelected"
- BackgroundColor="#A3C1AD">
- <ListView.ItemTemplate>
- <DataTemplate>
- <ViewCell>
- <StackLayout VerticalOptions="FillAndExpand"
- Orientation="Horizontal"
- Padding="20,10,0,10"
- Spacing="20">
- <Image Source="{Binding Icon}"
- WidthRequest="30"
- HeightRequest="30"
- VerticalOptions="Center" />
- <Label Text="{Binding Title}"
- FontSize="Medium"
- VerticalOptions="Center"
- TextColor="Black"/>
- </StackLayout>
- </ViewCell>
- </DataTemplate>
- </ListView.ItemTemplate>
- </ListView>
- </StackLayout>
- </ContentPage>
- </MasterDetailPage.Master>
- <MasterDetailPage.Detail>
- <NavigationPage>
- <x:Arguments>
- <local:HomeTabbedPage/>
- </x:Arguments>
- </NavigationPage>
- </MasterDetailPage.Detail>
- </MasterDetailPage>
Note
In the above code in MasterDetailPage.Master Tag, I am using Title="☰", because in an iOS application, instead of showing the icon, it displays Title. Therefore, to show the hamburger icon, I used this character. You can change this according to your preference. In Android, the Hambuger icon is displayed by default, without any issue.
- public partial class MainMasterDetailPage : ContentPage
- {
- public MainPage()
- {
- InitializeComponent();
- }
- }
If you see the above MainMasterDetailPage file inheriting with ContentPage, change it into MasterDetailPage as we did for MainMasterDetailPage.xml file. Below is the .cs file of MainMasterDetailPage.xaml.
MainMasterDetailPage.xaml.cs
- namespace MasterDetailDemo.View
- {
- [XamlCompilation(XamlCompilationOptions.Compile)]
- public partial class MainMasterDetailPage :MasterDetailPage
- {
- public MainMasterDetailPage ()
- {
- InitializeComponent ();
- navigationDrawerList.ItemsSource = GetMasterPageLists();
- }
- private void OnMenuSelected(object sender, SelectedItemChangedEventArgs e)
- {
- var item = (MasterPageList)e.SelectedItem;
- if (item.Title == "Setting")
- {
- Detail.Navigation.PushAsync(new SettingPage());
- IsPresented = false;
- }
- else
- {
- Application.Current.Properties["MenuName"] = item.Title;
- Detail = new NavigationPage(new HomeTabbedPage());
- IsPresented = false;
- }
- }
- List<MasterPageList> GetMasterPageLists()
- {
- return new List<MasterPageList>
- {
- new MasterPageList() { Title = "Games", Icon = "home.png" },
- new MasterPageList() { Title = "Movies", Icon = "admin.png" },
- new MasterPageList() { Title = "Setting", Icon = "setting.png" }
- };
- }
- }
- //This class used for binding ListView. We can move it to other separate files as well
- public class MasterPageList
- {
- public string Title { get; set; }
- public string Icon { get; set; }
- }
- }
Simplify the above code,
MainMasterDetailPage.xaml file has navigationDrawerList ListView’s which we bind to MasterPageList method. MasterPageList method returns data to bind navigationDrawerList.
MainMasterDetailPage.xaml file has the ListView’s item selected event OnMenuSelected which we are implementing in MainMasterDetailPage.xaml.cs class. When we select items from the side menu, this method is called. Based on a clicked menu, we switch to an appropriate Detail Page.
Using Application Properties, we can store which menu we have clicked, so in the next page, we would change tabs accordingly.
Now, open HomeTabbedPage & write this code.
HomeTabbedPage.xaml
- <?xml version="1.0" encoding="utf-8" ?>
- <TabbedPage xmlns="http://xamarin.com/schemas/2014/forms"
- xmlns:x="http://schemas.microsoft.com/winfx/2009/xaml"
- xmlns:views="clr-namespace:MasterDetailDemo.View"
- Title = "Home Page"
- x:Class="MasterDetailDemo.View.HomeTabbedPage">
- <TabbedPage.Children>
- <NavigationPage Title="Games" Icon="games">
- <x:Arguments>
- <views:GamePage/>
- </x:Arguments>
- </NavigationPage>
- <NavigationPage Title="Movies" Icon="camera">
- <x:Arguments>
- <views:MoviePage/>
- </x:Arguments>
- </NavigationPage>
- </TabbedPage.Children>
- </TabbedPage>
HomeTabbedPage.xaml.cs
- public partial class HomeTabbedPage : TabbedPage
- {
- public HomeTabbedPage ()
- {
- InitializeComponent ();
- if (Application.Current.Properties.ContainsKey("MenuName"))
- {
- var menuName = Application.Current.Properties["MenuName"].ToString();
- if (menuName == "Movies")
- {
- this.CurrentPage = Children[1];
- }
- }
- }
- }
Simplify above code,
HomeTabbedPage.xaml file has TabbedPage.Children tag which contains NavigationPage’s. Each NavigationPage displays one Tab.
HomeTabbedPage.xaml has views variable which contain the path View folder in our solution.
HomeTabbedPage.xaml & HomeTabbedPage.xaml.cs both files should be inherited with the same class in our case this is TabbedPage.
- HomeTabbedPage.xaml.cs file checking Application properties which we set in our previous MainMasterDetailPage.xaml.cs file, based on property value Tabs are being switched.
- <ContentPage xmlns="http://xamarin.com/schemas/2014/forms"
- xmlns:x="http://schemas.microsoft.com/winfx/2009/xaml"
- NavigationPage.HasNavigationBar="False"
- x:Class="MasterDetailDemo.View.GamePage">
- <ContentPage.Content>
- <StackLayout>
- <Label Text="Welcome to Xamarin.Forms!"
- VerticalOptions="CenterAndExpand"
- HorizontalOptions="CenterAndExpand" />
- </StackLayout>
- </ContentPage.Content>
- </ContentPage>
GamePage.xaml.cs
- public partial class GamePage : ContentPage
- {
- public GamePage ()
- {
- InitializeComponent ();
- }
- }
MoviePage.xaml
- <ContentPage xmlns="http://xamarin.com/schemas/2014/forms"
- xmlns:x="http://schemas.microsoft.com/winfx/2009/xaml"
- NavigationPage.HasNavigationBar="False"
- x:Class="MasterDetailDemo.View.MoviePage">
- <ContentPage.Content>
- <StackLayout>
- <Button Text="Movies List" BackgroundColor="#D19FE8" TextColor="#008B8B" Clicked="Button_Clicked"
- VerticalOptions="CenterAndExpand"
- HorizontalOptions="CenterAndExpand" />
- </StackLayout>
- </ContentPage.Content>
- </ContentPage>
MoviePage.xaml.cs
- public partial class MoviePage : ContentPage
- {
- public MoviePage ()
- {
- InitializeComponent ();
- }
- private void Button_Clicked(object sender, EventArgs e)
- {
- (App.Current.MainPage as MasterDetailPage).Detail.Navigation.PushAsync(new MovieListPage());
- }
- }
Simplifying the above code.
MoviePage.xaml.cs file has Button_click event, when we are clicking on it, we push a new page. This is just for demo purposes to show you how to push child pages.
We are disabling the navigation for MoviePage.xaml so that it won’t show twice in any page.
MovieListPage.xaml
- <ContentPage xmlns="http://xamarin.com/schemas/2014/forms"
- xmlns:x="http://schemas.microsoft.com/winfx/2009/xaml"
- Title="Movie List"
- x:Class="MasterDetailDemo.View.MovieListPage">
- <ContentPage.Content>
- <StackLayout>
- <Label Text="Movie list page"
- VerticalOptions="CenterAndExpand"
- HorizontalOptions="CenterAndExpand" />
- </StackLayout>
- </ContentPage.Content>
- </ContentPage>
MovieListPage.xaml.cs
- public partial class MovieListPage : ContentPage
- {
- public MovieListPage ()
- {
- InitializeComponent ();
- }
- }
SettingPage.xaml
- <ContentPage xmlns="http://xamarin.com/schemas/2014/forms"
- xmlns:x="http://schemas.microsoft.com/winfx/2009/xaml"
- Title="Setting"
- x:Class="MasterDetailDemo.View.SettingPage">
- <ContentPage.Content>
- <StackLayout>
- <Label Text="This is setting page"
- VerticalOptions="CenterAndExpand"
- HorizontalOptions="CenterAndExpand" />
- </StackLayout>
- </ContentPage.Content>
- </ContentPage>
SettingPage.xaml.cs
- public partial class SettingPage : ContentPage
- {
- public SettingPage ()
- {
- InitializeComponent ();
- }
- }
Now we move to our App.xaml.cs file to set the MainPage of the Application.
- public App()
- {
- InitializeComponent();
- MainPage = new MainMasterDetailPage();
- }
Note
All XAML and .cs files should be inherited by the same class. In XAML files, we have defined a local variable View that should have the same path of our pages.
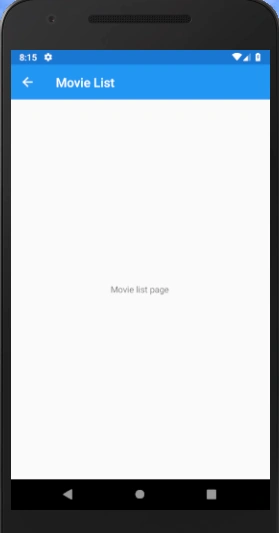
These are the output screens.
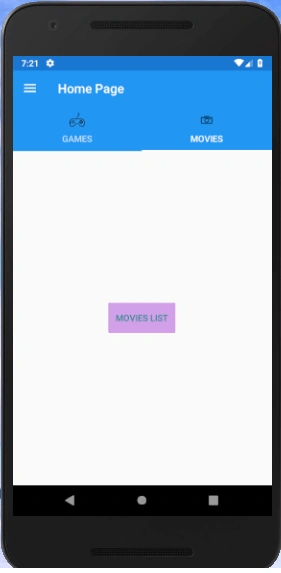
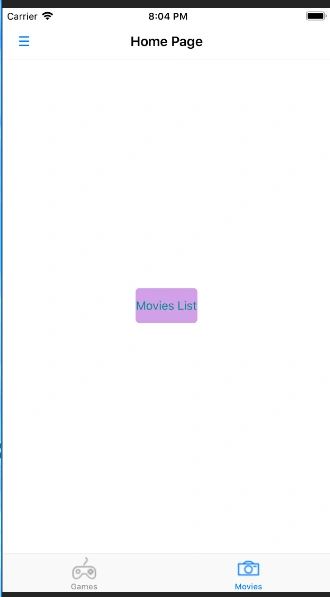
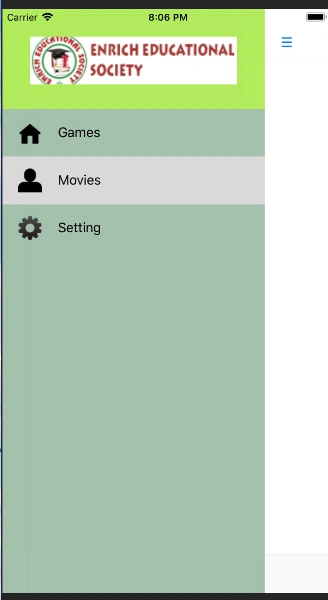
This is the MasterPage (iOS) & Child Movie list page (Android).
Happy coding!
Luis CarreroPosted Aug 8, 2019, 5:39 PM
Where I can see the code? I follow the instructions but my bottom menu is not show
Ramiro AldunatePosted Jun 1, 2019, 8:32 PM
Hi, the bar with symbol of the three lines repeat each time I selected de list items....
DiogoPosted May 2, 2019, 2:05 PM
Hey, do you know how to keep the bottom menu (from tabbed page) for all pages? In your example, when you open the movie list, you loose the bottom menu, you only have the back button. I have the same problem in my app.
eliyas babyPosted Apr 25, 2019, 8:11 AM
How to bring tabs bottom instead of top
Arvind ChourasiyaPosted Apr 2, 2019, 7:51 AM
Joel Clyne - Pl share you email address I would try to send sample.
Joel ClynePosted Mar 30, 2019, 4:26 PM
I tried to follow this but got loads of errors. Do you have a zip of the solution so I can compare it with what I did and learn where I went wrong?