
Introduction
List Content Types provide a reusable structure for managing list data by defining a set of metadata (columns). They ensure consistency, improve data quality, and simplify data management across multiple lists.
Why Use Content Types?
Maintain same structure everywhere
Avoid creating columns again and again
Easy to manage and update
Useful for Power Apps and automation
Go to Content Type Settings
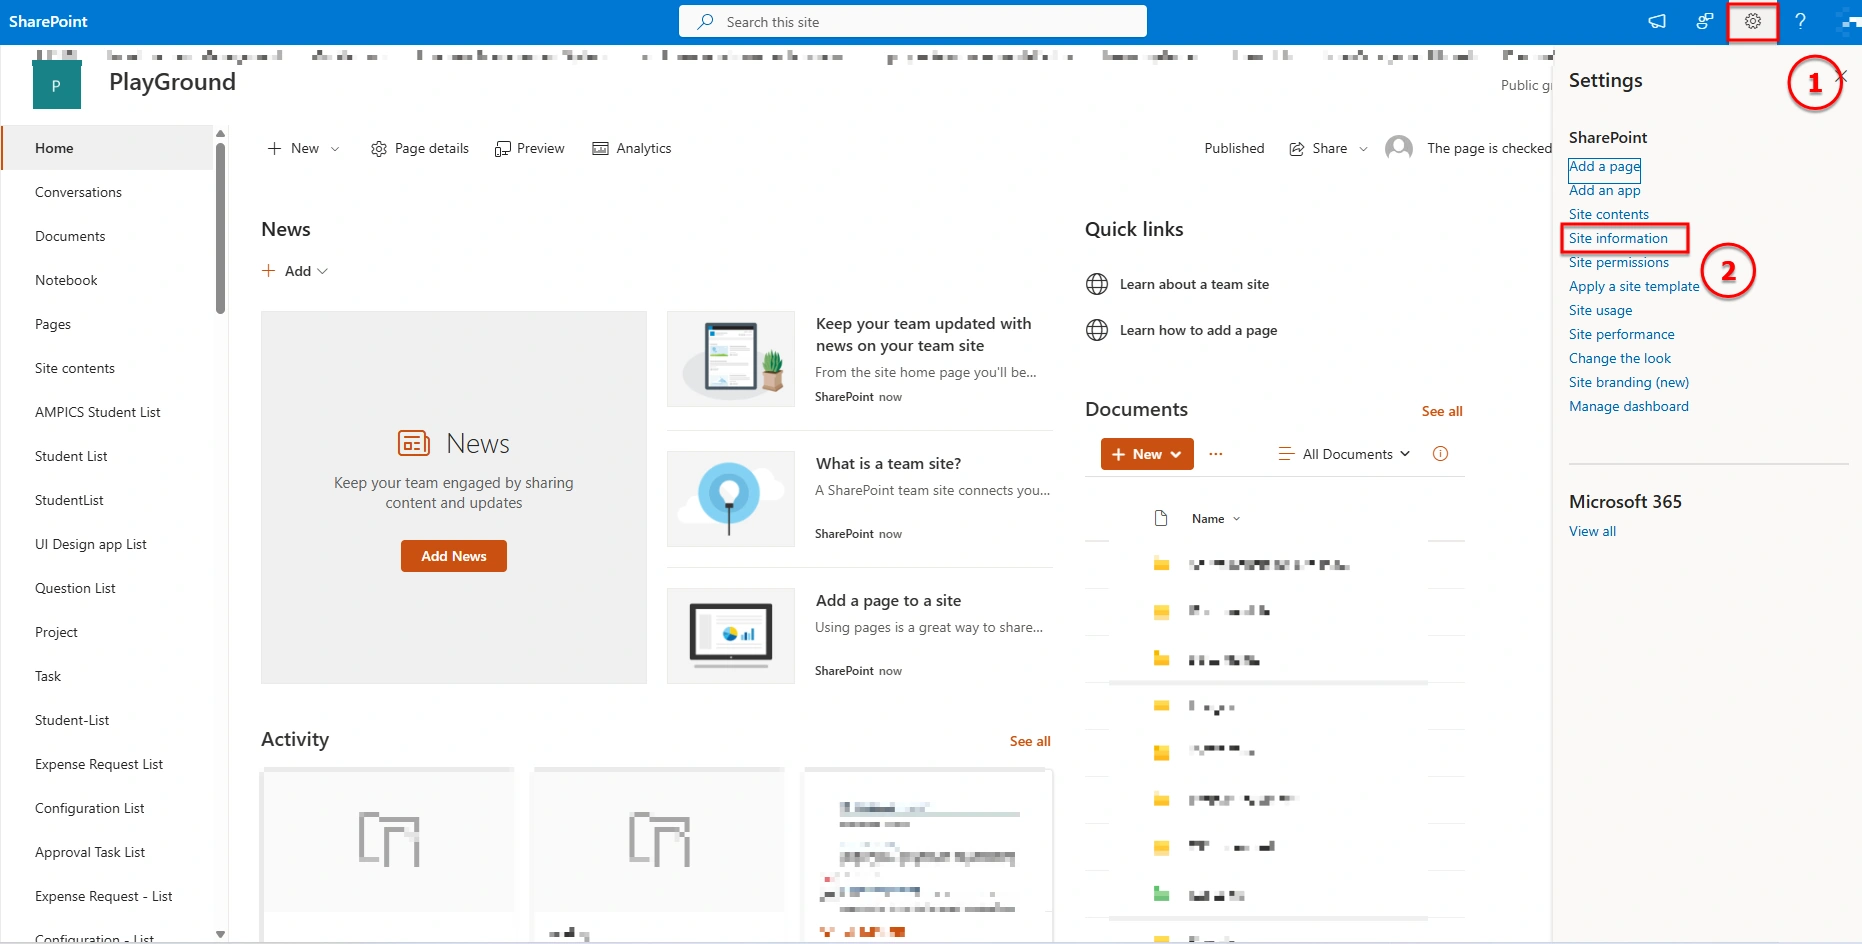
Open your SharePoint Site
Click Settings (⚙️ icon)
Click Site Information
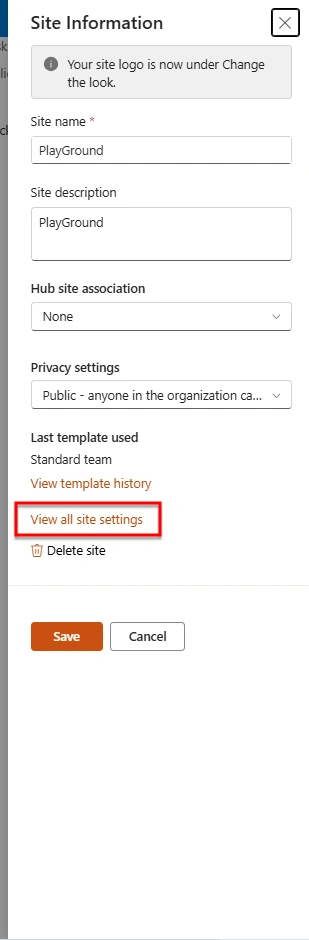
Select View all site settings
Click Site Content Types
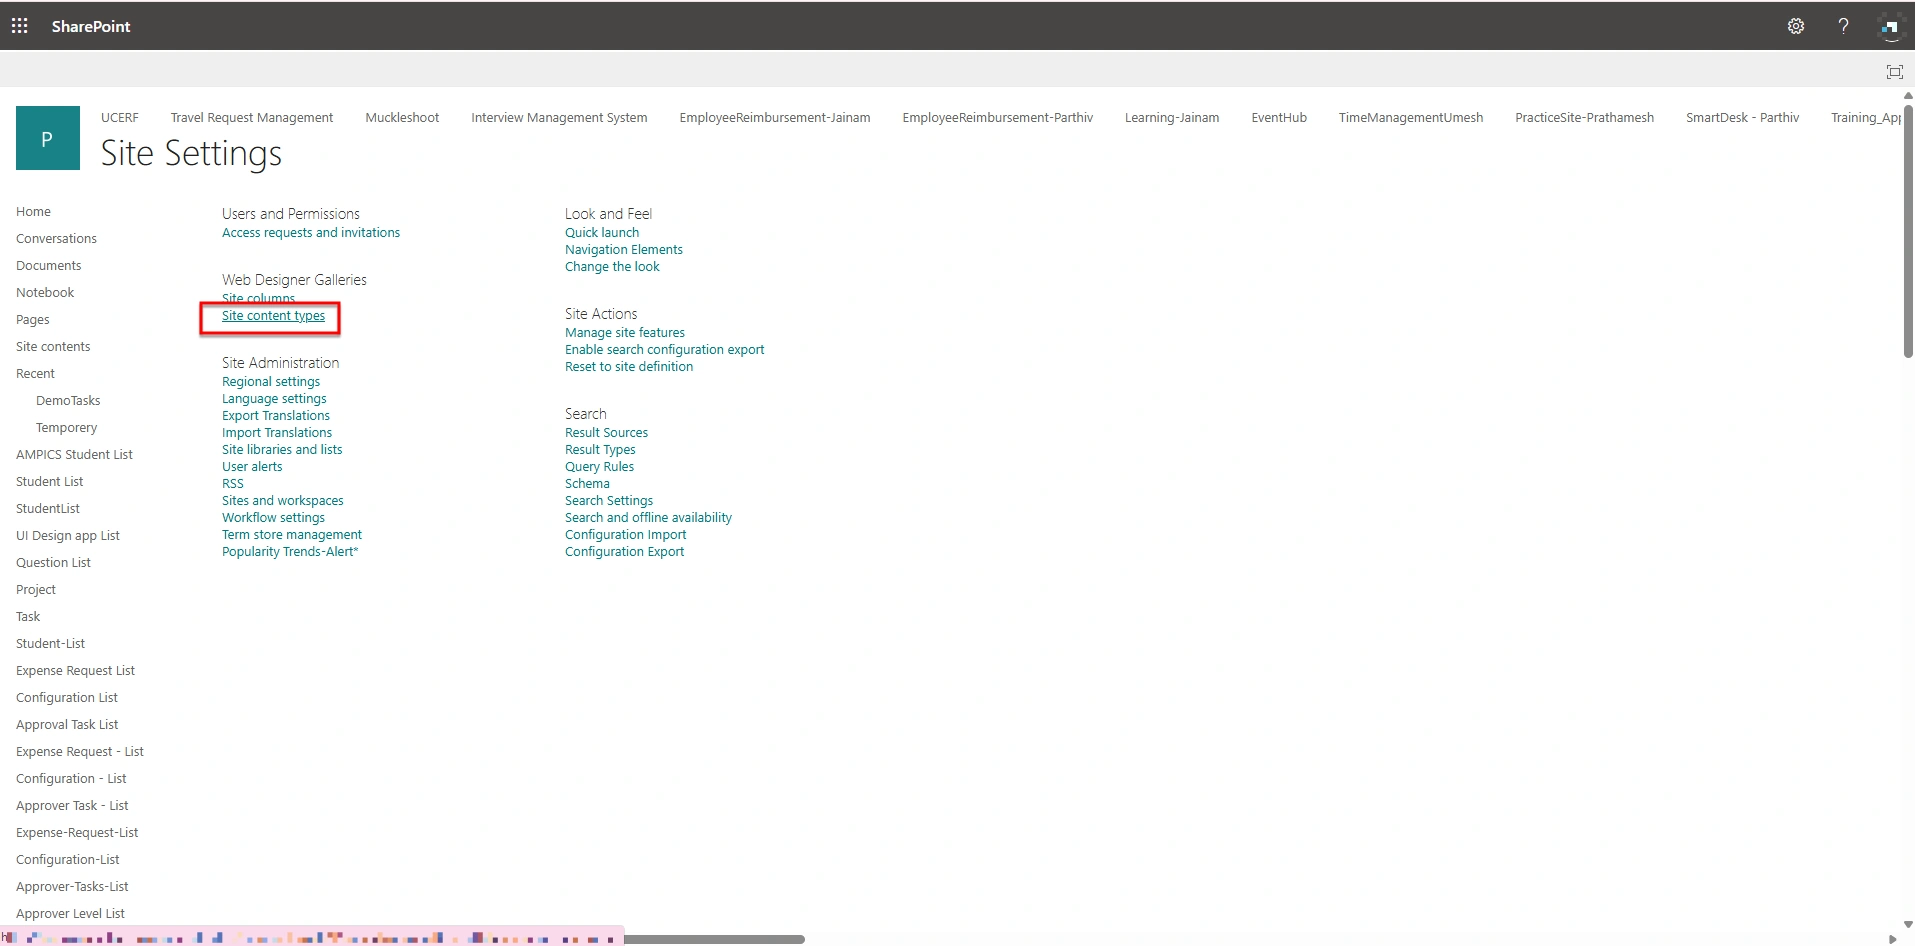
You will now see the site content type gallery, listing all existing content types on this site
Step 1: Create New Content Type
In the Content Type Gallery, click on + Create content type
Step 2: Enter Basic Details
Name:
Enter a meaningful name
👉 Example: Expense Content Type
Description (Optional):
Add a short description to explain the purpose
Under Category, choose one of the following:
Option A: Use Existing Category
Select an existing group
👉 Example: Custom Content Types
Option B: Create New Category
Select New category
Enter a name
👉 Example: Expense Content Type
Select a specific parent content type such as “Item” (for list items) .
Click on Create
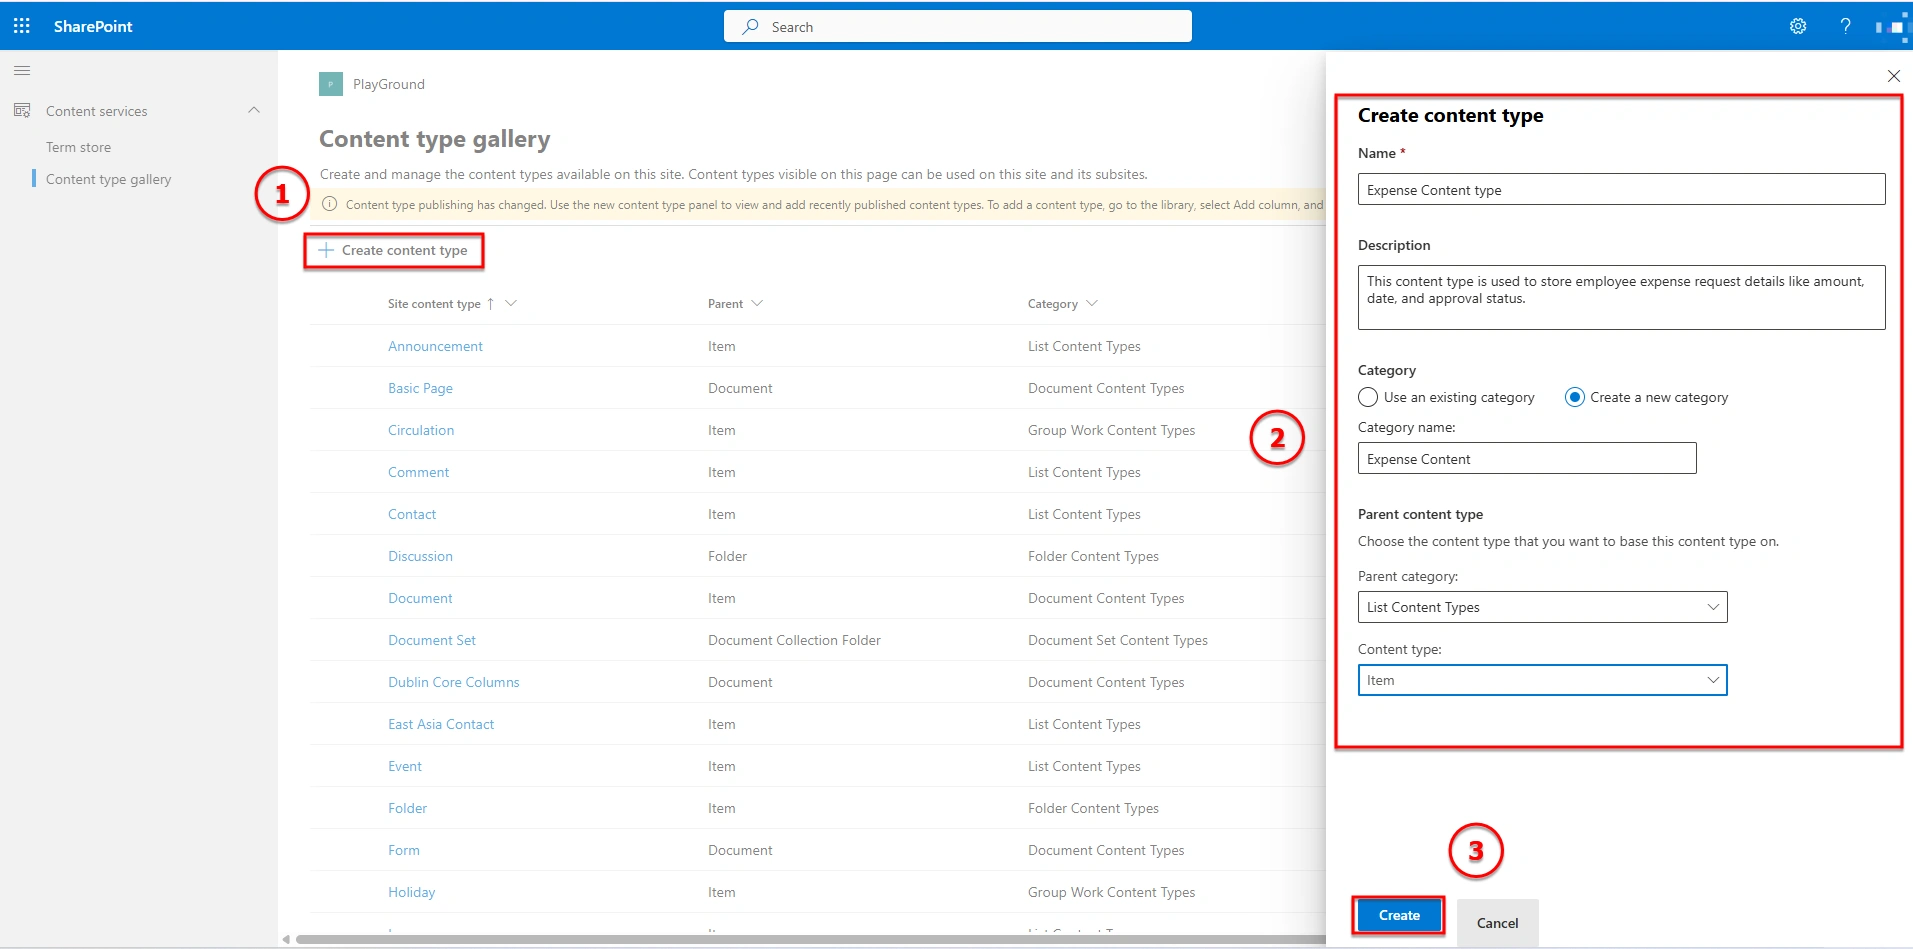
Your newly created content type is now available in the Content Type Gallery and can be used across lists and libraries within the site and its subsites.
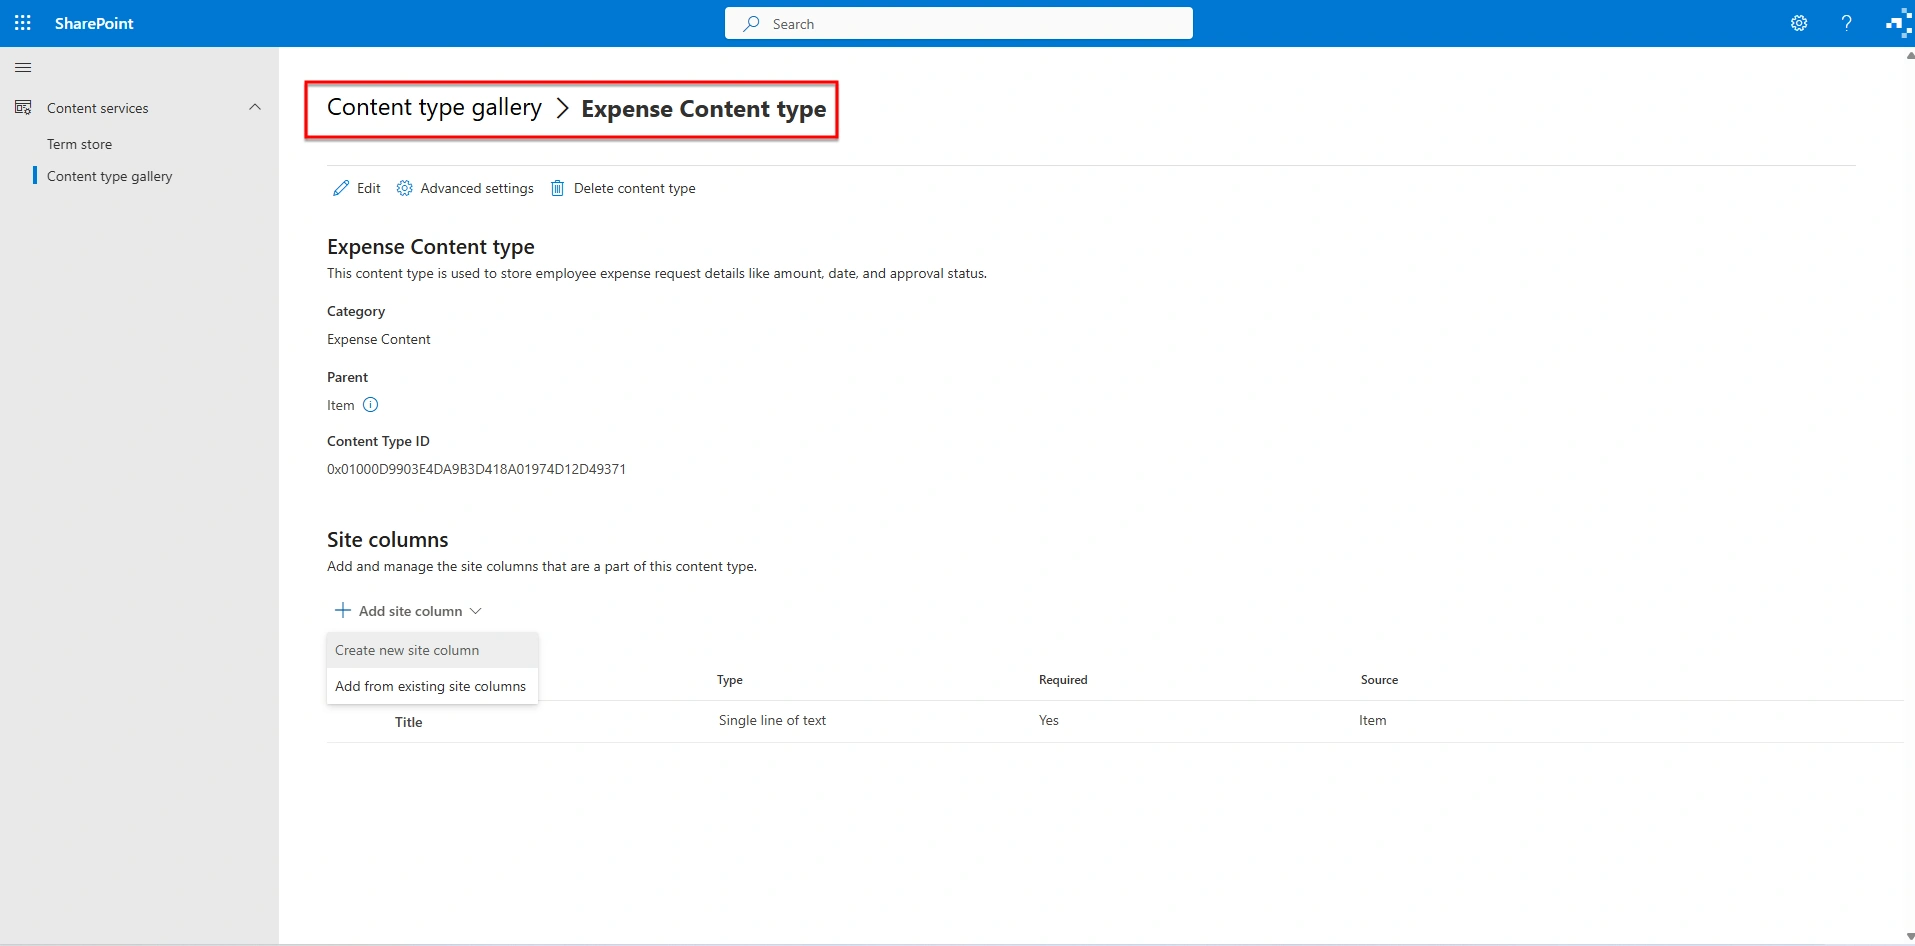
Add Site Columns to a SharePoint List Content Type
After creating the content type, you can enhance it by adding existing site columns or creating new ones directly within the content type.
Steps:
Steps to Add Site Columns to a SharePoint List Content Type
Select the content type you created (for example, Expense Content Type).
On the content type page, click on + Add site column.
Choose one of the following options:
Create a new site column
Add from existing site columns
If you choose Create a new site column, follow these steps:
Enter the Column Name (for example, Expense Type).
Select a Category (either use an existing category like Custom Columns or create a new one).
Choose the Column Type (such as Choice, Single line of text, Number, Date and Time, Person, etc.).
Configure additional settings:
Set the column as Required or Optional
Add Default Values (if needed)
Define how choices are displayed (Dropdown, Radio buttons, etc.)
Click Save to add the column to the content type.
Repeat the same process to add all required columns.
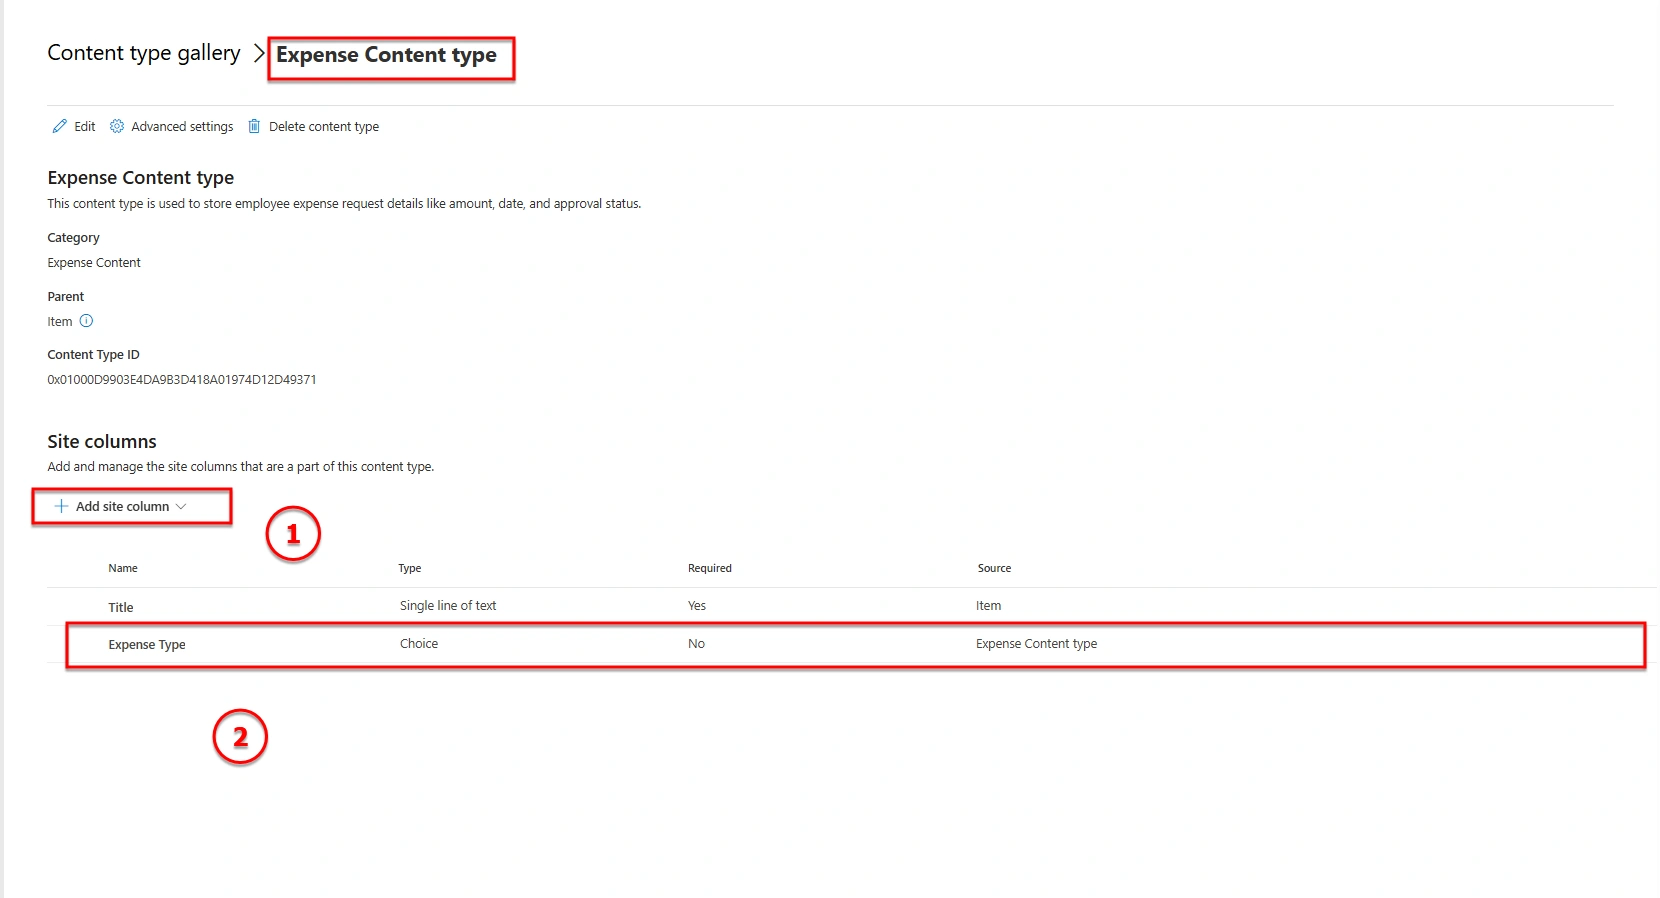
Behavior of Site Columns in Content Types
After saving, all the added site columns become part of the content type. These columns will automatically appear in any SharePoint list or library where this content type is applied.
Enable Content Type in a SharePoint List
By default, modern SharePoint lists do not display content type options until content type management is enabled.
Steps to Enable Content Type Management
Open the target SharePoint list .
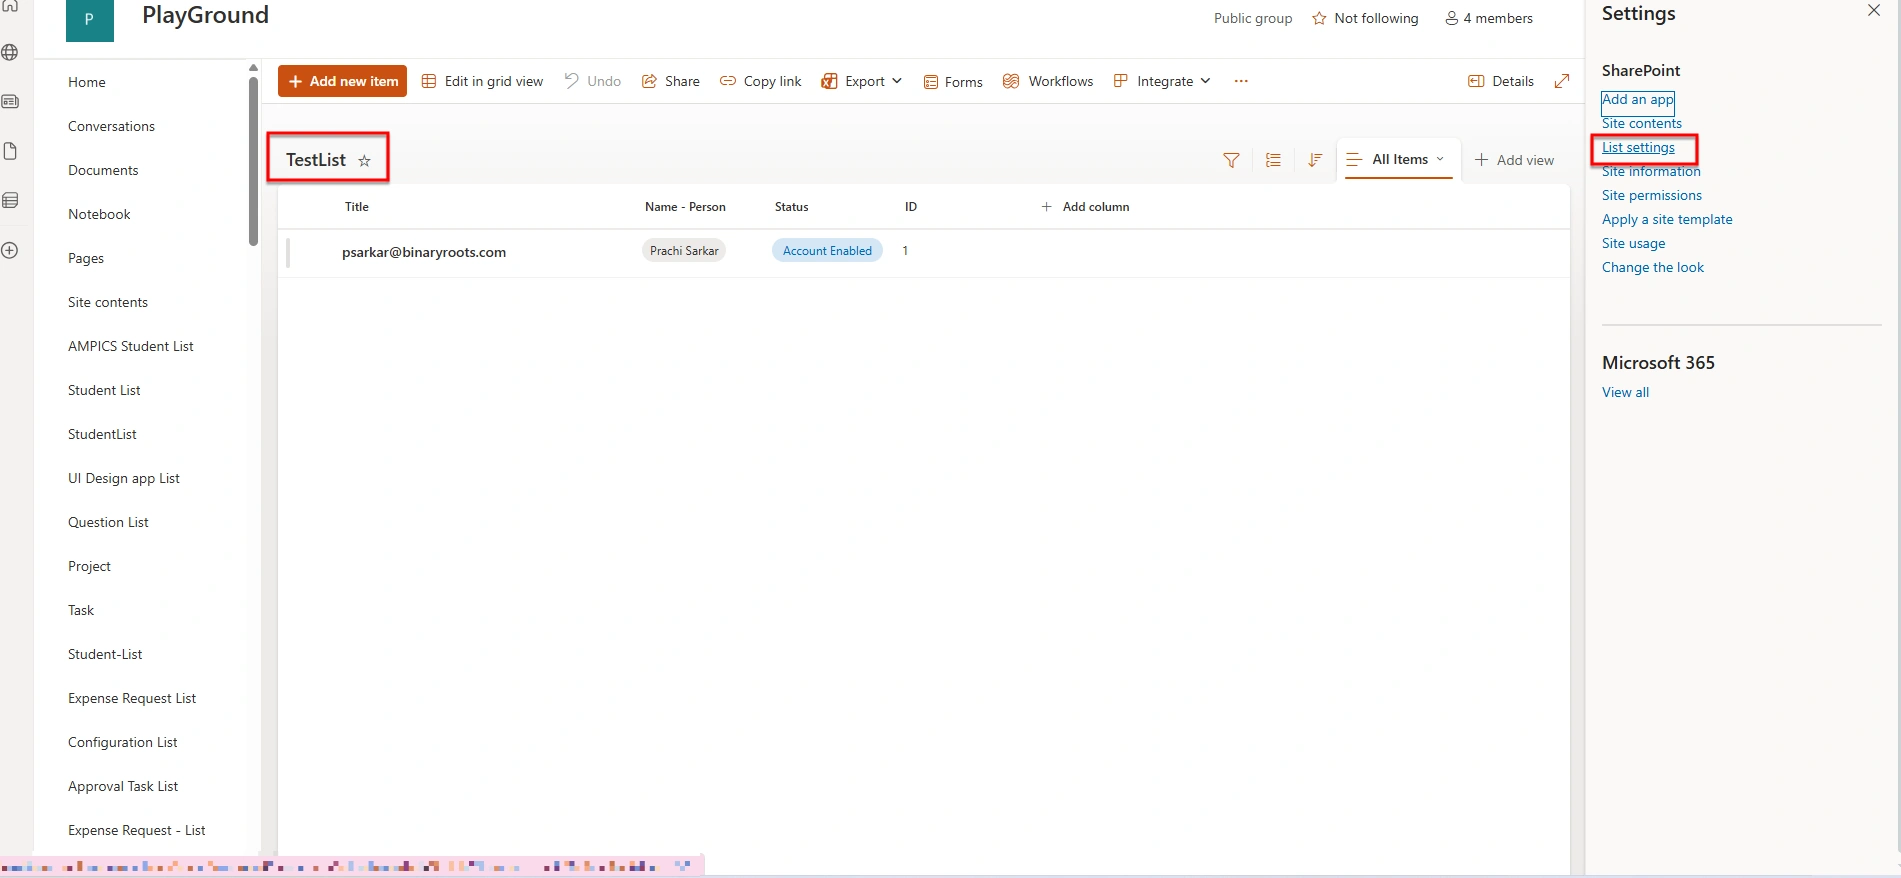
Click on the Settings (⚙️ icon) and select List settings .
Under General Settings, click on Advanced settings.
In the Content Types section, set Allow management of content types? to Yes.
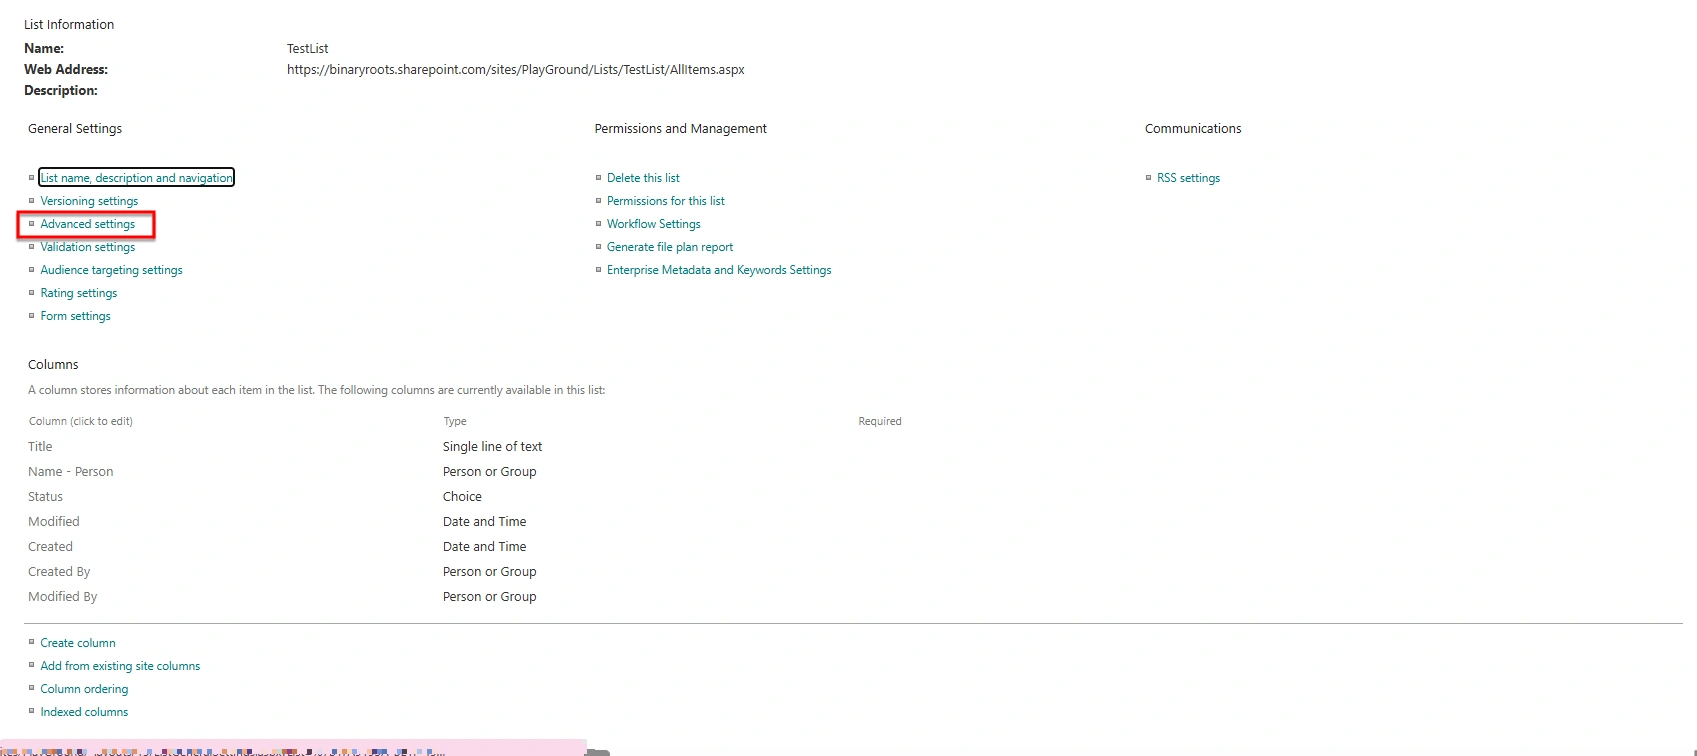
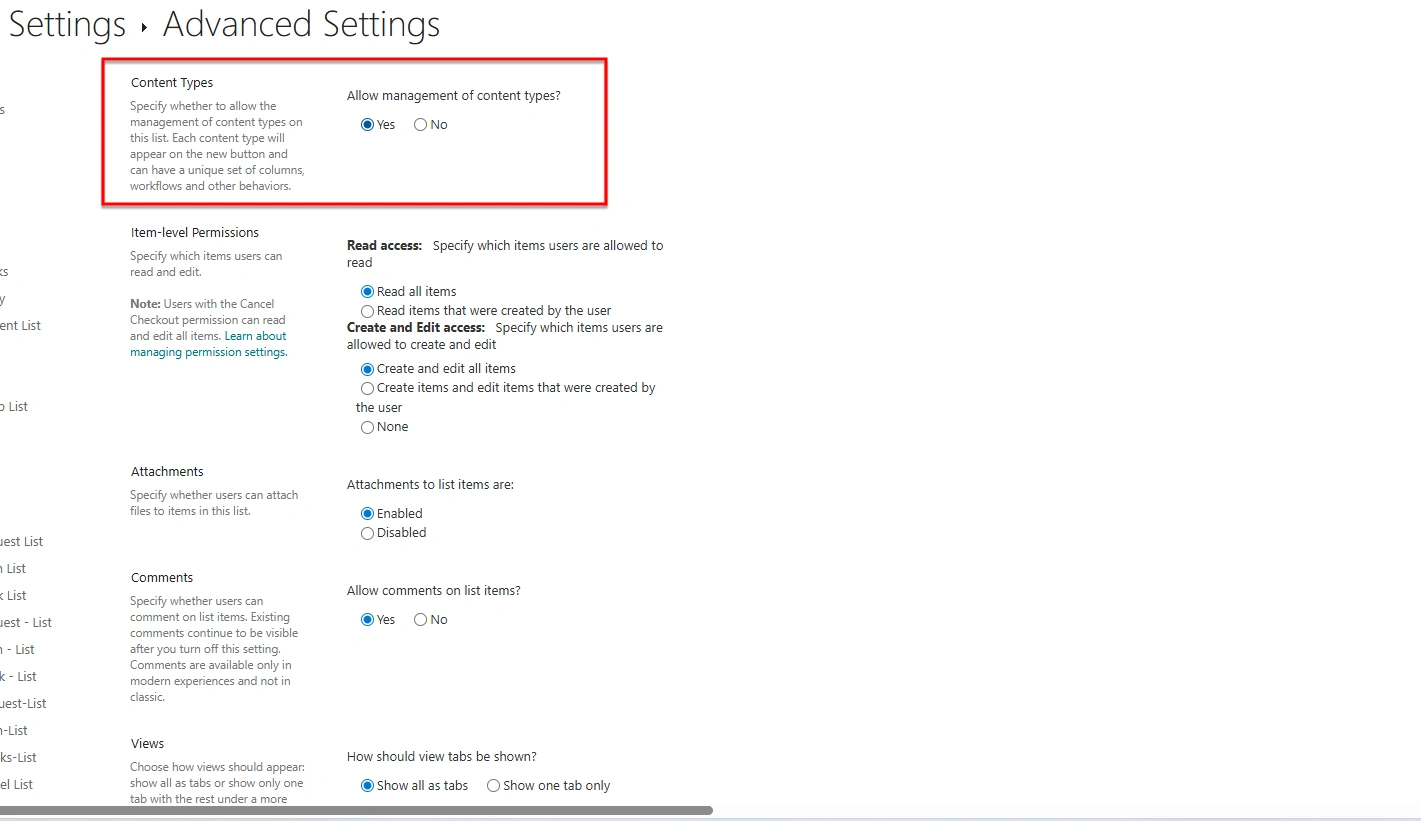
After enabling this option, a Content Types section will appear in the list settings, allowing the list to support multiple content types.
Add a Content Type to a SharePoint List
Once content type management is enabled, you can add your custom content type to the list.
Steps to Add Content Type
Navigate to the list and open List settings.
Under the Content Types section, click Add from existing site content types.
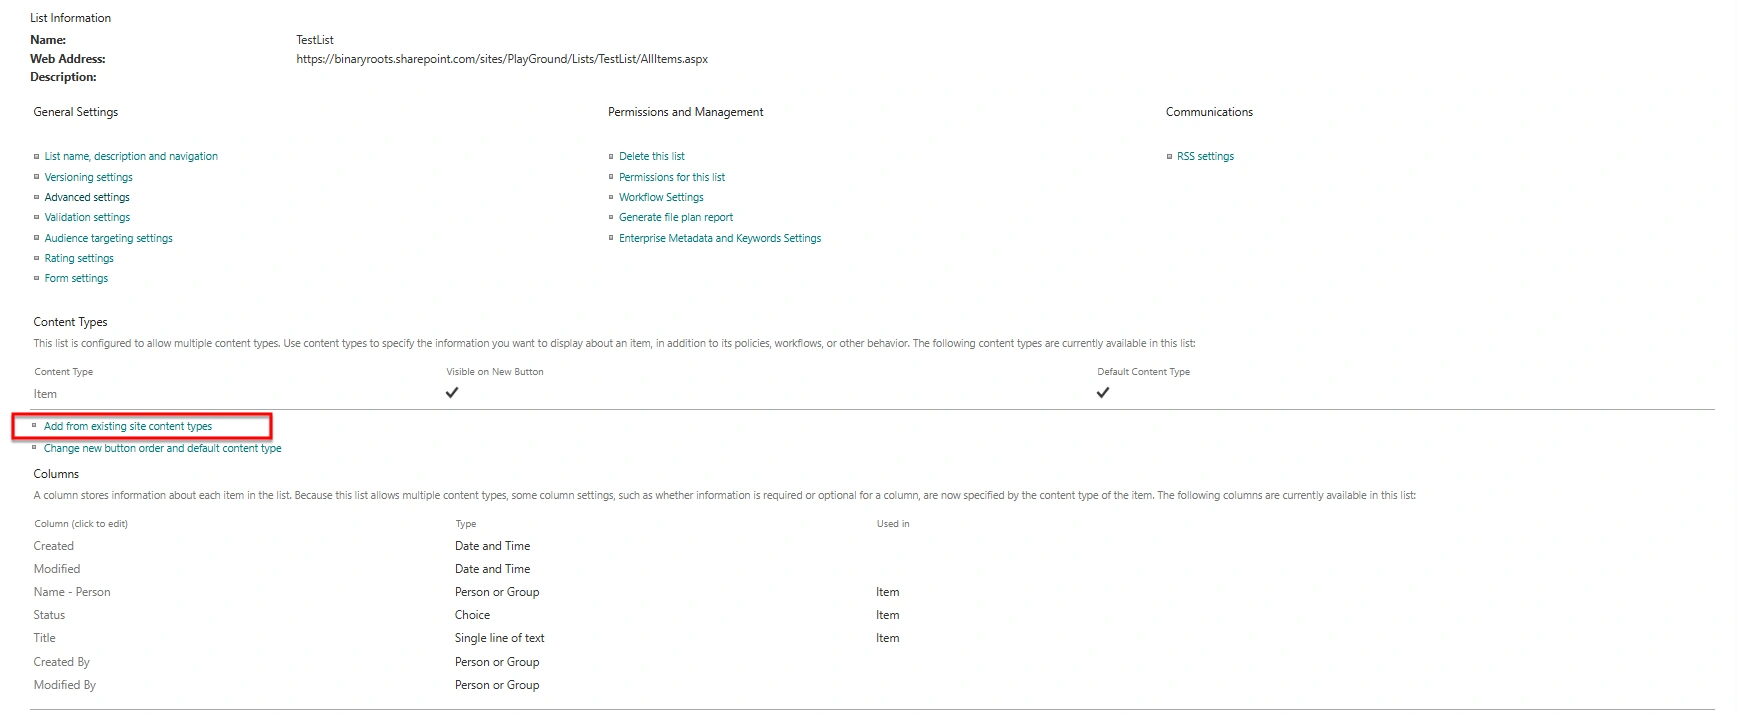
In the Select Content Types From dropdown, choose the appropriate category.
Select your content type (e.g. Expense Content Type).
Click Add, then click OK.
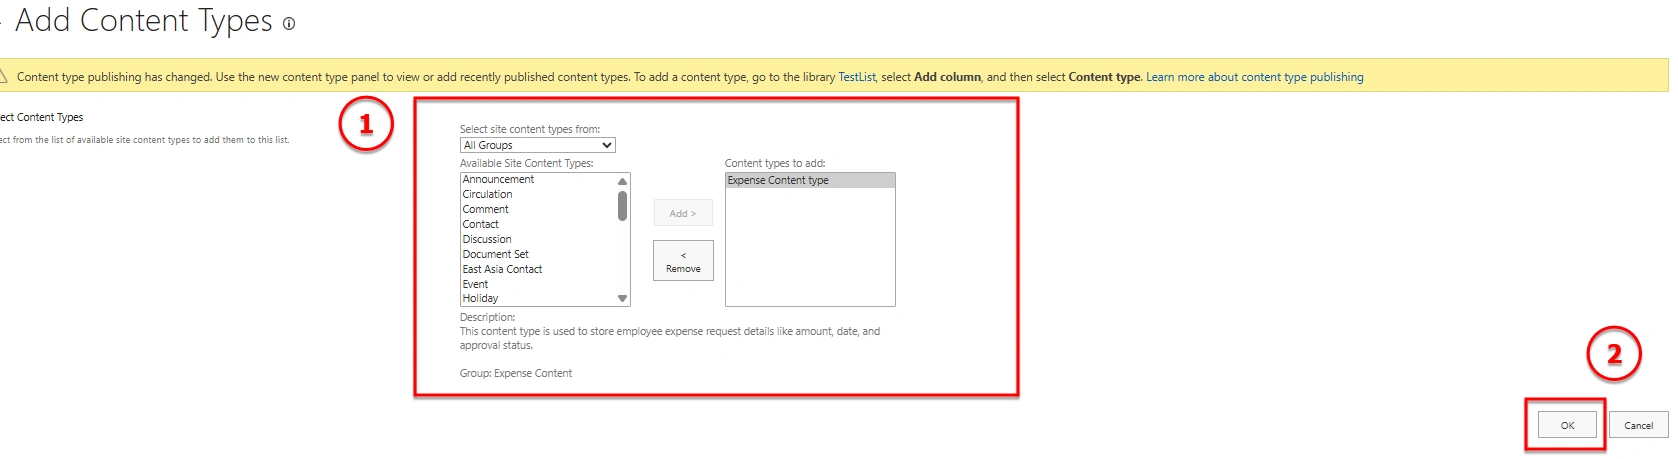
The selected content type will now appear in the list and be available for use.
Using Content Types in the Modern List View
Click on + New in the list.
If multiple content types are available, select your desired content type from the dropdown.
The form will display all the columns defined in that content type, along with default columns like Title.
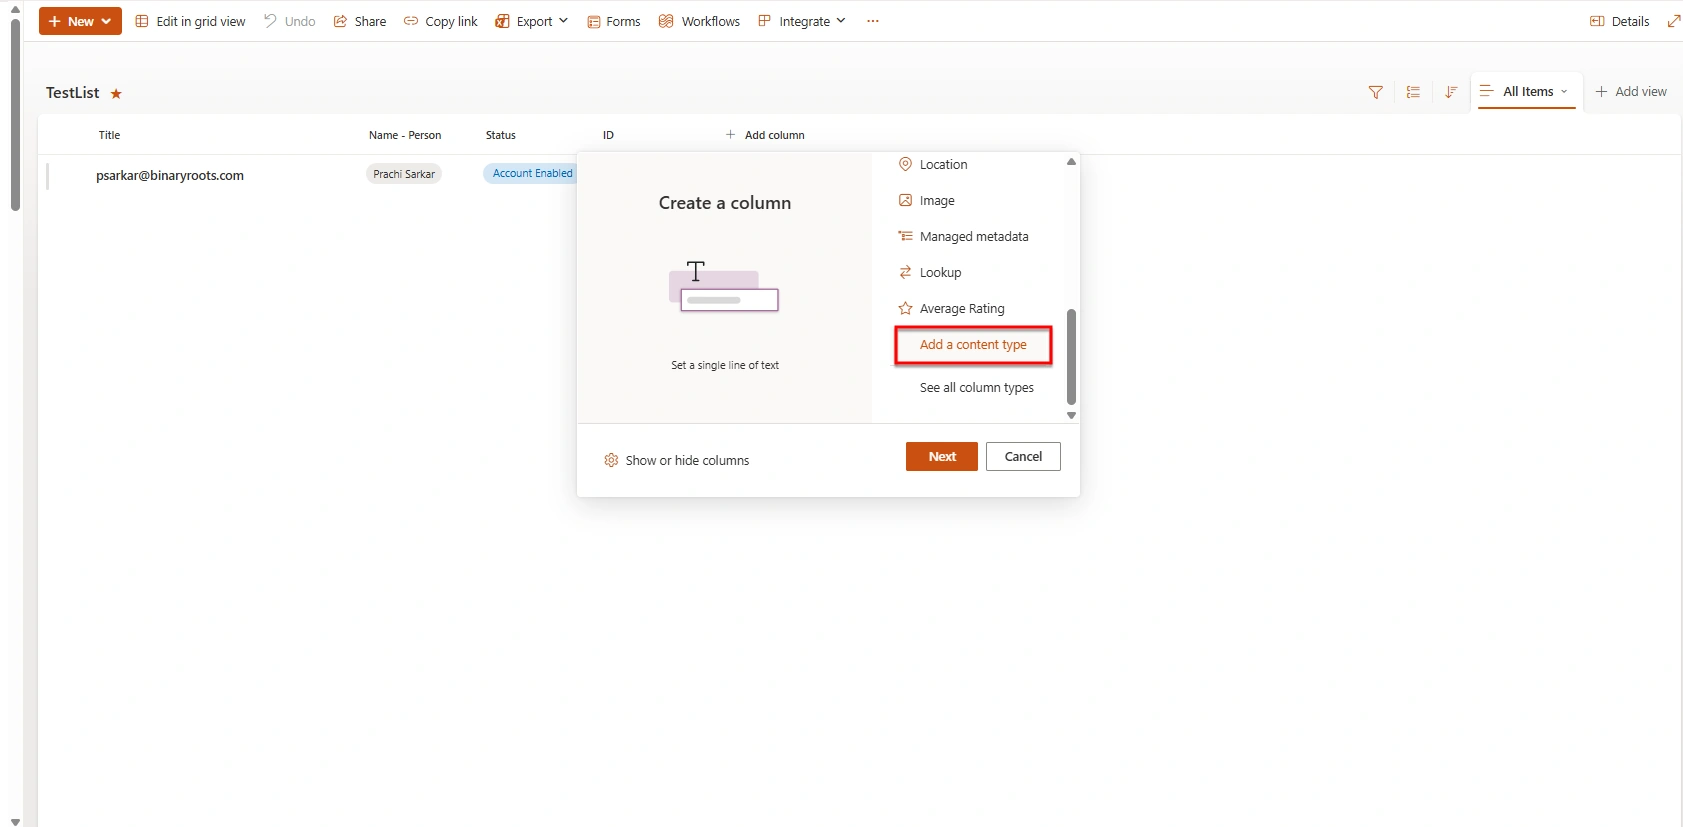
Display Content Type Columns in List Views
By default, the Content Type column may not be visible in the list view. You can enable it for better visibility and management.
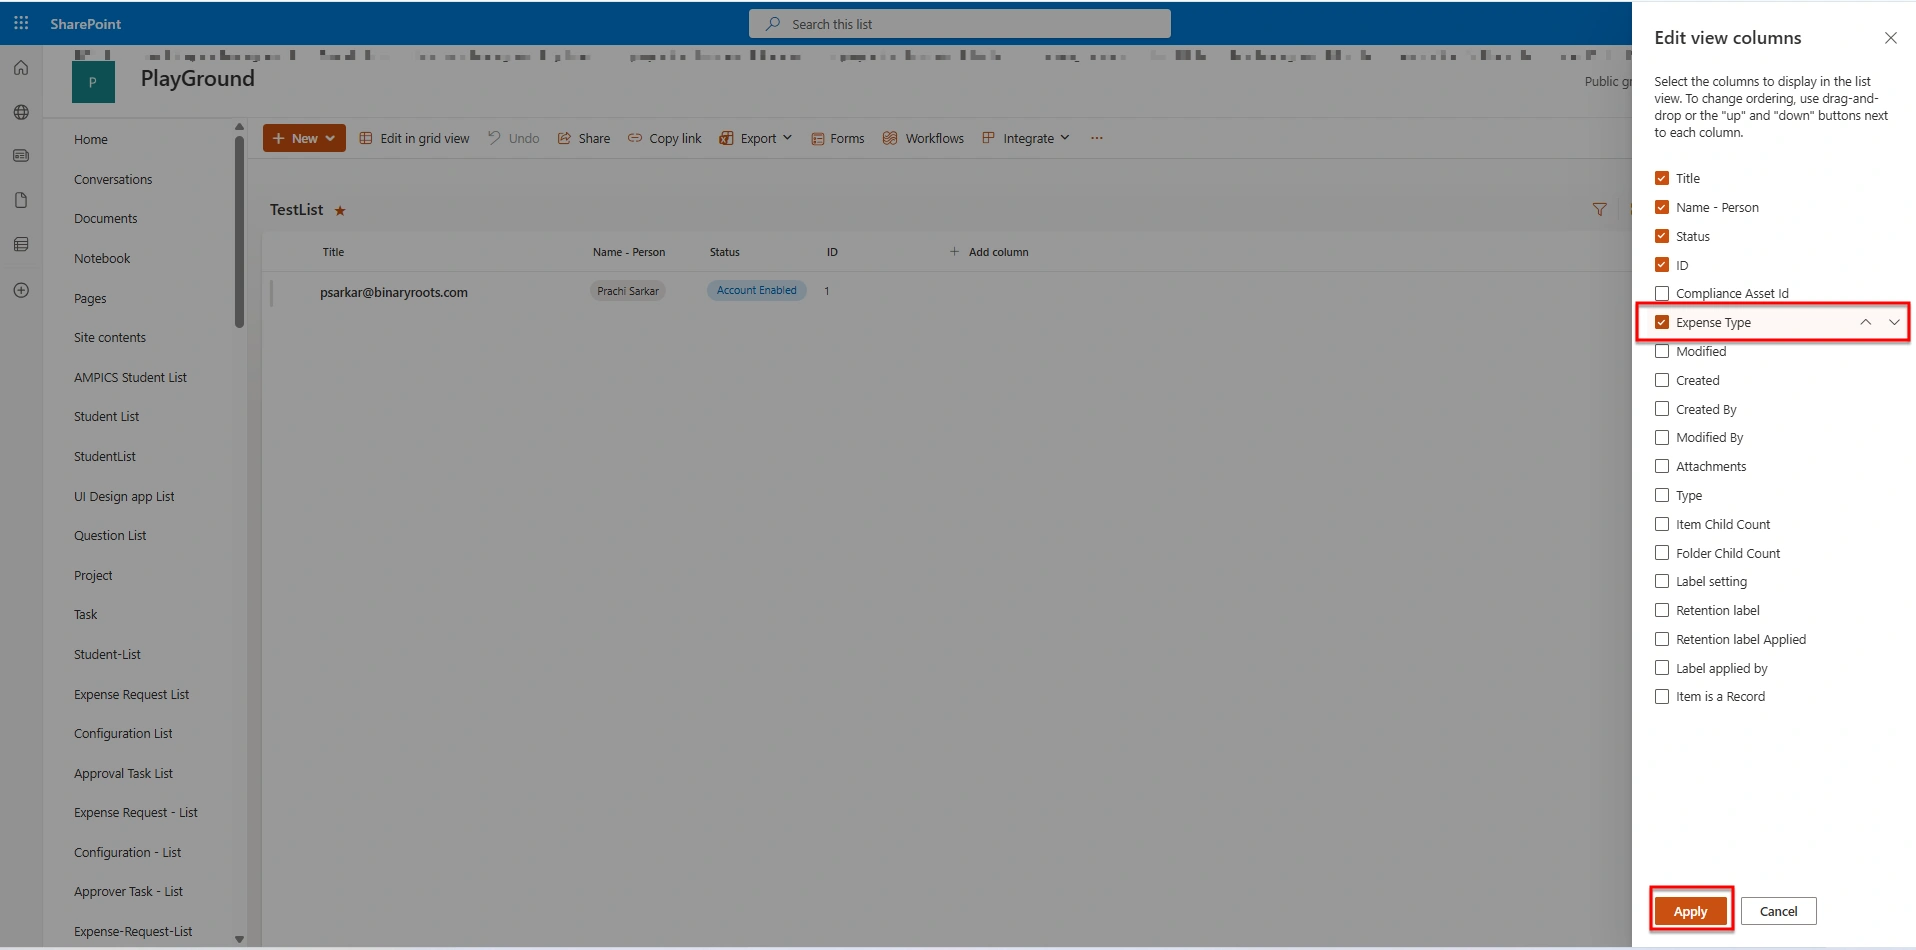
Steps to Show Columns
In the modern list view, click on any column dropdown.
Select Column settings → Show/hide columns.
In the panel, check the columns you added through the content type.
Optionally, reorder columns to adjust their position.
Click Apply to save the view.
You can now filter or group items based on content type.
Change Content Type Order and Set Default
If multiple content types are added to a list, you can control their order and define which one appears as the default.
Steps to Configure Order and Default
Open the list and go to List settings.
In the Content Types section, select Change new button order and default content type.
On the configuration page:
Use the position dropdown to rearrange content types.
Check or uncheck Visible to show or hide content types.
Set the default content type by placing it at position 1 and keeping it visible.
Click OK to save your changes.

Final Behavior in the List
When users click + New, the default content type appears first.
Other content types are available in the dropdown menu based on the configured order.

Conclusion
Content types in SharePoint lists provide a structured and efficient way to manage different types of data within a single list. By defining reusable columns, standardizing forms, and organizing information logically, content types help improve consistency, reduce duplication, and simplify data management.
Join the conversation! Your thoughts help the community grow.