

InfoPath is designed to make it easy to build rich forms-based applications on the Microsoft SharePoint Server platform. Microsoft InfoPath 2013 in conjunction with Microsoft SharePoint Server 2013 and InfoPath Forms Services has many features for developers. InfoPath Forms Services, that is available in SharePoint Server 2013, enables you to deploy an InfoPath form template to a SharePoint Server so that users without the InfoPath rich client can open and fill out InfoPath forms in a Web browser.
New Features
- SharePoint Sandboxed Solutions
- Publish Forms with One Click
- Enhance SharePoint List Forms
- Host Forms on Portal Pages using the InfoPath Form Web Part
- Richer Web Forms
- Standards Compliant Browser Forms
New Controls
The feature gap between client and browser forms has been narrowed, creating a more consistent form-filling experience for all users. Controls and functionality that are now supported in browser forms include the following:
- Bulleted, numbered, and plain lists
- Multiple selection list boxes
- Combo boxes
- Picture buttons
- Hyperlink capabilities
- Choice group and section
- Date and time controls
- Person/group pickers
- Filtering functionality
Write and Edit Code using Visual Studio
The Microsoft Visual Studio Tools for Applications IDE that was integrated with InfoPath 2010 has been removed in InfoPath 2013. To write or edit form code in InfoPath 2013, Visual Studio 2012 is now required with the Microsoft Visual Studio Tools for Applications 2012 add-on installed. The programming experience itself has not fundamentally changed, but you can now use the full Visual Studio development experience when writing managed code for your InfoPath forms.
Create a simple InfoPath form
Open the InfoPath Designer 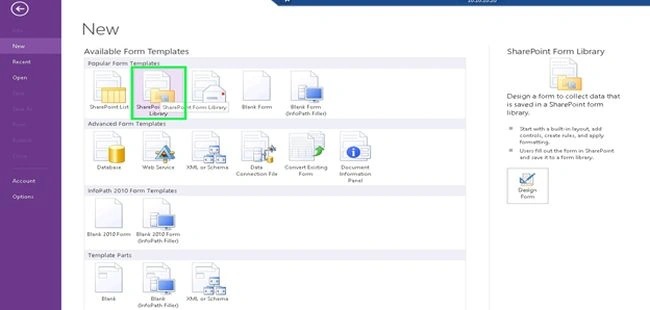
Double-click the SharePointFormLibrary 
After that we need to create a group 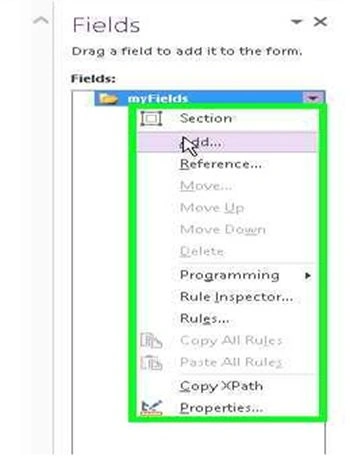
Enter the name of the group and select the Type as "Group"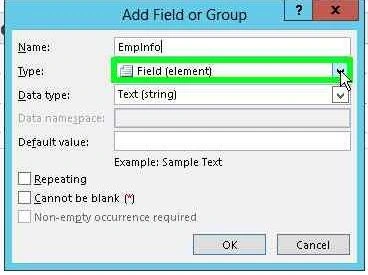
Here we are entering some fields in that group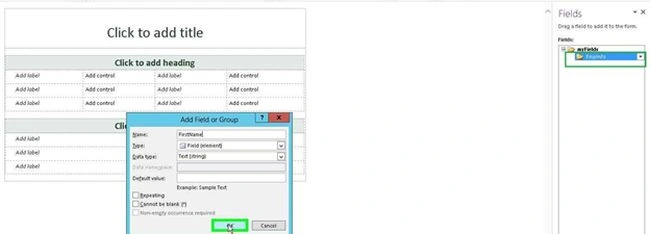
Select the field's data type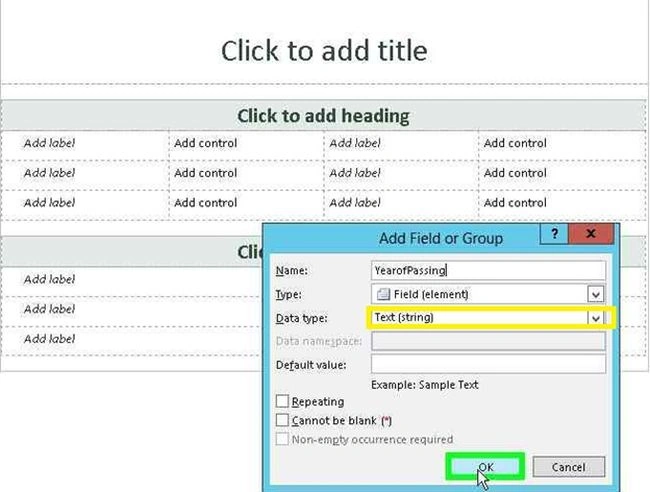
We entered four more fields 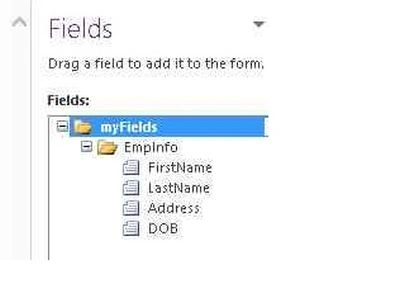
Drag and drop all the fields to the from tables 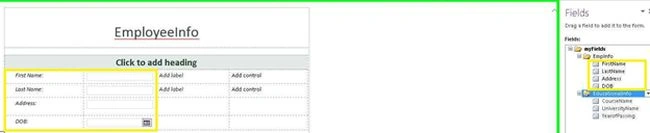
Create a repeatable table
Here we are creating "EducationalInfo"as the Repeating Table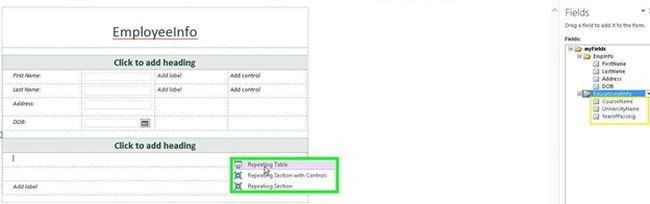
Now the form is showing like: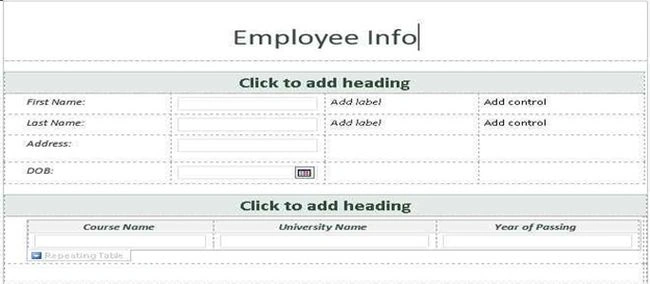
Publishing the InfoPath form to the SharePoint Library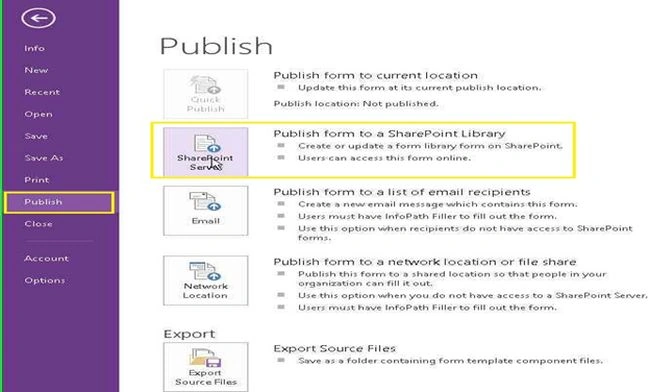
Before publishing the form we need to save that from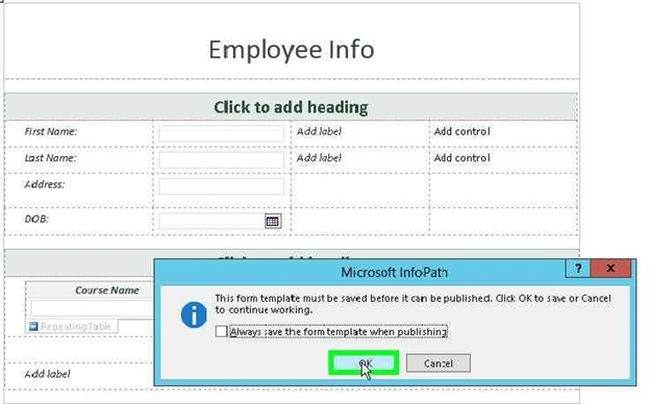
After saving, the form publishing wizard will open and here we need to enter the site URL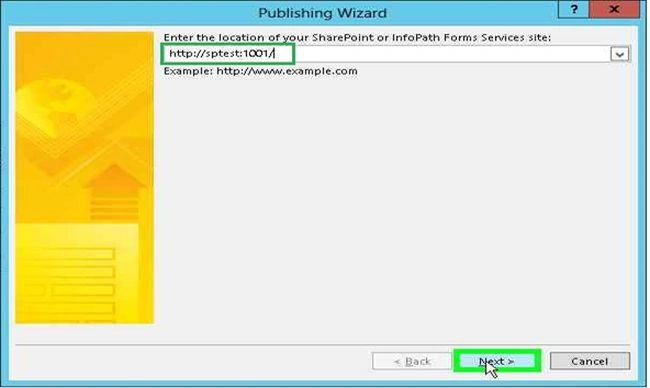
Here we uncheck the option "Enable this form to be filled out by using a browser" (this part I will explain later in Part 2).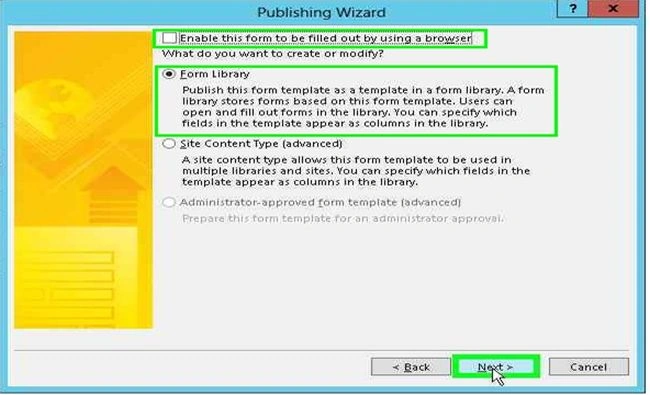
Here we are creating a new library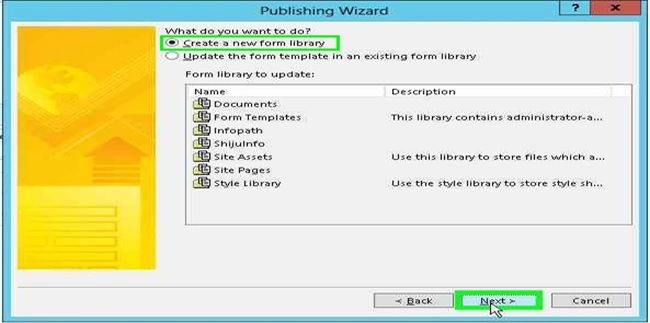
Enter the name of the new Library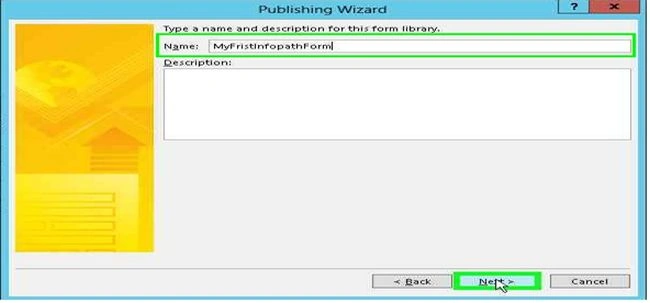
Here we need to select group 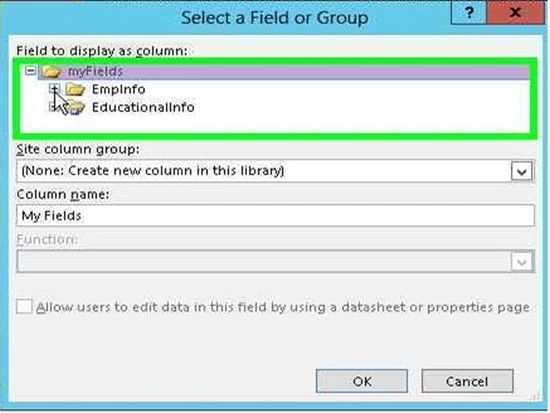
Inside the group we need to select the fields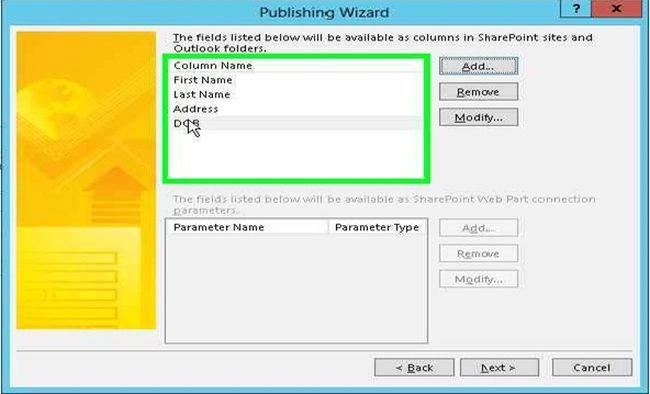
Now it's verifying the form information and then click "Publish"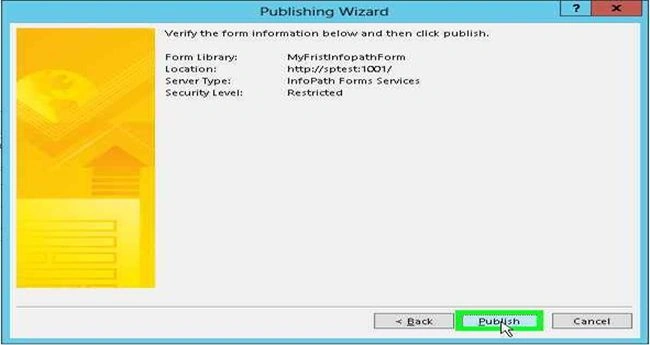
The from published successfully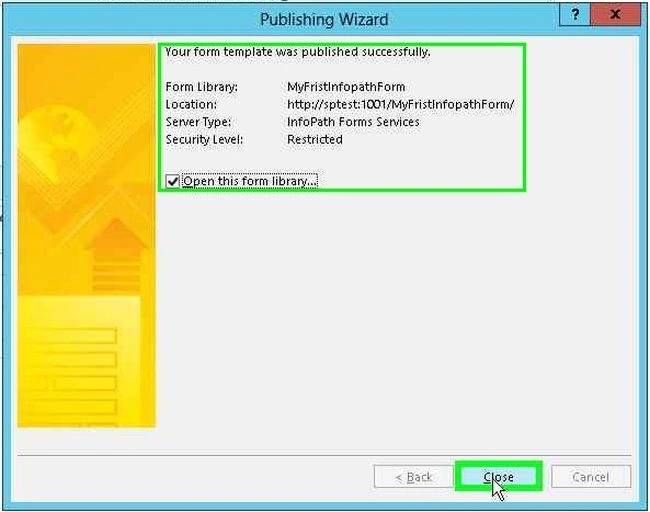
Refresh the site and add a new document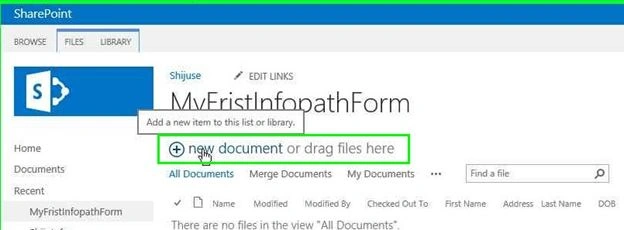
Now the InfoPath forms open and we can insert some values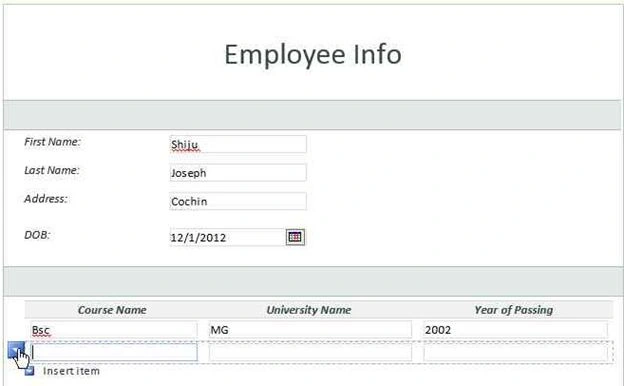
In the repeatable table we have an option for showing in the figure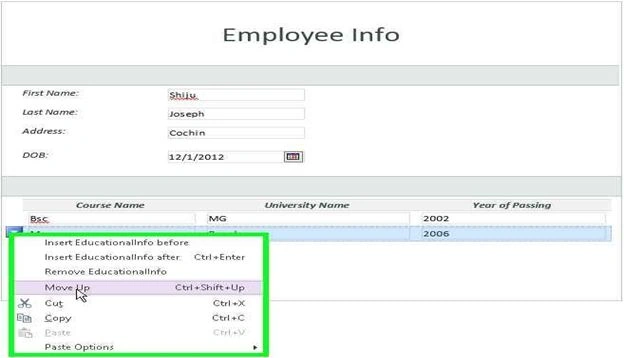
Click on the "Save" button; its values are directly saved in the SharePoint Library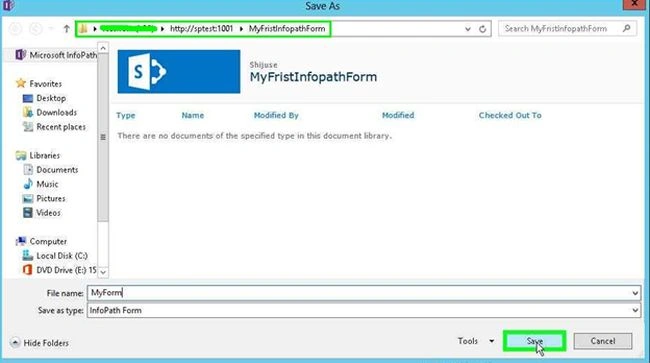
Refresh the site and its showing the data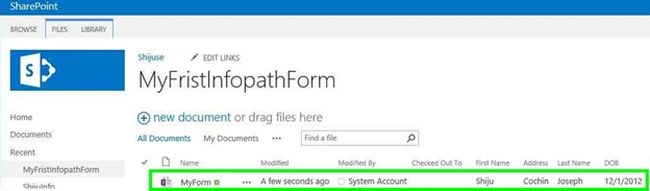
Summary
In this article we explored how to create simple InfoPath forms and how to publish them into a SharePoint site.
Rupali ShindePosted Dec 9, 2015, 3:27 AM
nice article to understand infopath concepts
Sreejith GopinathanPosted May 20, 2013, 2:32 AM
Nice one Shiju, Thanks for sharing :)
Veena SardaPosted May 12, 2013, 4:53 PM
The word that is coming out subtly from multiple SharePoint MVPs is that InfoPath may not be the way forward to go with. Access and Excel Forms may be what Microsoft will promote.