

Introduction
In the previous article InfoPath Forms 2013 Part 2 I demonstrated the various methods to fill a dropdown list in an InfoPath form. In this article we will explore how to use the various controls in an InfoPath form.
Types of controls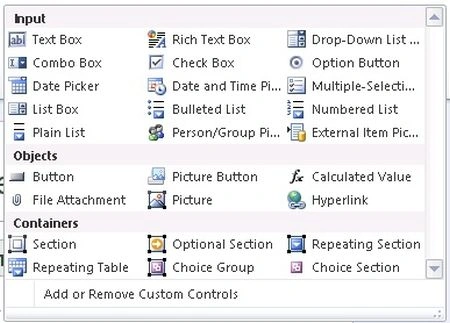
Input
Input controls include the controls that you typically associate with collecting and displaying information.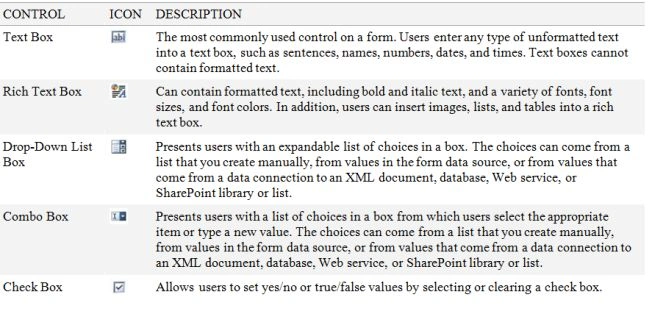

Objects
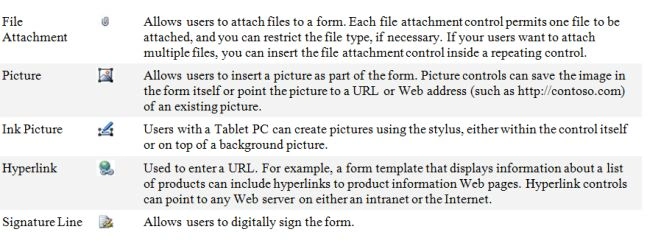
Object controls include buttons, labels, and ways to insert attachments, pictures and hyperlinks when users fill out forms.
Containers
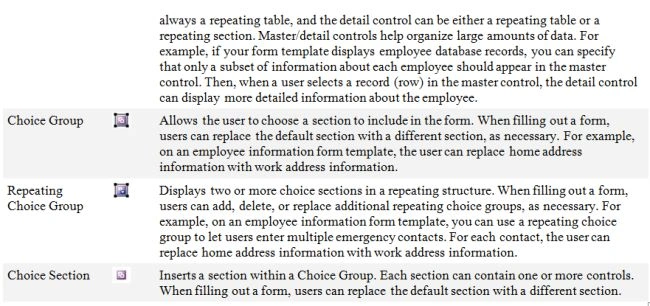
Container controls help organize form design by allowing other controls to be placed inside them. They also provide a way to allow multiple instances of a set of controls (repeating) or to allow the controls to be optional.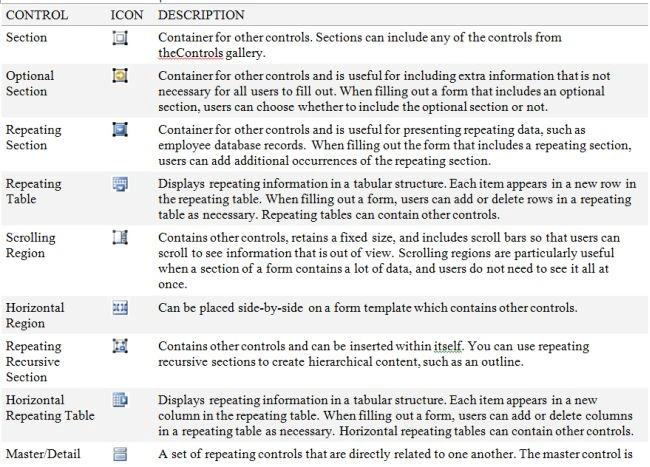
Example for File Attachment Control
Create one field for the attachment control: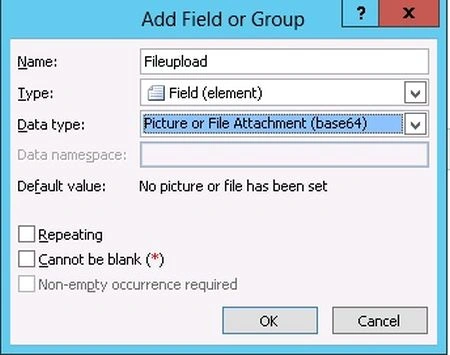
Choose the control type as File Attachment: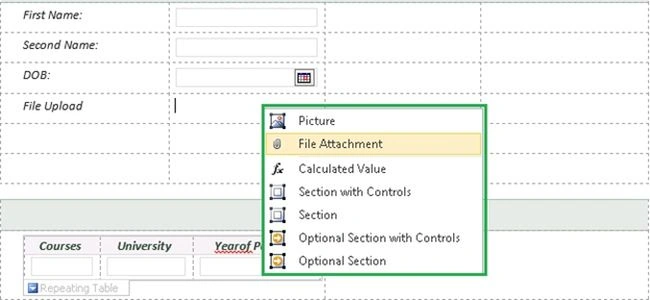
After that we need to click Preview; the control shows like this: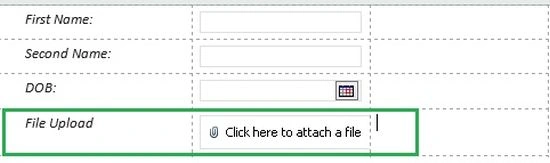
Click on the attachment and select the file: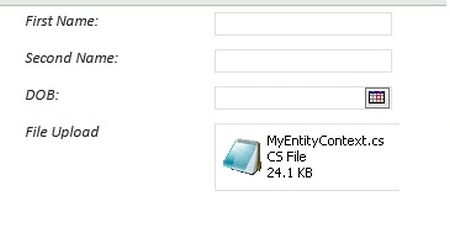
Example for the Button control
Insert a button control in the form: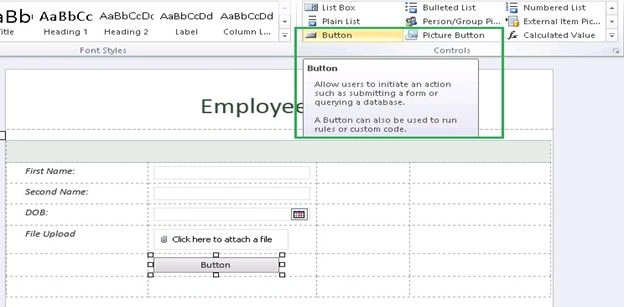
Right-click on the button control and change the Label: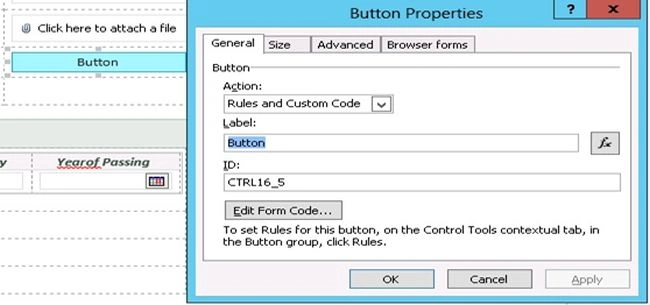
And click on "Submit":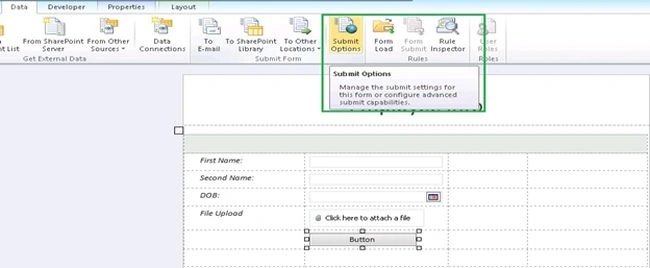
Enable the user to submit the form and select the drop down value as SharePoint document Library: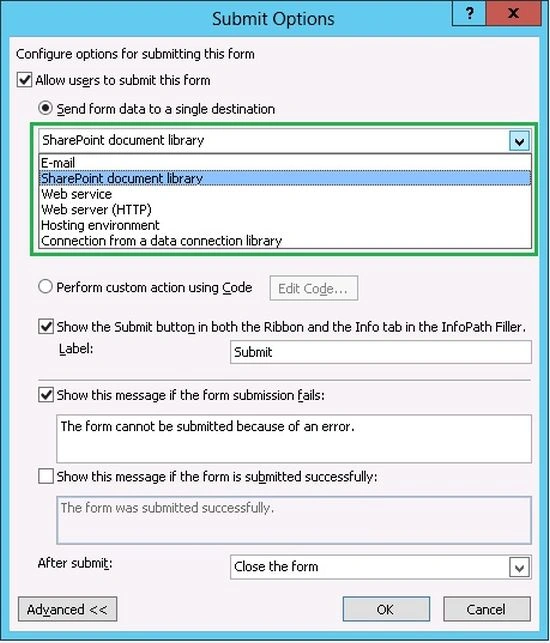
Add a new data connection for the submit: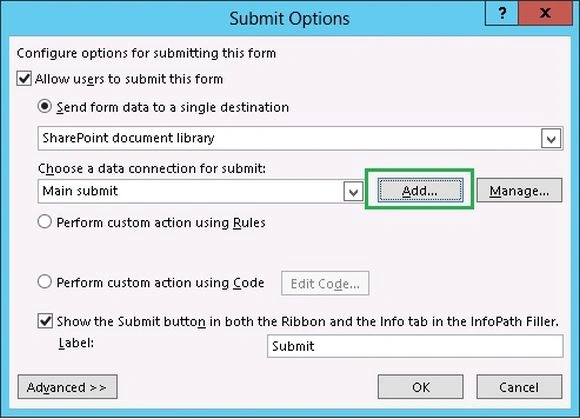
Or we need to create a new connection from here and select the option to submit data: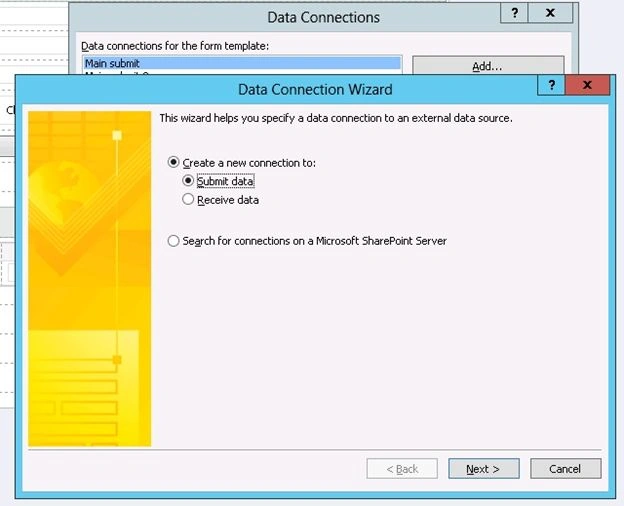
Please select the option "To a document library on a SharePoint site":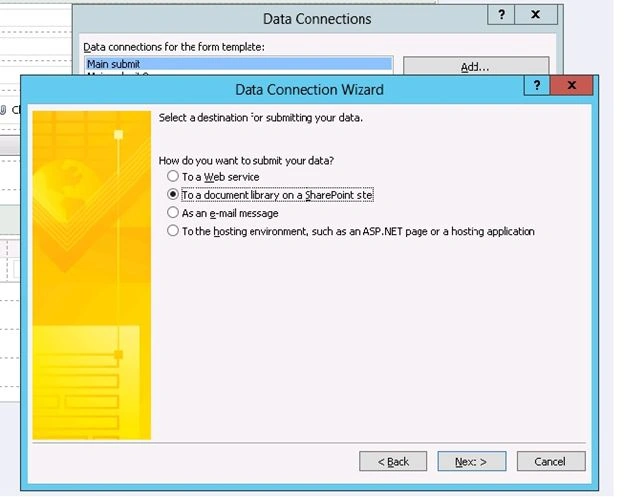
Enter the site URL here: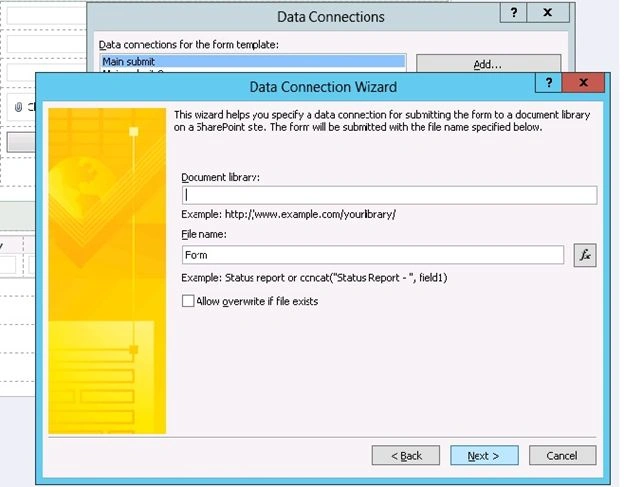
Give the name for the new data connection here: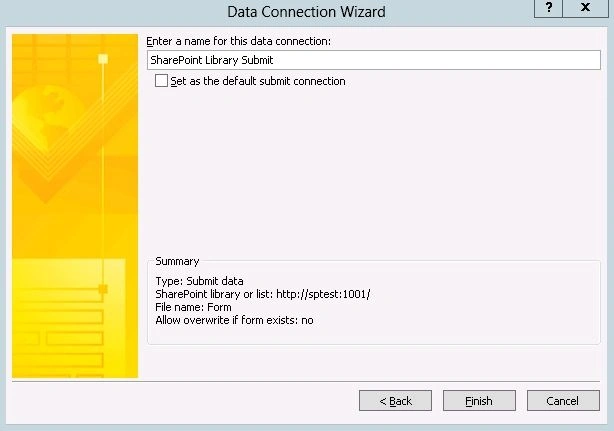
Here we can show all the connections that we created: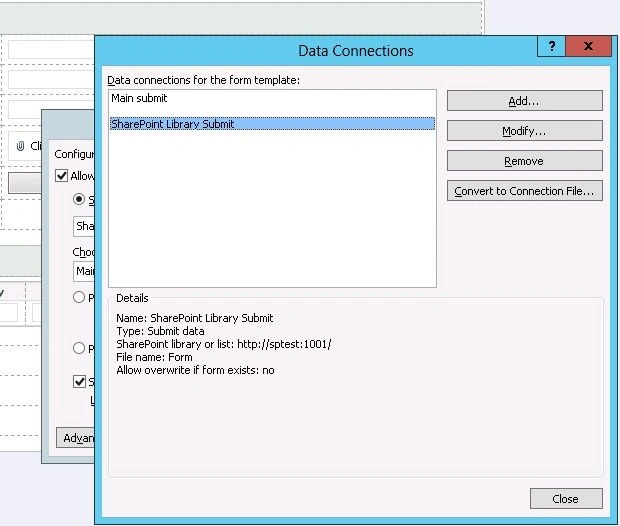
After that Publish the form: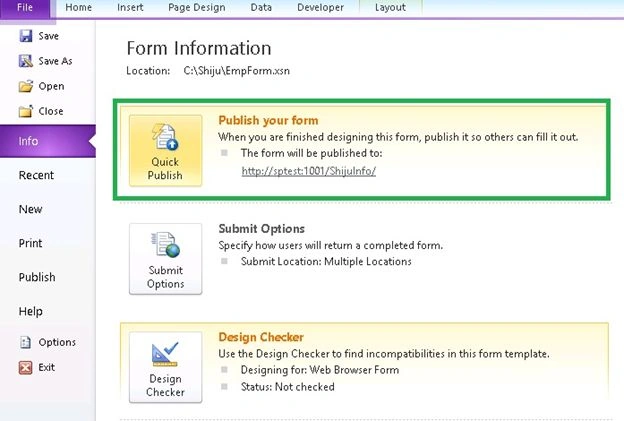
Your form template was published successfully and click the "Ok" button: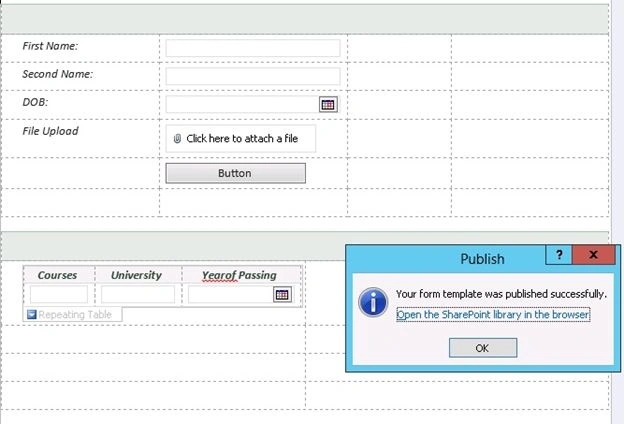
Finally we can update the data into the SharePoint list:
Reference
http://office.microsoft.com/en-in/infopath-help/introduction-to-controls-HA101732804.aspx#_Toc268101499
Summary
In this article we explored the various controls and how to use them in the InfoPath forms.
Join the conversation! Your thoughts help the community grow.