

Introduction
This tutorial explains database connectivity in Android. We will see how to create a database and insert and delete in a database and view the database. To explain this I am making a database for a bank.
First, the user will select whether he/she is an admin or a customer. An admin can add and delete accounts and view all accounts. Customers will be able to withdraw cash, deposit cash and view his account details.
In this tutorial, we will create functionalities only for the Admin. In the next article, we will create customer functionalities.
Step 1
Right-click on "Values" -> "New" -> "Values Resource File". Name this file as "color". Add the following code to this file:
- <resources>
- <color name="txt">#FFFFFF</color>
- <color name="bg">#454545</color>
- <color name="withdar1">#4d2177</color>
- </resources>
Step 2
Make the following changes in "strings.xml":
- <resources>
- <string name="app_name" >BankDB </string>
- <string name="action_settings" >Settings</string>
- <string name="hello_world" >Welcome to the BANK..... </string>
- <string name="admin">Admin</string>
- <string name="admintxt">Welcome Admin...</string>
- </resources>
Step 3
Do the following changes in "dimens.xml":
- <resources>
- <!-- Default screen margins, per the Android Design guidelines. -->
- <dimen name="activity_horizontal_margin">16dp</dimen>
- <dimen name="activity_vertical_margin">16dp</dimen>
- <dimen name="wel_admin">30dp</dimen>
- <dimen name="form_ele">20dp</dimen>
- </resources>
Step 4
Make the following changes in "activity_main.xml" in the layout (your main layout file): Use LinearLayout element.
- <TextView
- android:layout_width="wrap_content"
- android:layout_height="wrap_content"
- android:text="@string/hello_world"
- android:layout_marginLeft="70dp"
- android:textColor="@color/txt"/>
- <Button
- android:id="@+id/admin"
- android:layout_height="wrap_content"
- android:layout_width="wrap_content"
- android:layout_marginTop="50dp"
- android:background="@drawable/admin_design"
- android:text="@string/admin"/>
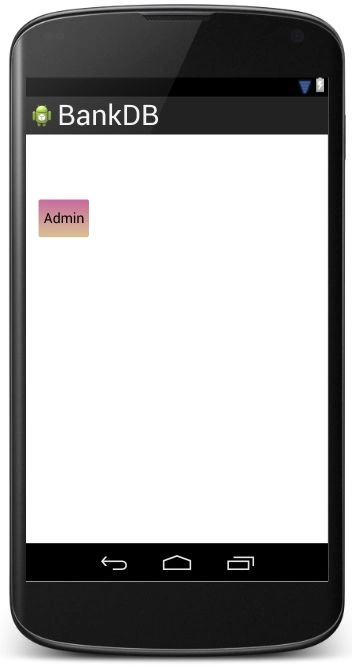
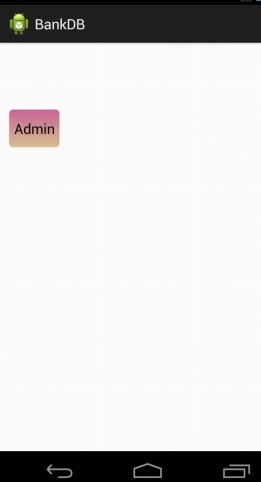
Note that we are only creating an Admin here. A customer will be explained in my next article. The layout looks like:
Step 5
Make the layout file for the Admin. Right-click on layout then select "New" -> "Layout Resource File". Name this file "admin_layout". Add the following code to this XML file (using LinearLayout element):
- <TextView
- android:layout_width="wrap_content"
- android:layout_height="wrap_content"
- android:text="@string/admintxt"
- android:layout_marginLeft="80dp"
- android:textColor="@color/txt"
- android:layout_marginTop="20dp"
- android:textSize="@dimen/wel_admin"/>
- <Button
- android:id="@+id/create"
- android:layout_height="wrap_content"
- android:layout_width="wrap_content"
- android:layout_marginTop="70dp"
- android:layout_marginLeft="40dp"
- android:background="@drawable/admin_design"
- android:text="Add new"
- android:paddingLeft="10dp"
- android:paddingRight="10dp"/>
- <Button
- android:id="@+id/del"
- android:layout_height="wrap_content"
- android:layout_width="wrap_content"
- android:layout_marginTop="70dp"
- android:layout_marginLeft="40dp"
- android:background="@drawable/admin_design"
- android:text="Delete Acc"
- android:paddingLeft="10dp"
- android:paddingRight="10dp"/>
- <Button
- android:id="@+id/view"
- android:layout_height="wrap_content"
- android:layout_width="wrap_content"
- android:layout_marginTop="70dp"
- android:layout_marginLeft="40dp"
- android:background="@drawable/admin_design"
- android:text="View Acc"
- android:paddingLeft="10dp"
- android:paddingRight="10dp"/>
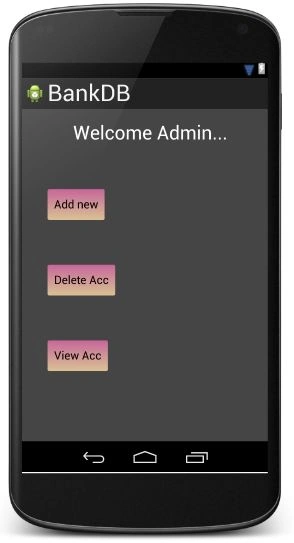
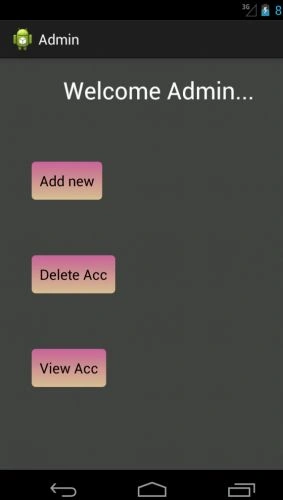
The layout looks like:
Step 6
Create a new layout file for adding a new account to the database in the same way as was done above and name this new file as "create_layout". Add the following to this file, again inside LinearLayout element:
- <TextView
- android:layout_width="wrap_content"
- android:layout_height="wrap_content"
- android:text="Create an account...."
- android:layout_marginLeft="60dp"
- android:layout_marginTop="20dp"
- android:textSize="@dimen/wel_admin"
- />
- <RelativeLayout
- android:layout_width="fill_parent"
- android:layout_height="wrap_content">
- <TextView
- android:id="@+id/t1"
- android:layout_width="wrap_content"
- android:layout_height="wrap_content"
- android:text="Acc id: "
- android:layout_marginLeft="20dp"
- android:layout_marginTop="40dp"
- android:textSize="@dimen/form_ele"/>
- <EditText
- android:id="@+id/accid"
- android:layout_height="wrap_content"
- android:layout_width="fill_parent"
- android:layout_marginTop="40dp"
- android:layout_toRightOf="@id/t1"
- android:layout_marginLeft="30dp"/>
- </RelativeLayout>
- <RelativeLayout
- android:layout_width="fill_parent"
- android:layout_height="wrap_content">
- <TextView
- android:id="@+id/t2"
- android:layout_width="wrap_content"
- android:layout_height="wrap_content"
- android:text="Acc type: "
- android:layout_marginLeft="20dp"
- android:layout_marginTop="40dp"
- android:textSize="@dimen/form_ele"/>
- <EditText
- android:id="@+id/acctype"
- android:layout_height="wrap_content"
- android:layout_width="fill_parent"
- android:layout_marginTop="40dp"
- android:layout_toRightOf="@id/t2"
- android:layout_marginLeft="10dp"/>
- </RelativeLayout>
- <RelativeLayout
- android:layout_width="fill_parent"
- android:layout_height="wrap_content">
- <TextView
- android:id="@+id/t3"
- android:layout_width="wrap_content"
- android:layout_height="wrap_content"
- android:text="Bal: "
- android:layout_marginLeft="20dp"
- android:layout_marginTop="40dp"
- android:textSize="@dimen/form_ele"/>
- <EditText
- android:id="@+id/accbal"
- android:layout_height="wrap_content"
- android:layout_width="fill_parent"
- android:layout_marginTop="40dp"
- android:layout_toRightOf="@id/t3"
- android:layout_marginLeft="60dp"/>
- </RelativeLayout>
- <Button
- android:id="@+id/bCreate"
- android:layout_height="wrap_content"
- android:layout_width="wrap_content"
- android:layout_marginTop="80dp"
- android:layout_marginLeft="130dp"
- android:text="Create"
- android:background="@drawable/admin_design"/>
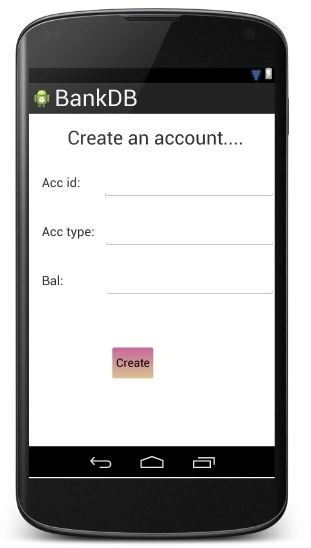
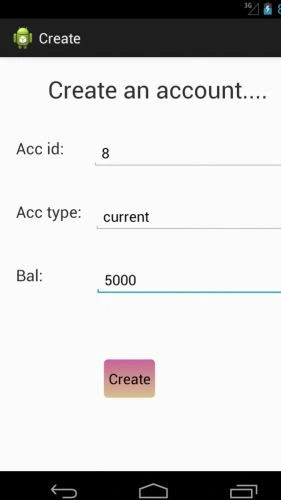
Relative Layout is added wherever needed. The layout looks like:
Step 7
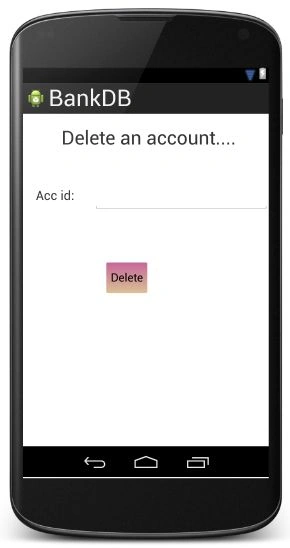
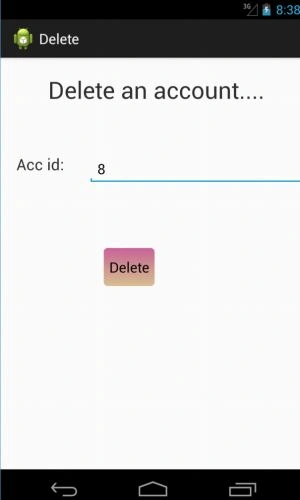
Create yet another layout file for deleting and name this file "del_layout". Add the following code in the LinearLayout element of this file:
indradeo kumarPosted Jun 9, 2020, 6:57 AM
I have four edit text as employee details and one search button.While user fill employee details in edit text and click on search button the employee details should be fetch database and display on activity two page ..please ..
JosephsPosted Dec 6, 2015, 11:47 PM
Hi Chhavi Goel Good one but My doubt is how to implemented this in my android phone where i will go to install sql lite what is the mobile requirement can you guide me and help me Soon
Udit MisraPosted Oct 12, 2015, 7:29 AM
how can i refresh xml page in android studio
Niwin SanthoshPosted Oct 7, 2014, 3:13 AM
Is it possible to include a .sql or .db file in res folder and access it inside the app in Android Studio?
kalpesh gajeraPosted May 17, 2014, 7:57 AM
I like your work. Excelent.
Min Thein WinPosted Jan 9, 2014, 4:08 AM
greate
David SanchezPosted Aug 20, 2013, 3:41 PM
Excelent work!!
Ivan TanasijevicPosted Jun 18, 2013, 4:06 PM
Do I need to create database through code. Is there possibility to already created sqlite database import in project?
Chhavi GoelPosted Jun 7, 2013, 10:44 AM
Mr. Yusuf the article in continuation with this article has been posted with the name "Update Database in Android Studio". I hope that it will help you
Yusuf KaratoprakPosted Jun 6, 2013, 1:33 PM
I'm thirsty for new one.Write write write!
Yusuf KaratoprakPosted Jun 6, 2013, 1:32 PM
Good and great !
Deepak GoyalPosted Jun 6, 2013, 4:39 AM
WOW Chhavi...Again a very good article......
Chhavi GoelPosted Jun 6, 2013, 1:58 AM
Thank you sir :)
Sam HobbsPosted Jun 6, 2013, 1:39 AM
Wow, that is a lot of code. I hope many people benefit from this very much.