

In this article, I'm walking through exactly how I moved a JSON sales file into a proper table inside my Microsoft Fabric Lakehouse, using Dataflow Gen2. I'm not covering the setup work — I already have my Sales_LH Lakehouse created and a Dataflow Gen2 item named JSON Data Dataflow sitting ready, with the editor already launched and staring at me with that empty canvas. What I want to focus on instead is the actual mechanics of getting JSON data in: pointing at the file, untangling the nested structure JSON always seems to arrive in, getting the types right, and landing it as a clean table I can actually build reports on.
I've done this migration a few times now for different datasets, and every time I do it, I'm reminded that the process looks intimidating for about the first thirty seconds — that nested "Record" column throws people off — and then becomes almost mechanical once you know the sequence. So this is that sequence, step by step, using my sales data as the running example.
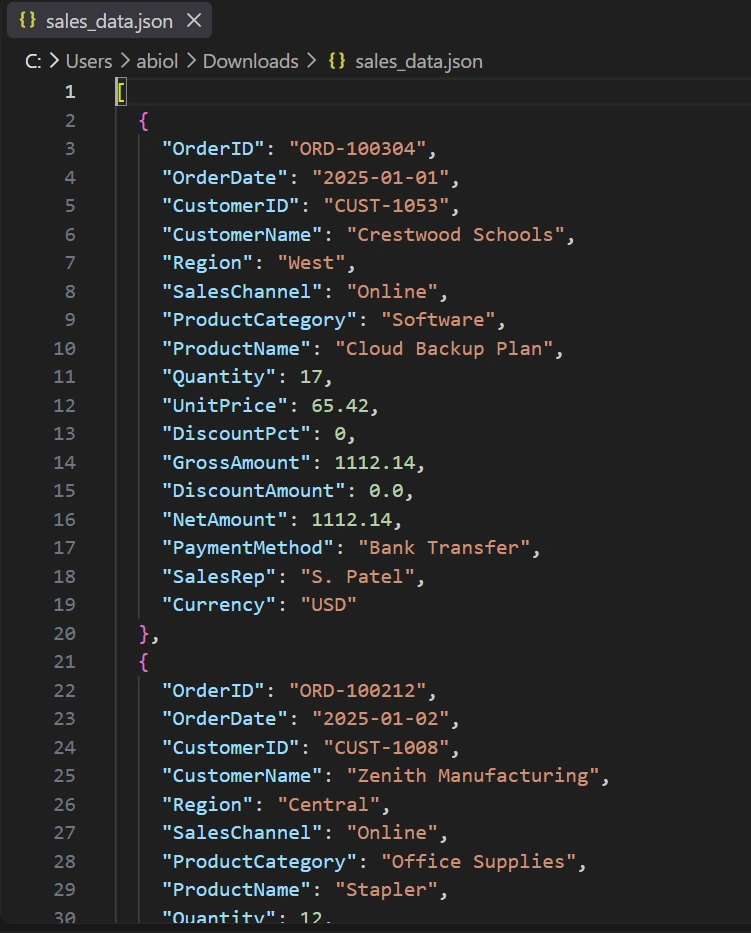
Sample JASON Sales Data
The first thing I'd like to show you is the prepared JSON Sales Data as seen below
Step 1: Launching "Get Data" from the Dataflow Editor
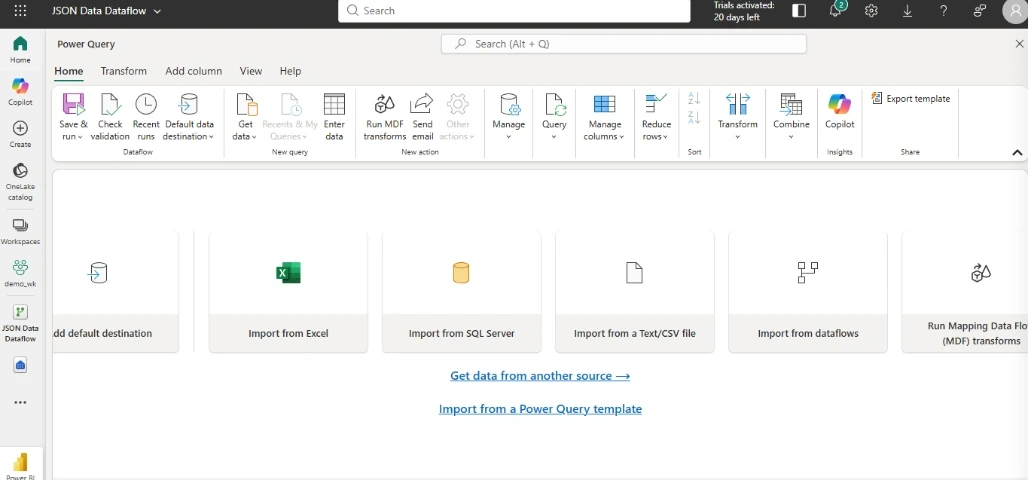
With the Dataflow Gen2 editor already open, the canvas shows the empty "Get data" prompt in the middle — a big button inviting me to pick a source. I clicked Get data on the ribbon at the top (it's also available as a tile right in the middle of the blank canvas if this is the first source in the dataflow). This opens the connector gallery, which is genuinely huge — hundreds of connectors organized into categories like Azure, Database, Online Services, and File.
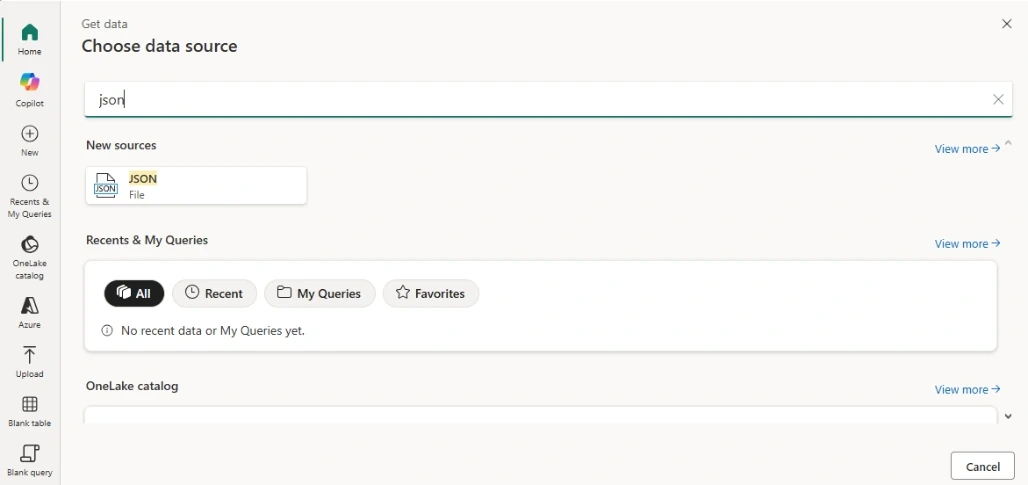
Rather than scroll through all of that, I just typed JSON into the search box at the top of the gallery. It filtered down immediately to the JSON connector.
Step 2: Pointing the Connector at My File
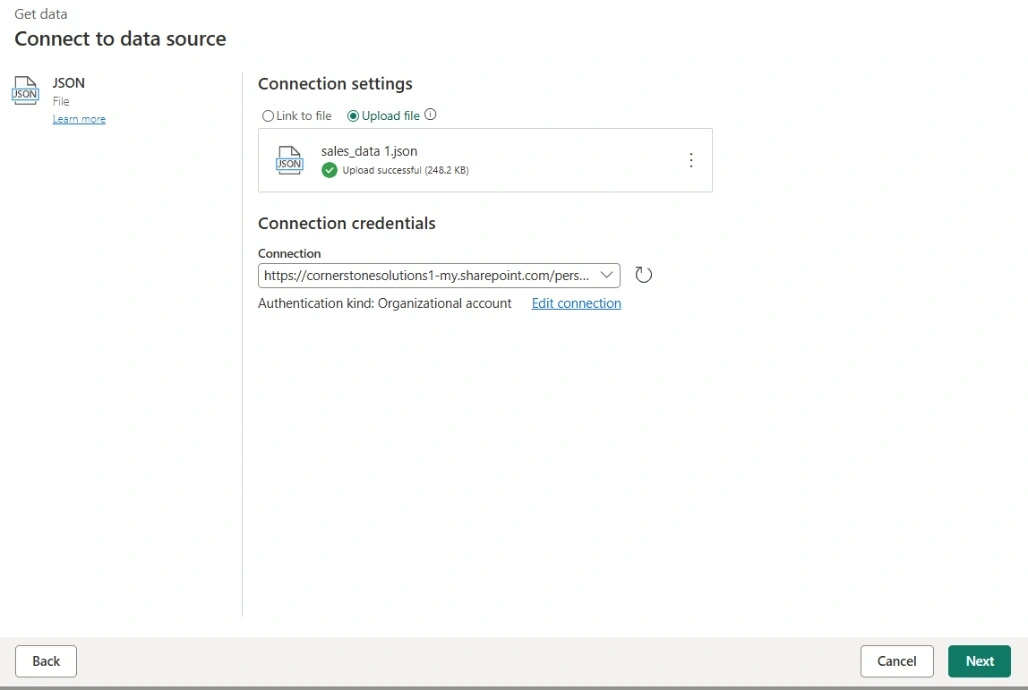
Selecting the JSON connector opens a small dialog asking where the file actually lives. I select the upload file radio button and browse to my Downloads and selected the sales_data.json file and I hit Next, Fabric read the file and dropped me into the Power Query editor with a preview of what it found.
Step 3: Data loaded to Power Query
Power Query automatically read the files and read the data into the editor automatically as a structure table without any need to perform any transformation. You will observe that the appropriate data types is applied to each of the columns in the dataset. That's the Power of Power Query in Dataflow Gen2
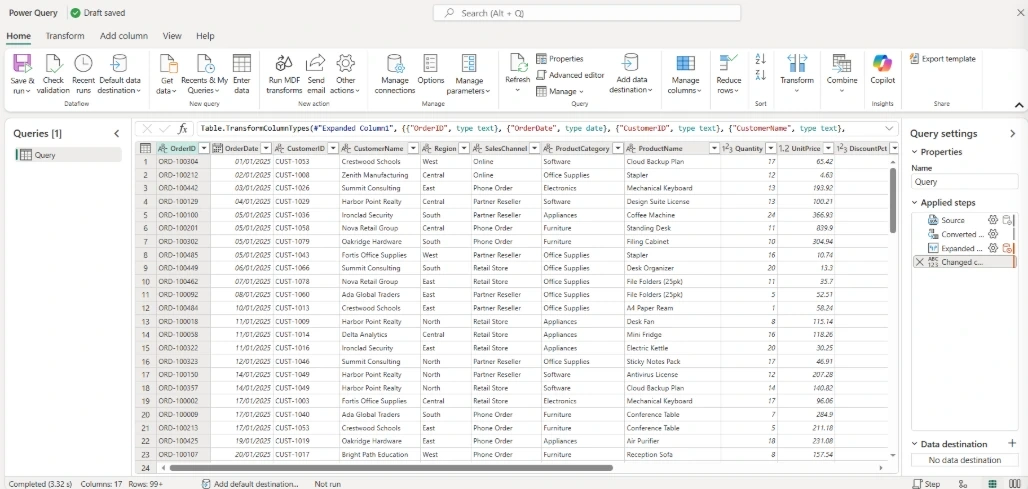
Step 6: Setting the Data Destination
This is the step that actually connects the dataflow to the lakehouse, and it's easy to miss if you're not looking for it. On the right-hand side of the editor, in the Query settings pane, there's a Add data destination button.
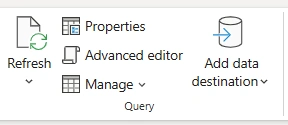
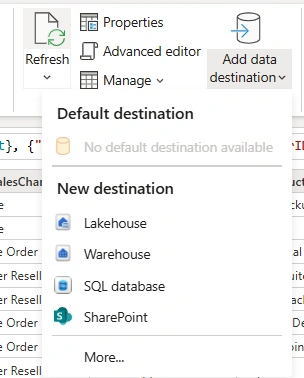
I clicked it. Then, selected Lakehouse from the New destination option
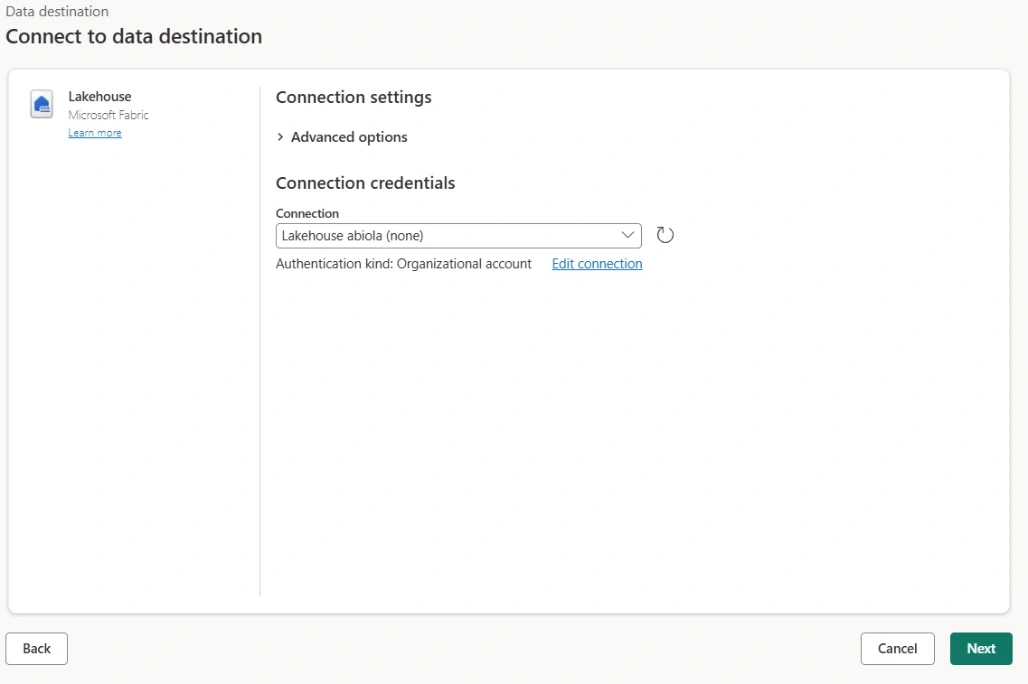
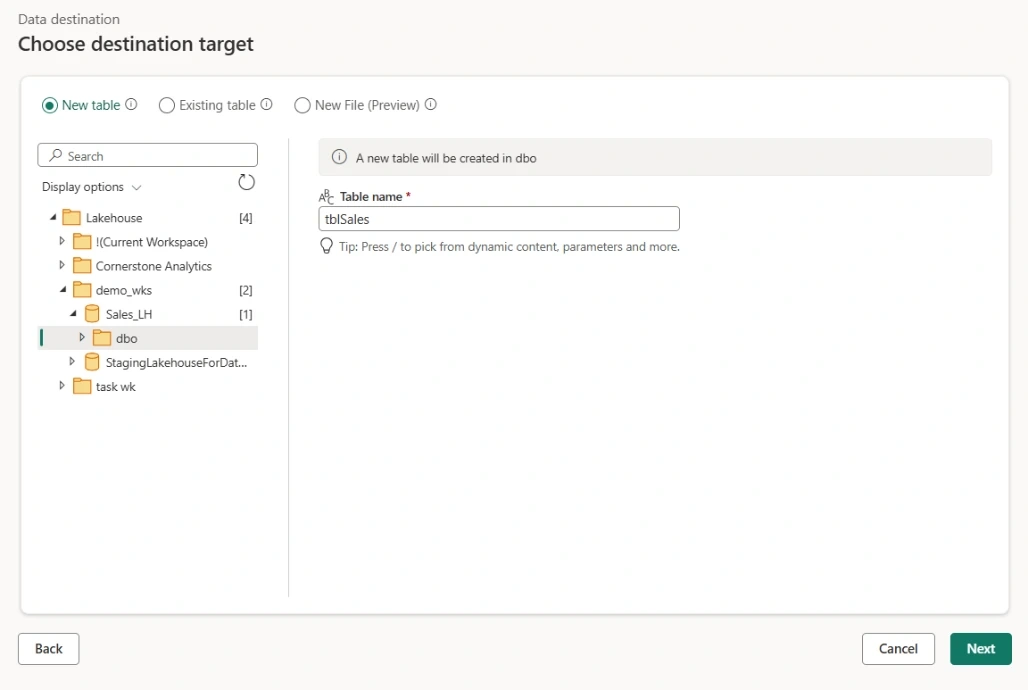
That opened a destination picker where I signed in to my workspace connection (already authenticated, so this was a formality) and browsed to my Sales_LH lakehouse. I chose New table and named it tblSales
Fabric then showed me a column mapping screen, matching each source column from my query to a destination column in the new table. Everything auto-mapped cleanly since I'd already cleaned up the column names and types in the previous steps.
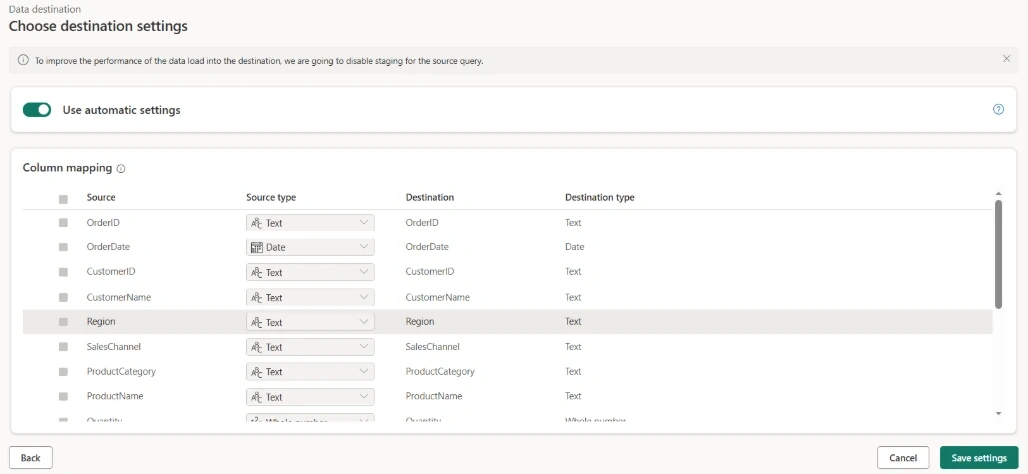
Clicked Save settings
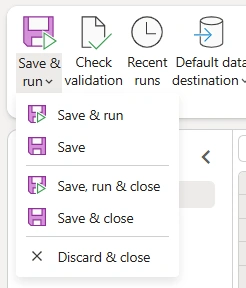
Step 7: Save, run & close Dataflow
With the destination configured, I clicked Save, run & close in the bottom-right corner of the editor. Fabric validated the query, saved the dataflow definition, and closed the editor, dropping me back into the workspace view. A small notification tracked the publish progress, and shortly after, it moved into its first run automatically.
Step 8: Verifying the Run
Back in the workspace, I clicked into the JSON Data Dataflow item and checked its refresh history to confirm the run had actually succeeded rather than just assuming it worked. It showed a green checkmark and a duration — a few seconds, since 500 rows is a tiny load.

Then I opened Sales_LH itself, went to the Tables section in the Lakehouse explorer, and there it was: tblSales Clicking it gave me a live preview of the rows,
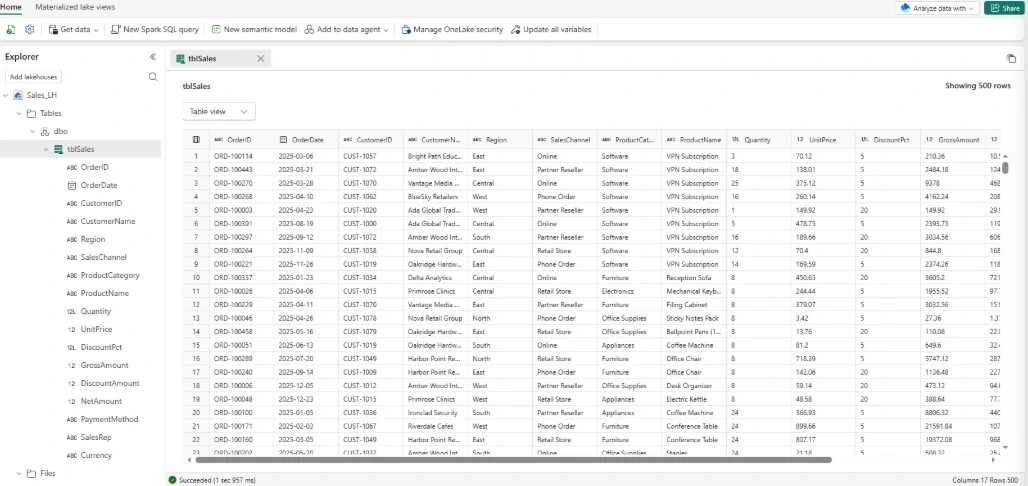
That's the whole path from a raw JSON file to a governed, queryable table in Fabric — no code, just the Dataflow Gen2 editor doing the heavy lifting. The one habit that saved me the most time was fixing data types before setting the destination rather than after; catching a text-formatted date at the Power Query stage is a five-second fix, catching it after it's already landed in a table means rebuilding the load.
Join the conversation! Your thoughts help the community grow.