

In this article, we will explore Azure App Service and understand how to configure it using the Azure Portal. We will also deploy a sample ASP.NET Core application to Azure App Service using Visual Studio.
Agenda
What is Azure App Service?
Difference between Azure App Service and Azure Virtual Machine
How to configure Azure App Service in the Azure Portal
Deploying an ASP.NET Core application using Visual Studio
What is Azure App Service?
Azure App Service is fully managed. platform as a service (PaaS) offering provided by Microsoft. It allows developers to build, deploy, and scale web applications, REST APIs, and backend services without managing the infrastructure.
With Azure App Service, you do not need to worry about:
Server management
Operating system updates
Infrastructure maintenance
Load balancing configuration
Microsoft manages all of these at the platform level.
Key Features of Azure App Service
Multiple Language Support
Supports .NET, .NET Core, Java, Node.js, Python, and PHP.Built-in CI/CD Integration
Can integrate directly with GitHub, Azure DevOps, or publish via Visual Studio.Auto Scaling
Automatically scales up or out based on traffic.High Availability
Built-in load balancing and fault tolerance.Security & Compliance
Supports HTTPS, authentication/authorization, managed identities, and private endpoints.
Difference between Azure App Service and Azure Virtual Machine
| Feature | Azure App Service | Azure Virtual Machine |
|---|---|---|
| Service Model | PaaS (Platform as a Service) | IaaS (Infrastructure as a Service) |
| Server Management | Managed by Microsoft | Managed by User |
| OS Access | No direct access | Full access |
| Scaling | Automatic | Manual (or configured manually) |
| Maintenance | Managed by Microsoft | User responsibility |
| Deployment Speed | Faster | Slower |
| Cost Management | Optimized for apps | Depends on VM size & usage |
Simple Explanation
Azure App Service → Focus only on your application. Microsoft handles the infrastructure.
Azure Virtual Machine → You control everything, including the operating system and server setup.
When to Choose What?
If you are deploying an ASP.NET Core Web API using Visual Studio, App Service is usually the best and easiest choice.
If you need complete control over the server environment, choose Virtual Machine
How to configure Azure App Service in the Azure Portal
Step 1: Login to Azure Portal
Go to https://portal.azure.com
Sign in with your Azure credentials.
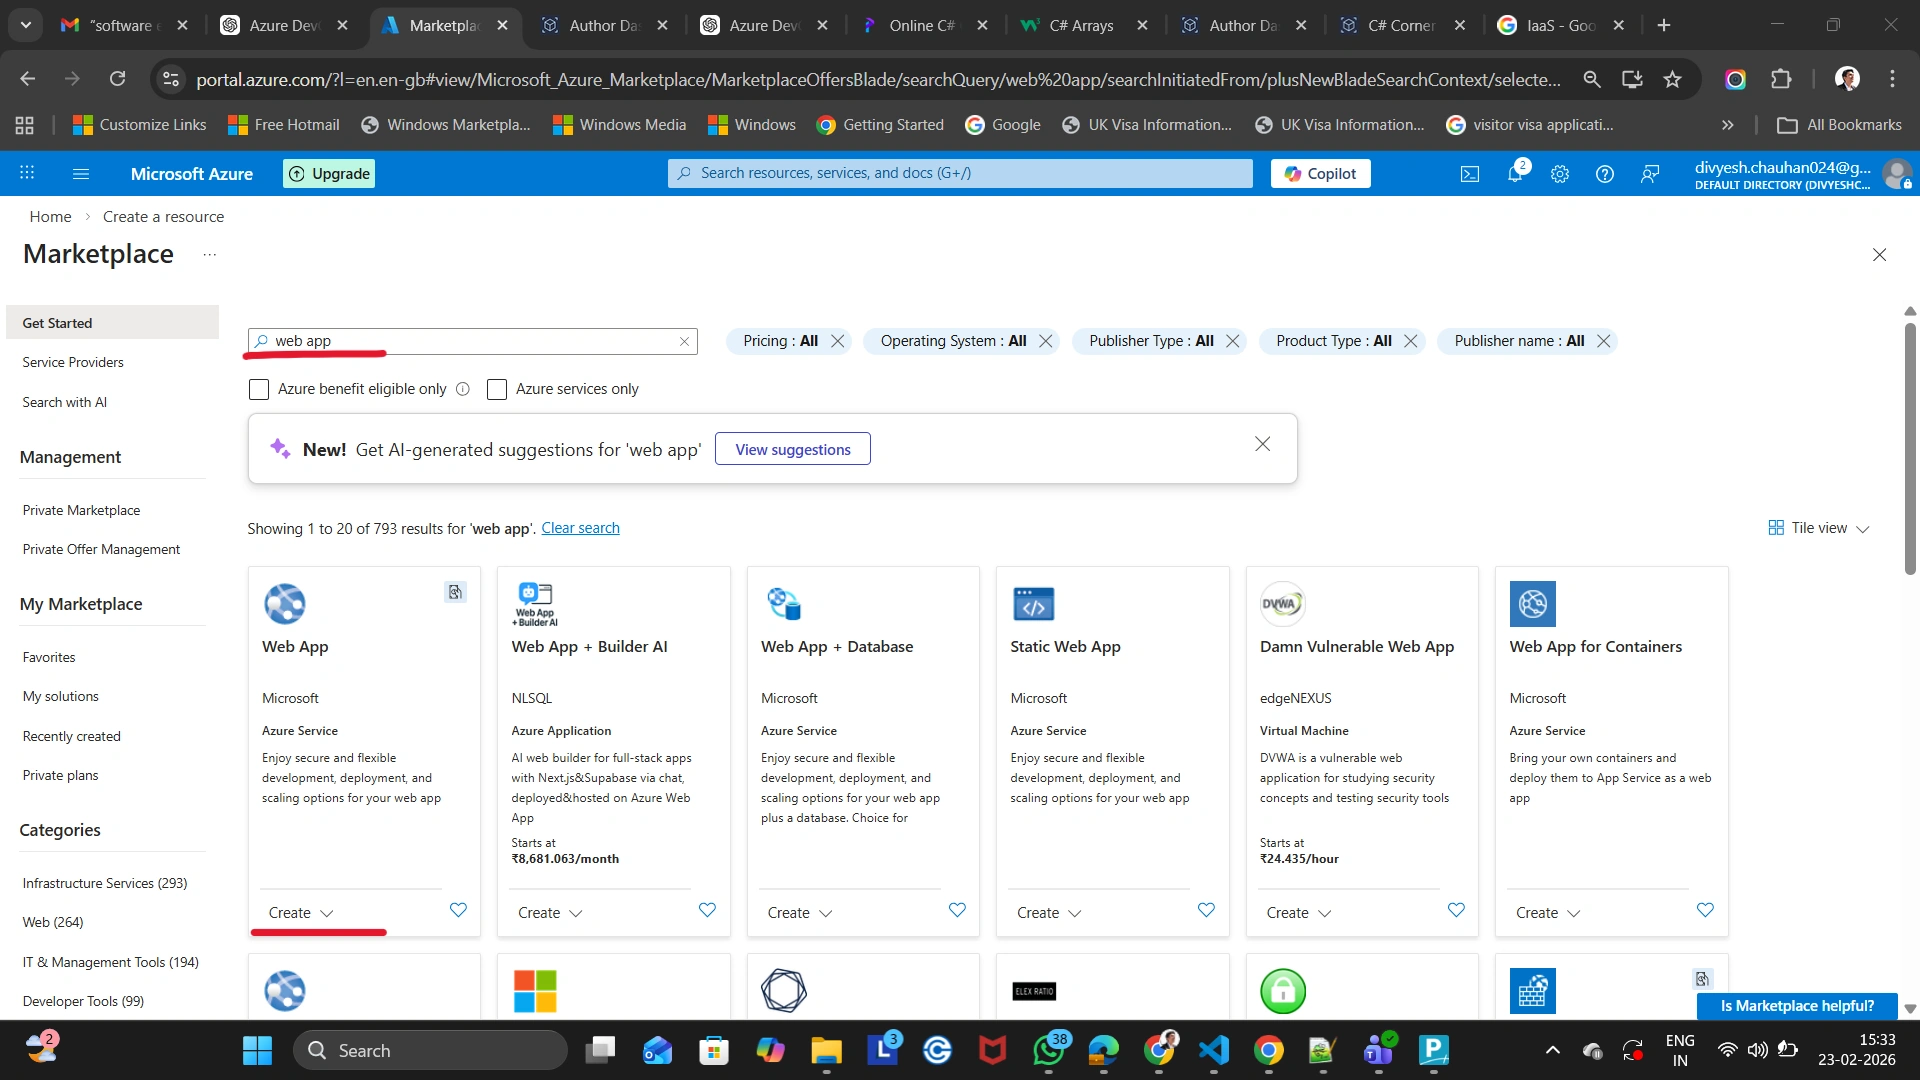
Step 2: Create a Web App
Click Create a resource
Select Web App
Click Create
This will create an instance of Azure App Service.
Step 3: Configure Basic Settings
Fill in the required details:
Subscription → Select your active subscription
Resource Group → Create new (e.g.,
AppServiceDemoRG)Name → Enter unique app name (e.g.,
myappdemo123)Publish → Code
Runtime Stack → .NET (Choose version like .NET 8 or .NET 6)
Operating System → Windows
Region → Choose nearest region (e.g., Central India)

Click Review + Create
Click Create
Deployment will take 1–2 minutes.
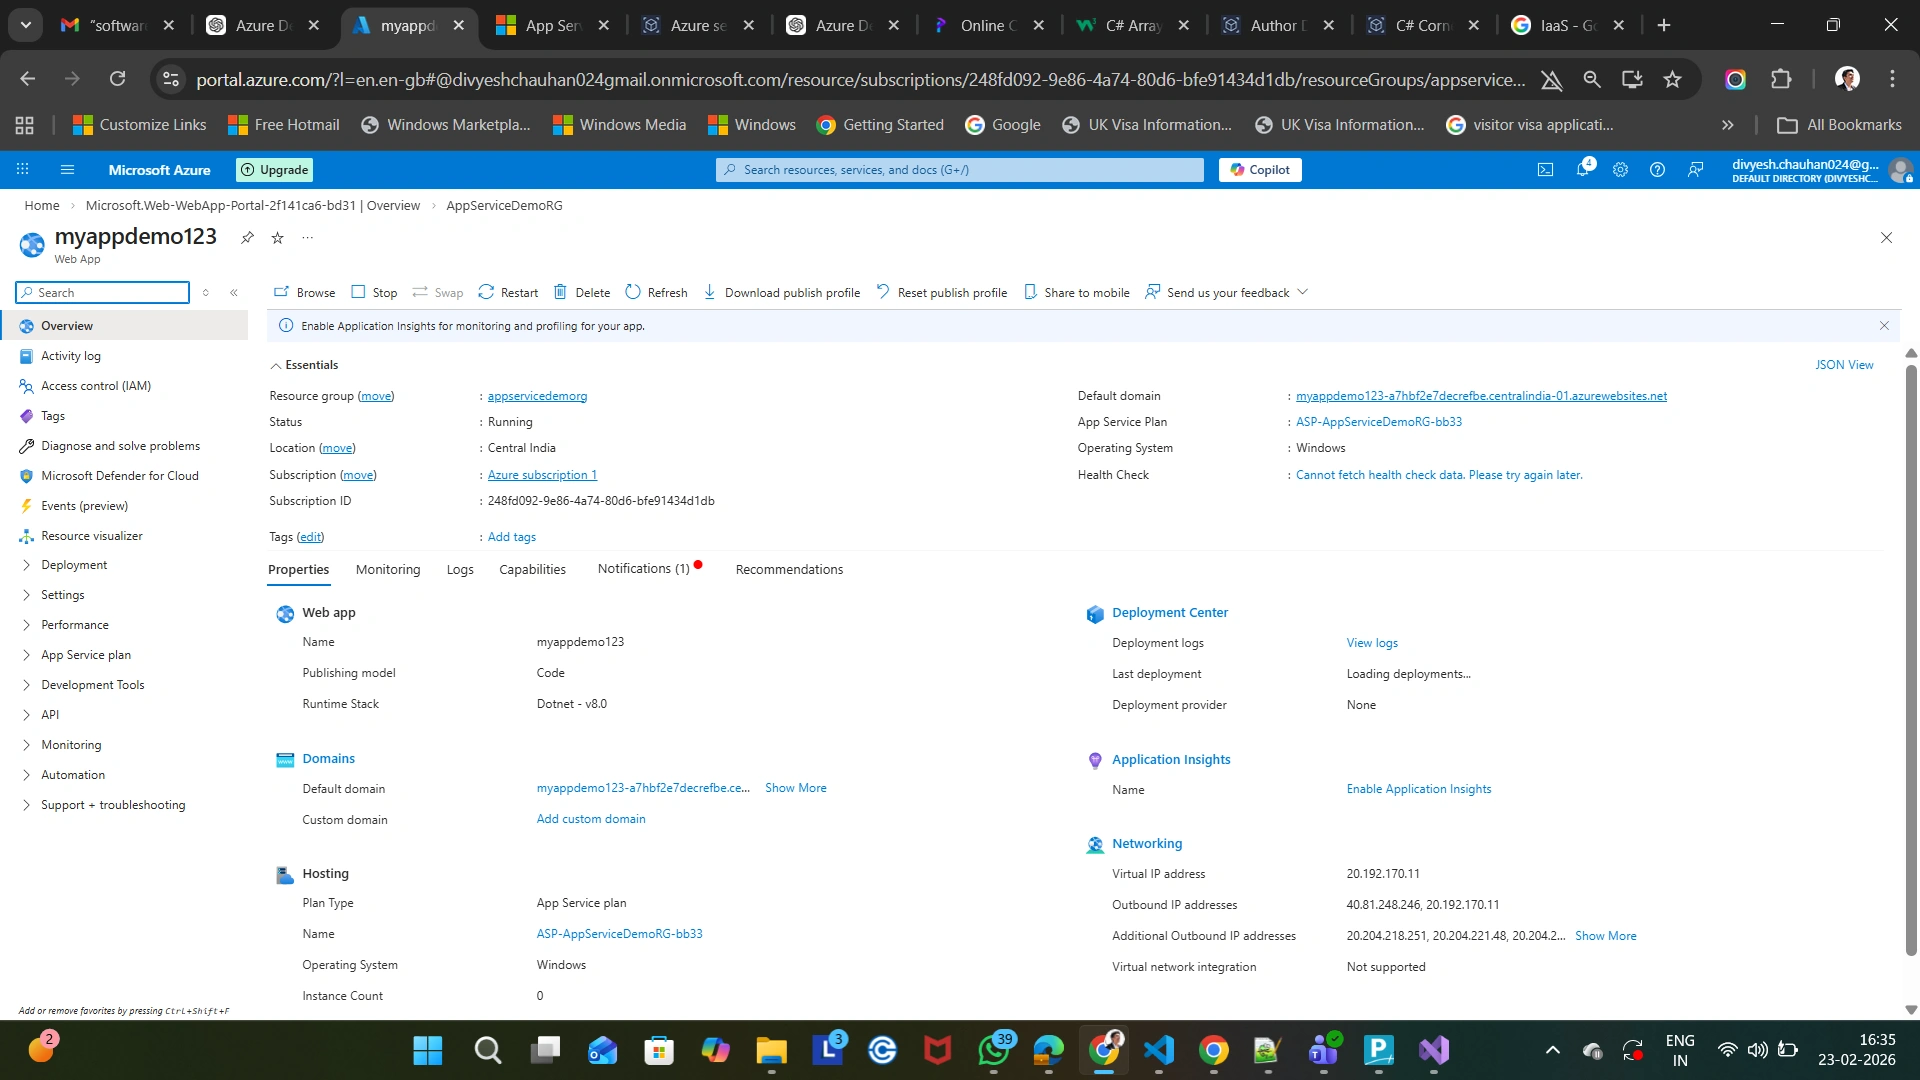
Step 4: After Deployment
Go to Resource
Click the Default domain URL
On the Overview page, look for:
Default domain:
https://myappdemo123.azurewebsites.net
Click it.
You should see the default Azure App Service page.

Deploying ASP.NET Core Application to Azure App Service Using Visual Studio
Step 1: Open Your Project
Open Visual Studio 2022
Open your ASP.NET Core project
Make sure the project builds successfully
Step 2: Right-Click → Publish
In Solution Explorer
Right-click on the project
Click Publish

Step 3: Choose Publish Target
In the Publish dialog:
Select Azure
Select Azure App Service (Windows)
Click Next
Step 4: Select Existing App Service
Choose Select Existing
Click Next
Sign in to Azure (if not already signed in)
Select:
Subscription
Resource Group
Your App Service (e.g.,
myappdemo123)
Click Finish
Visual Studio will create a publish profile automatically.

Step 5: Click Publish
Click the Publish button.
Visual Studio will:
Build the project
Package the application
Deploy to Azure
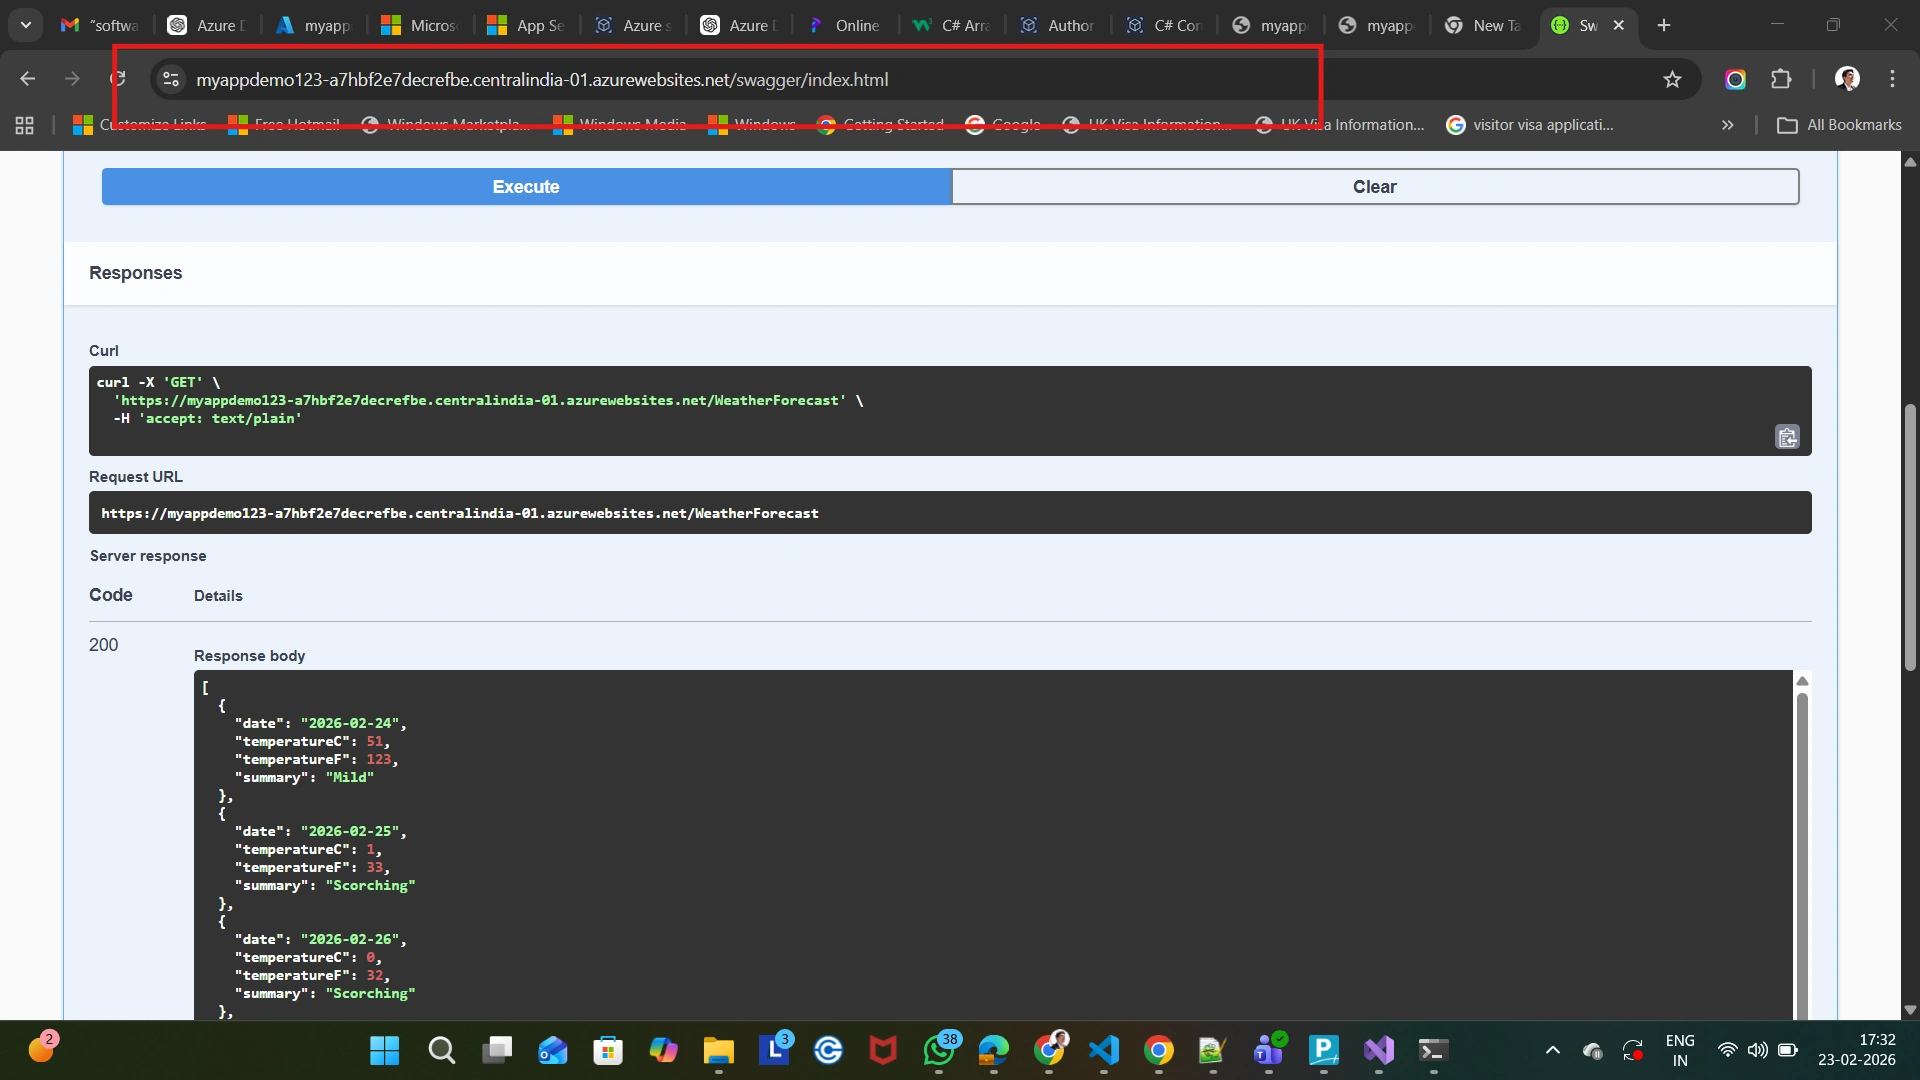
Open the browser automatically
Conclusion
In this article, we explored how to create and configure an Azure App Service using the Azure Portal and deploy an ASP.NET Core application using Visual Studio 2022.
We covered:
Understanding what Azure App Service is
Difference between Azure App Service and Virtual Machine
Deploying an ASP.NET Core application directly from Visual Studio
Verifying deployment using API endpoints
Azure App Service simplifies cloud hosting by eliminating the need to manage servers, operating systems, and infrastructure. It allows developers to focus entirely on writing and deploying application code.
Thank you so much for reading this article. Happy coding!!
Join the conversation! Your thoughts help the community grow.