

In our previous post, we elaborated on:
- What pipes are.
- How they help us to transform the values within template.
- How we can chain pipes.
- What are custom pipes & how to create them.
We are already familiar with how to create a component in Angular 2. In this post, we’ll try to dabble more on components & understand how to do event handling, how we can create nested components, and what are Component Life cycle Events/hooks.
Event Binding
We’ve already seen how to bind a property with an HTML element through Property Binding (where data from Component was bound to the HTML element); i.e. by enclosing the HTML element’s attribute inside the “[]” brackets &and assigning the value of the Component’s property to it. This is one way type of binding from Component to HTML element; however, we sometimes need the opposite way where some action on HTML element updates the component’s data. This is where Event Binding comes into picture.
To demonstrate event binding, we’ll update our emp-list.component.html file to have a button, on click of which we’ll toggle the employee photo column.
Below is the snap of code change made to emp-list.component.html.
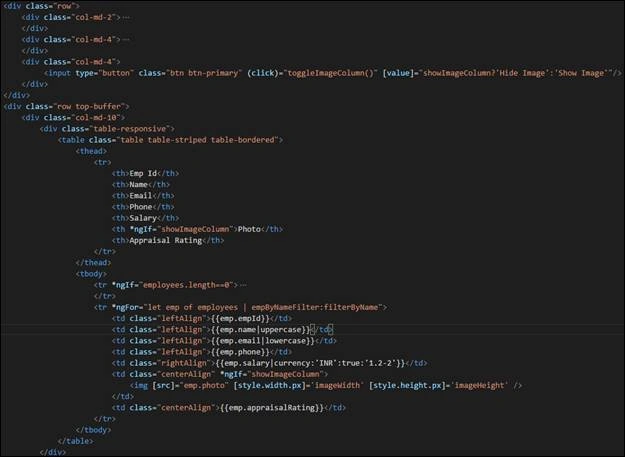
As you can see, we are doing property binding on “value” attribute of button element, by switching the text of the button to “Show Image” or “Hide Image” based on the value of “showImageColumn” property which is declared in our EmployeeListComponent class. Also, we’ve binded the Angular click event to toggleImageColumn() declared in EmployeeListComponent class. We’ve also added *ngIf= “showImageColumn” structural directive to the table head (i.e. th) HTML element as well as to the table data (i.e. td) HTML element.
Here is the updated snap for EmployeeListComponent class.
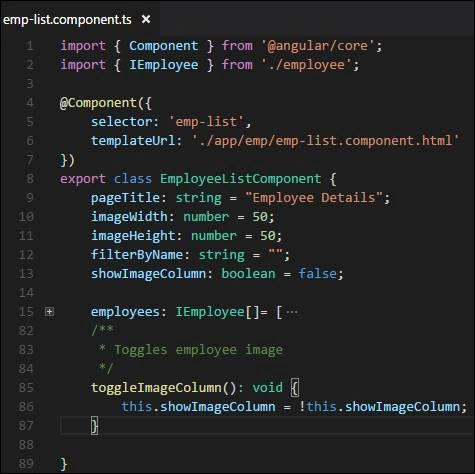
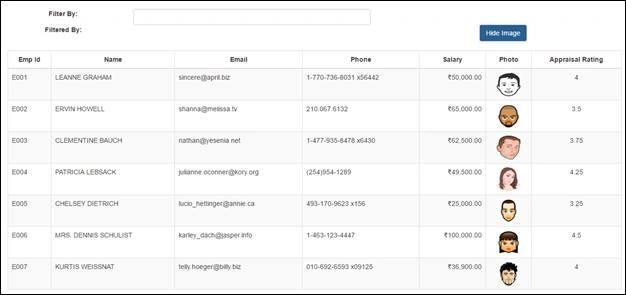
Try running the application and check if our latest feature of toggling the image column is working.

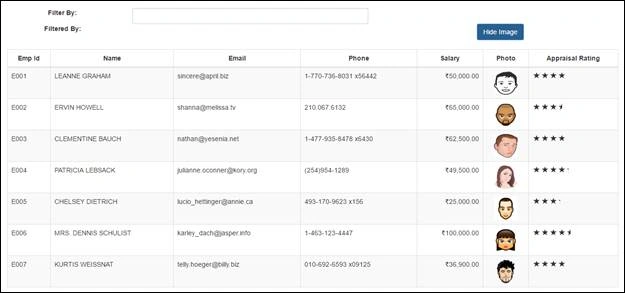
On clicking the button, the photo column toggles. The below snap shows the same.
Component Life Cycle Hooks
Every component has a life cycle which is managed by Angular right from the component initialization till it gets destroyed. Angular creates the component, renders it, creates & renders the child/nested components, check for any data bound property changes, and then finally, destroys it by removing the component from the HTML DOM.
Angular provides us with some life cycle hooks (in the form of interfaces) which can be used for performing a task, such as - for loading data from a back-end, we can use ngOnInit method which is responsible for carrying out any pre load initialization work. Similarly, in ngOnDestroy method, we can explicitly try to release any used resources.
For more information on component life cycle hook, please refer to this link.
For demonstrating this, we’ll try to update EmployeeListComponent class. In our class, we are loading the employees[] model data at the class level. Now, we’ll implement the OnInit interface and will load the employees[] array in the ngOnInit() method.
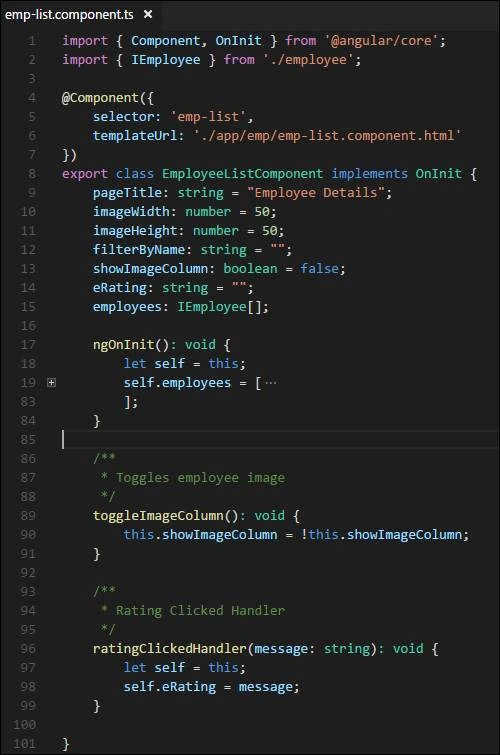
Here is the updated code for the same.
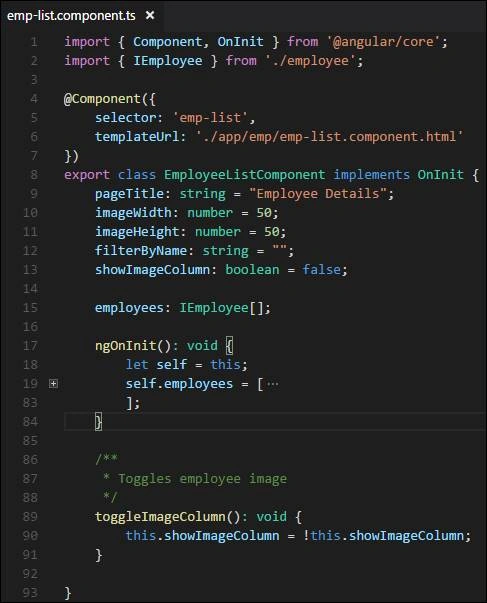
As you can see, we’ve imported the OnInit interface from @angular/core library and implemented on the EmployeeeListComponent class. Inside the class, we provided definition for the ngOnInit method and loaded our employees[] model data there.
Note
- We didn’t make use of constructor for performing the same task because constructors are used for initializing the variables to default value and not for making service calls. For now, our employees[] data is not coming from back-end but soon we’ll try to get our data from back-end service. Making service calls inside constructor is not a good practice.
- We can implement multiple life cycle hooks for a single component as per our need. For more information on component life cycle hooks, please refer this link.
After making the changes, try running the application. You’ll see the same output.
Creating Nested Components
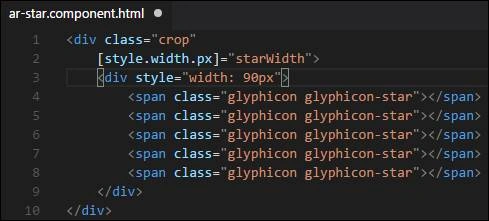
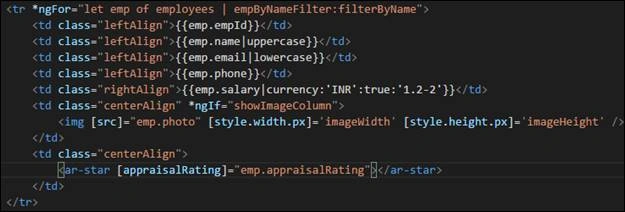
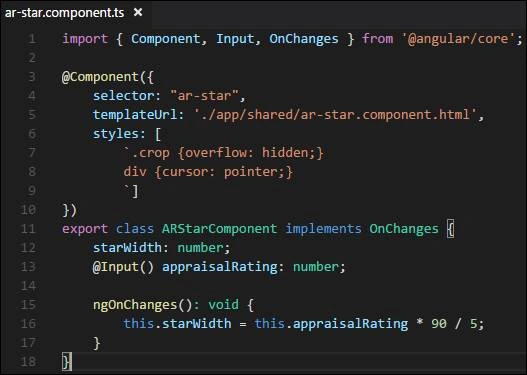
We can nest components into each other. The main reason for nesting a component is re-usability. If the component is going to be used frequently throughout the application, it’s better to create a nested component rather than defining the same logic again and again. Nested component is simply referred as “Child Component”. Nesting a component simply means, using the “selector” name of one component inside another and registering the component with the module/sub module of the application. We can also pass the data to/from between parent component and child component. To demonstrate this, we would convert our “Appraisal Rating” value from numbers to “*”. Below are the steps for the same.
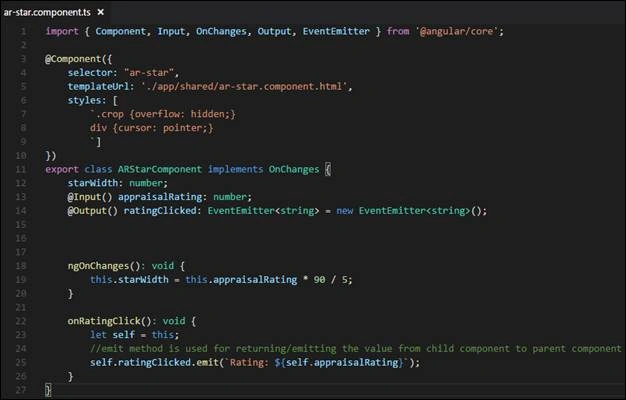
To start with, we’ll first create a shared folder inside our root folder whereby we can put our shared/nested components of the application. Inside the shared folder, I’ve added new TypeScript file named “ar-star.component.ts”. Below is the code snap for the same.
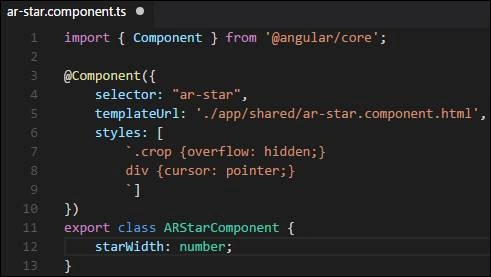
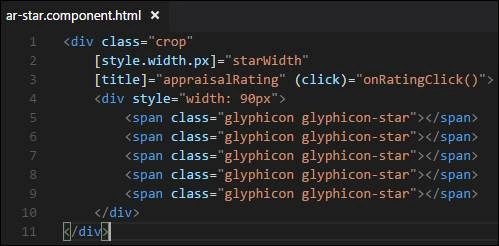
As you can see, we provided selector as “ar-star” i.e. wherever we want to use this component inside a parent component, we’ll be simply using <ar-star> tag in the parent component html file. Also, I’ve provided inline styles for the component using the “styles”[] property. You can pass multiple inline styles to it. However, the component decorator also provides the object property named “styleUrls” where you can specify the multiple external style sheet relative file paths.


Join the conversation! Your thoughts help the community grow.