

Introduction
This article explains the authentication of your MVC application with Facebook, or you can associate your application with any of the various other OAuth providers, like Google, Twitter, and Microsoft. You can also view the registered user information in your application using this article.
In that context, at first, you should be aware of the External Login Configuration in the MVC 4 application project. So let's start to create a web application based on MVC 4 with the app in the Facebook Developer.
I also assume that you have the knowledge of creating an app on Facebook. If you need any help then see Login App with Facebook & Google
Creating the MVC Application
Step 1: Open Visual Studio
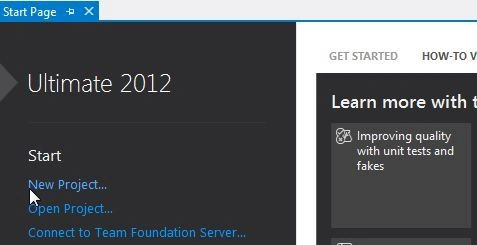
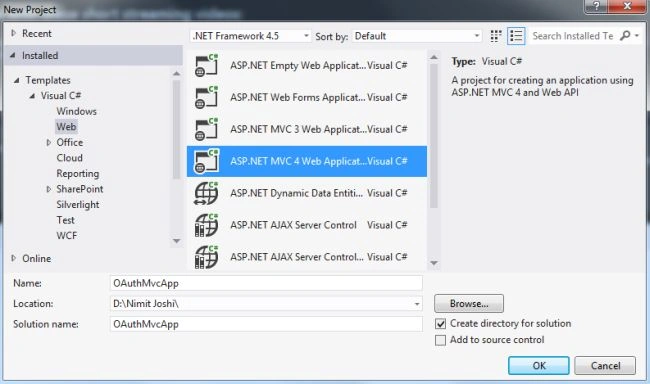
Step 2: Create a new ASP.NET MVC 4 Application
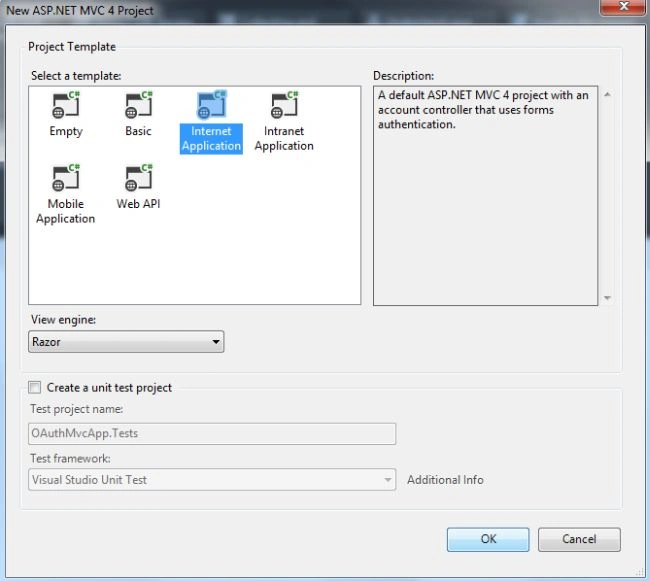
Step 3: Select the Internet Application and click "OK".
Step 4: In your Solution Explorer, open the AuthConfig.cs file.
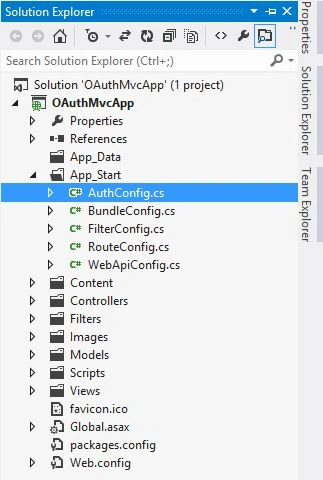
As you can see, the Facebook authentication is disabled.
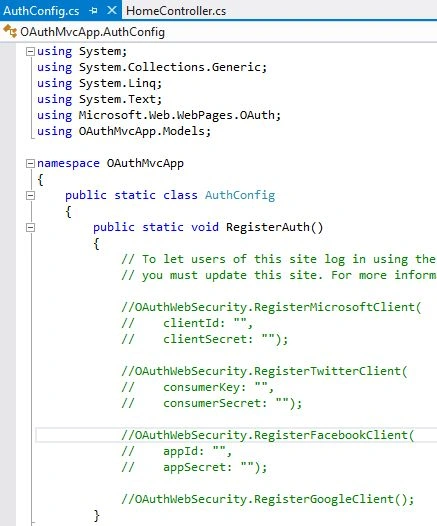
Note: To enter the Facebook app id and secret, create an app on Facebook.
Facebook App Provider
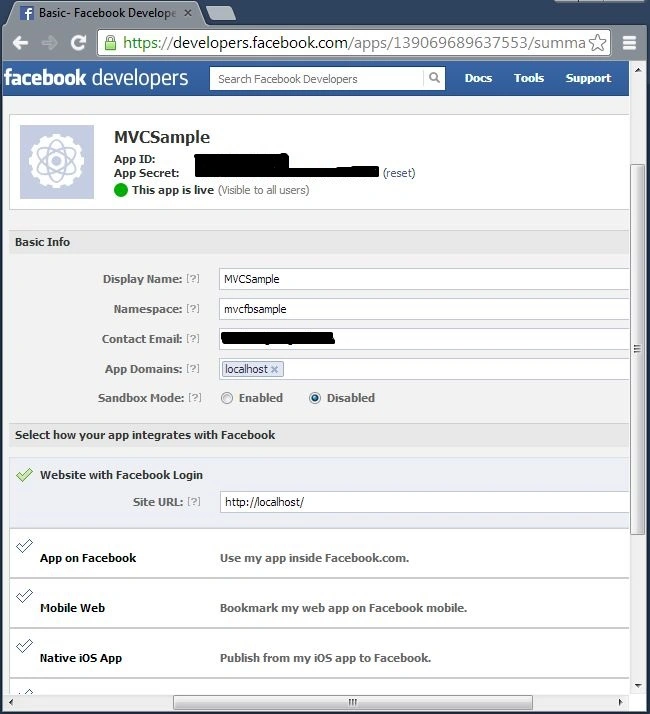
As you know that there are various authentication providers available to register the MVC application. To register the site with the Facebook provider you can simply provide localhost in the app domain and http://localhost/ in the site URL as shown below:
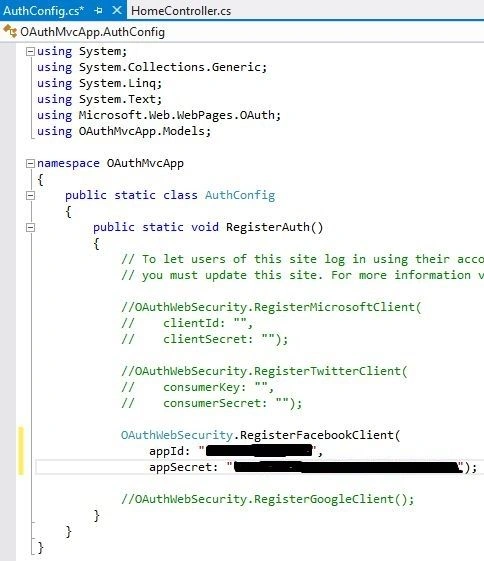
Now, copy the app id and app secret of your Facebook app and paste as shown below:
External Service Login
Now, you have successfully created the app. Debug your application and open the Login link from the browser.
Step 1: Click on Facebook
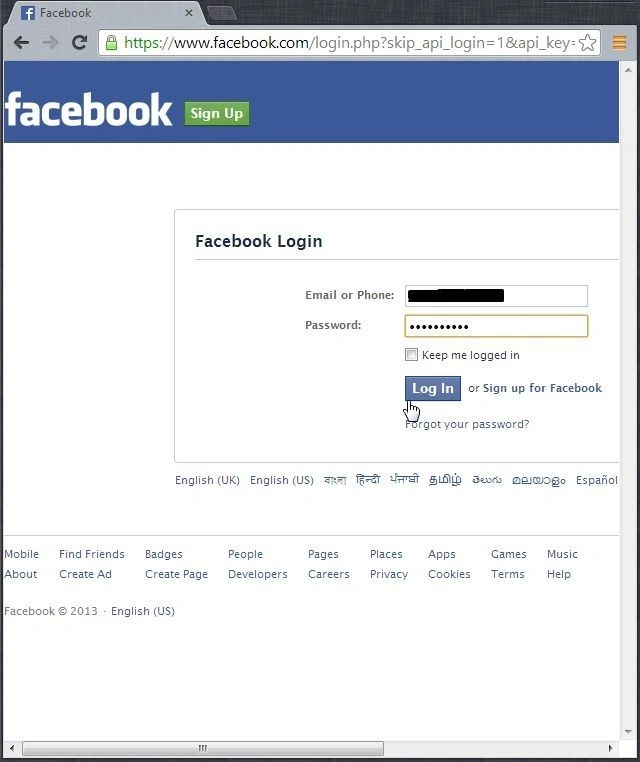
Step 2: If you are connecting your app for the first time then you must enter the Facebook credentials.
Step 3: It automatically opens the user name registration page.
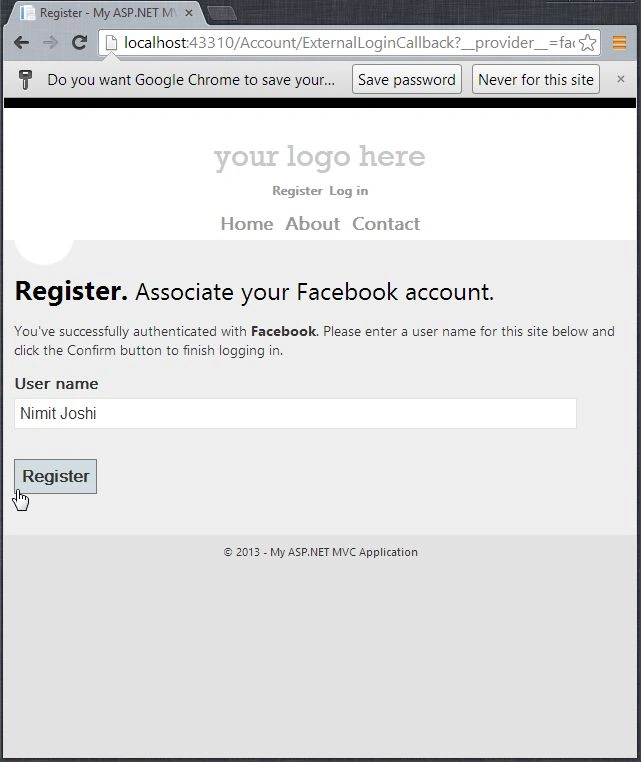
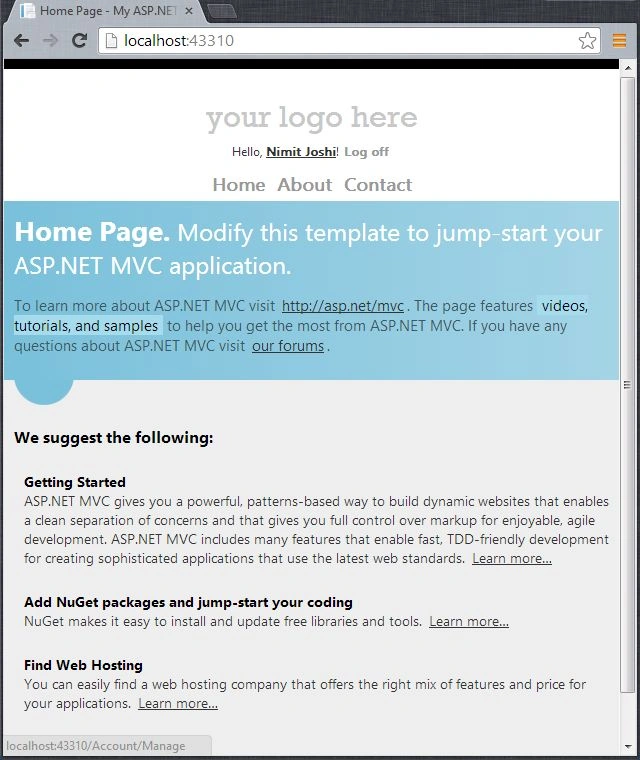
Step 4: You can see your user name on the Home Page in the next window
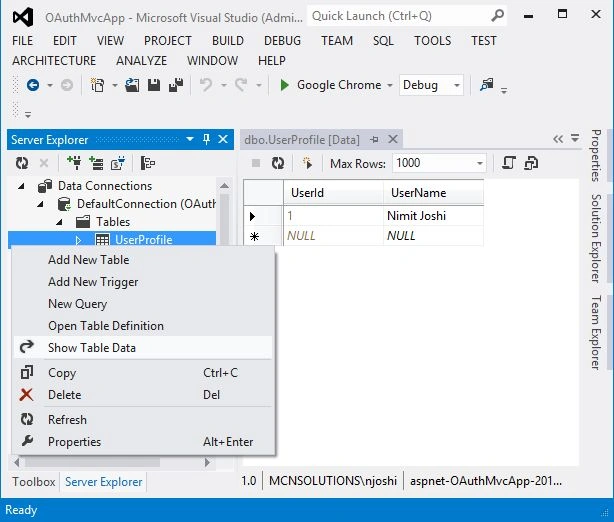
User Details in Server Explorer
Step 1: Open the Server Explorer and right-click on Default Connection to open the user table.
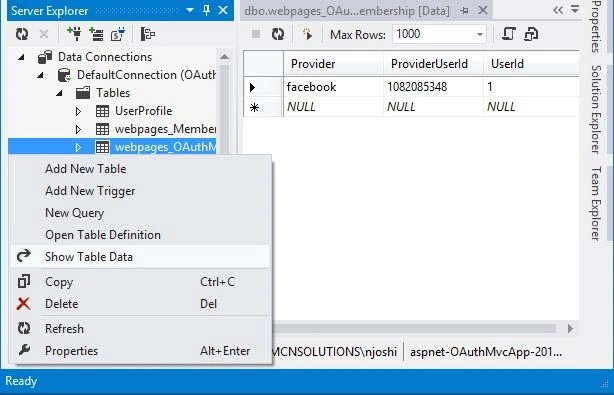
Step 2: You can see the membership table for the user information.
Creating Model for New Registration
You saw that you do not need to retrieve extra info for the registration. We will now see in this section that we can create extra information to register for any new user. For this you need to follow the instructions given below:
- Open the Package Manager Console in the Library Package.
- Execute the command: enable-migrations
- Execute the command: add-migration initial-IgnoreChanges
- Execute the command: update-database
Step 1: Open the AccountModel.cs file from the Model folder and add modify your code with the following code:
- public class RegisterExternalLoginModel
- {
- [Required]
- [Display(Name = "User name")]
- public string UserName { get; set; }
- public string ExternalLoginData { get; set; }
- [Display(Name = "Your Name")]
- public string Name { get; set; }
- [Display(Name = "Your Page Link")]
- public string PageLink { get; set; }
- }
Step 2: Now, add a new class in this AccountModel.cs file with the following code:
- [Table("ExternalUserDetails")]
- public class ExternalUser
- {
- public int ID { get; set; }
- public int UserID { get; set; }
- public string Name { get; set; }
- public string PageLink { get; set; }
- public bool? Status { get; set; }
- }
Step 3: Modify the UsersContext.cs class with the following code:
- public class UsersContext : DbContext
- {
- public UsersContext()
- : base("DefaultConnection")
- {
- }
- public DbSet<UserProfile> UserProfiles { get; set; }
- public DbSet<ExternalUser> ExtraUsers { get; set; }
- }
Step 4: Build the solution. Open the Package Manager Console.
- Execute the command: add-migration AddExternalUserDetails
- Execute the command: update-database
Retrieving the Additional Details
To retrieve the additional details, we need to modify the ExternalLoginCallback and EnternalLoginConfirmation. The additional user data is passed back with the ExtraData property that exists in the AuthenticationResult object of the VerifyAuthentication method. The Facebook client contains the following values in the ExtraData:
- id
- name
- link
- gender
- accesstoken
Step 1: Open the AccountController.cs file from the Controller folder
Step 2: Modify the else block code in the ExternalLoginCallback() with the following code:
- else
- {
- // User is new, ask for their desired membership name
- string loginData = OAuthWebSecurity.SerializeProviderUserId(result.Provider, result.ProviderUserId);
- ViewBag.ProviderDisplayName = OAuthWebSecurity.GetOAuthClientData(result.Provider).DisplayName;
- ViewBag.ReturnUrl = returnUrl;
- return View("ExternalLoginConfirmation", new RegisterExternalLoginModel
- {
- UserName = result.UserName,
- ExternalLoginData = loginData,
- Name=result.ExtraData["name"],
- PageLink=result.ExtraData["link"]
- });
- }
Step 3: Modify the if block code in the ExternalLoginConfirmation() with the following code:
- if (user == null)
- {
- // Insert name into the profile table
- UserProfile NewRegistration = db.UserProfiles.Add(new UserProfile { UserName = model.UserName });
- db.SaveChanges();
- db.ExtraUsers.Add(new ExternalUser
- {
- UserID = NewRegistration.UserId,
- Name = model.Name,
- PageLink = model.PageLink
- });
- db.SaveChanges();
- OAuthWebSecurity.CreateOrUpdateAccount(provider, providerUserId, model.UserName);
- OAuthWebSecurity.Login(provider, providerUserId, createPersistentCookie: false);
- return RedirectToLocal(returnUrl);
- }
View Editing
Step 1: Open the ExternalLoginConfirmation.cshtml file from the Views/Account folder and modify the code with the following code:
- <ol>
- <li class="name">
- @Html.LabelFor(m => m.UserName)
- @Html.TextBoxFor(m => m.UserName)
- @Html.ValidationMessageFor(m => m.UserName)
- </li>
- <li>
- @Html.LabelFor(m=>m.Name)
- @Html.TextBoxFor(m=>m.Name)
- </li>
- <li>
- @Html.LabelFor(m=>m.PageLink)
- @Html.TextBoxFor(m=>m.PageLink)
- </li>
- </ol>
Step 2: Now, you are ready to debug the application, but you need to delete the user from the users table to register again.
Step 3: Debug the application and click on the log-in link and Facebook link later.
Step 4: In the next window, you can see the extra details to enter.
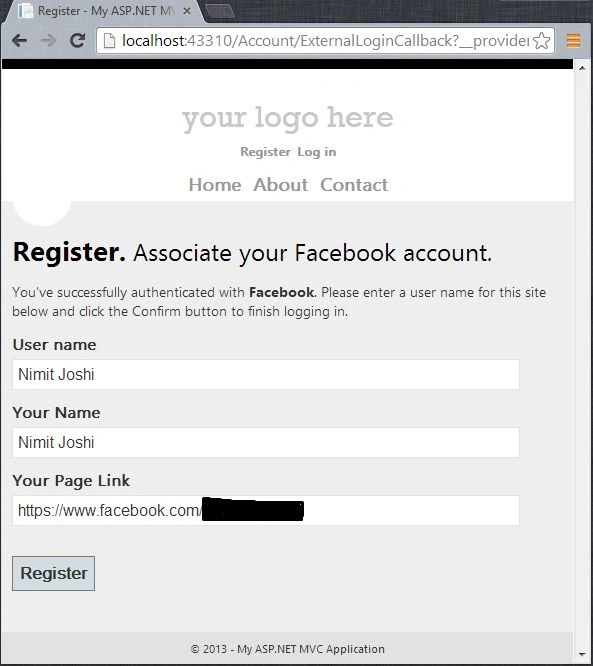
Step 5: Notice the ExternalUserDetails table added in the DefaultConnection.
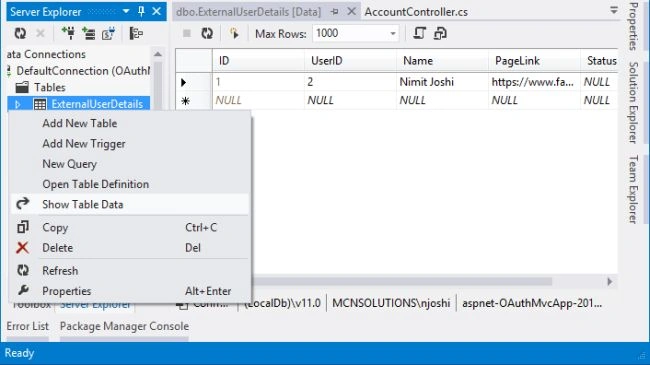
Facebook API
Step 1: Open Manage NuGet Packages and install the Facebook API.
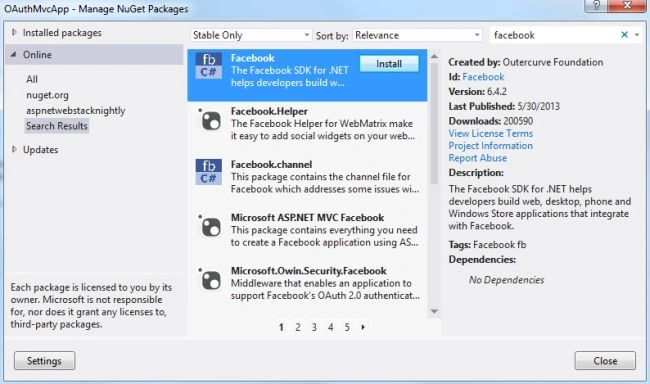
Step 2: In the ExternalLoginCallback()
- if (!result.IsSuccessful)
- {
- return RedirectToAction("ExternalLoginFailure");
- }
Add the following code after the preceding if block.
- if (result.ExtraData.Keys.Contains("accesstoken"))
- {
- Session["FbToken"] = result.ExtraData["accesstoken"];
- }
Step 3: Modify the LogOff() method as in the following code:
- [HttpPost]
- [ValidateAntiForgeryToken]
- public ActionResult LogOff()
- {
- WebSecurity.Logout();
- Session.Remove("FbToken");
- return RedirectToAction("Index", "Home");
- }
Step 4: Modify the if block code in the ExternalLoginConfirmation() with the following code:
- if (user == null)
- {
- // Insert name into the profile table
- UserProfile NewRegistration = db.UserProfiles.Add(new UserProfile { UserName = model.UserName });
- db.SaveChanges();
- bool FbStatus;
- var NewClient = new Facebook.FacebookClient(Session["FbToken"].ToString());
- dynamic Response = NewClient.Get("me", new { fields = "StatusVerified" });
- if (Response.ContainsKey("StatusVerified"))
- {
- FbStatus = Response["StatusVerified"];
- }
- else
- {
- FbStatus = false;
- }
- db.ExtraUsers.Add(new ExternalUser
- {
- UserID = NewRegistration.UserId,
- Name = model.Name,
- PageLink = model.PageLink,
- Status = FbStatus
- });
- db.SaveChanges();
- OAuthWebSecurity.CreateOrUpdateAccount(provider, providerUserId, model.UserName);
- OAuthWebSecurity.Login(provider, providerUserId, createPersistentCookie: false);
- return RedirectToLocal(returnUrl);
- }
Step 5: Again repeat Steps (2, 3, 4, 5) in the View Editing Section.
Summary
This article will help you to log in to the application with the external provider using localhost enabling in the site of the Facebook app. There is no need to enable the SSL and SSL URL to the application. You can also register the extra details for the new registration. Thanks for reading.
Join the conversation! Your thoughts help the community grow.