

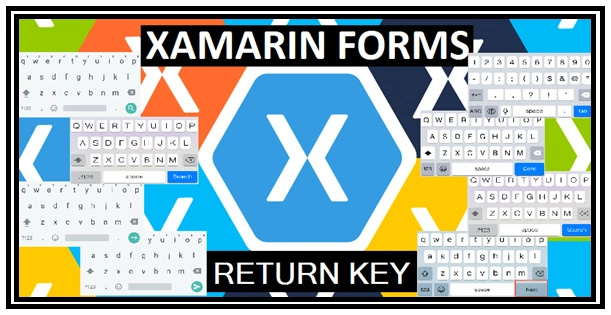
Today, I would like to tell you about Entry Key ReturnType. I'll tell you how to change ReturnKeyType keys like Search, Done, Next etc. In this article, I am using Xamarin.Forms PORTABLE and XAML.
Entry handles the Keyboard return key description.
- In iOS
We have UITextField which has a ReturnKeyType property that you can set to a pre-assigned list. - In Android
We have EntryEditText which has an ImeOptions property which helps in changing the EditText Key for Keyboard button.
Implementation
Open Visual Studio and select a "New Project".
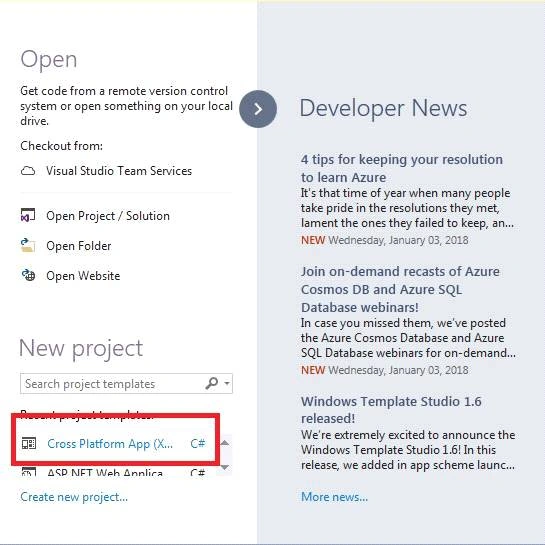
Select Cross-Platform App, give the project a name, and set the project path. After that, click OK.
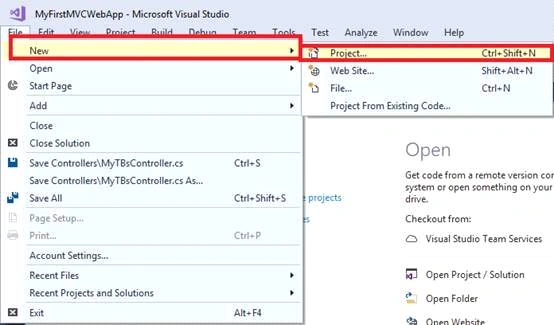
Select the template as "Blank App" and code sharing as "PCL".
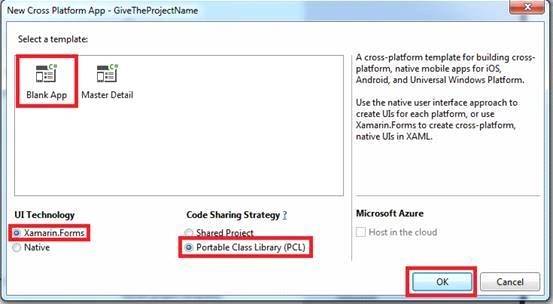
Right-click on PCL project and select Add >> New Item or Add >> Class.
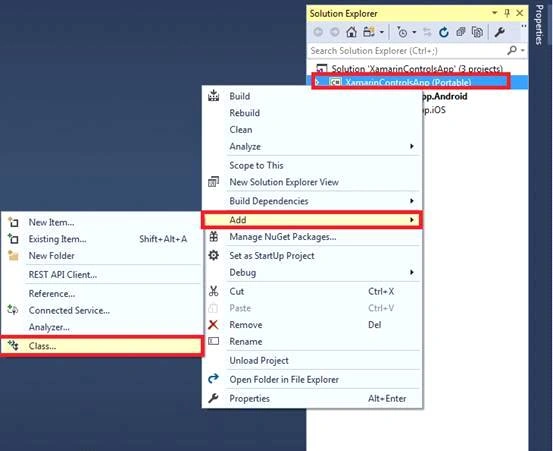
Now, we are creating a class CustomKeyEntry.cs and write the following C# code.
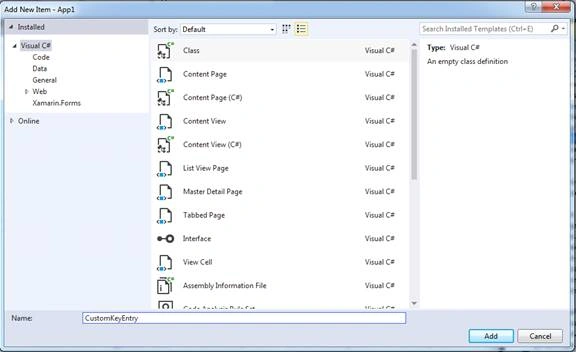
CustomKeyEntry.cs
- public class CustomKeyEntry : Entry
- {
- // Need to overwrite default handler because we cant Invoke otherwise
- public new event EventHandler Completed;
- public static readonly BindableProperty ReturnTypeProperty = BindableProperty.Create(nameof(ReturnType),
- typeof(ReturnType), typeof(CustomKeyEntry),
- ReturnType.Done, BindingMode.OneWay);
- public ReturnType ReturnType
- {
- get { return (ReturnType)GetValue(ReturnTypeProperty); }
- set { SetValue(ReturnTypeProperty, value); }
- }
- public void InvokeCompleted()
- {
- if (this.Completed != null)
- this.Completed.Invoke(this, null);
- }
- }
- public enum ReturnType
- {
- Go,
- Next,
- Done,
- Send,
- Search
- }
- }
We need to set ReturnType property in Android and iOS project.
Let us start with Android….
We have to create a Class in Android Project and render the entry.
Then, we set all the properties during the initialization of PCL Project.
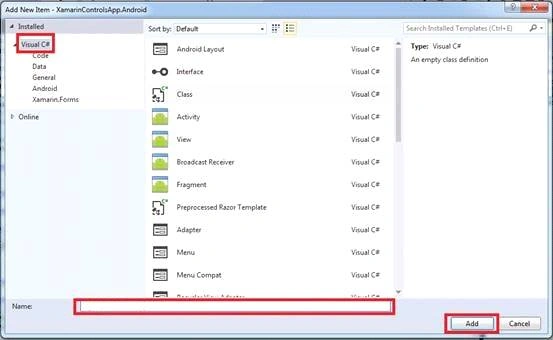
Please make sure to add dependency ([assembly: ExportRenderer(typeof(CustomKeyEntry), typeof(CustomKeyEntryRenderer))]) of Android (CustomEntryRndered) and PCL(CustomEntry).
CustomKeyEntryRenderer.cs
- public class CustomKeyEntryRenderer : EntryRenderer
- {
- protected override void OnElementChanged(ElementChangedEventArgs<Entry> e)
- {
- base.OnElementChanged(e);
- CustomKeyEntry entry = (CustomKeyEntry)this.Element;
- if (this.Control != null)
- {
- if (entry != null)
- {
- SetReturnType(entry);
- // Editor Action is called when the return button is pressed
- Control.EditorAction += (object sender, TextView.EditorActionEventArgs args) =>
- {
- if (entry.ReturnType != ReturnType.Next)
- entry.Unfocus();
- // Call all the methods attached to custom_entry event handler Completed
- entry.InvokeCompleted();
- };
- }
- }
- }
- private void SetReturnType(CustomKeyEntry entry)
- {
- ReturnType type = entry.ReturnType;
- switch (type)
- {
- case ReturnType.Go:
- Control.ImeOptions = Android.Views.InputMethods.ImeAction.Go;
- Control.SetImeActionLabel("Go", ImeAction.Go);
- break;
- case ReturnType.Next:
- Control.ImeOptions = ImeAction.Next;
- Control.SetImeActionLabel("Next", ImeAction.Next);
- break;
- case ReturnType.Send:
- Control.ImeOptions = ImeAction.Send;
- Control.SetImeActionLabel("Send", ImeAction.Send);
- break;
- case ReturnType.Search:
- Control.ImeOptions = ImeAction.Search;
- Control.SetImeActionLabel("Search", ImeAction.Search);
- break;
- default:
- Control.ImeOptions = ImeAction.Done;
- Control.SetImeActionLabel("Done", ImeAction.Done);
- break;
- }
- }
- }
Let’s come to iOS project. First, set the PCL(CustomEntry) property in iOS Project.
Create a class by right-clicking on iOS Project and select Apple. Then select "Class" and give this class a name as CustomEntryRendered.cs.
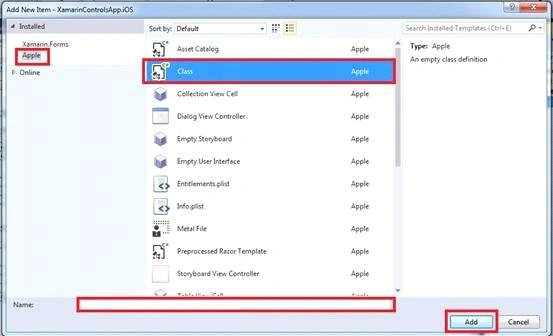
Please make sure to add dependancy [assembly: ExportRenderer(typeof(CustomKeyEntry), typeof(CustomKeyEntryRenderer))].
Now, let’s write some code for Entry and set the property.
CustomKeyEntryRenderer.cs
- public class CustomKeyEntryRenderer : EntryRenderer
- {
- protected override void OnElementChanged(ElementChangedEventArgs<Entry> e)
- {
- base.OnElementChanged(e);
- CustomKeyEntry entry = (CustomKeyEntry)this.Element;
- if (this.Control != null)
- {
- if (entry != null)
- {
- SetReturnType(entry);
- Control.ShouldReturn += (UITextField tf) =>
- {
- entry.InvokeCompleted();
- return true;
- };
- }
- }
- }
- private void SetReturnType(CustomKeyEntry entry)
- {
- ReturnType type = entry.ReturnType;
- switch (type)
- {
- case ReturnType.Go:
- Control.ReturnKeyType = UIReturnKeyType.Go;
- break;
- case ReturnType.Next:
- Control.ReturnKeyType = UIReturnKeyType.Next;
- break;
- case ReturnType.Send:
- Control.ReturnKeyType = UIReturnKeyType.Send;
- break;
- case ReturnType.Search:
- Control.ReturnKeyType = UIReturnKeyType.Search;
- break;
- case ReturnType.Done:
- Control.ReturnKeyType = UIReturnKeyType.Done;
- break;
- default:
- Control.ReturnKeyType = UIReturnKeyType.Default;
- break;
- }
- }
- }
Now, go to the PCL Project and write this code in MainPage.xaml.
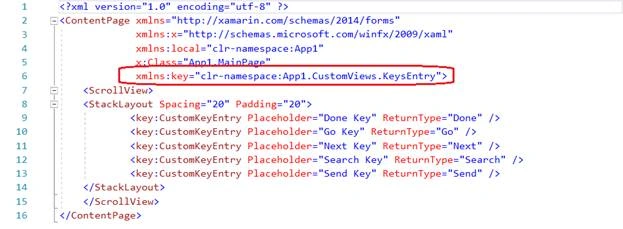
As you can see in the above code, we have to set the view reference in xmlns:custom="clr-namespace:App1.CustomViews.KeyEntry" MainPage.xaml.
Write the following code for CustomKeyEntry.
MainPage.xaml
- <StackLayout Spacing="20" Padding="20">
- <key:CustomKeyEntry Placeholder="Done Key" ReturnType="Done" />
- <key:CustomKeyEntry Placeholder="Go Key" ReturnType="Go" />
- <key:CustomKeyEntry Placeholder="Next Key" ReturnType="Next" />
- <key:CustomKeyEntry Placeholder="Search Key" ReturnType="Search" />
- <key:CustomKeyEntry Placeholder="Send Key" ReturnType="Send" />
- </StackLayout>
TADDAAAAA! :)
Features of CustomReturnType controls
Custom ReturnType Property=(ReturnType="Search") and all public entry controls are available in this CustomKeyEntry.
Join the conversation! Your thoughts help the community grow.