

Introduction
Xamarin is a platform to develop cross-platform and multi-platform apps (for example, Windows phone, Android and iOS). In Xamarin platform, the code sharing concept is used. In Xamarin Studio, Visual Studio is also available. Json.NET is a popular high-performance JSON framework for .NET.
Xamarin is a platform to develop cross-platform and multi-platform apps (for example, Windows phone, Android and iOS). In Xamarin platform, the code sharing concept is used. In Xamarin Studio, Visual Studio is also available. Json.NET is a popular high-performance JSON framework for .NET.
- Xamarin Studio.
- Xcode.
The steps given below are required to be followed in order to write JSON in Xamarin iOS, using Xamarin Studio.
Step 1
Go to Xamarin Studio.
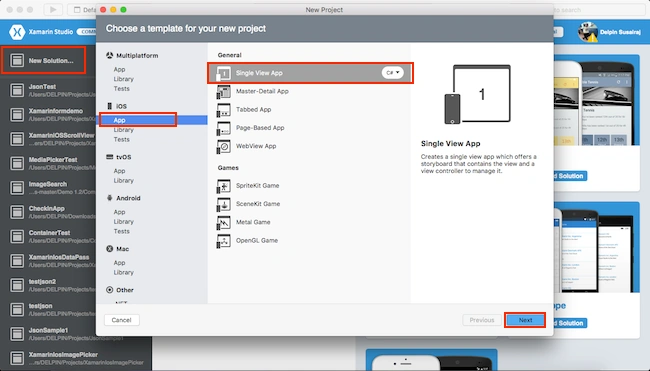
Click New Solution—> select iOS—>select App--> Choose single View App. Afterwards, click Next.
Step 2
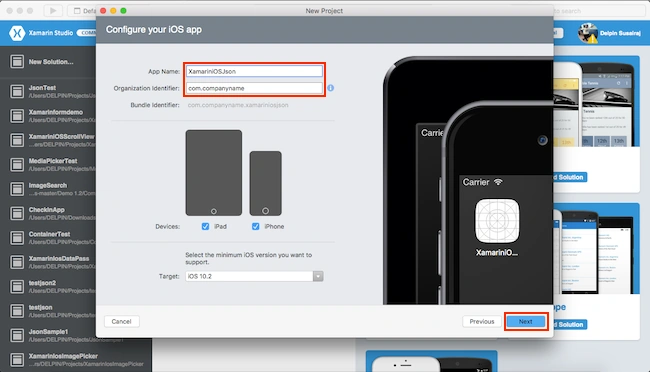
In this step, configure your app. Give the app name (Ex:sample), Organization Identifier. Afterwards, click Next.
Step 3
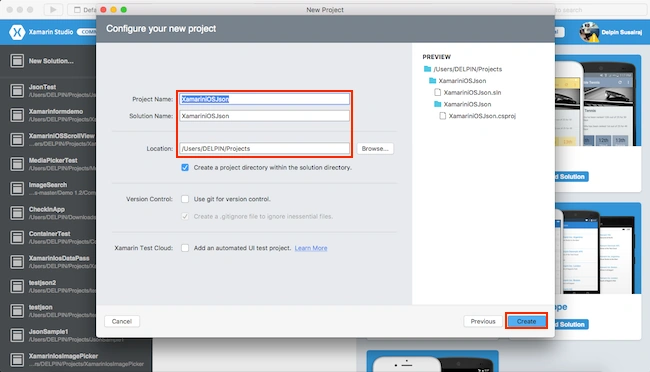
In this step, give your project name (Ex: Sample) and solution name (Ex: Sample). Give the path of your project. Afterwards, click Create.
Step 4
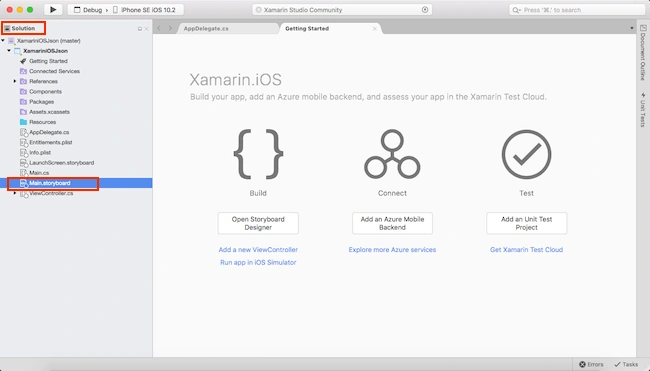
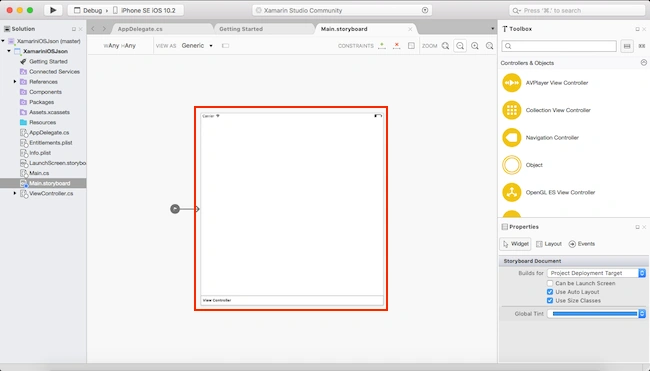
Subsequently, go to the solution. In the solution, get all the files and sources in your project. Now, select Main.storyboard and double click to open Main.storyboard page.
Step 5
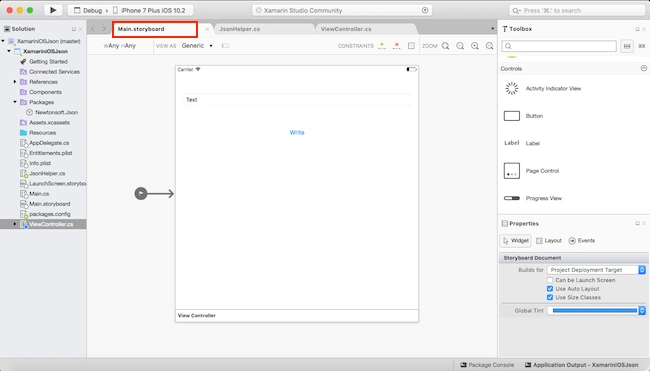
After opening the Main.storyboard, you can design this page, as per your desire.
Step 6
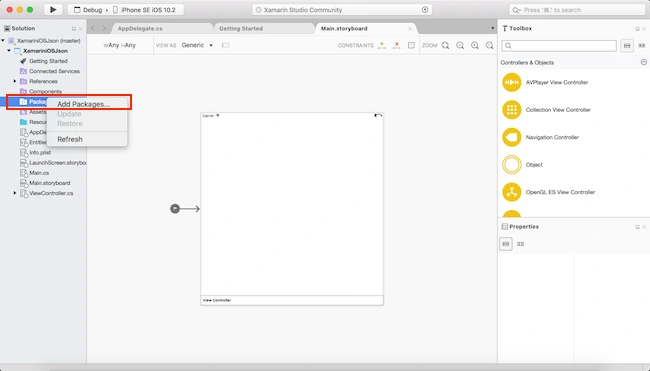
In this step, add one Package in your project. Its name is called Json.NET.
Go to Solution Explorer—>Package—>Add Package.
Step 7
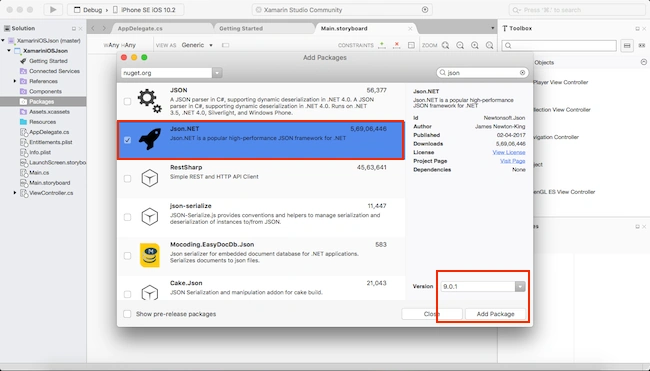
Now, choose Json.NET and select Version. Afterwards, click Add Package.
Step 8
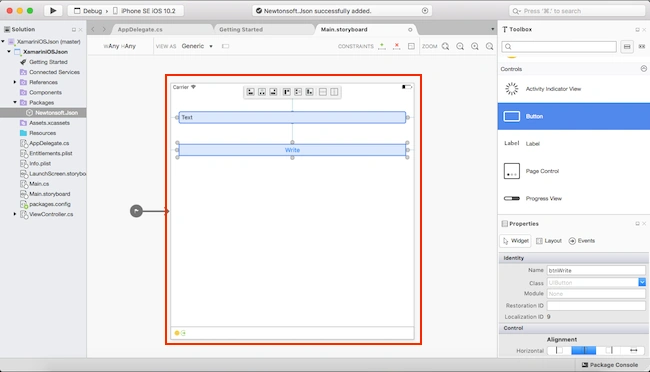
In this step, design your app, using storyboard and Toolbox.
TextBox(txtInput).
Button(btnCreate).
Step 9
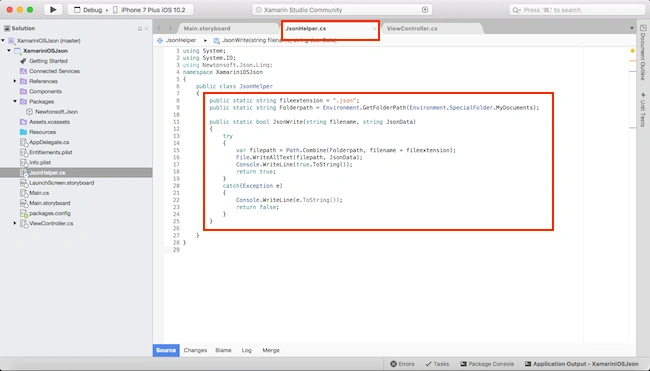
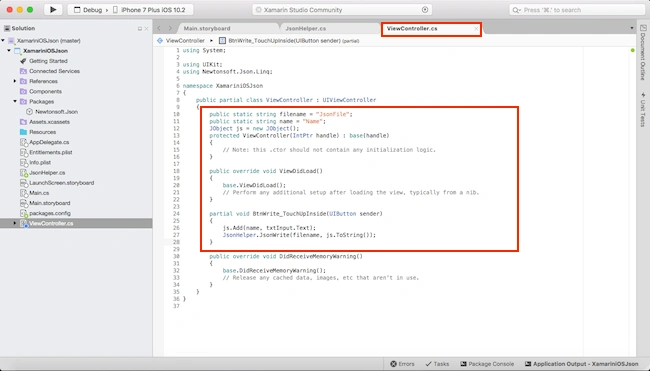
In this step, add one class file name called(JsonHelper.cs) and write the code given below.
JsonHelper.cs
Step 1
Go to Xamarin Studio.
Click New Solution—> select iOS—>select App--> Choose single View App. Afterwards, click Next.
Step 2
In this step, configure your app. Give the app name (Ex:sample), Organization Identifier. Afterwards, click Next.
Step 3
In this step, give your project name (Ex: Sample) and solution name (Ex: Sample). Give the path of your project. Afterwards, click Create.
Step 4
Subsequently, go to the solution. In the solution, get all the files and sources in your project. Now, select Main.storyboard and double click to open Main.storyboard page.
Step 5
After opening the Main.storyboard, you can design this page, as per your desire.
Step 6
In this step, add one Package in your project. Its name is called Json.NET.
Go to Solution Explorer—>Package—>Add Package.
Step 7
Now, choose Json.NET and select Version. Afterwards, click Add Package.
Step 8
In this step, design your app, using storyboard and Toolbox.
TextBox(txtInput).
Button(btnCreate).
Step 9
In this step, add one class file name called(JsonHelper.cs) and write the code given below.
JsonHelper.cs

Join the conversation! Your thoughts help the community grow.