

As with any Web Service, the microservices need to be protected from unauthorized access. So how do you protect each of your services? How does one share the token that is received from the Auth service? Exposing your microservices directly to the client and allowing them to directly communicate with all your services would have its own problems, so in this example, we will also add a layer of API Gateway which would be the single point of contact for all your clients.
The Gateways, in addition to providing a single point of access, also adds a security layer over your microservices. It could also support load balancing and reducing round trips when the client requires calls to multiple microservices. With regard to authentication, the gateway could pass the authentication token to the downstream paths. In this example, we would be using Ocelot for building our gateway.
The Working
The typical authentication process could be outlined as shown in the diagram below.
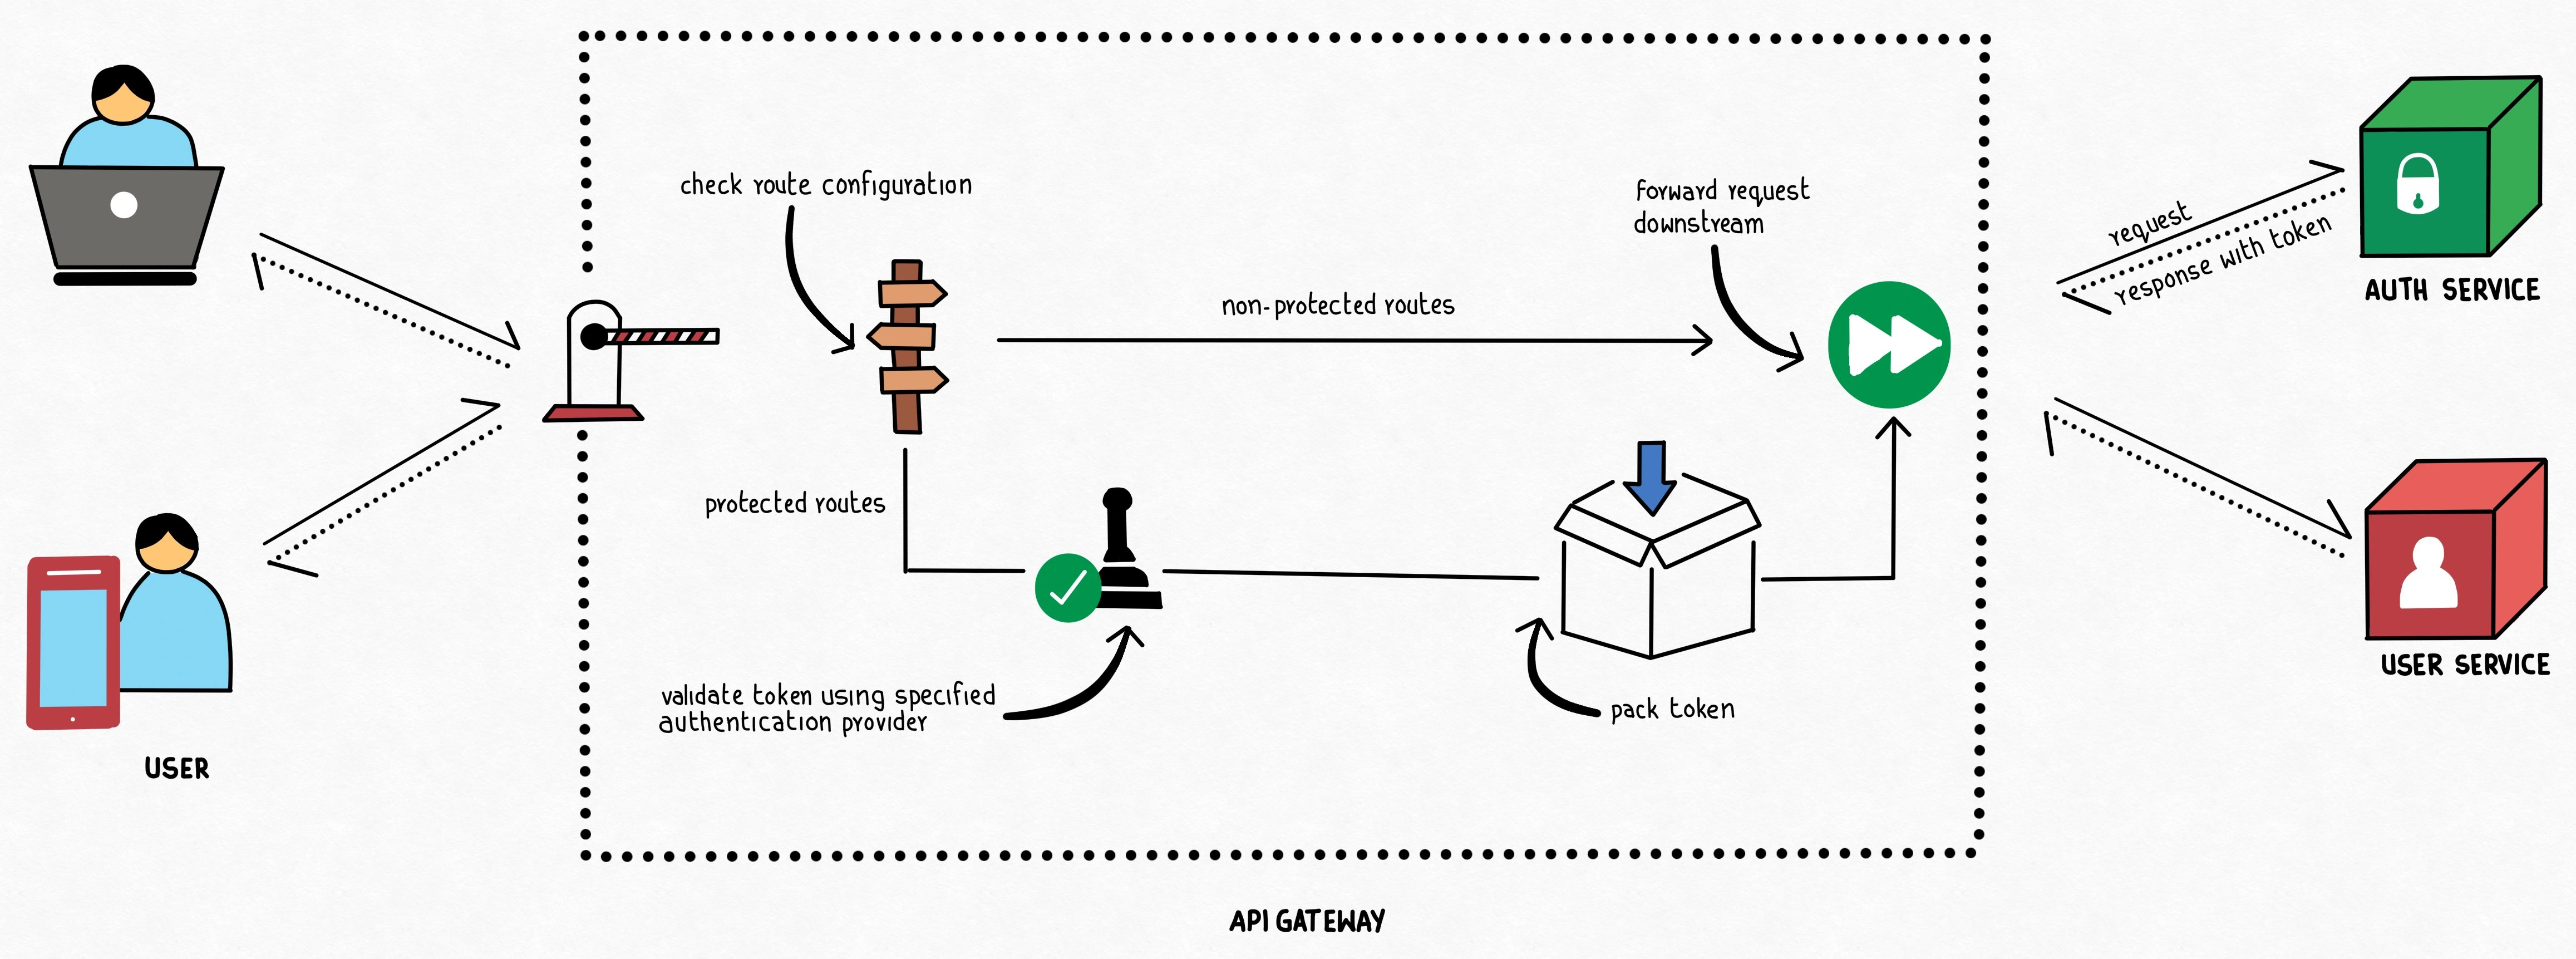
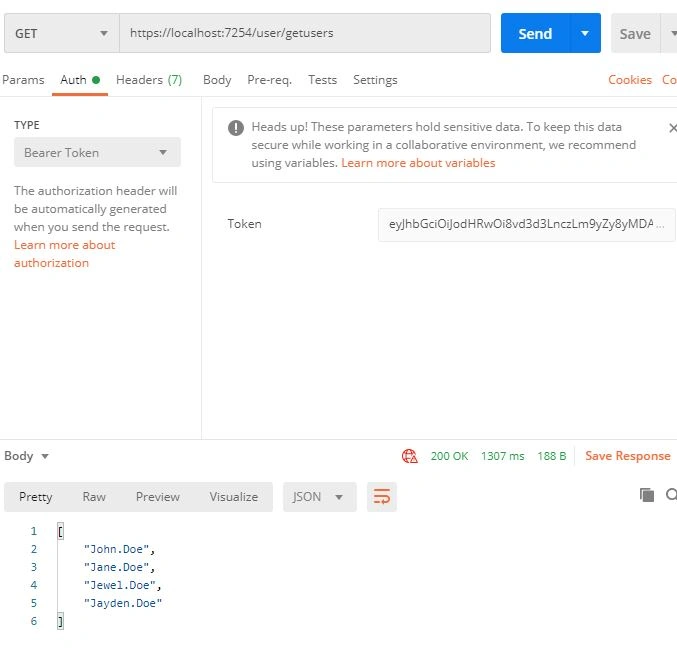
The authentication request from the client is redirected to the dedicated Auth service. This service would be responsible for validating the user and granting the authentication token. The authentication token is then returned back to the client via the gateway. In each of the subsequent requests, the client would pass the Authentication token along with the request. The API Gateway would be processed the incoming request, and if the downstream service requires an authenticated path, would pass the received token along.
We could also add BFF and other layers in the architecture, but for this article, we will keep it to a bare minimum. Let us now get our hands dirty and start building our sample application which would comprise of an API Gateway, two microservices - an auth service, and a User Service. For the sake of example, we will use Postman as our client and use Minimal API for building our services.
Auth Service
As mentioned earlier, the Auth Service would be responsible for authenticating the User and generating the Auth token. We will begin by defining our Token Service and registering it.
internal interface ITokenService
{
    string BuildToken(string key, string issuer, IEnumerable<string> audience, string userName);
}
internal class TokenService : ITokenService
{
    private TimeSpan ExpiryDuration = new TimeSpan(0, 30, 0);
    public string BuildToken(string key, string issuer, IEnumerable<string> audience, string userName)
    {
        var claims = new List<Claim>
        {
            new Claim(JwtRegisteredClaimNames.UniqueName, userName),
        };

        claims.AddRange(audience.Select(aud => new Claim(JwtRegisteredClaimNames.Aud, aud)));

        var securityKey = new SymmetricSecurityKey(Encoding.UTF8.GetBytes(key));
        var credentials = new SigningCredentials(securityKey, SecurityAlgorithms.HmacSha256Signature);
        var tokenDescriptor = new JwtSecurityToken(issuer, issuer, claims,
            expires: DateTime.Now.Add(ExpiryDuration), signingCredentials: credentials);
        return new JwtSecurityTokenHandler().WriteToken(tokenDescriptor);
    }
}
We will go ahead and register it so that we could use it with DI.
builder.Services.AddSingleton<ITokenService>(new TokenService());
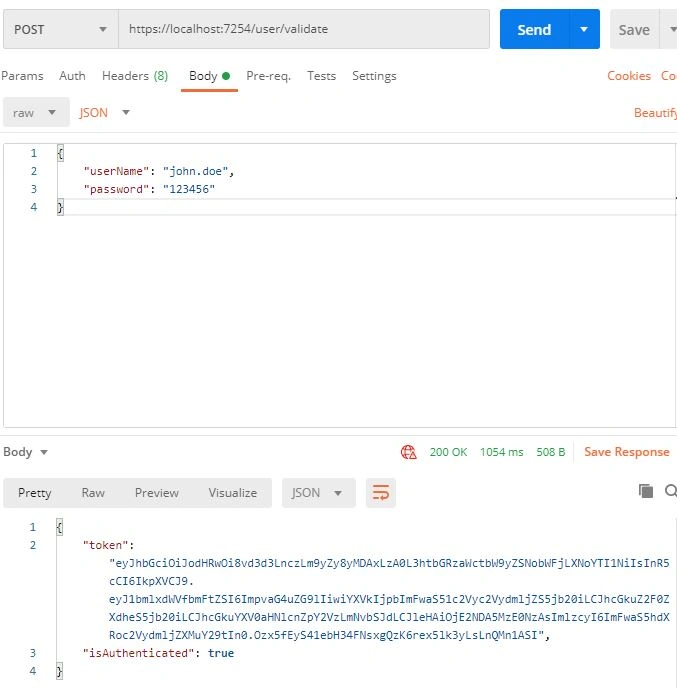
We will keep the Validate endpoint simple for sake of the example and hardcode our user credentials, but this could be easily replaced with your repositories later.
app.MapPost("/validate", [AllowAnonymous] (UserValidationRequestModel request, HttpContext http, ITokenService tokenService) =>
{
    if (request is UserValidationRequestModel { UserName: "john.doe", Password: "123456" })
    {
        var token = tokenService.BuildToken(builder.Configuration["Jwt:Key"],
                                            builder.Configuration["Jwt:Issuer"],
                                            new[]
                                            {
                                                        builder.Configuration["Jwt:Aud1"],
                                                        builder.Configuration["Jwt:Aud2"]
                                                    },
                                            request.UserName);
        return new
        {
            Token = token,
            IsAuthenticated = true,
        };
    }
    return new
    {
        Token = string.Empty,
        IsAuthenticated = false
    };
})
.WithName("Validate");
Where UserValidationRequestModel is defined as
internal record UserValidationRequestModel([Required]string UserName, [Required] string Password);
Saravanakumar SekaranPosted Jan 28, 2022, 6:39 AM
Wow Super Thank you
Hamid KhanPosted Jan 22, 2022, 7:53 AM
Very nice article and explanation Thanks @Anu Viswan