

Before going through this article ensure that you have the basic knowledge of
MVC Architecture and ASP.NET Web API.
Let us start with creating a REST service using WEB API.
Just create a WEB API project in Visual Studio as in the following figure 1 and 2:

Figure 1: New Project
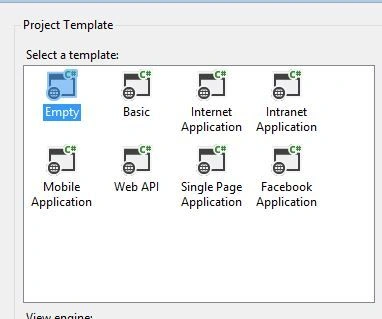
Figure 2: Project Template
Creating a Model Class
Right-click on the model folder and create a class, in my case I named it
Product.
Write the following code in the Product.cs model class:
- public class Product
- {
- [Key]
- [DatabaseGenerated(DatabaseGeneratedOption.Identity)]
- public int ProductID
- {
- get;
- set;
- }
- [Required]
- public string ProductName
- {
- get;
- set;
- }
- [Required]
- public string UnitPrice
- {
- get;
- set;
- }
- }
Right-click on the model folder and create one more class, in my case I named it ProductContext.
Write the following code in ProductContext class:
- public class ProductContext: DbContext
- {
- public ProductContext(): base("name=TestConnection")
- {
- }
- public DbSet < Product > Products
- {
- get;
- set;
- }
- }
Note : Before Scaffolding build your application once.
Right Click on Controller folder, then select add Controller and create a WEB API class as in the following figure 3 & 4.
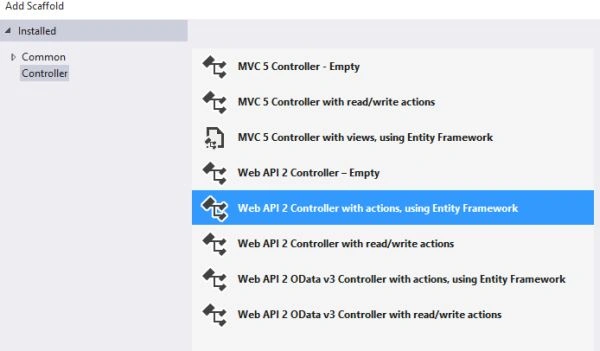
Figure 3: Add scaffold
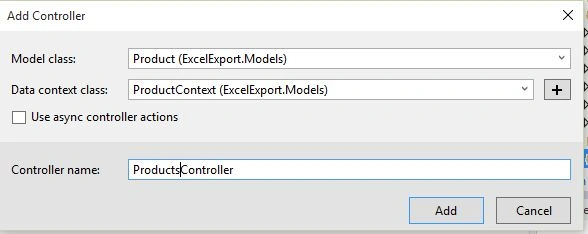
Figure 4: Add controller
The preceding procedure will scaffold the RESTful service in the ProductsController.cs.
You will get some pre-defined HTTP GET, POST, PUT and DELETE requests/responses in the products controller. Modify the code based on your application requirements. For this example I didn't modified the code.
Now the REST services are created, it's time to create a Kendo UI Grid to consume the services.
Before implementing the service in the Kendo UI check that in Postman / Fiddler.

I have already inserted some records in the Kendo Grid using HTTP POST service. For more details on how to insert a record in kendo grid using WEB API and Entity framework please click here.
Here is my SQL Table:
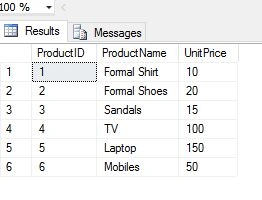
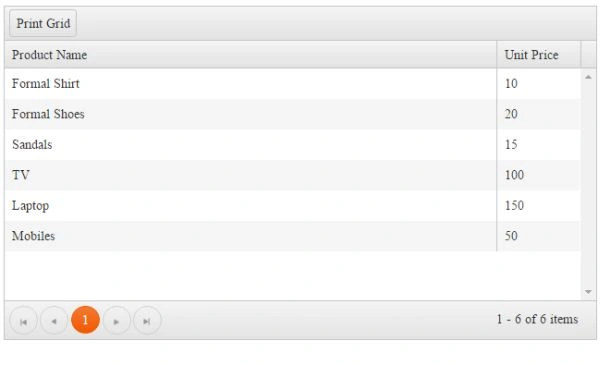
Creating a Kendo Grid with Remote Binding and Print Functionality
Create an HMTL page in your project, in my case I named it KendoPrint.html.
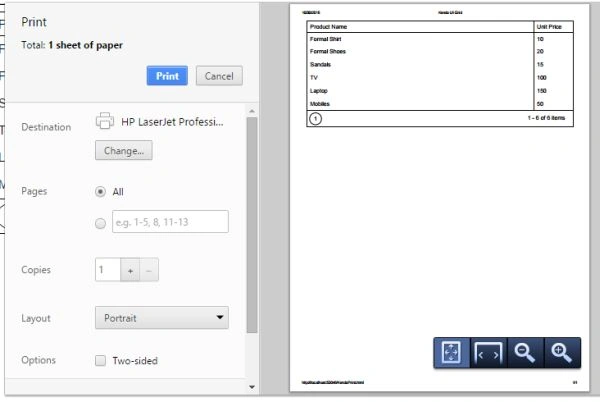
There are two ways to print the kendo grid:
- Print the existing web page, but use a print style sheet to hide parts of the page that are not needed.
- Retrieve the Grid HTML, inject it in a new browser window, and trigger printing of the new page.
I am going to work on the 2nd way.
Design in KendoPrint.html
- <html>
- <head>
- <title></title>
- <meta charset="utf-8" />
- <link rel="stylesheet" href="http://cdn.kendostatic.com/2014.3.1316/styles/kendo.common.min.css" />
- <link rel="stylesheet" href="http://cdn.kendostatic.com/2014.3.1316/styles/kendo.default.min.css" />
- <link rel="stylesheet" href="http://cdn.kendostatic.com/2014.3.1316/styles/kendo.dataviz.min.css" />
- <link rel="stylesheet" href="http://cdn.kendostatic.com/2014.3.1316/styles/kendo.dataviz.default.min.css" />
- <script src="http://cdn.kendostatic.com/2014.3.1316/js/jquery.min.js"></script>
- <script src="http://cdn.kendostatic.com/2014.3.1316/js/kendo.all.min.js"></script>
- <script src="http://cdn.kendostatic.com/2014.3.1029/js/jszip.min.js"></script>
- </head>
- <body>
- <div id="grid"></div>
- <script type="text/x-kendo-template" id="toolbar-template">
- <button type="button" class="k-button" id="printGrid">Print Grid</button>
- </script>
- </body>
- </html>
Marshal MarshalPosted Dec 21, 2016, 1:09 AM
Ho Frozen columns kendo gride?
CHAITANYA KIRAN KASANIPosted Oct 5, 2016, 3:25 AM
How to design Cheque Print using kendo ui
Arul RPosted Jan 17, 2016, 10:51 AM
Thanks for nice article
Sibeesh VenuPosted Nov 2, 2015, 4:44 AM
Nice Share
Harshad PansuriyaPosted Nov 1, 2015, 11:00 PM
Nice one