

Microsoft Fabric provides a unified analytics platform for working with data across different workloads. As data environments grow, organizing tables properly becomes important for maintaining a clean, scalable, and manageable data platform.
One of the features that can help with this organization is Lakehouse schemas. Instead of storing every table under the default dbo schema, you can create separate schemas based on business domains, such as Sales, Marketing, Finance, and Human Resources.
In this article, we will explore how to create Sales and Marketing schemas in a Microsoft Fabric Lakehouse and use a Fabric Notebook to create and write tables into their respective schemas. The demonstration will use PySpark to create sample data and save it as Delta tables.
What Are Lakehouse Schemas?
A Lakehouse schema provides a way to organize tables within a Fabric Lakehouse. It allows you to group related tables under a named schema, making it easier to manage and navigate data.
For example, instead of having all tables stored under dbo, we can organize our data as follows:
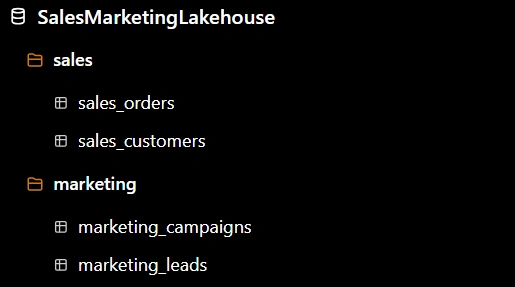
This approach makes it easier to identify which tables belong to a particular business function.
Note: Lakehouse schemas are supported in Fabric's schema-enabled Lakehouse experience. Ensure that your Lakehouse supports schemas before following the demonstration.
Why Use Separate Schemas for Sales and Marketing?
In a real-world data platform, different departments often have their own datasets, reporting requirements, and data ownership responsibilities.
Using schemas helps organize these datasets without creating a separate Lakehouse for every department.
Here are a few benefits:
- Better organization: Related tables are grouped under their business domain.
- Simplified data discovery: Developers and analysts can quickly identify the tables belonging to Sales or Marketing.
- Improved access management: Schema-level permissions can help separate access between teams.
- Clearer table references: Schema-qualified names make it easier to understand where a table belongs.
Microsoft Fabric also supports querying tables using a four-part namespace, which includes the workspace, Lakehouse, schema, and table name.
Prerequisites
Before starting the demonstration, you will need:
- A Microsoft Fabric workspace.
- A schema-enabled Lakehouse.
- A Fabric Notebook attached to the Lakehouse.
- Permission to create schemas and tables.
For this demonstration, I will use the following setup:
| Workspace | Cornerstone Analytics |
| Lakehouse | SalesMarketingLakehouse |
| Schema 1 | sales |
| Schema 2 | marketing |
You can replace these names with those in your own Fabric environment.
Step 1: Create a Schema-Enabled Lakehouse
The first step is to create a Lakehouse with schema support enabled.
From your Microsoft Fabric workspace:
- Select + New.
- Select Lakehouse.
- Enter the Lakehouse name:
SalesMarketingLakehouse. - Ensure that Lakehouse schemas is checked.
- Select Create.
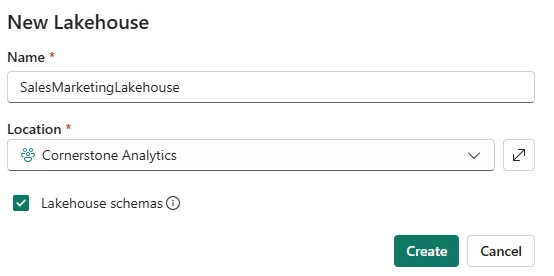
Lakehouse schemas are enabled by default when creating a Lakehouse through the Fabric portal, unless the option is unchecked. Existing Lakehouses created before schema support became available may not have schema support enabled
Once the Lakehouse is created, open it in the Fabric workspace.
Under the Tables section, you should see the default dbo schema.
The dbo schema is included in schema-enabled Lakehouses and cannot be renamed or removed.
Step 2: Create the Sales Schema
Now that the Lakehouse is ready, let's create a dedicated schema for our Sales tables.
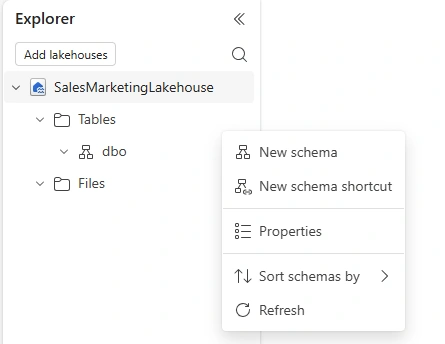
In the Lakehouse Explorer:
- Hover over Tables.
- Select the ellipsis (
...). - Select New schema.
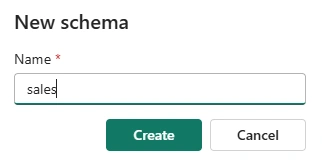
- Enter
salesas the schema name. - Select Create.
You should now see the sales schema under Tables.
Step 3: Create the Marketing Schema
Repeat the same process to create the Marketing schema.
- Hover over Tables.
- Select the ellipsis (
...). - Select New schema.
- Enter
marketing. - Select Create.
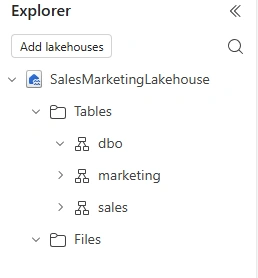
The schemas are now ready to receive their respective tables.
Step 4: Create a Fabric Notebook
We will use a Fabric Notebook to generate sample Sales and Marketing data and write it into the correct schemas.
From the Fabric workspace:
- Select + New.
- Select Notebook.
- Open the newly created notebook.
- Attach
SalesMarketingLakehouseas the default Lakehouse.
Important: The default Lakehouse attached to the notebook must be schema-enabled when using schema references in notebook code.
We will use PySpark DataFrames and the saveAsTable() method to write the data.
Understanding the Table Naming Convention
When writing a table to a particular schema, include the schema name in the table reference:
df.write.mode("overwrite").saveAsTable("sales.sales_orders")Here:
salesis the schema name.sales_ordersis the table name.
If you omit the schema name, the table is written to the default dbo schema
Step 5: Create and Write the Sales Table
Let's start by creating a Sales DataFrame containing sample order information.
The table will include:
- Order ID
- Customer ID
- Product
- Sales Amount
- Order Date
PySpark Code
Copy the following code into a new notebook cell and run it.
from pyspark.sql import Row
# Create sample Sales data
sales_data = [
    Row(
        OrderID=1001,
        CustomerID=501,
        Product="Laptop",
        SalesAmount=1200.00,
        OrderDate="2026-09-01"
    ),
    Row(
        OrderID=1002,
        CustomerID=502,
        Product="Monitor",
        SalesAmount=350.00,
        OrderDate="2026-09-02"
    ),
    Row(
        OrderID=1003,
        CustomerID=503,
        Product="Keyboard",
        SalesAmount=85.00,
        OrderDate="2026-09-03"
    ),
    Row(
        OrderID=1004,
        CustomerID=504,
        Product="Mouse",
        SalesAmount=45.00,
        OrderDate="2026-09-04"
    )
]
# Create DataFrame
sales_df = spark.createDataFrame(sales_data)
# Convert OrderDate to date
from pyspark.sql.functions import to_date
sales_df = sales_df.withColumn(
    "OrderDate",
    to_date("OrderDate")
)
# Display the DataFrame
display(sales_df)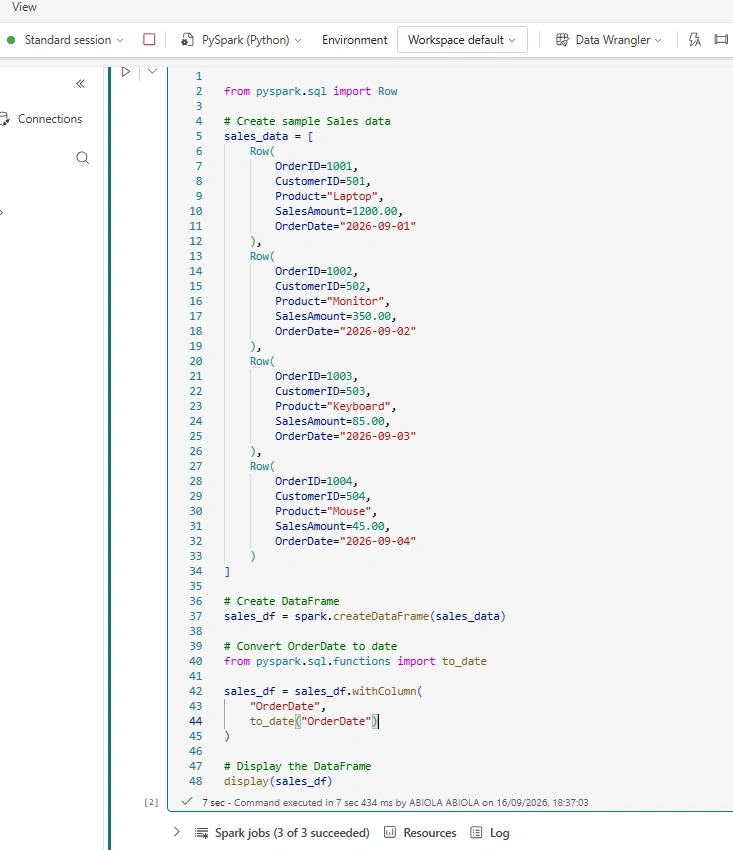
The sales_df DataFrame now contains our sample Sales data.
Write the Sales DataFrame to the Sales Schema
To save the DataFrame as a Delta table under the sales schema, run the following code:
# Write Sales table to the sales schema
sales_df.write \
    .format("delta") \
    .mode("overwrite") \
    .saveAsTable("sales.sales_orders")
The table will be created as:
sales.sales_orders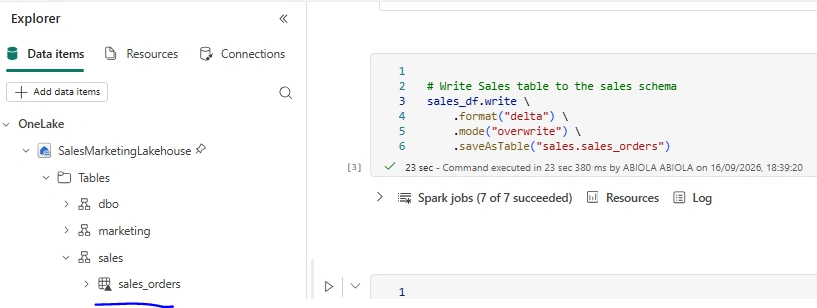
The schema name is explicitly included in the saveAsTable() statement, ensuring that the table is written to the Sales schema rather than dbo.
After running the code, navigate to the Lakehouse Explorer and expand the sales schema. You should see the sales_orders table.
Step 6: Create and Write the Marketing Table
Next, let's create a Marketing DataFrame containing information about marketing campaigns.
The table will include:
- Campaign ID
- Campaign Name
- Channel
- Budget
- Campaign Date
PySpark Code
Create a new notebook cell and run the following code:
from pyspark.sql import Row
# Create sample Marketing data
marketing_data = [
    Row(
        CampaignID=2001,
        CampaignName="Summer Sale",
        Channel="Email",
        Budget=5000.00,
        CampaignDate="2026-09-01"
    ),
    Row(
        CampaignID=2002,
        CampaignName="Product Launch",
        Channel="Social Media",
        Budget=8500.00,
        CampaignDate="2026-09-05"
    ),
    Row(
        CampaignID=2003,
        CampaignName="Customer Retention",
        Channel="Email",
        Budget=3500.00,
        CampaignDate="2026-09-08"
    ),
    Row(
        CampaignID=2004,
        CampaignName="Brand Awareness",
        Channel="Search",
        Budget=7000.00,
        CampaignDate="2026-09-10"
    )
]
# Create DataFrame
marketing_df = spark.createDataFrame(marketing_data)
# Convert CampaignDate to date
from pyspark.sql.functions import to_date
marketing_df = marketing_df.withColumn(
    "CampaignDate",
    to_date("CampaignDate")
)
# Display the DataFrame
display(marketing_df)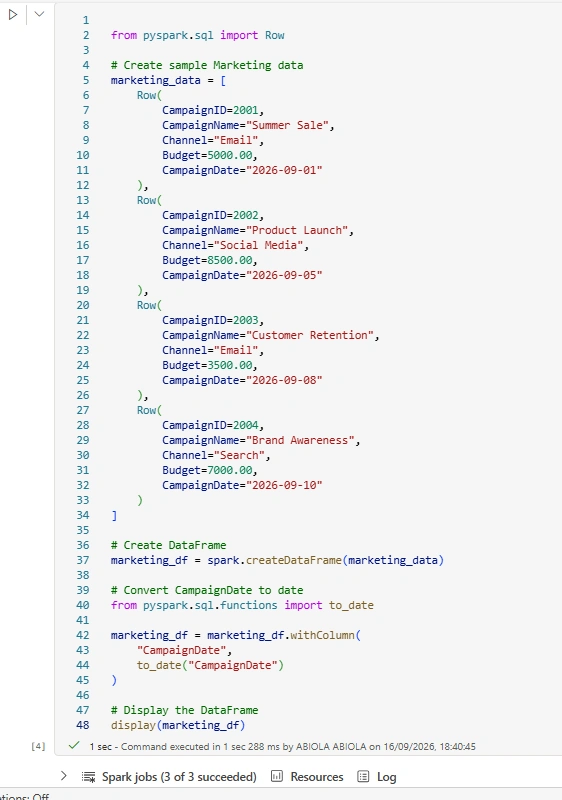
Write the Marketing DataFrame to the Marketing Schema
Now, let's save the DataFrame as a Delta table under the marketing schema.
# Write Marketing table to the marketing schema
marketing_df.write \
    .format("delta") \
    .mode("overwrite") \
    .saveAsTable("marketing.marketing_campaigns")
The table will be created as:
marketing.marketing_campaigns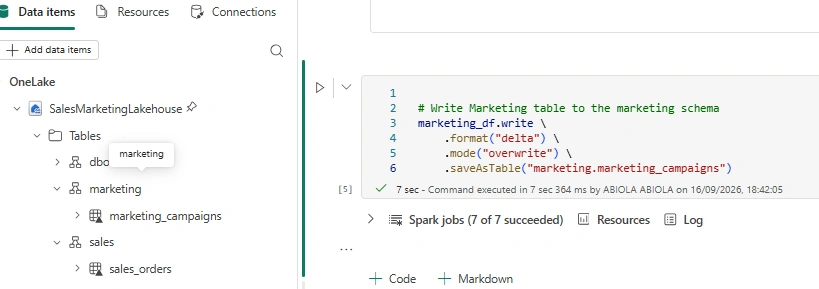
Because we specified the marketing schema in the table name, Fabric will write the table into that schema.
Navigate to the Lakehouse Explorer and expand the marketing schema to confirm that the marketing_campaigns table has been created.
Step 7: Verify the Tables Using Spark SQL
Now that both tables have been created, let's verify that they are available in their respective schemas.
Fabric Notebook supports Spark SQL, so we can query the tables directly using their schema-qualified names.
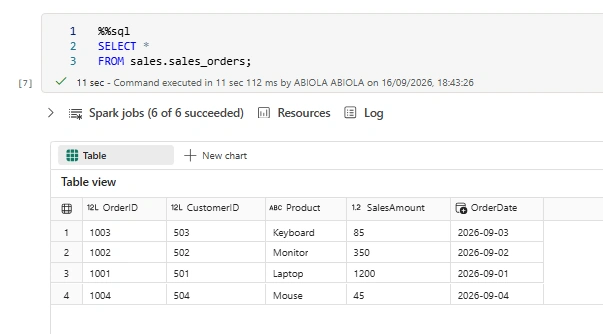
Query the Sales Table
Create a new notebook cell and run:
SELECT *
FROM sales.sales_orders;
This query retrieves all records from the sales_orders table within the sales schema.
Query the Marketing Table
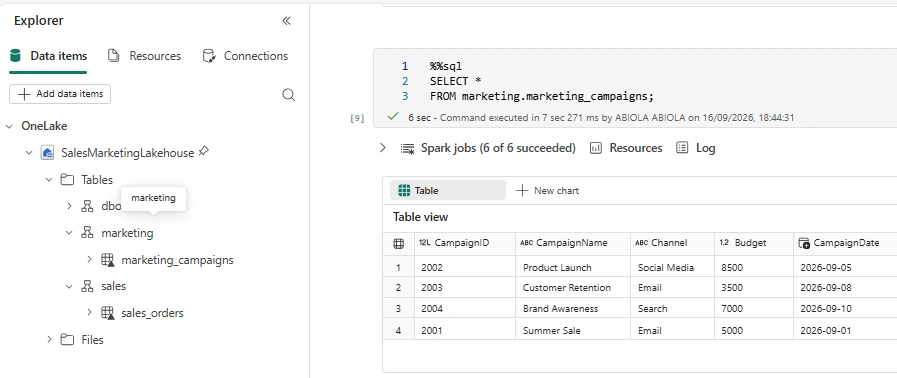
Similarly, run:
SELECT *
FROM marketing.marketing_campaigns;
This retrieves the records from the Marketing table.
Step 8: Confirm the Final Lakehouse Structure
After running the notebook, the Lakehouse should contain the following tables:
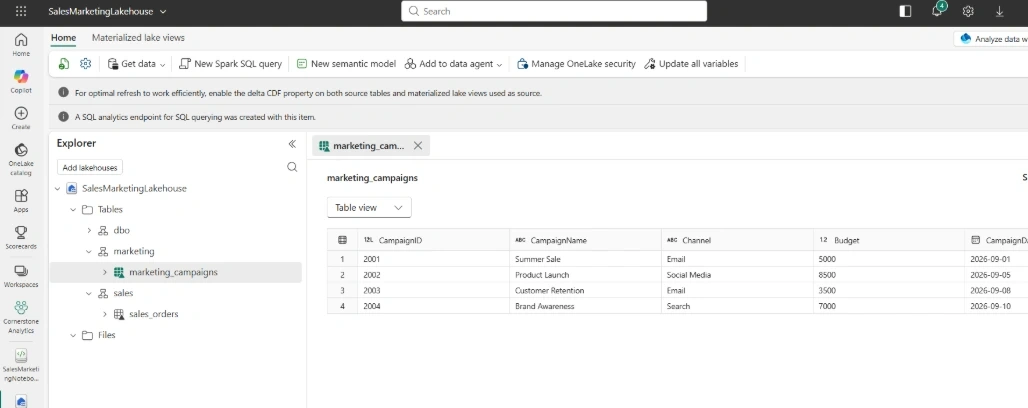
The Sales and Marketing tables are now separated into their respective schemas, while the default dbo schema remains available.
In conclusion, Lakehouse schemas in Microsoft Fabric provide a practical way to organize tables by business domain. In this demonstration, we created sales and marketing schemas and used a Fabric Notebook to create and write Delta tables into their respective locations.
The key takeaway is that the schema name must be included in the table reference when writing data to a specific schema.
Instead of keeping every table under the default dbo schema, you can structure your Lakehouse around business functions, making it easier to navigate and maintain as your data platform grows.
Join the conversation! Your thoughts help the community grow.