

The BNB Chain (formerly Binance Smart Chain) has become one of the most popular blockchains for creating and launching tokens due to its low fees, fast transactions, and massive ecosystem. Whether you're launching a utility token for your dApp, a governance token for your DAO, or a meme coin for your community, the BNB Chain provides everything you need.
In this article, we’ll walk you through the process of launching your own token on BNB Chain in 2025, step by step.
Why Choose BNB Chain in 2025?
Before we jump into the how, let’s look at why BNB Chain remains a top choice this year.
- Low Gas Fees: Still among the cheapest L1s to deploy and use.
- High TPS: BNB Chain handles thousands of transactions per second with minimal latency.
- Large User Base: Easy access to a huge community via Binance ecosystem integrations.
- Developer Tools: Robust support for EVM-compatible tools like Hardhat, Remix, and MetaMask.
- Built-in Cross-Chain Support: Easily bridge tokens to/from Ethereum and other networks.
Types of Tokens You Can Launch
Not all tokens are the same. Here's a simple breakdown to help you decide what you're building.
| Token Type | Purpose |
|---|---|
| Utility Token | Used in apps for access, features, or fees |
| Governance Token | Voting rights in a DAO or protocol decisions |
| Meme/Community Token | Created for viral growth or fun |
| Reward Token | Distributed for participation or staking |
Step 1. Understand the Basics
To create a token on BNB Chain, you’ll be writing a smart contract, typically using Solidity, the same language used for Ethereum.
You’ll also need,
- A BNB wallet (e.g., MetaMask)
- Some BNB for gas fees
- A testnet for trial runs (BNB Chain’s testnet is called “Chapel”)
- Tools like Remix IDE or Hardhat
Step 2. Set Up Your Environment
Here’s a simple checklist:
- Install MetaMask and connect it to BNB Chain.
- Add BNB Smart Chain manually using this config.
- Get test BNB for development from the BNB Faucet.
- Use either
- Remix IDE (web-based) – great for quick deployments.
- Hardhat (local) – better for more complex workflows and deployments.
Step 3. Write a Simple Token Contract (ERC-20 Compatible)
You can use OpenZeppelin’s contracts to speed things up. Here’s a minimal example using Solidity.
// SPDX-License-Identifier: MIT
pragma solidity ^0.8.20;

import "@openzeppelin/contracts/token/ERC20/ERC20.sol";

contract MyToken is ERC20 {
    constructor(uint256 initialSupply) ERC20("MyToken", "MTK") {
        _mint(msg.sender, initialSupply * (10 ** decimals()));
    }
}
Replace "MyToken" and "MTK" With your own token name and symbol.
Step 4. Deploy the Token to BNB Testnet
- Open Remix IDE.
- Paste your contract code into a new file.
- Compile using the Solidity Compiler.
- In the Deploy & Run Transactions tab.
- Set the environment to Injected Web3 (uses MetaMask).
- Make sure you’re on the BNB Testnet.
- Enter your desired token supply (e.g., 1000000).
- Click Deploy and confirm in MetaMask.
You should now see your token contract on the BNB testnet. Check its status using the testnet explorer.
Step 5. Deploy to Mainnet
Once you’ve tested thoroughly.
- Switch MetaMask to BNB Mainnet.
- Fund your wallet with real BNB.
- Use the same process as above to deploy the contract.
- Verify the contract on BscScan using the Verify & Publish feature.
Step 6. Add Token to Wallet and Share It
- In MetaMask, click “Import Tokens” and paste your contract address.
- Share your token contract address with users and potential community members.
Best Practices
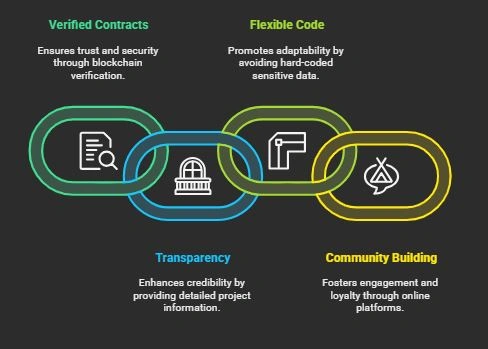
- Use Verified Contracts: Always verify your contract on BscScan. It builds trust with users.
- Be Transparent: Add details like tokenomics, roadmap, and use cases to your site and whitepaper.
- Avoid Hard-Coding Sensitive Info: Use environment variables or constructor parameters to make your code flexible.
- Build a Community Early: Use Telegram, Discord, or Lens for Web3-native communities. Engagement matters more than just numbers.
Tokenomics Template
Use this as a basic tokenomics plan.
| Allocation | Amount |
|---|---|
| Total Supply | 1,000,000 |
| Founder Wallet | 500,000 |
| Community Fund | 200,000 |
| Airdrop/Marketing | 100,000 |
| Team Reserve | 100,000 (locked) |
| Staking Rewards | 100,000 |
Adjust this based on your project’s vision.
Final Thoughts
Launching a token is now easier than ever with BNB Chain’s tooling, but success depends on more than just code. It's about building trust, solving a problem, and delivering real utility (or at least solid fun in the case of meme coins).
Join the conversation! Your thoughts help the community grow.