

Introduction
This article provides a walkthrough of how to install Umbraco CMS in Visual Studio and hosting in local IIS.
Umbraco is an open-source CMS based on the Microsoft.NET platform that provides its users with all the great functionality they expect from a full-fledged CMS without the hefty license fees. The platform has consistently proven to be one of the best CMS options due to its unlimited functionality and customizability
Step 1
Why Umbraco?
Umbraco is an open-source CMS based on the Microsoft.NET platform that provides its users with all the great functionality they expect from a full-fledged CMS without the hefty license fees. The platform has consistently proven to be one of the best CMS options due to its unlimited functionality and customizability
Step 1
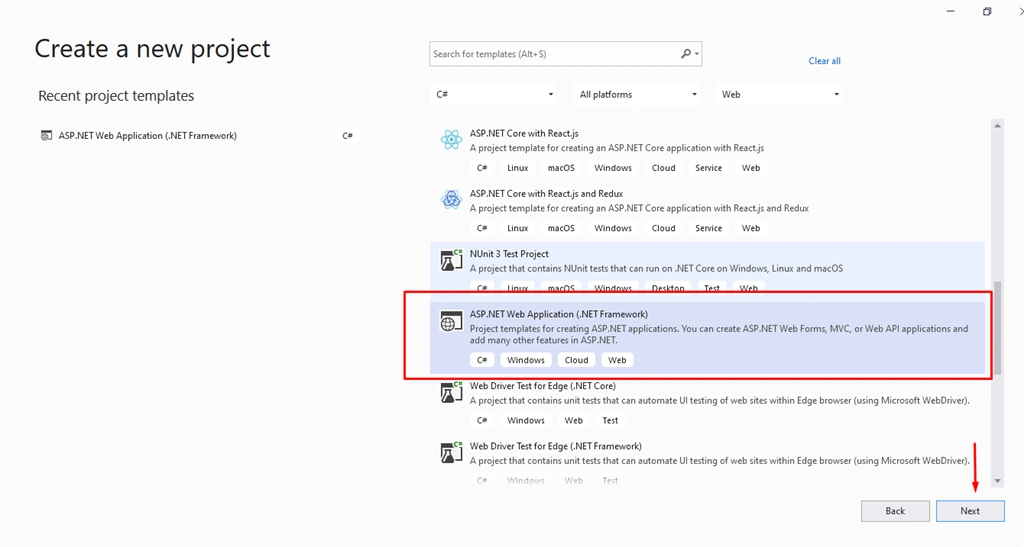
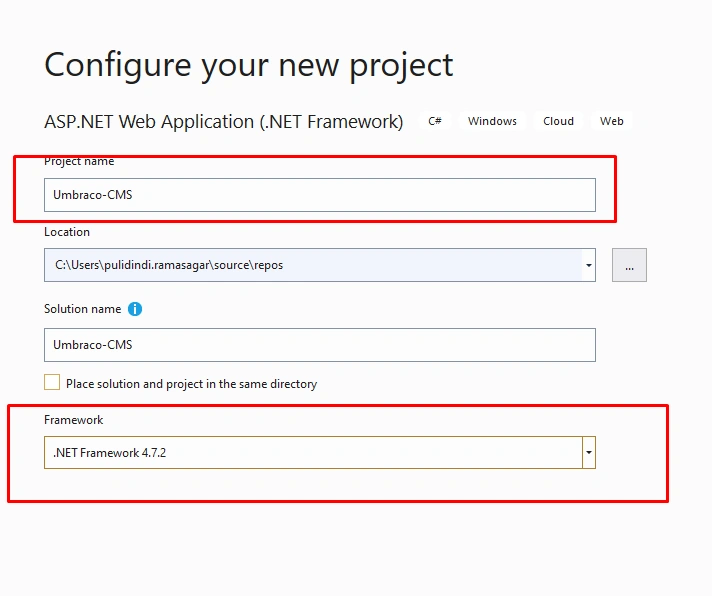
Create New project as shown below
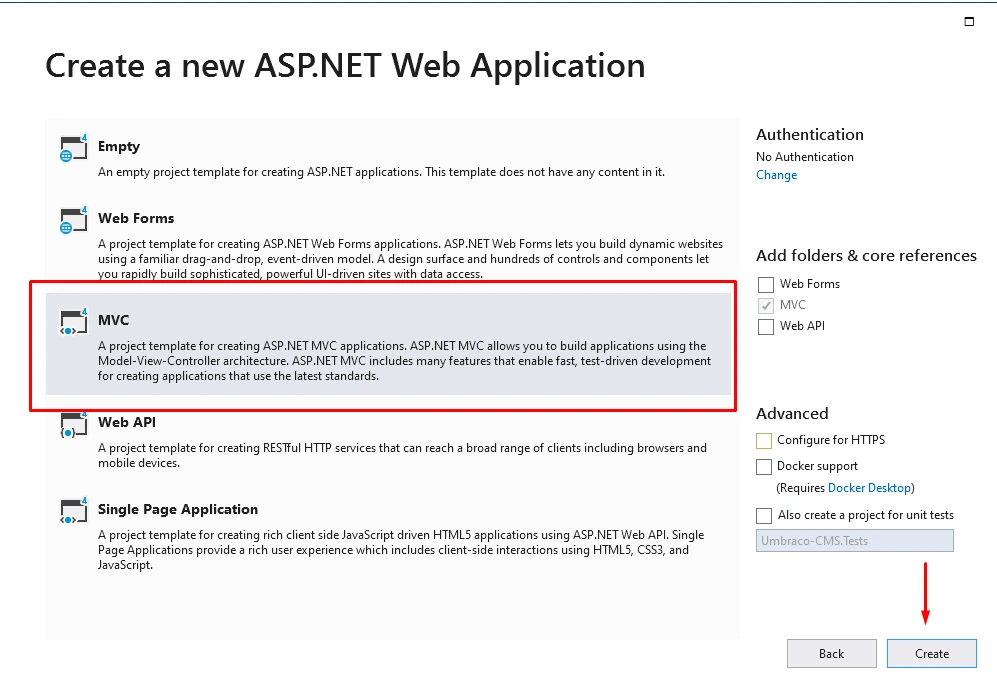
Select MVC and click on create
Step 2
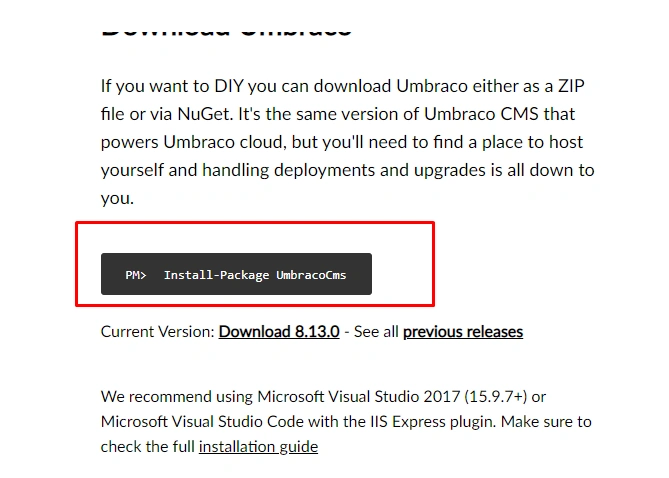
Open Umbraco.com and click on Download Umbraco

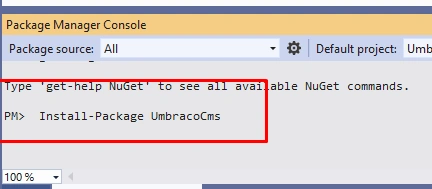
Copy the Nuget command
Step 3
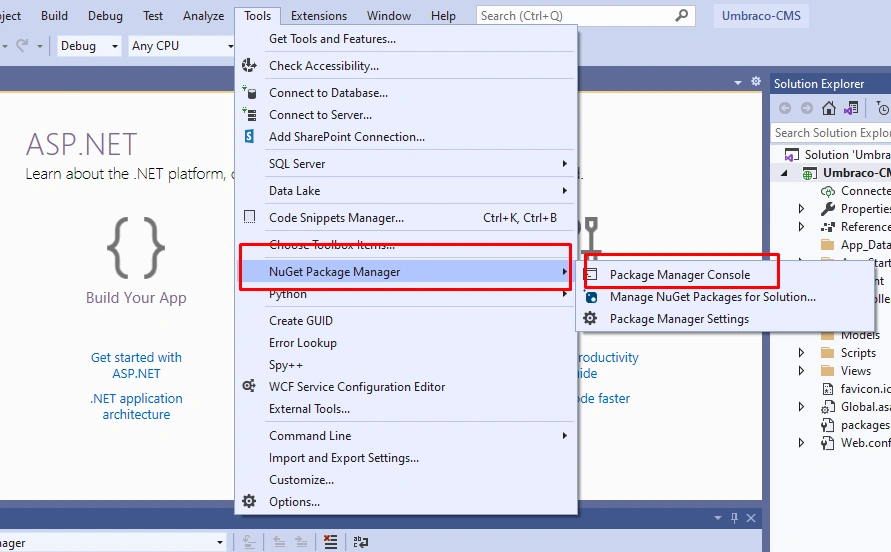
Open Nuget Package Manger and click on Package Manger Console
Enter the command as below,
Step 4
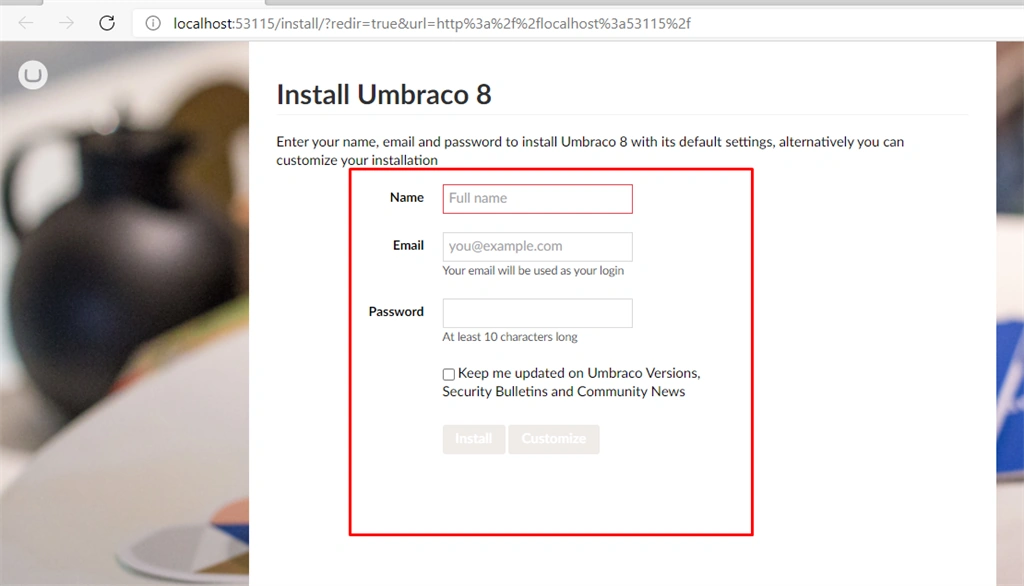
Now run the application and we can see the page as below.Enter the details and click on customize
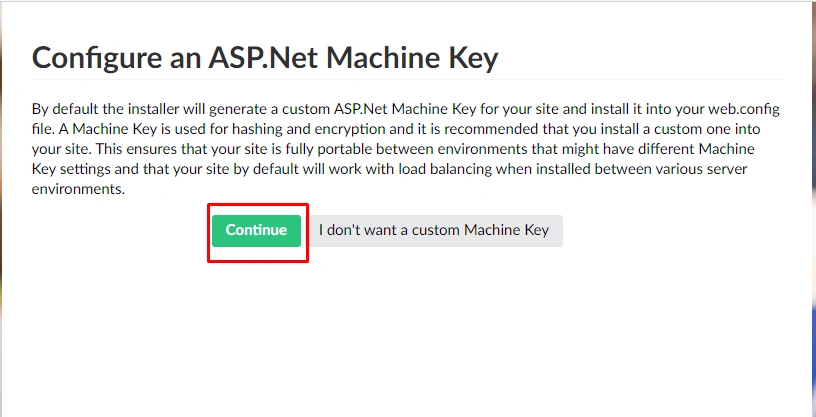
click on continue
Step 5
Select the default template and configure the database
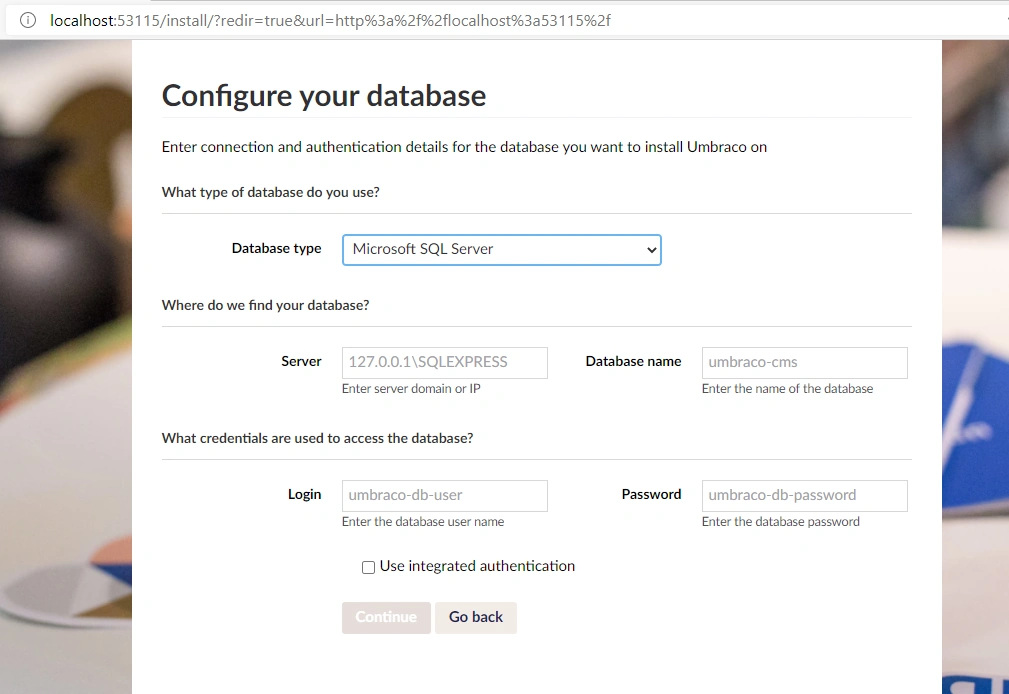
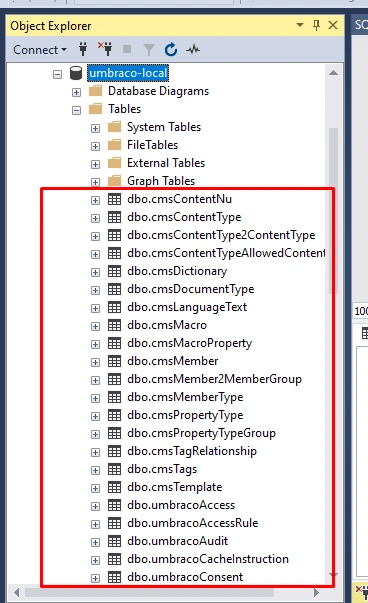
we can see the tables as below after database configuration
Step 6
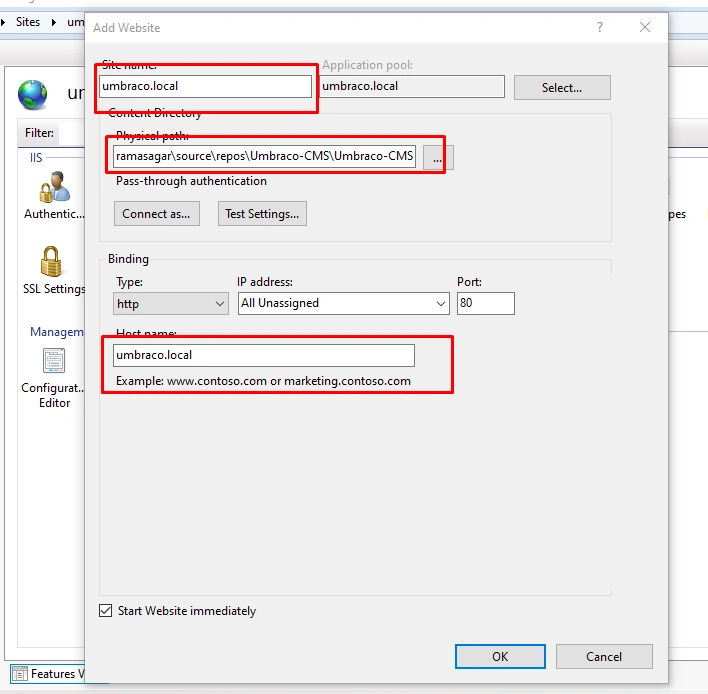
Now lets host the app in local IIS right click on Sites and click on Add website and configure as below
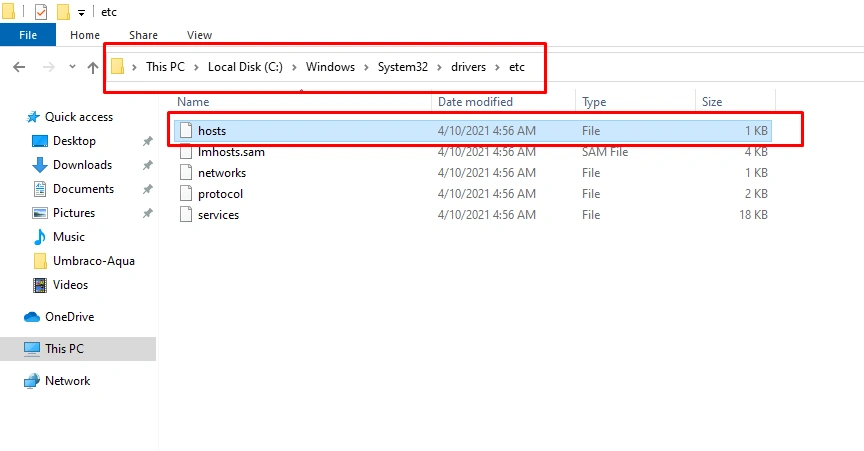
Open windows >System32>drivers>etc and edit the hosts file as below
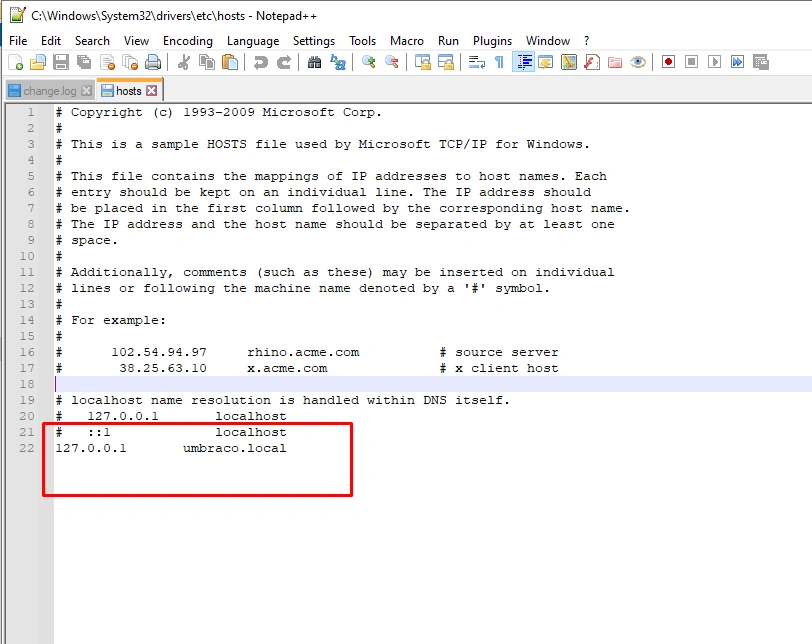
Now Open umbraco.local and can see as below.

Summary
In this article we learned how to install umbraco cms and host it in IIS. In the future articles we will learn about creating Templates, Document Types and Content Pages.
Join the conversation! Your thoughts help the community grow.