

Introduction
In my previous article, we discussed the steps to create and configure an organization in GitHub. Also, we understood about the organization and why we require an organization in GitHub.
In this article, I will describe the below-mentioned points in detail,
- Know about the project in Github
- Know about the project board
- Create a project and project Board in GitHub
- Link GitHub repository with Project
Note
Before going through this session, please visit my below-mentioned sessions related to Git and GitHub,
- Introduction To Git
- Steps For Configuring Git With Details
- Let's Know About Git Add, Git Commit, Git Status, And Git Push-In Details
- Let's Understand How Git Maintains History Of Version Or Commit Ids With Details
- Steps To Initialize A Git Repository And Push The Changes To GitHub In Details
- Let's Know About Git Branches And How To Implement It
- Let's Understand About Git Branches And Its Real-Time Uses
- Let's Learn About Merging The Git Branches And Create Pull Request In Details
- Steps To Ignore Files Using Gitignore In Details
- Let's Learn About Git Default Branch In Detail
- Steps To Create And Configure Organizations In GitHub In Details
Steps To Create Project In Github
First log in to GitHub as Owner of a GitHub organization as we discussed in the earlier session. Next, click on Projects as shown below,
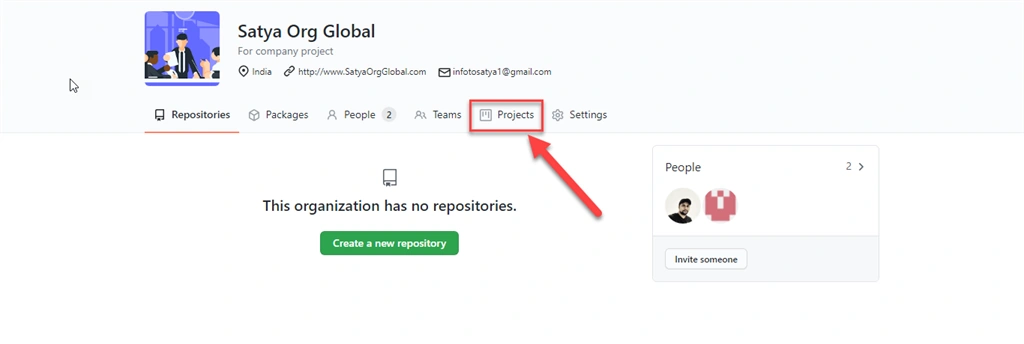
With Projects, we can manage work directly from our GitHub repository. The interface will be shown as mentioned below,
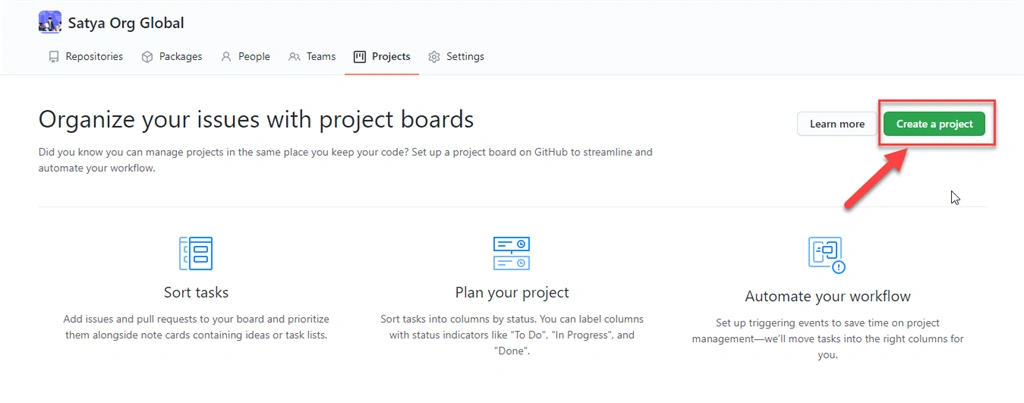
Know About The Project Board
Basically, the project board on GitHub helps you to organize and manage your work. We can create Project Board for specific work that is a roadmap or even a release checklist.
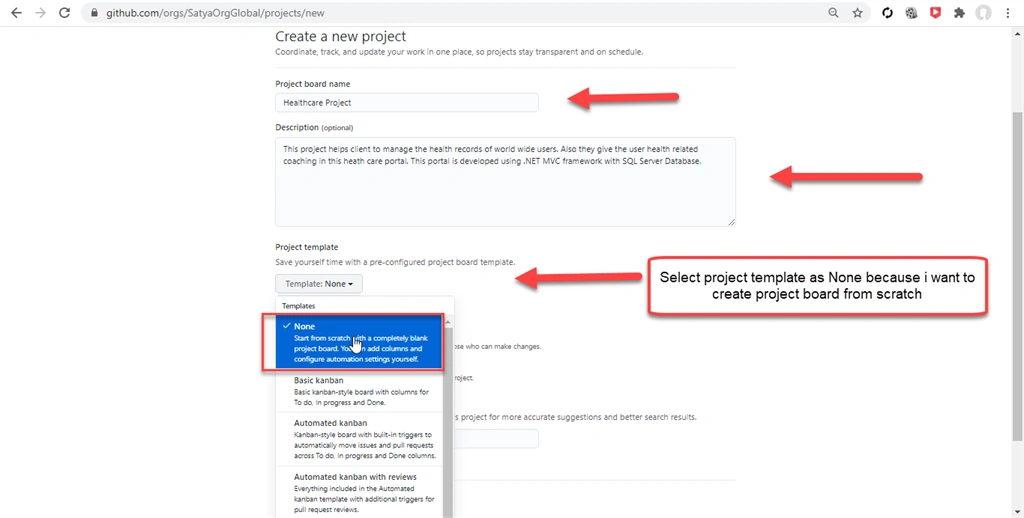
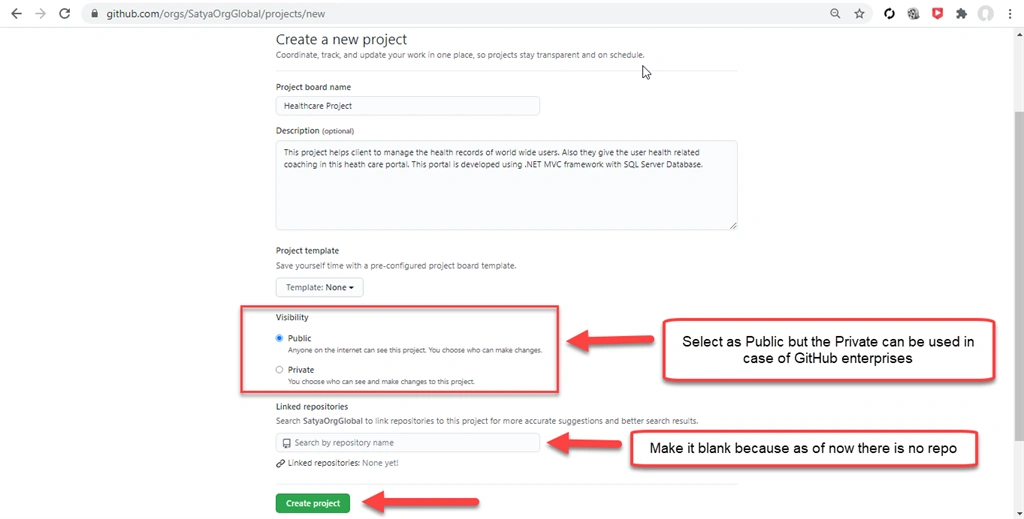
After the successful creation of the project, the interface will be shown below,
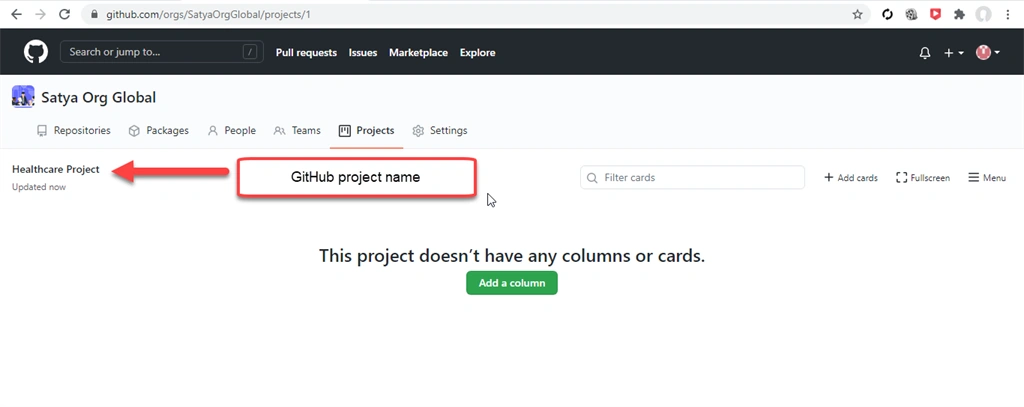
Let's create Project Board after a click on Add a column as in the above image,
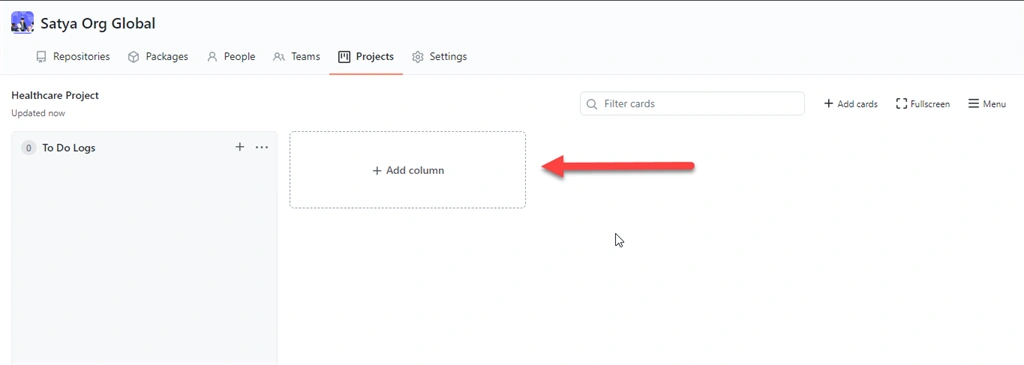
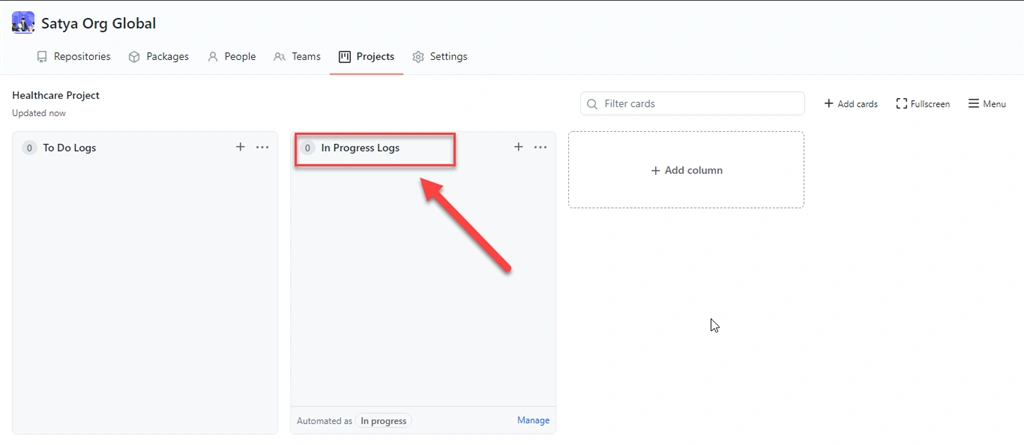
After successful creation of the Project Board, the interface will be as shown below and next click on Add column,
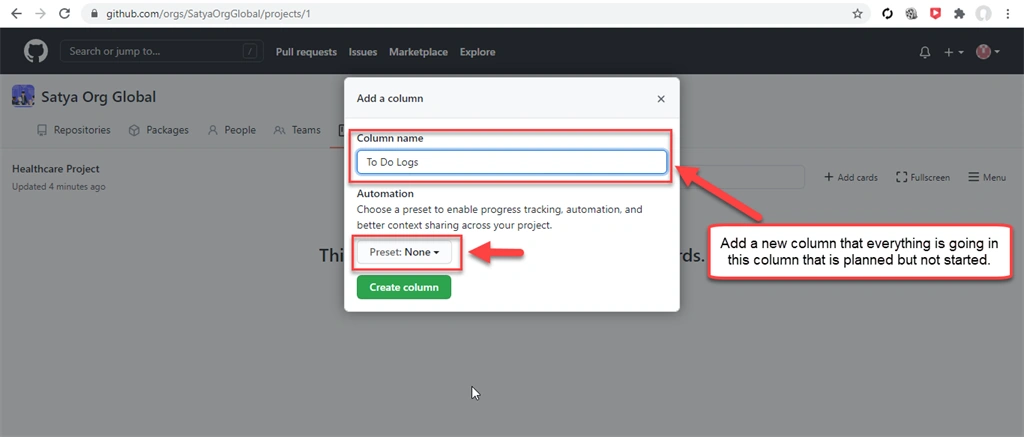
The below details we need to put as mentioned.
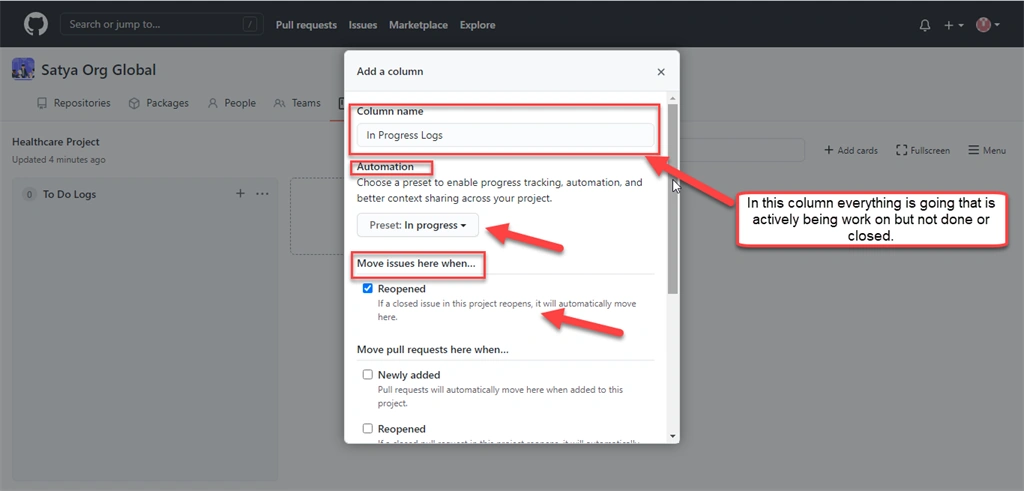
After successful creation, The interface is shown as below.
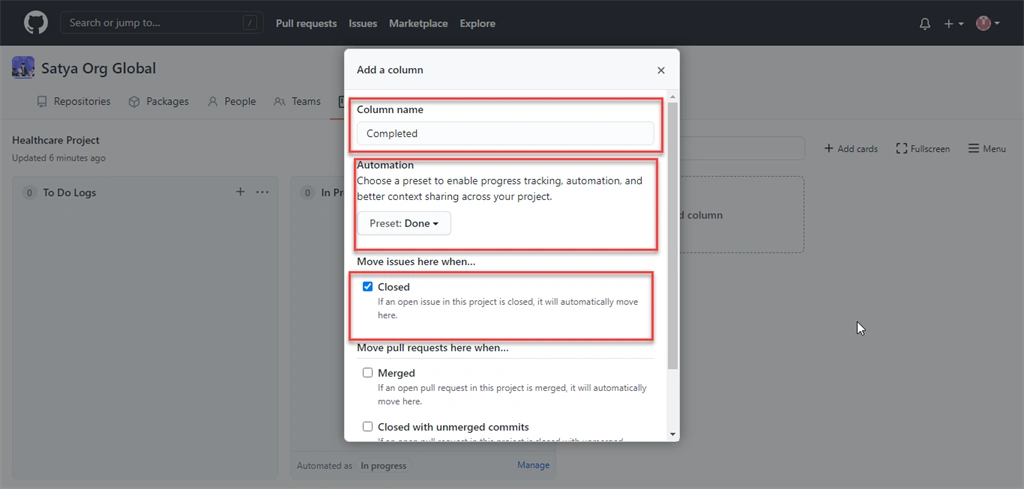
Let's add one more column called Completed with the below details as shown below. This column is used for if any open project is closed then that comes under this column called Completed.
After successful creation, the interface is shown as below.
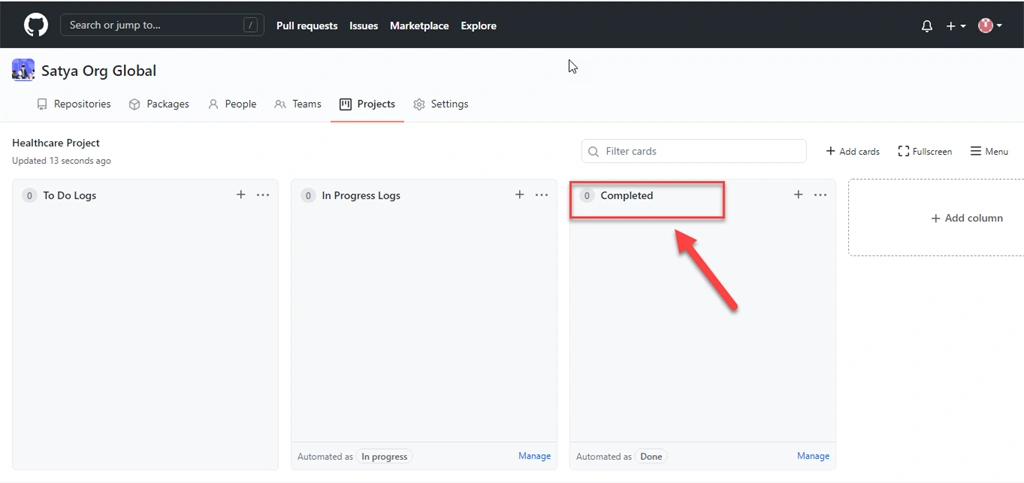
Now the creation of the Project Board is completed and next, we need to discuss with team members like the Project manager or Developer about the project lifecycle.
Let's add items under To Do Logs column as mentioned below.
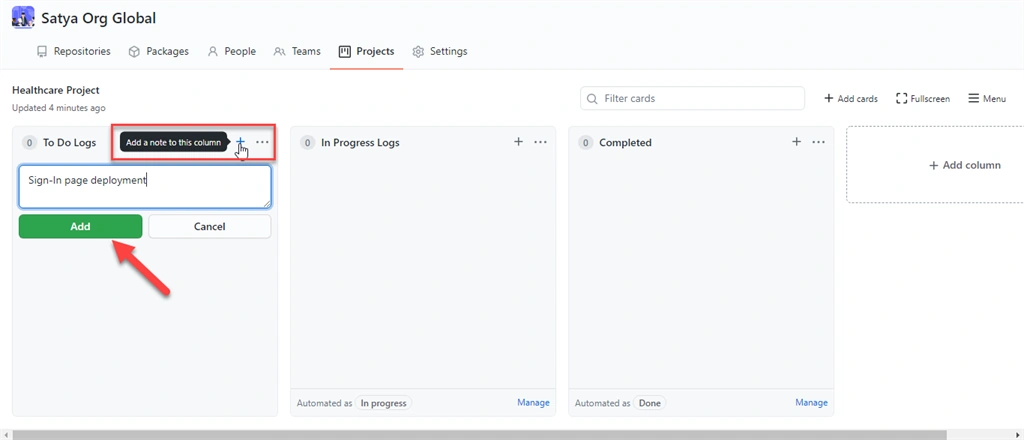
Here I created 4 list items under To Do Logs column as shown below.
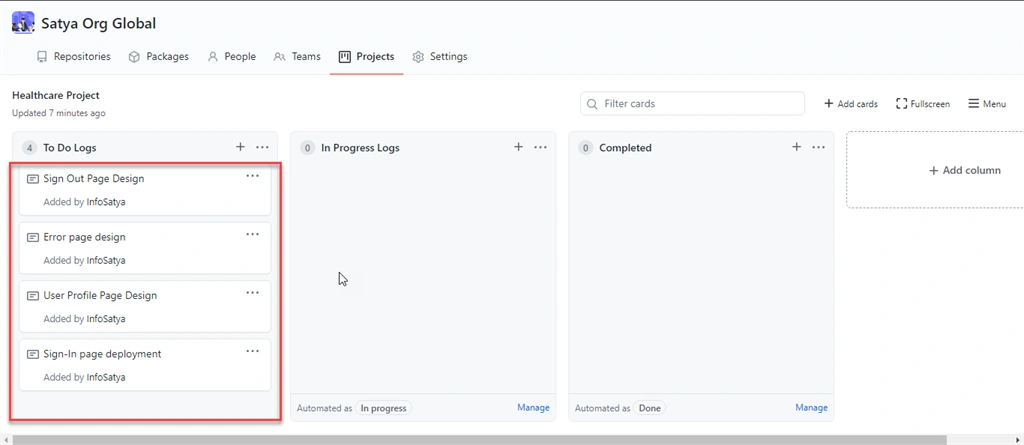
Now we are having a regular discussion with the Development team and we are tracking down the In Progress of each and every item as added earlier.
Let's add some items under In Progress Logs column as shown below.
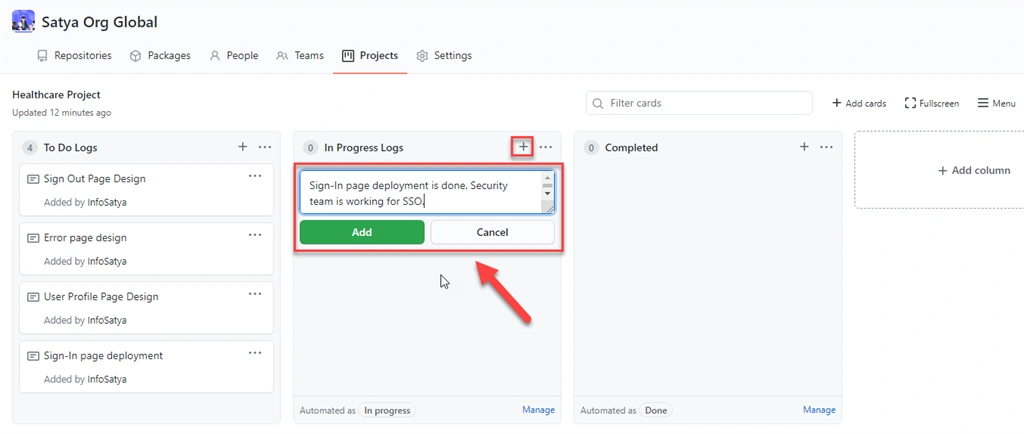
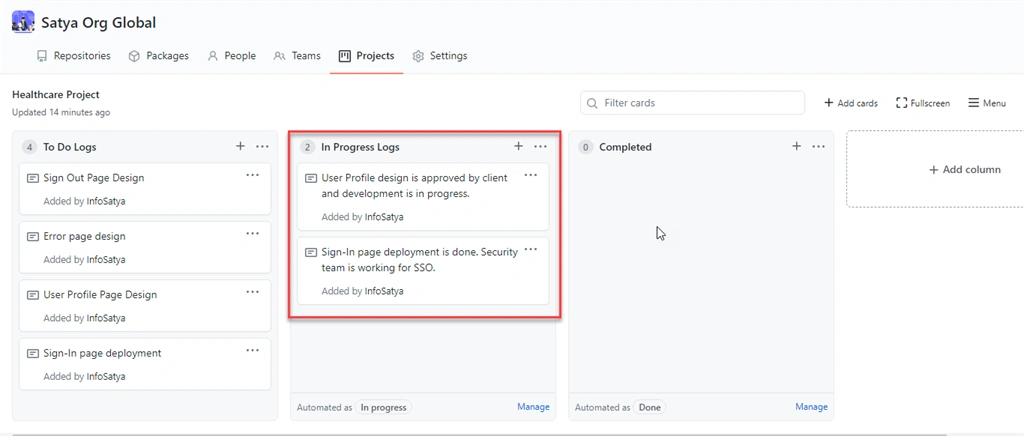
Here I created 2 list items under In Progress Logs column as shown below.
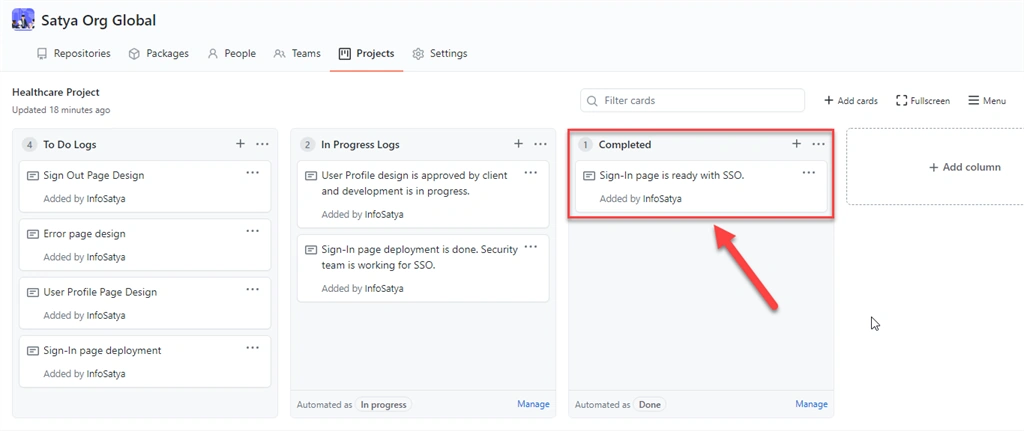
If any other tasks or items are completed then it goes to the Completed column as mentioned below.
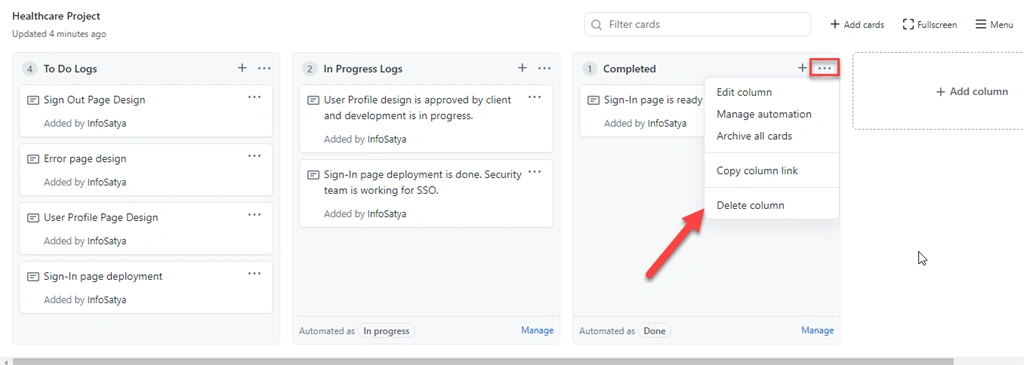
Here we can manage the column as shown below.
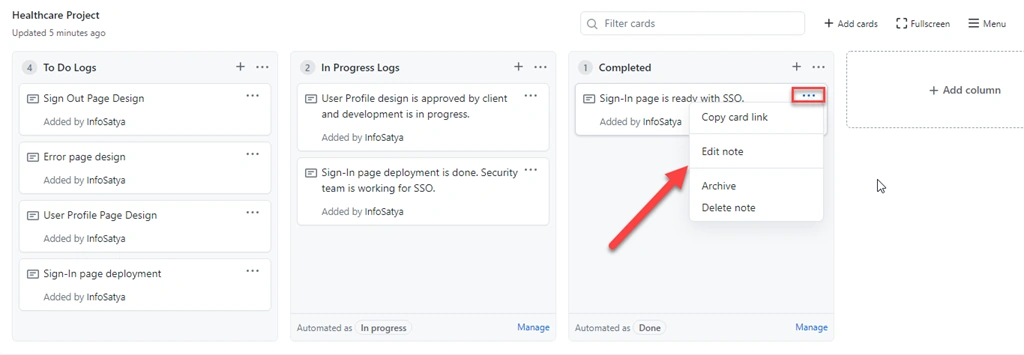
Here we can manage the items under a particular column as shown below.
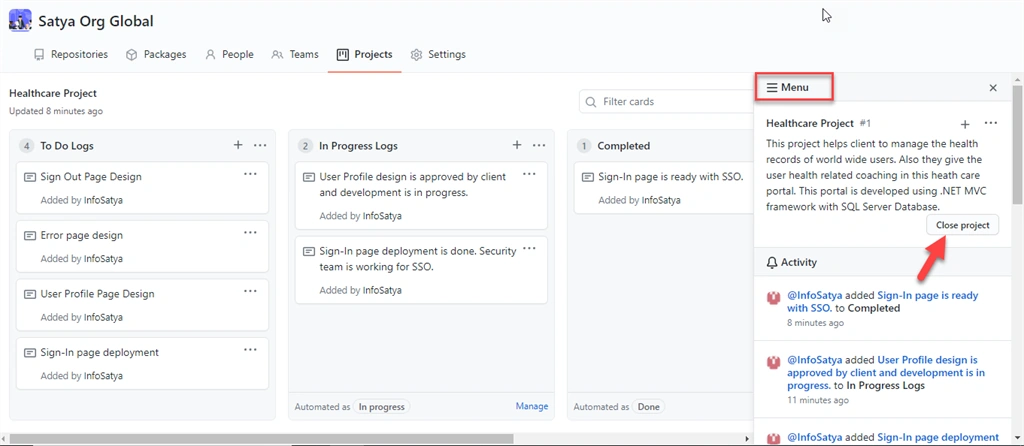
Once the project has been completed, We can close the project anytime as shown below.
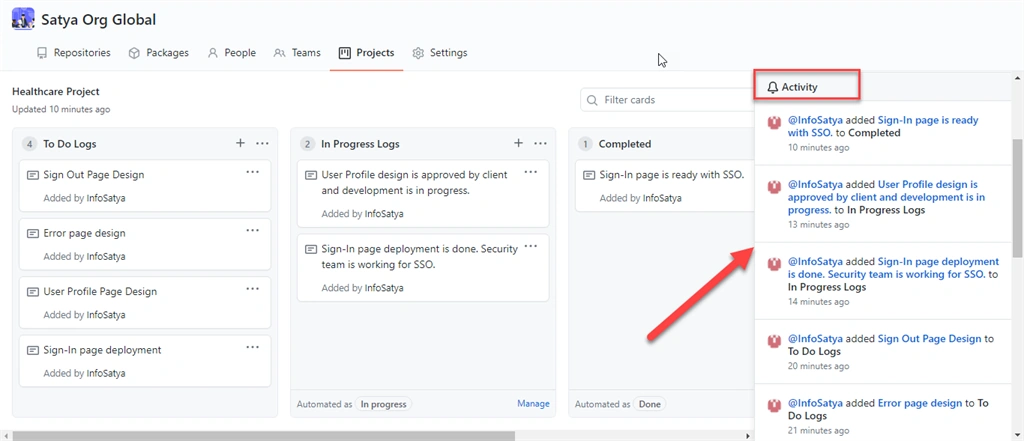
Here we check all the activities of this project under Menu as shown below.
Link GitHub Repository With Project
Here we can see the project details with status as shown below.
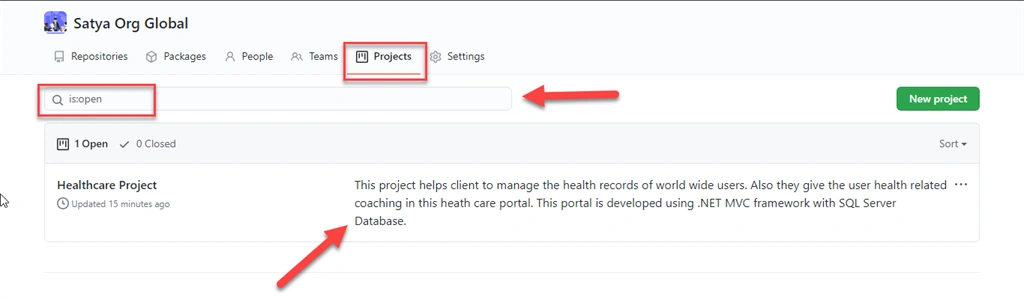
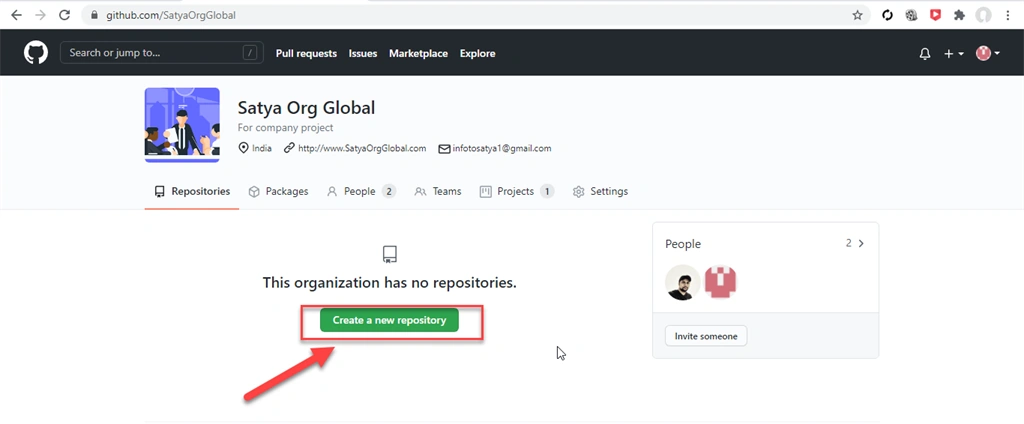
Let's create a new GitHub repo and link that repo with this GitHub project. Click on Create a new repository as mentioned below.
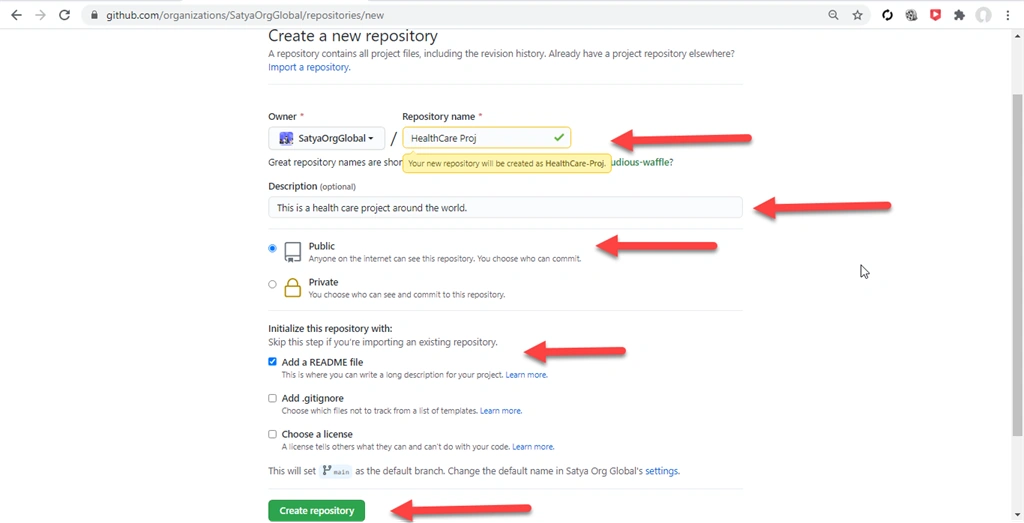
We need the below details for creating the GitHub repo as shown below.
Now after successful creation, the interface is shown below.
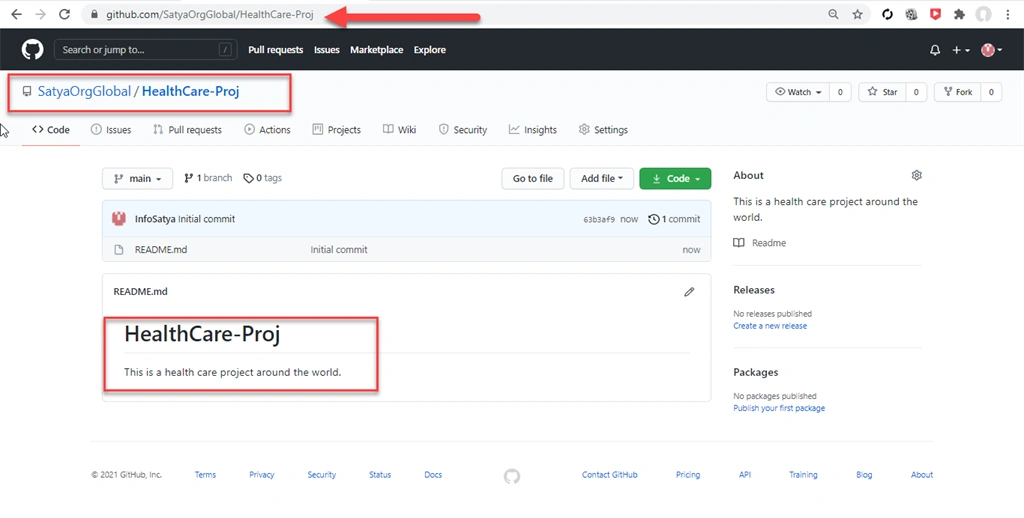
As of now, this repo is not a part of any GitHub project yet. Let's go ahead and link this repo with our GitHub project.
Step 1
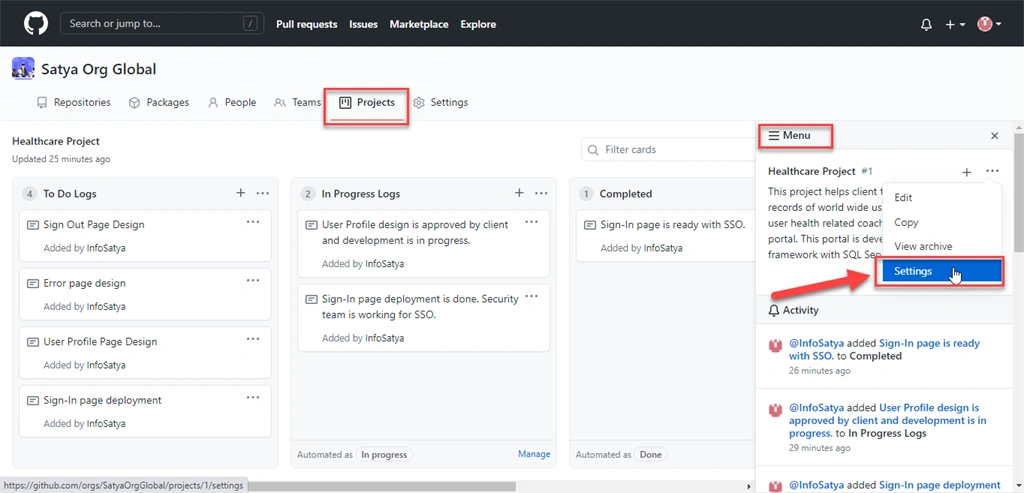
First, go to GitHub project and under Menu click on Settings option as shown below.
Step 2
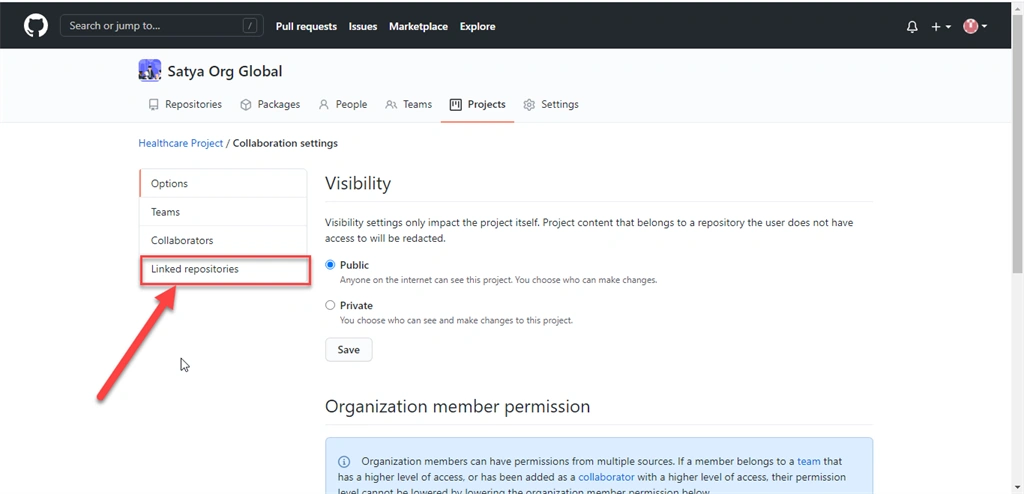
Then click on the Link repositories option as shown below.
Step 3
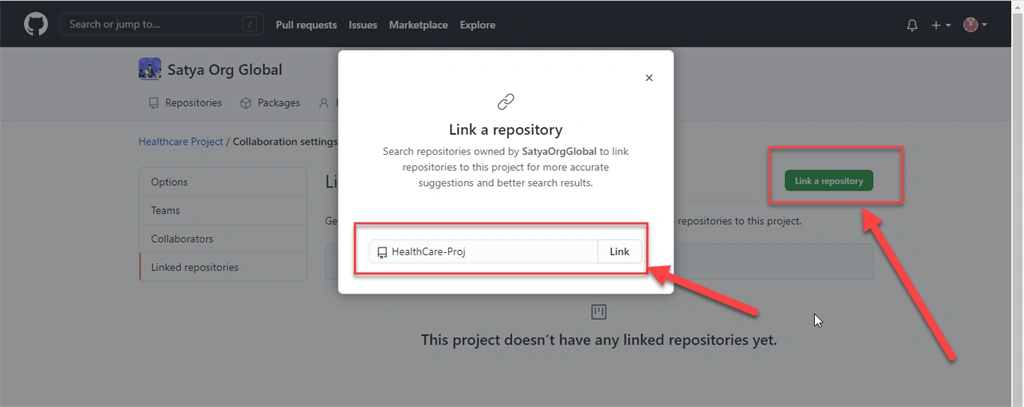
Then search and link your repo as shown below.
Now the Repository linked successfully as shown below.
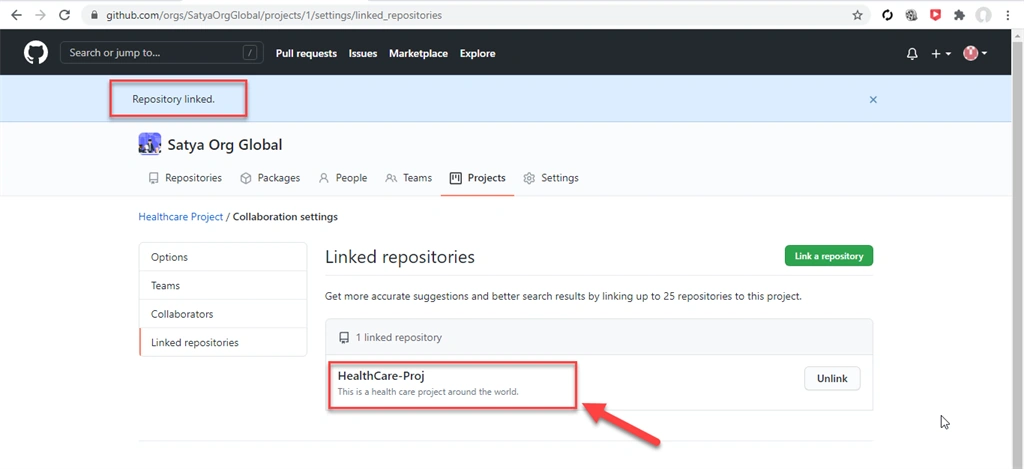
Later we can unlink the repo as shown in the above image. We can link up to 25 repositories to this project.
Now check the Project with Linked repositories as shown below.
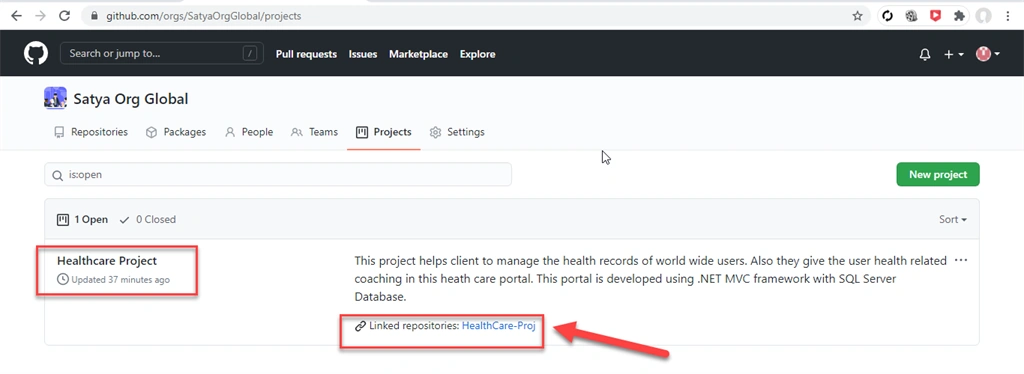
Now our GitHub organization is ready with a project with a linked repository as shown earlier.
Now we can see the newly created repo under the project of our GitHub organization as shown below.
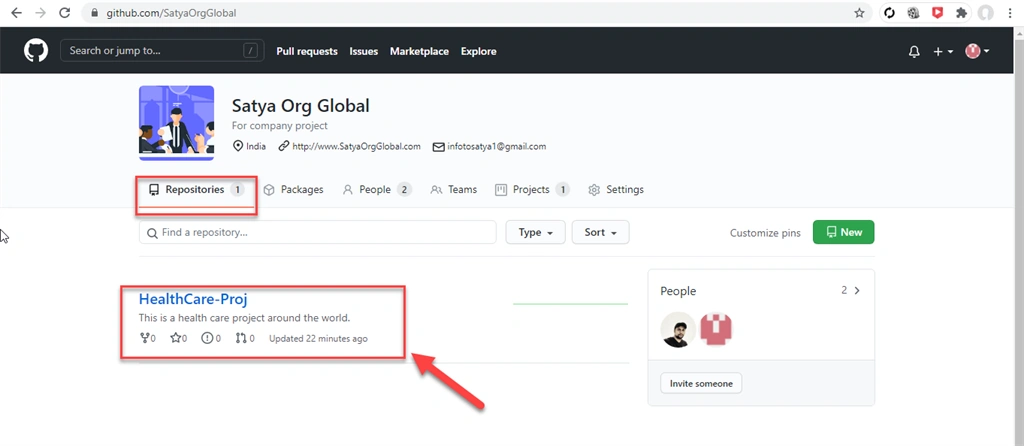
Summary
In this write-up, we have learned the below details,
- Know about the project in Github
- Know about the project board
- Create a project and project board in GitHub
- Link GitHub repository with Project
Thank You & Stay Tuned For More
Join the conversation! Your thoughts help the community grow.