In this article, we will go, step by step, and create two Ubuntu Servers 14.04 LTS using the same cloud service. After two virtual machines, we will create one Azure Load Balancer. So, it will distribute incoming traffic on two or more virtual machines. With the help of Load Balancer, you can distribute the load or traffic across multiple servers. Azure can also load balance within a cloud service or virtual network. This is known as internal load balancing. In this example, deployment model is Classic. So, it will create Cloud Service.
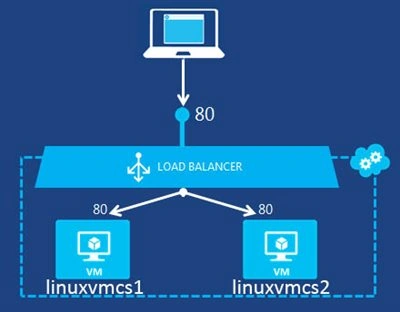
Prerequisites
You will learn
- How to Create Ubuntu Server
- Deployment Models: Classic
- How to establish connection with Ubuntu Server
- How to Configure Azure Load Balancer on Ubuntu Virtual Machine
Create Ubuntu Virtual Machine
Step 1: Navigate to Azure Portal (http://portal.azure.com/) & sign in with Azure credentials
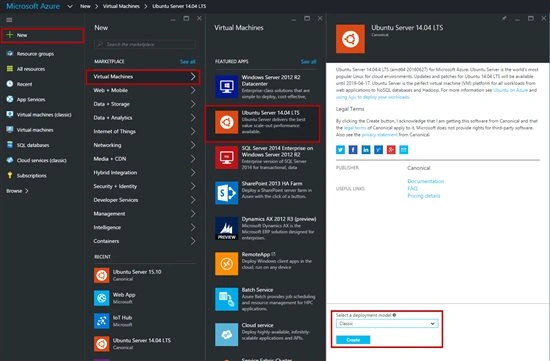
Step 2: Click on New -> Virtual Machine-> Ubuntu Server 14.04 LTS -> Classic (deployment model)
Click on "Create" button.
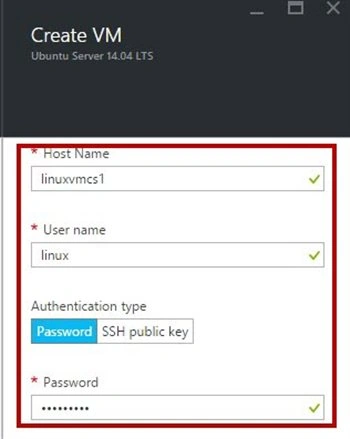
Step 3: Enter Host Name, Username & Password or SSH public key.
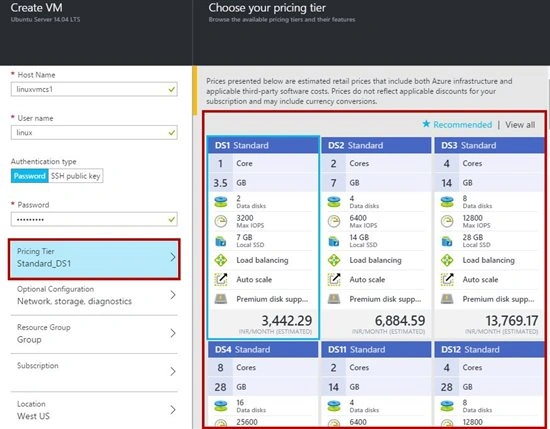
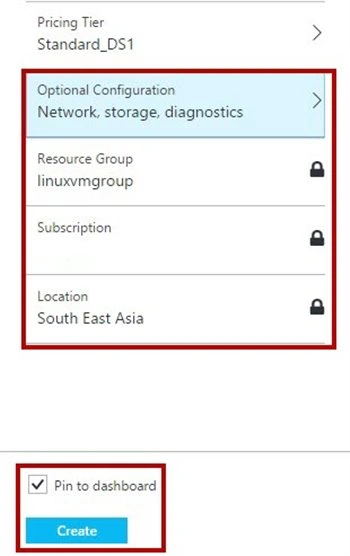
Step 4: Choose “Pricing Tier” from the list.
Step 5: Optional Configuration - leave with default options.
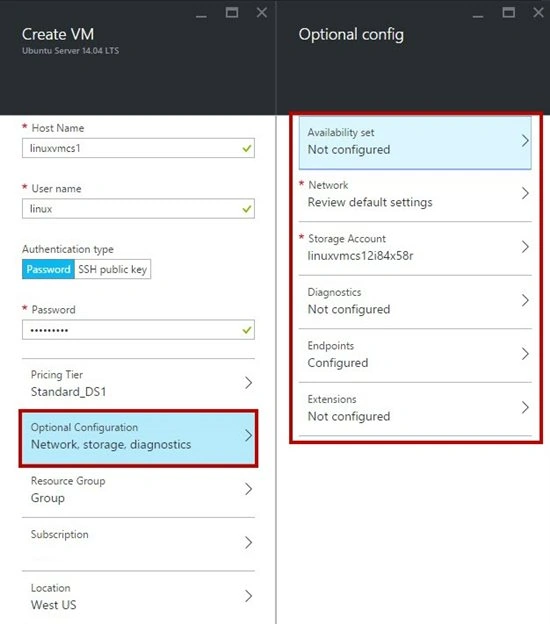
Step 6: Resource Group – Create New Resource or use existing group.
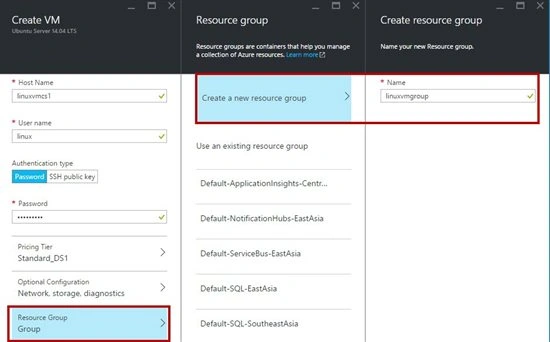
Step 7: Subscription – Select subscription if multiple subscription is available.
Step 8: Location – different locations are available. Select a location from the list.
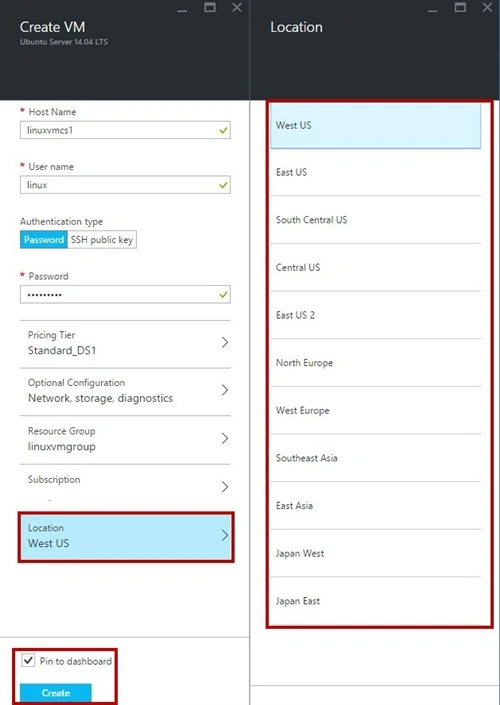
After all these settings, click on "Create" button.
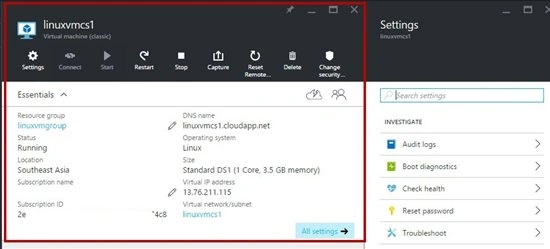
Step 9: Now, Linux VM is ready but we need to configure LAMP stack inside Linux VM.
Download PuTTY Client.
Run PuTTY Client & enter DNS Name or Host Name or IP Address.
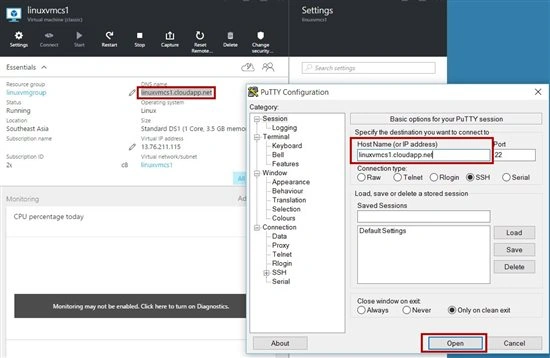
Step 10: Enter Linux VM username & password.
Linux Virtual Machine 1 is running: Ex. Linuxvmcs1
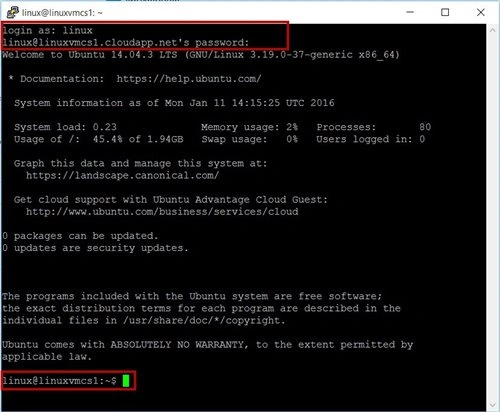
Step 11: Change the permission to root.
sudo su

Step 12: To install LAMP stack inside VM, run the following commands:
apt-get install tasksel
tasksel
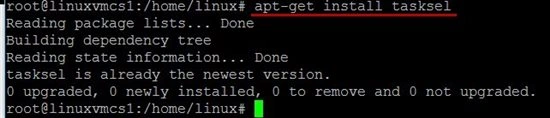

Step 13: Package Configuration window will appear.
Select “LAMP Server”.
Press TAB & hit ENTER,
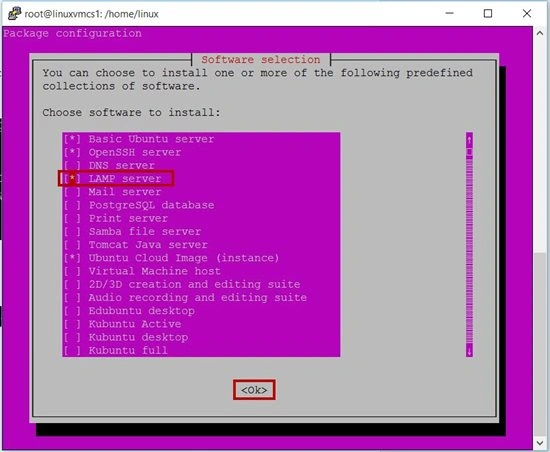
Enter the MySQL password during installation.
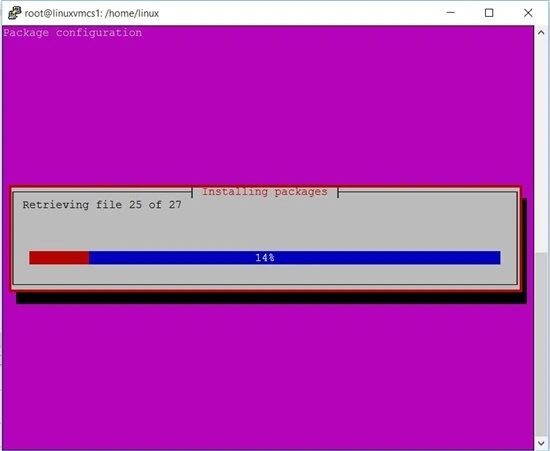
Step 14: Navigate to main directory or folder.
cd{space}/

Step 15: Again, navigate to LAMP stack installation directory by running the following commands:
cd{space}var/www/html

Note: Apache default page is available inside html folder but if VM is Ubuntu 12.04 html directory is not available.
Linux 12.04 LTS - cd var/www
Linux 14.04 LTS - cd var/www/html
Step 16: Start the nano editor and type the following command:
nano default.php

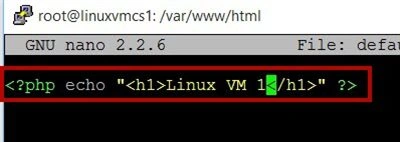
<?php echo "<h1>Linux VM 1</h1>" ?>
Hit "Ctrl + x"; then, "y" and press "Enter".
Now, close or exit the connection of first Linux VM.
Step 17: Now, create the other Linux VM.
New -> Virtual Machine -> Ubuntu Server 14.04 LTS -> Classic (deployment model).

Step 18: Enter second VM Host Name, Username & Password or SSH public key.
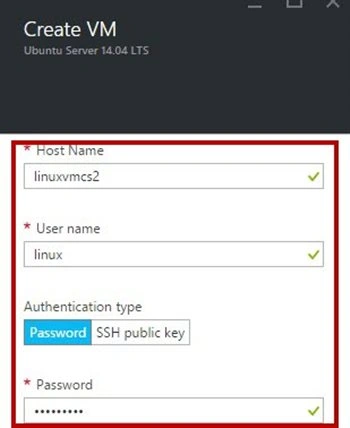
Step 19: Select “Optional Configuration” -> “Network” -> “Domain Name” -> Choose an existing domain name option with existing cloud domain name.
Choose first VM domain name ex. linuxvmcs1.cloudapp.net
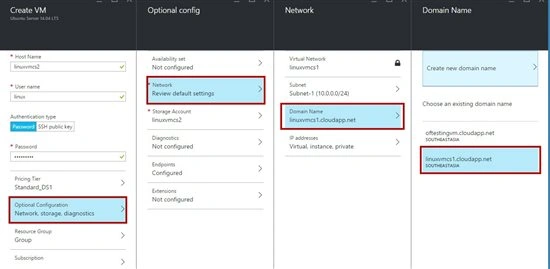
Step 20: After selecting the same dns name, all values, such as “Resource Group”, “Subscription”, “Location” will set, automatically.
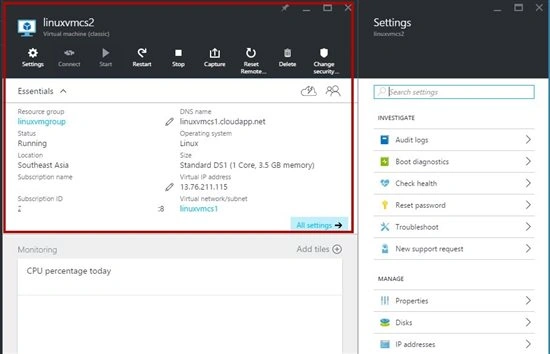
In Settings blade, select “Properties” -> SSH value.
For second VM, DNS Name will be the same but port number is different.
Ex. 1st VM – linuxvmcs1.cloudapp.net:22
2nd VM –linuxvmcs1.cloudapp.net:63784
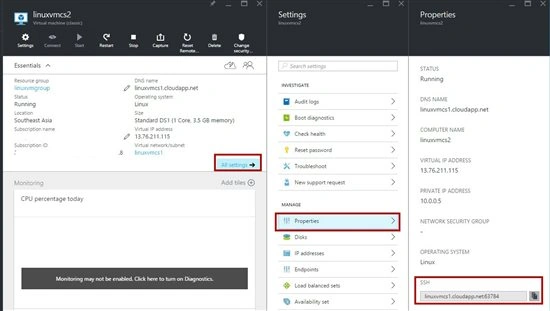
Step 21: Again, run the PuTTY SSH Client & Enter values according to second VM.
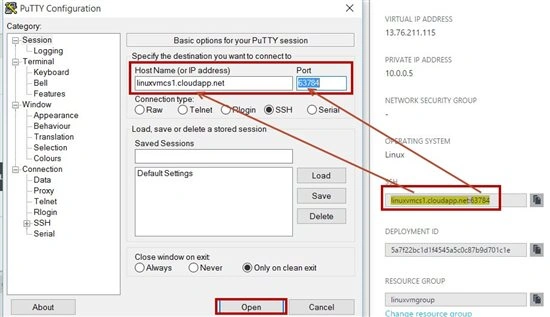
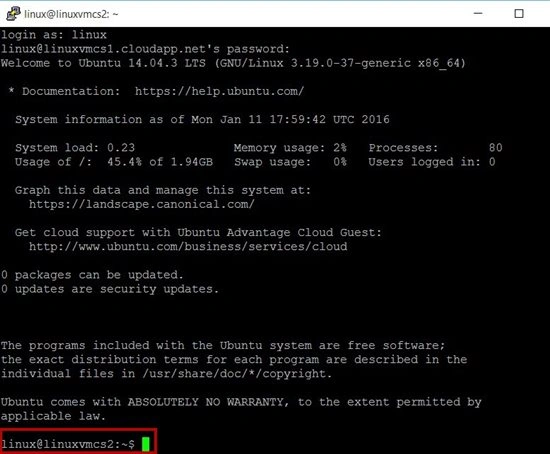
DNS name is the same but virtual machine is different ex. linuxvmcs2.
Step 22: Change the permission to root.
sudo su

Step 23: To install LAMP stack inside VM, run the following commands:
apt-get install tasksel
tasksel
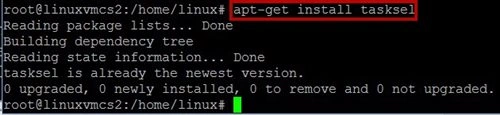

Step 24: Package Configuration window will appear.
Select “LAMP Server”. Press TAB & hit ENTER.
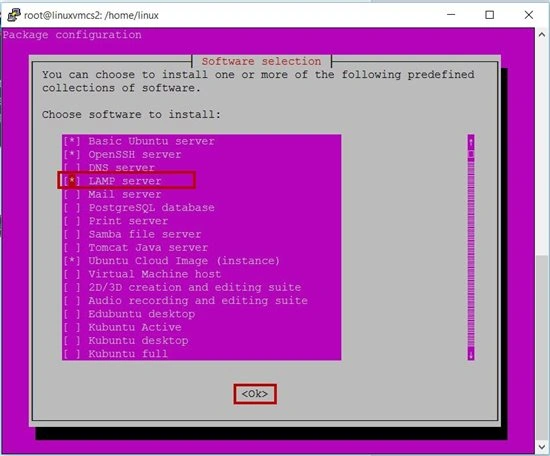
Enter the MySQL password during installation.
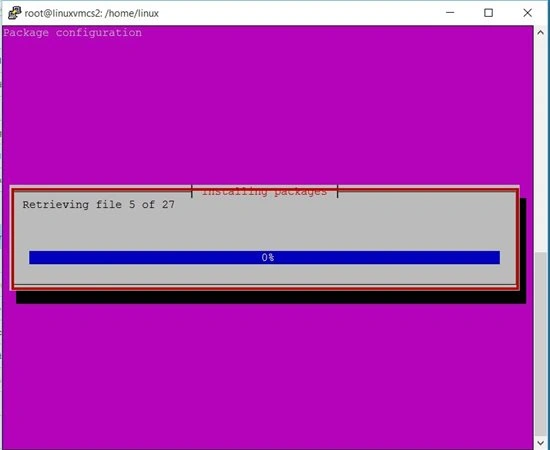
Step 25: Navigate to main directory or folder.
cd{space}/

Step 26: Again, navigate to LAMP stack installation directory by running the following commands:
cd{space}var/www/html
 Note:
Note: apache default page is available inside html folder but if VM is Ubuntu 12.04 html directory is not available.
Linux 12.04 LTS - cd var/www
Linux 14.04 LTS - cd var/www/html
Step 27: Start the nano editor and type the following command:
nano default.php

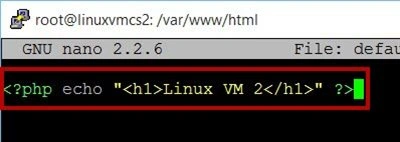
<?php echo "<h1>Linux VM 2</h1>" ?>
Press "Ctrl + x" and then, "y". Press "Enter".
Close or Exit second VM connection.
Configure Load Balancer sets
Step 28: Select “Load balanced sets” option on 2nd VM.
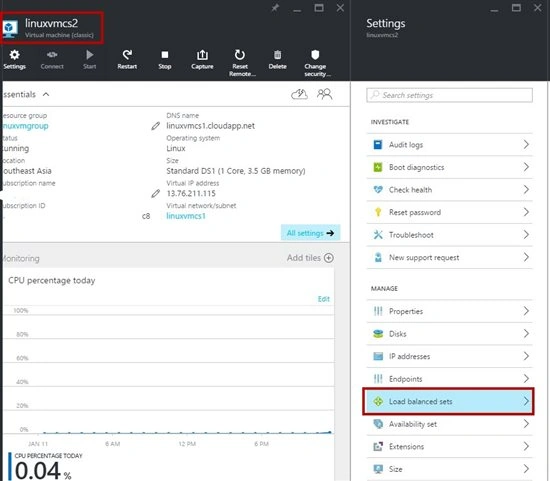
Step 29: Load balanced sets blade will open.
Click on “Join” option -> Load balanced set -> Create a load balanced set -> enter name, port, etc.
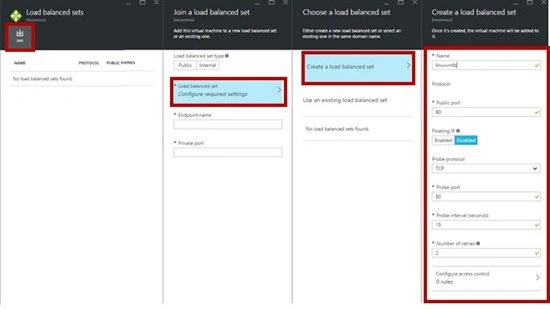
All the values are set for the load balancer.
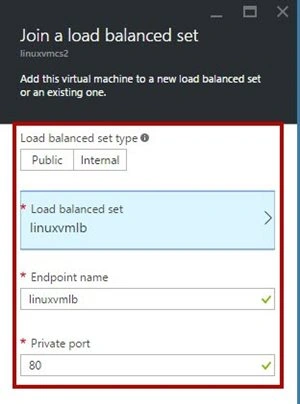
After a few seconds, load balancer will be generated.
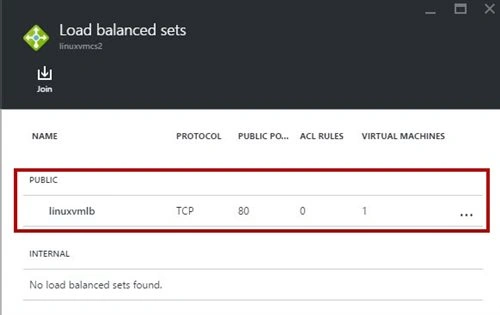
Step 30: Now, select 1st VM.
Settings blade -> “Load balanced sets” -> “Join” option
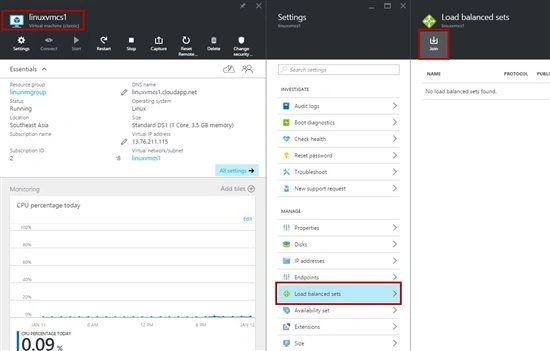
Step 31: First, select Load balanced set option. The load balanced set blade will open.
Select “Use existing load balanced set” option, ex. linuxvmlb
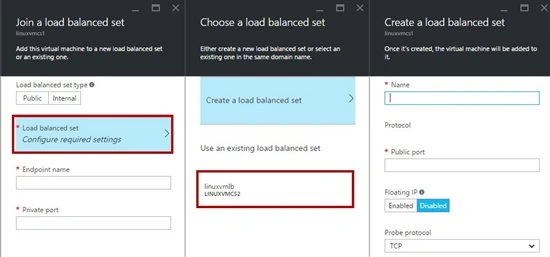
Automatically, all the values will set.
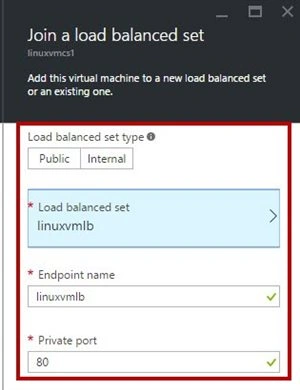
After that, set the load balance for 2nd VM.
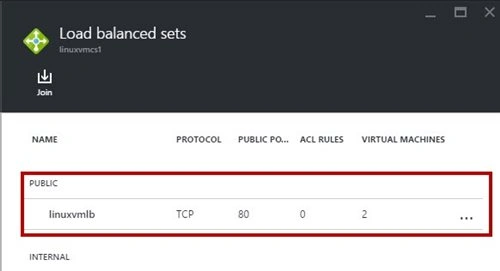
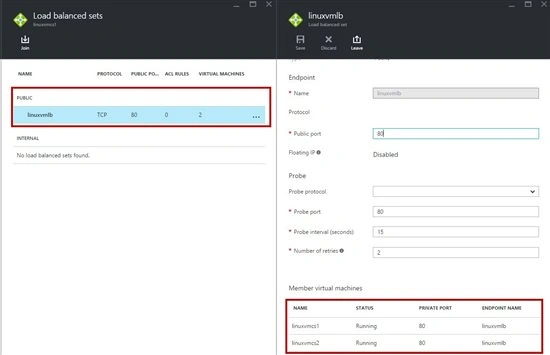
Now, open the browser & type dns name.
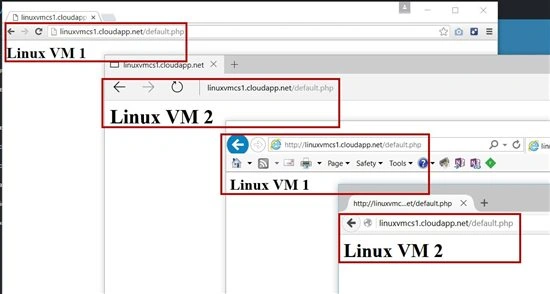 Congratulations! You have successfully configured Load Balancing workloads between two Linux Virtual Machines.

jaymin sutharPosted Jul 20, 2016, 2:21 AM
Is it same applicable to windows server ?
Vignesh ManiPosted Jul 11, 2016, 12:36 PM
Good one
Ravi KandelPosted Jul 11, 2016, 12:08 PM
Nice share.
Suketu NayakPosted Jul 11, 2016, 8:17 AM
Excellent Article....Superb
jaymin sutharPosted Jul 11, 2016, 4:37 AM
Very good
Tushar SharmaPosted Jul 10, 2016, 2:28 PM
Nice!
Praveen SreeramPosted Jul 10, 2016, 1:03 PM
Nice!