

Introduction
In this article, we will see how we can implement Localisation in the .NET MAUI project.
.NET MAUI, a cross-platform framework, empowers developers to build native mobile and desktop applications using C# and XAML. It enables the creation of apps that seamlessly operate on Android, iOS, macOS, and Windows, all from a unified codebase. This open-source platform is an advancement of Xamarin Forms, expanding its reach to desktop scenarios while enhancing UI controls for improved performance and extensibility.

Advantages of Localisation
- Localization improves user experience by providing content and language that is culturally relevant and easily understandable to users in different regions, increasing engagement and satisfaction.
- It expands market reach by making products or services accessible to a global audience, tapping into new markets, and driving business growth.
- Localization helps build trust and credibility with international customers by demonstrating a commitment to their specific needs and preferences, fostering stronger relationships and customer loyalty.
Quick Links
- Project Setup
- Implementation
- Demo
- Full Code
- Download Code
Project Setup
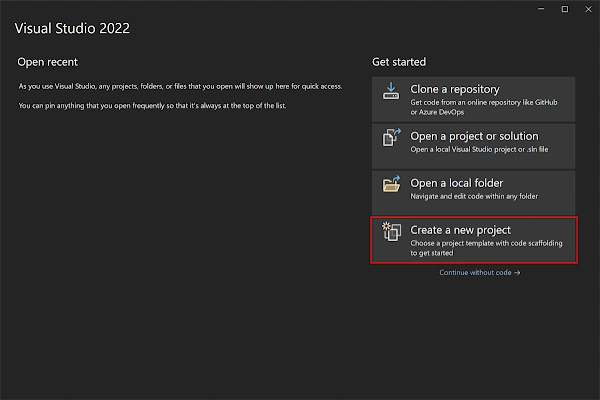
- Launch Visual Studio 2022, and in the start window, click Create a new project to create a new project.
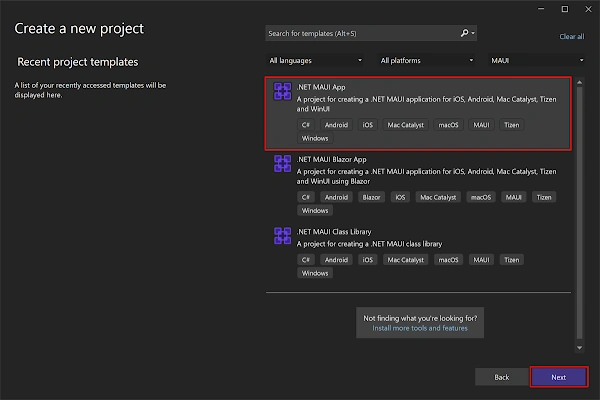
- In the Create a new project window, select MAUI in the All project types drop-down, select the .NET MAUI App template, and click the Next button:
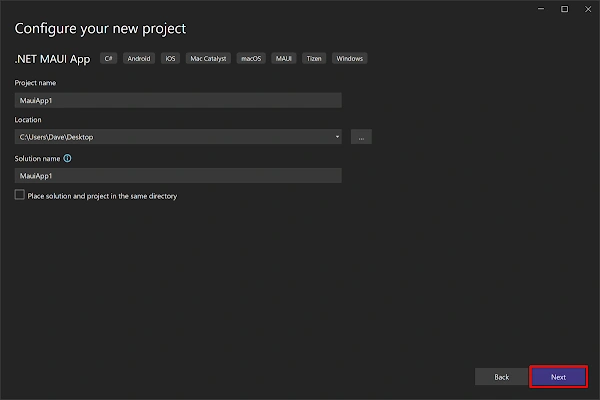
- In the Configure your new project window, name your project, choose a suitable location for it, and click the Next button:
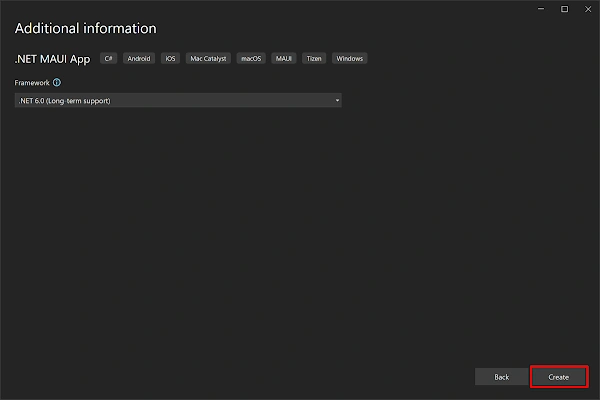
- In the Additional information window, click the Create button:
- Once the project is created, we can see the Android, iOS, Windows, and other running options in the toolbar. Press the emulator or run button to build and run the app

Screen Design
First, we need to implement the screen design as per our requirements. This tutorial will use 3 controls- 2 labels and a button like in the following code block.
<?xml version="1.0" encoding="utf-8" ?>
<ContentPage xmlns="http://schemas.microsoft.com/dotnet/2021/maui"
             xmlns:x="http://schemas.microsoft.com/winfx/2009/xaml"
             xmlns:resource="clr-namespace:MauiLocalization"
             x:Class="MauiLocalization.MainPage">

    <ScrollView>
        <VerticalStackLayout
            Spacing="25"
            Padding="30,0"
            VerticalOptions="Center">

            <Image
                Source="dotnet_bot.png"
                SemanticProperties.Description="Cute dot net bot waving hi to you!"
                HeightRequest="200"
                HorizontalOptions="Center" />

            <Label
                Text="{x:Static resource:LangResources.Helloworld}"
                SemanticProperties.HeadingLevel="Level1"
                FontSize="32"
                HorizontalOptions="Center" />

            <Label
                Text="{x:Static resource:LangResources.WelcomeNote}"
                SemanticProperties.HeadingLevel="Level2"
                SemanticProperties.Description="Welcome to dot net Multi platform App U I"
                FontSize="18"
                HorizontalOptions="Center" />

            <Button
                x:Name="CounterBtn"
                Text="Change to Tamil"
                SemanticProperties.Hint="Counts the number of times you click"
                Clicked="OnCounterClicked"
                HorizontalOptions="Center" />

        </VerticalStackLayout>
    </ScrollView>

</ContentPage>
Join the conversation! Your thoughts help the community grow.