

The following is the procedure.
Step 1: Create Table
- Create table userreg (id int identity(1,1),username varchar(50),password varchar(50))
- insert into userreg(username ,password) values('knk','knk')
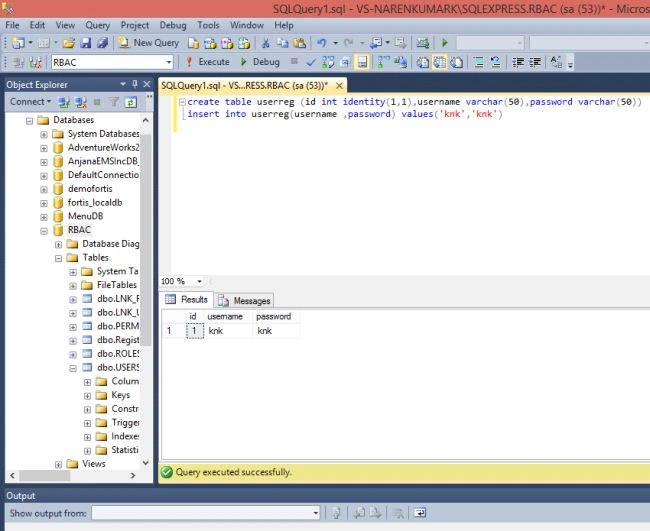
Step 2: Create a project
Go to File, then New and click Project. Select ASP.NET MVC 4 Web Application and enter the project name, then click OK, select Empty, select View Engine Razor and press OK.
Step 3: Add model
Go to File, then New and click Project. Select ASP.NET MVC 4 Web Application and enter the project name, then click OK, select Empty, select View Engine Razor and press OK.
Step 3: Add model
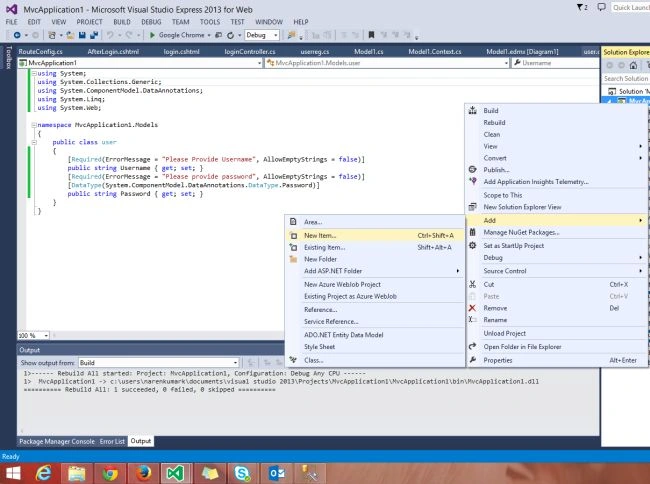
- public class user {
- [Required(ErrorMessage = "Please Provide Username", AllowEmptyStrings = false)]
- public string Username {
- get;
- set;
- }
- [Required(ErrorMessage = "Please provide password", AllowEmptyStrings = false)]
- [DataType(System.ComponentModel.DataAnnotations.DataType.Password)]
- public string Password {
- get;
- set;
- }
- }
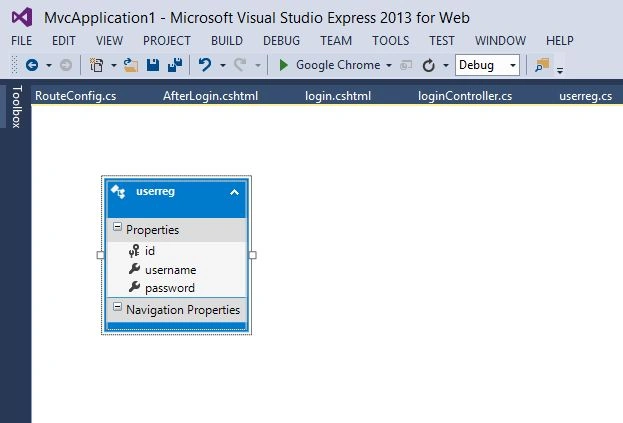
Step 4: Add Entity Data Model
To add an Entity Data Model, go to Solution Explorer, right-click on the Project name from Solution Explore, add a new item and select ADO.Net Entity Data Model under data. Now enter the model name and Add it. A dialog window will be shown (Entity Data Model Wizard), select Generate from database and click Next. Now choose your data connection, select your database and press next. Select tables and enter the Model namespace, then click Finish.


Step 5: Add a controller
Then add a controller as in the following:
- public ActionResult login() {
- return View();
- }
- [HttpPost]
- [ValidateAntiForgeryToken]
- public ActionResult login(userreg u) {
- if (ModelState.IsValid) {
- using(RBACEntities db = new RBACEntities()) {
- var v = db.userregs.Where(a = > a.username.Equals(u.username) && a.password.Equals(u.password)).FirstOrDefault();
- if (v != null) {
- Session["log"] = v.username.ToString();
- return RedirectToAction("AfterLogin");
- }
- }
- }
- return View(u);
- }
Step 6: Add a view
Then add a view as in the following:

Add a view for after the login as in the following:
- @model MvcApplication1.userreg
- @{
- ViewBag.Title = "login";
- }
- <h2>login</h2>
- @using (Html.BeginForm("Login", "Login", FormMethod.Post))
- {
- //this is for create form tag
- @Html.AntiForgeryToken() // this is for prevent CSRF attack
- @Html.ValidationSummary(true)
- if (@ViewBag.Message != null)
- {
- <div style="border:1px solid red">
- @ViewBag.Message
- </div>
- }
- <table>
- <tr>
- <td>@Html.LabelFor(a => a.username)</td>
- <td>@Html.TextBoxFor(a => a.username)</td>
- <td>@Html.ValidationMessageFor(a => a.username)</td>
- </tr>
- <tr>
- <td>
- @Html.LabelFor(a => a.password)
- </td>
- <td>
- @Html.PasswordFor(a => a.password)
- </td>
- <td>
- @Html.ValidationMessageFor(a => a.password)
- </td>
- </tr>
- <tr>
- <td></td>
- <td>
- <input type="submit" value="Login" />
- </td>
- <td></td>
- </tr>
- </table>
- }
Step 7: Add controller action after login
Add a controller action for after the login as in the following:
- public ActionResult AfterLogin() {
- if (Session["log"] != null) {
- return View();
- } else {
- return RedirectToAction("login");
- }
- }
Step 8: Add view after login
Add a view for after the login as in the following:
- @{
- ViewBag.Title = "AfterLogin";
- }
- <h2>After Login</h2>
- @if (Session["log"] != null)
- {
- <text>
- Welcome @Session["log"].ToString()
- </text>
- }
Dharmendra Kumar PanditPosted Jan 3, 2020, 6:23 AM
Thank you working fine.........
seema biradarPosted May 4, 2017, 9:40 AM
Nice Article! Thanks for sharing
Kundena Mohan GoudPosted Dec 21, 2015, 8:40 AM
Nice article
Santhakumar MunuswamyPosted Jul 16, 2015, 3:15 PM
Nice Article! Thanks for sharing
Santhakumar MunuswamyPosted Jul 16, 2015, 3:15 PM
Welcome
Santhakumar MunuswamyPosted Jul 16, 2015, 3:15 PM
Good Start
Chandradev PrasadPosted Jul 9, 2015, 12:34 PM
Nice post.
Sibeesh VenuPosted Jul 1, 2015, 6:36 AM
Good one.
Gopi ChandPosted Jul 1, 2015, 4:25 AM
Good one..welcome