

Introduction
- Raspberry Pi Board
- Push Button-2
- Led-1
- Bread Board
- Hook-Up Wires
- Resistor-2.
Parts Explanation
In the article, I have already explained about Raspberry Pi, LED, Bread Board, Resistor. Now, I am going to explain about the push button and its uses.
Push-button

- A push-button (also spelled pushbutton) or simply button is a simple switch mechanism to control some aspect of a machine or a process. Buttons are typically made out of hard material, usually plastic or metal.
- The surface is usually flat or shaped to accommodate the human finger or hand, so as to easily press or push. Buttons are most often biased switches, though even many un-biased buttons (due to their physical nature) require a spring to return to their un-pushed state.
- Different people use different terms for the "pushing" of the button, such as press, depress, mash, hit and punch.
Uses
- In industrial and commercial Applications, push buttons can be connected together by a mechanical linkage, so that the act of pushing one button causes the other button to be released.
- In this way, a stop button can "force" a start button to be released.
- This method of linkage is used in simple manual operations in which the machine or process has no electrical circuits for control.
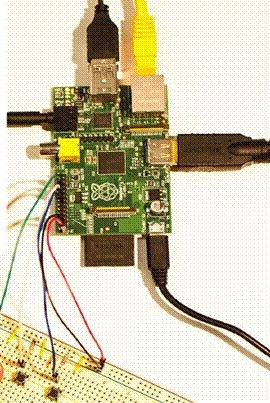
Let's Start Connecting the Parts with the RPI
- First step is to connect the First push button to RPI
- Second step is to connect the Second push button to RPI.
| PUSH BUTTON | GPIOPIN |
| First Push | Button 11 |
| Second Push | Button 12 |
- Connect the Resistor also on the positive side and connect the negative side with the 5V.
- Connect the GND side to the GND of the GPIO.
- Connect LED's positive pin to the 13 of the GPIO
- Connect the negative pin to the GND side.
Programming Part
- import RPi.GPIO as GPIO
- import time
- GPIO.setmode(GPIO.BCM)
- GPIO.setup(13, GPIO.OUT)
- GPIO.setup(11, GPIO.IN, pull_up_down = GPIO.PUD_UP)
- GPIO.setup(12, GPIO.IN, pull_up_down = GPIO.PUD_up)
- while True:
- input_state = GPIO.input(11)
- GPIO.output(13, 0)## Turn ON HIGH
- if input_state == True:
- input_state = GPIO.OUTUT(12)
- GPIO.Output(13, 0)## Turn ON LOW
- if input_state == False:
- print('Button Pressed')
- time.sleep(0.2)
- input_state = GPIO.input(11)
- GPIO.output(13, 0)## Turn ON HIGH
- if input_state == True:
- input_state = GPIO.OUTUT(12)
- GPIO.Output(13, 0)## Turn ON LOW
- if input_state == False:
Hadshana KamalanathanPosted Jul 21, 2018, 8:06 PM
Thanks for sharing
Hussain PatelPosted Nov 2, 2016, 10:33 AM
Nice article - please see my article on Rasberry pi as well
RajaPosted Oct 31, 2016, 7:58 AM
Great Share...
Anu VPosted Oct 28, 2016, 12:12 AM
Nice..