

From the ASP.NET Web API perspective, serialization is the process of translating a .NET Common Language Runtime (CLR) type into a format that can be transmitted over HTTP. The default format is are either JSON or XML
A media type formatter, which is an object of type MediaTypeFormatter, performs the serialization in the ASP.NET Web API pipeline. Consider a simple action method handling GET in an ApiController: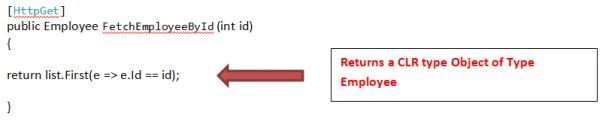
Content negotiation is the process by which the ASP.NET Web API chooses the formatter to use and the media type for the response message.
Whenever we request a URL, the WebApi checks the following four items before deciding on the media formatter to use.
- Media type mapping: Every MediaTypeFormatter has a collection of MediaTypeMapping values. A MediaTypeMapping allows you to map the request or response messages with certain characteristics to a media-type. There are four out-of-box media type mappings: QueryStringMapping, UriPathExtensionMapping, RequestHeaderMapping and MediaRangeMapping. These respectively map a query string parameter, URI path extension, request header and media range to a media type. As an example, defining a QueryStringMapping with a parameter name of fmt and a value of JSON and media-type of application/json will let the ASP.NET Web API choose JsonMediaTypeFormatter, if the query string has a field fmt with a value of JSON, such as this: http://localhost:57888/api/employees/001?fmt=json.
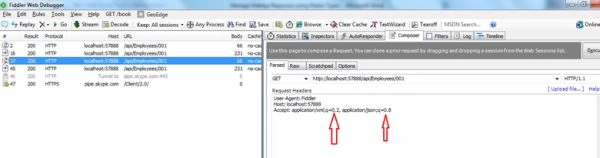
- Media type as specified in the Accept request header.
- Media type as specified in the Content-Type request header.
- If there is no match so far then the conneg algorithm goes through the MediaTypeFormatter Objects defined in the config and checks if a formatter can serialize the type by calling the CanWriteType method. The first formatter that can serialize the type is chosen. Kindly refer to this link to understand CanWriteType:
WebApi: MediaTypeFormatters in WebApi
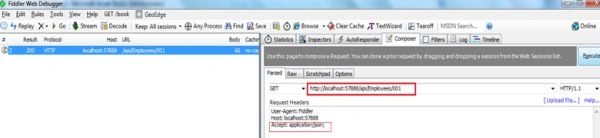
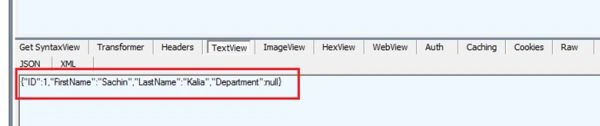
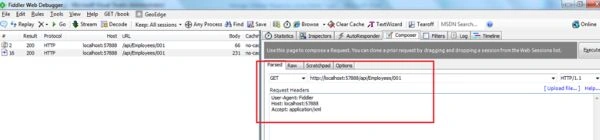
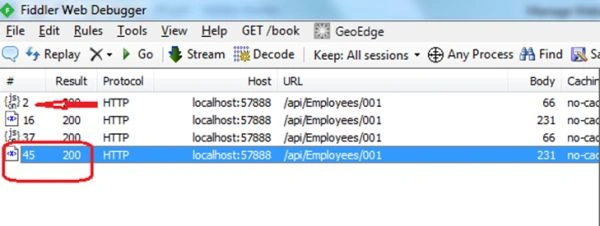
Now we use an example and see the behavior of request with Media Type.
Kindly also visit these links to learn more about the WebApi.
- WEBAPI: EXECUTION OF RPCSTYLE ACTION METHOD IN WEBAPI USING MVC4
- WEBAPI PATCH UPDATE USING FROMBODY PARAMETER IN WEBAPI USING MVC4 TEMPLATE
- WEBAPI Configuration over Convention using MVC4 template
Let's create a sample application and do this step-by-step.
Step 1: Let's first create a sample web application using an ASP.NET MVC 4 Web Application and name it as you choose; I used WebApiDemo as shown in the image below: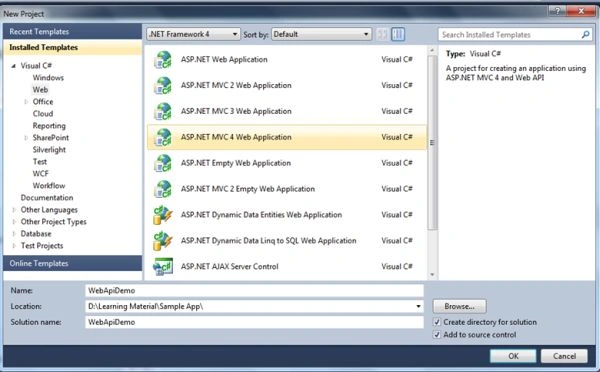
Step 2: Click OK and choose the Web API option from the templates shown in the wizard window.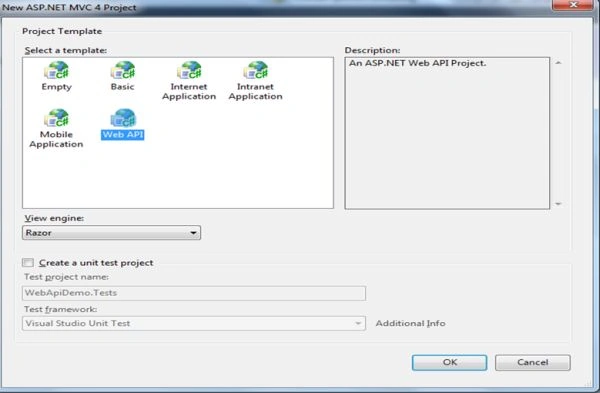
Step 3: You'll find the application structure as shown below at first sight.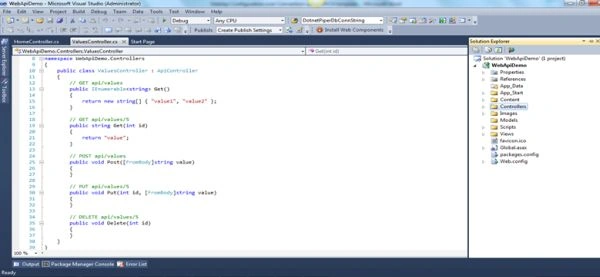
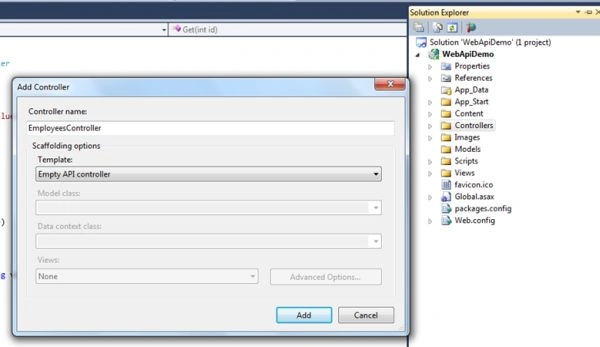
Step 4: Right-click the Controllers folder in the Solution Explorer of Visual Studio. Select Add ➤Controller and provide a name of EmployeesController for the controller. Leave the option Empty API Controller selected in the Template dropdown and click Add, as shown in Figure below. Notice that the generated controller class inherits from ApiController, a class that is part of the ASP.NET Web API framework.Kinldy add the following code into EmployeesController class.
- public static IList<Employee> listEmp = new List<Employee>()
- {
- new Employee()
- {
- ID = , FirstName="Sachin", LastName="Kalia"
- },
- new Employee()
- {
- ID =002, FirstName="Dhnanjay" ,LastName="Kumar"
- },
- new Employee()
- {
- ID =003, FirstName="Ravish", LastName="Sindhwani"
- },
- new Employee()
- {
- ID =004, FirstName="Amit" ,LastName="Chaudhary"
- },
- new Employee()
- {
- ID =004, FirstName="Anshu" ,LastName="Aggarwal"
- },
- };
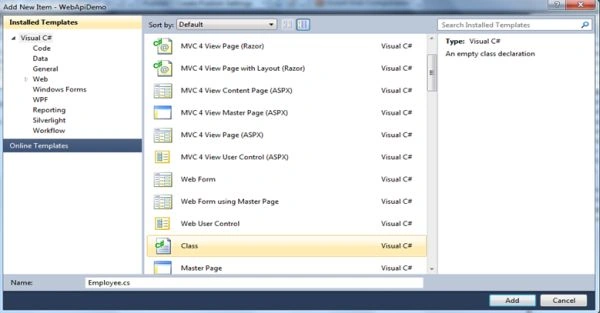
Step 5: Right-click the Models folder in the Solution Explorer of Visual Studio. Select Add ➤ Class
To add a new class with a name of Employee.
After creating the Employee class, kindly add the following code into this class.



Join the conversation! Your thoughts help the community grow.