

Introduction
As organizations increasingly rely on Power BI to share business insights, protecting sensitive data has become a top priority. Not every user should have access to all the data within a report. For example, a Regional Sales Manager should only view sales for their assigned region, while an HR Manager should only access employee information relevant to their department.
This is where Row-Level Security (RLS) comes into play.
Power BI Desktop allows report developers to define security roles that restrict data access at the row level. Once the report is published to the Power BI Service, users assigned to these roles only see the data they are authorized to view.
In this article, you'll learn how to create, manage, test, and deploy roles in Power BI Desktop.
What Are Roles in Power BI?
A role is a collection of security rules that determine which rows of data users can access.
Instead of creating multiple reports for different users, a single report can serve everyone while automatically filtering data according to each user's permissions.
For example:
| User | Visible Data |
|---|---|
| John | North Region |
| Mary | South Region |
| David | East Region |
All users access the same report, but each sees different data.
Understanding Row-Level Security (RLS)
Row-Level Security filters table rows based on DAX expressions.
Suppose your Sales table contains:
| Region | Sales |
|---|---|
| North | 50,000 |
| South | 42,000 |
| East | 35,000 |
| West | 61,000 |
A role with the filter:
[Region] = "North"allows users assigned to that role to see only:
| Region | Sales |
|---|---|
| North | 50,000 |
The remaining rows are hidden.
Types of Row-Level Security
Static RLS
Static RLS uses fixed filter values.
Example:
[Country]="United Kingdom"
Every user assigned to this role sees only UK data.
Advantages
Simple to implement
Easy to understand
Suitable for small organizations
Disadvantages
Requires multiple roles
Difficult to maintain when users increase
Dynamic RLS
Dynamic RLS filters data based on the currently logged-in user.
Example:
[Email] = USERPRINCIPALNAME()Instead of creating many roles, Power BI automatically determines which records belong to the current user.
Dynamic RLS is recommended for enterprise deployments.
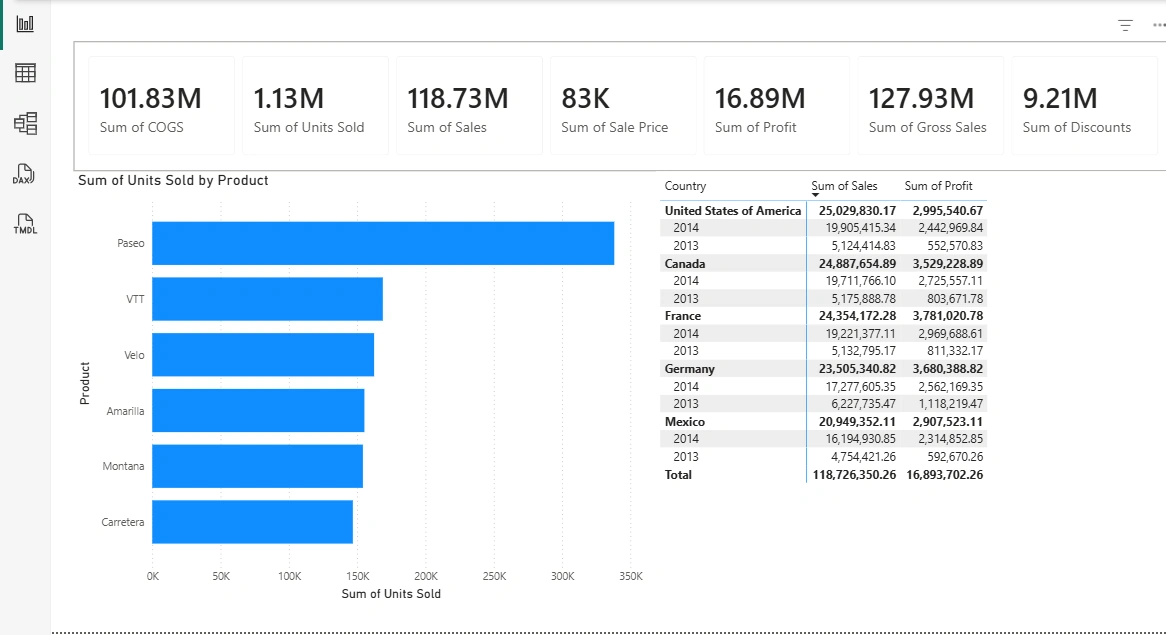
Financial Sample Dataset in Power BI
Assume the Sales report as seen below containing three visuals
Creating Roles in Power BI Desktop
Our goal is to create a simple static role using the country field to filter the report based on the country value we will specify in the create role.
In the Modeling → Manage Roles
The Manage Roles window opens.
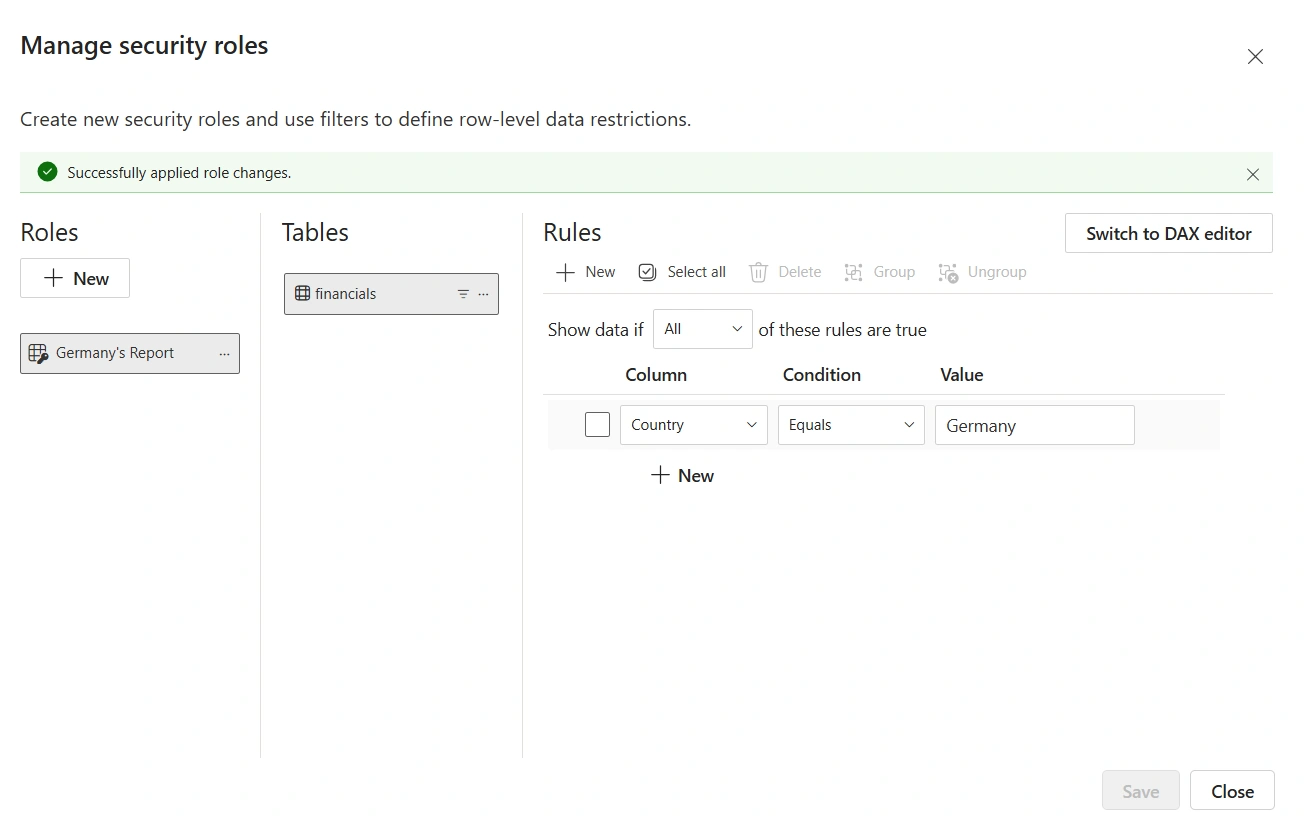
Under Roles, click New and provide name for the role. In this article, I provided Germany's Report as the name.
Under Rules, click New
Select Country column
In the Value, type Germany
Click Save
Close the window
The role has now been created.
Testing Roles
Power BI Desktop makes testing simple.
Navigate to:
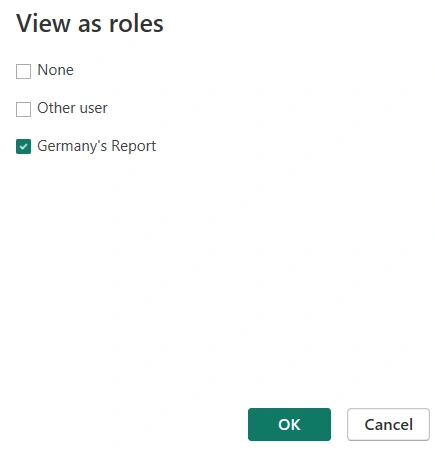
Modeling → View As
Select the desired role.
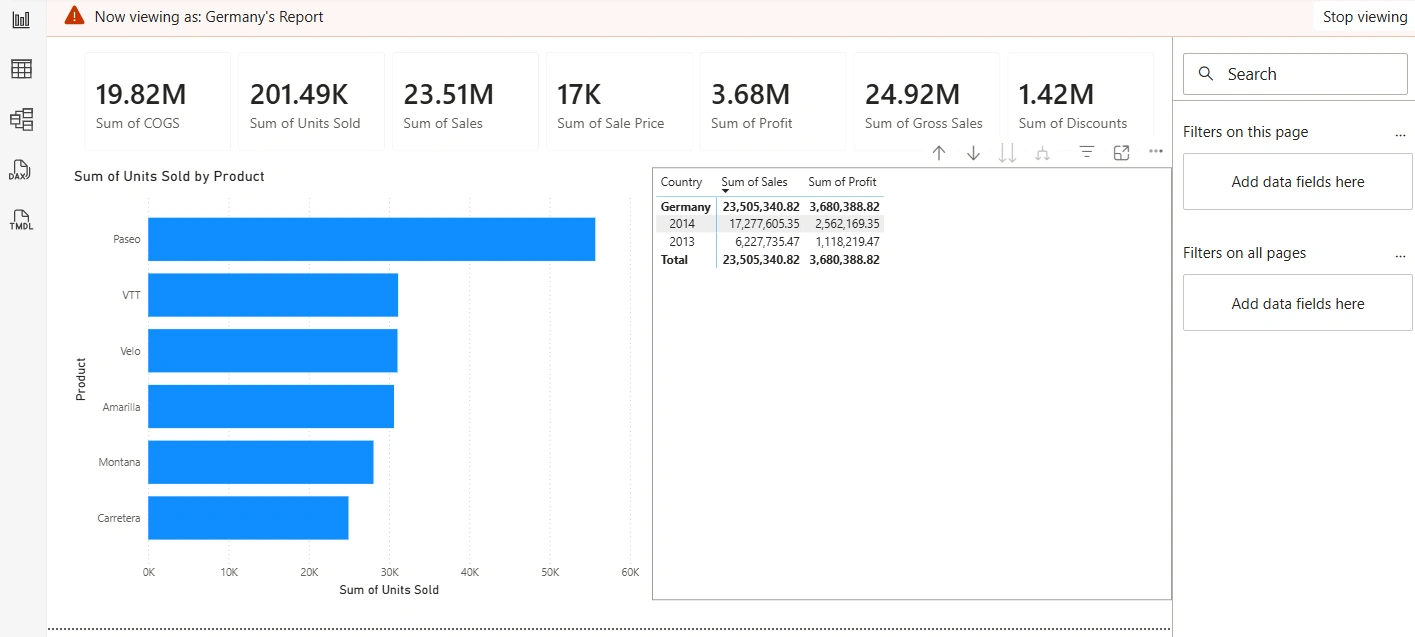
The report immediately displays only the rows available to that role as seen below. This allows developers to verify security before publishing.
Conclusion
Managing roles in Power BI Desktop is a fundamental skill for building secure, enterprise-grade analytics solutions. By leveraging Row-Level Security, developers can control exactly what each user sees without duplicating reports or datasets. Mastering roles and Row-Level Security is an essential step toward designing secure, scalable, and governance-friendly Power BI solutions.
Join the conversation! Your thoughts help the community grow.