

Introduction
In my earlier article, we had learned how to publish a static website using Firebase hosting service. Once you publish your static website using Firebase-CLI, Firebase also provides the facility to connect or map your domain name with the published website. So in this article, we will learn the step-by-step mapping of your domain name with a published website.
Get started mapping your domain with a hosted website in Firebase
Step 1
Open Firebase Console - Open the project created earlier(In this case, the project is not created. You can refer my earlier article to create a project.)
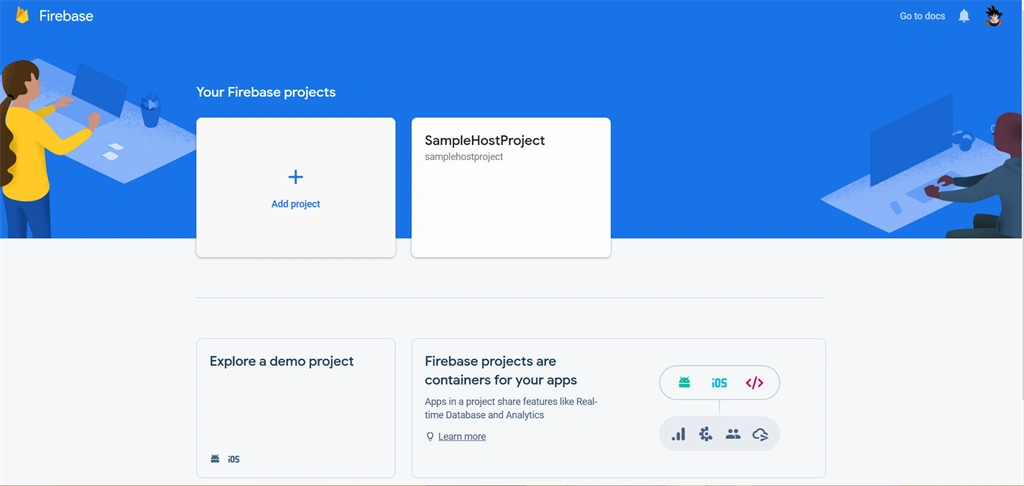
Step 2
Once opening the project, there will be HOSTING link option from the left sidebar in the dashboard screen, you need to open that screen.
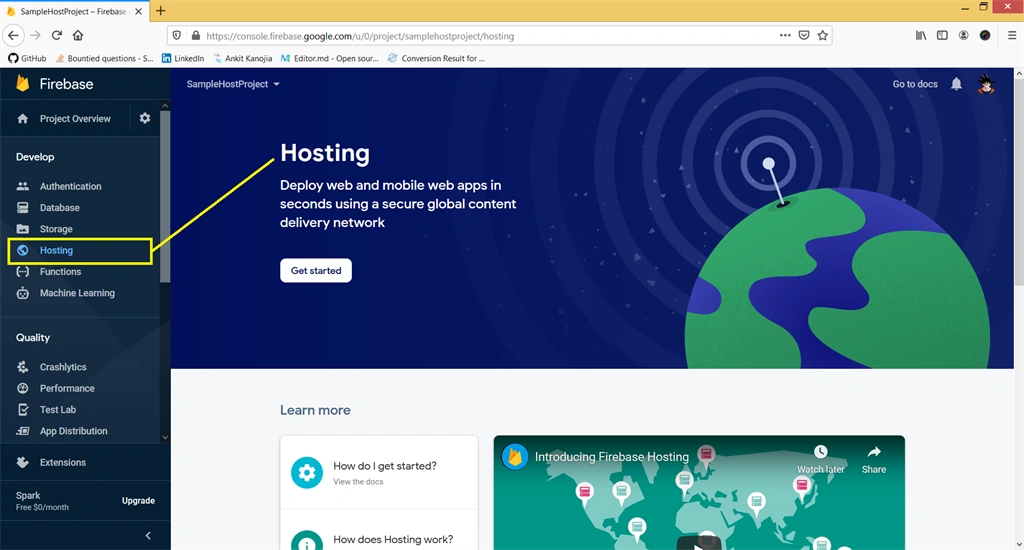
Step 3
Hosting screen will appear, from the "dashboard" menu option there will be "Add a custom domain" button, you need to click on it.
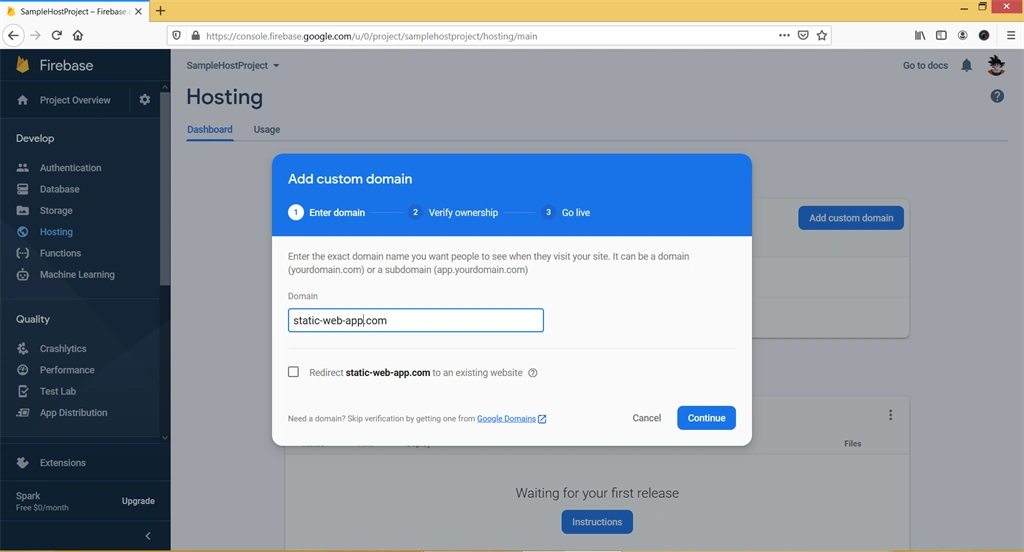
Step 4
You need to add a domain name, once the domain name is added, they will provide you the "TXT record" for DNS provider. Copy that txt record.
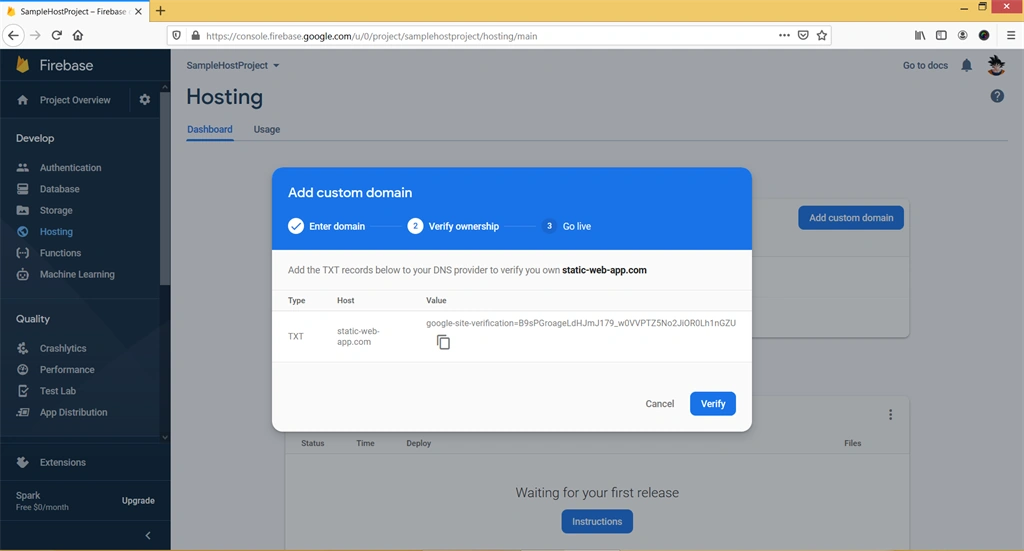
Step 5
Let's say you have purchased a domain from GoDaddy provider, then you need to verify or enter TXT Record into GoDaddy provider hosting settings. which is called "A" records for DNS settings.
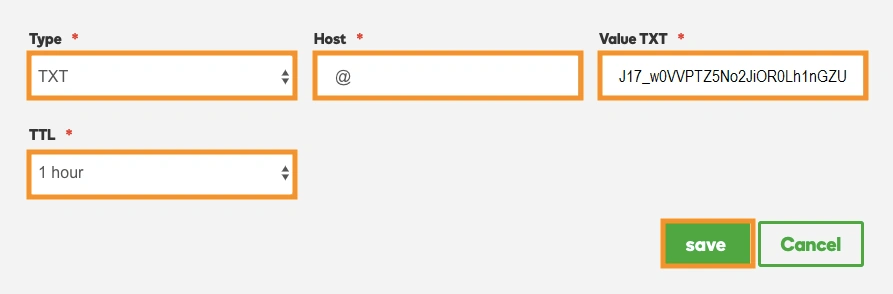
Step 6
Once a TXT Record is added, you need to add domain IP address into a setting that points to DNS.
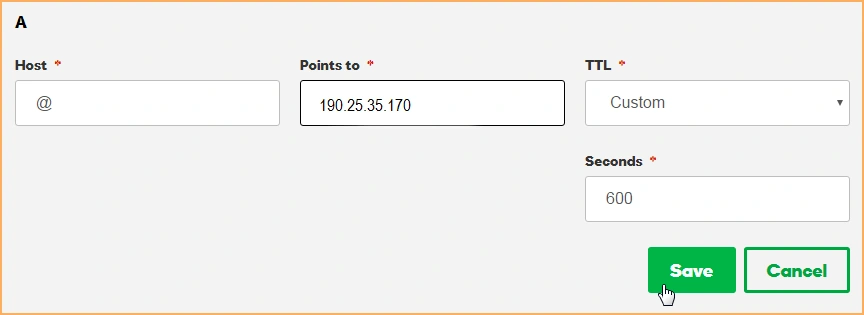
After configuring or updating DNS settings on a domain provider, it will take up to 5 minutes to 1 hour for a map or connect with the domain which you provided. Once the domain is mapped you can access your website using a domain name that you map with the hosted provider.
Summary
These are a few steps to map your custom domain or preferred domain with a published website on Firebase cloud using their services.
Join the conversation! Your thoughts help the community grow.