

This article will let you to know about how to create a Moodle in Windows Azure.
Requirements
- Windows Azure account
Follow the below steps now,
Step 1 - login with your Azure credentials,
Step 2
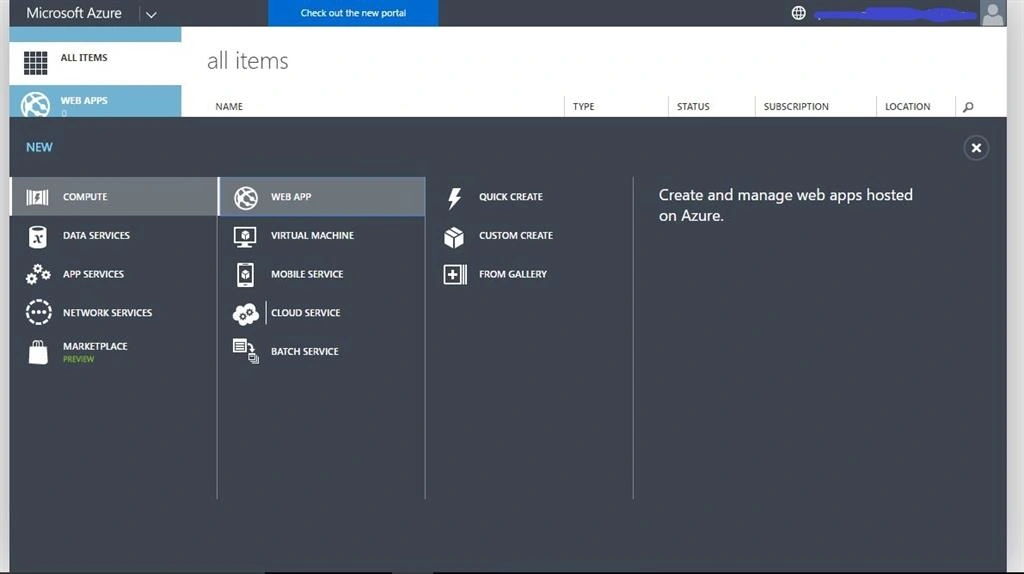
Now on the home screen of Azure management portal select New, Compute , Web App, then select From Gallery. And the window shown below appears.
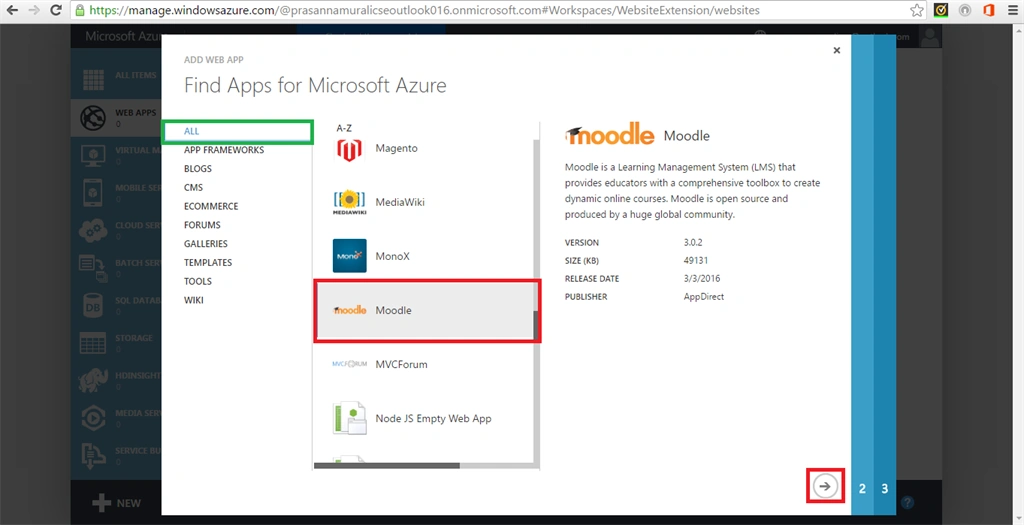
Now find the Web Apps from the gallery that is shown below. On that scroll down and find Moodle and choose Moodle and click next.
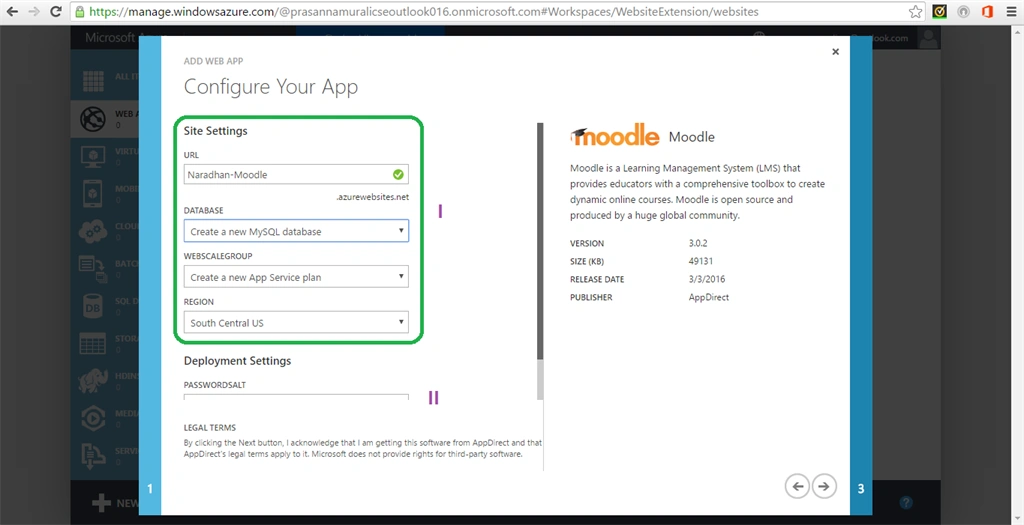
Now configure your web app as shown below in the screenshot. By giving the URL, Database, Webscale group and Region in site settings option.
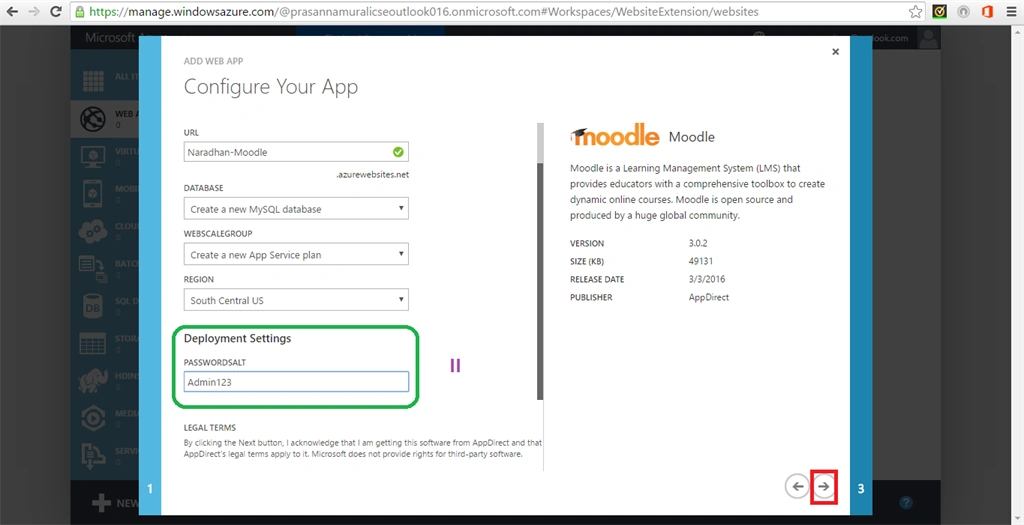
Step 6
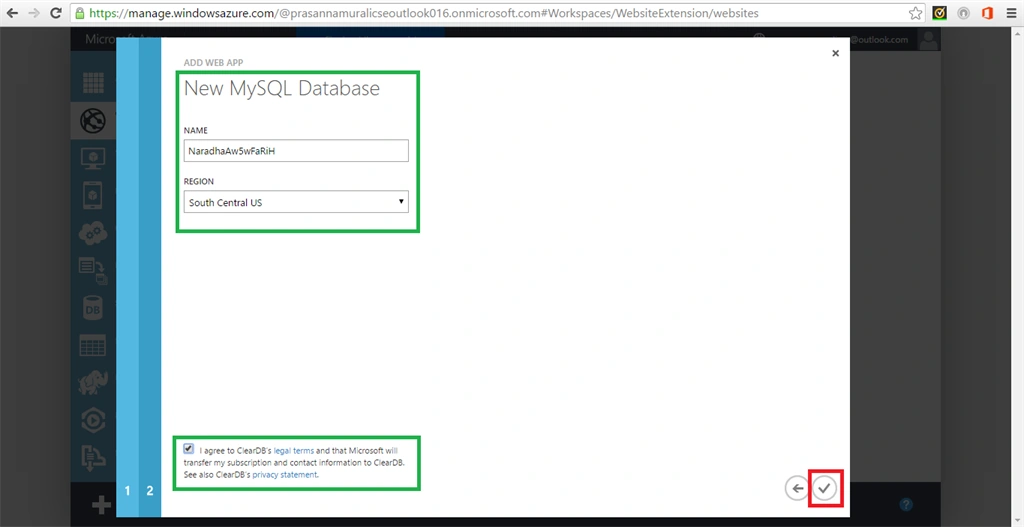
After that configure your New MySql database by name and Region. And tick the License agreement in the bottom of the page then click next.
Step 7
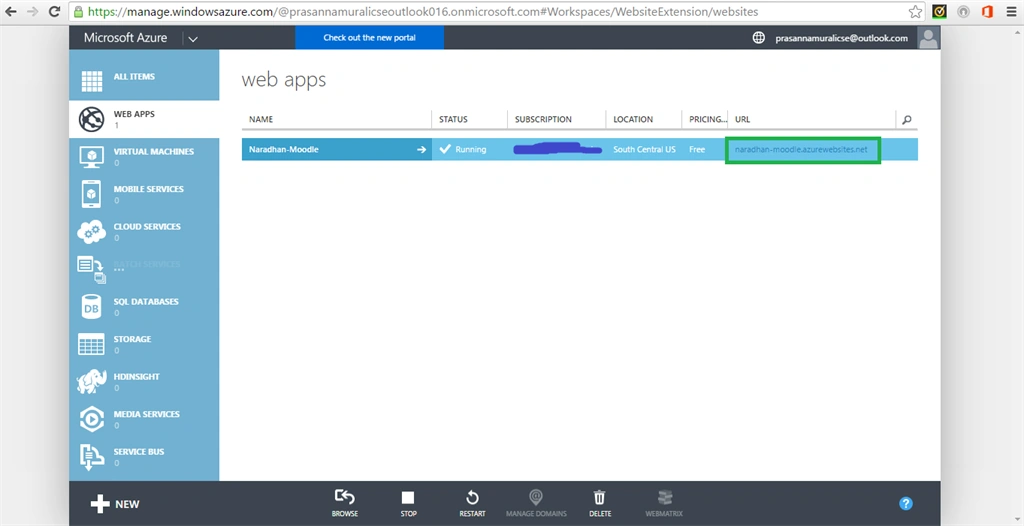
It takes some time on Azure portal and then click the URL that is available in your management portal.
Step 8
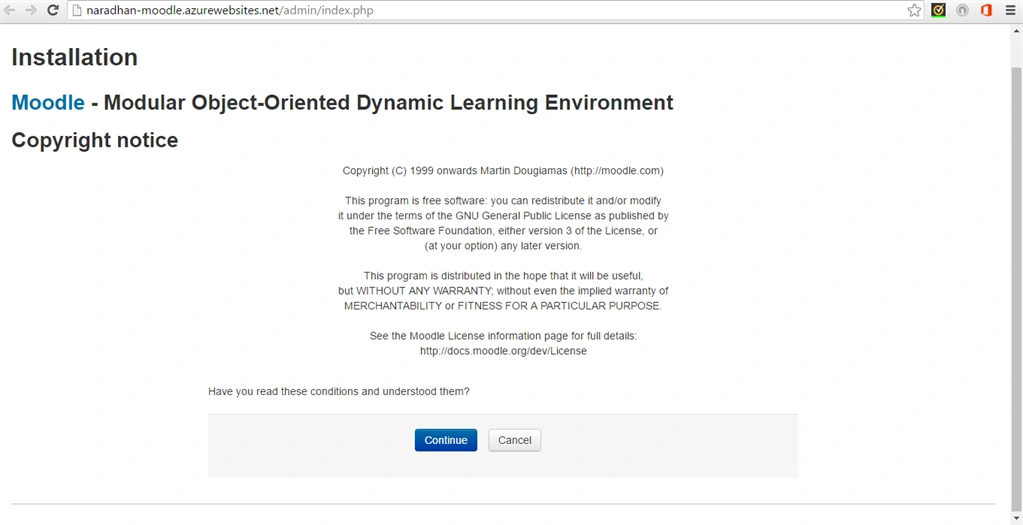
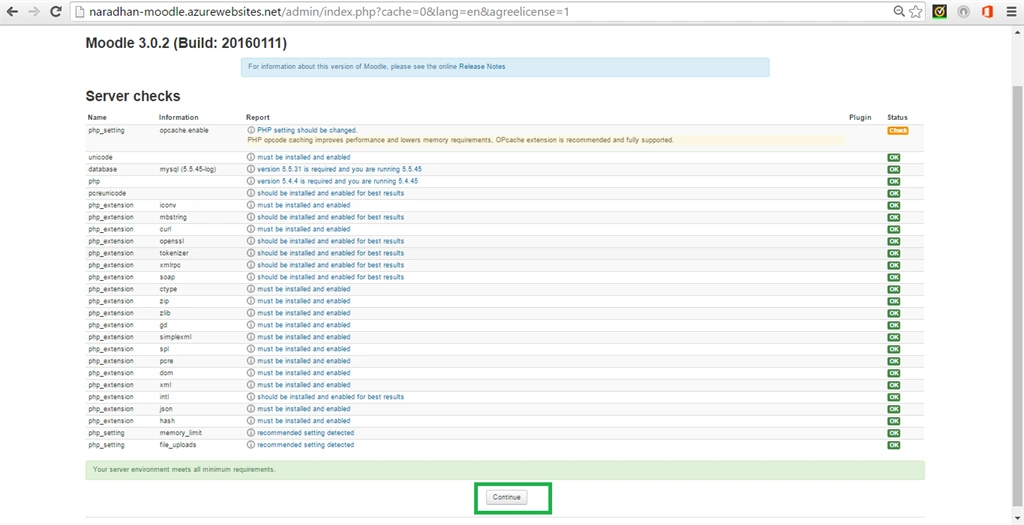
Configure the dashboard as show in the screenshot. And the link is shown in URL Bar after the dashboard installation appears click continue.
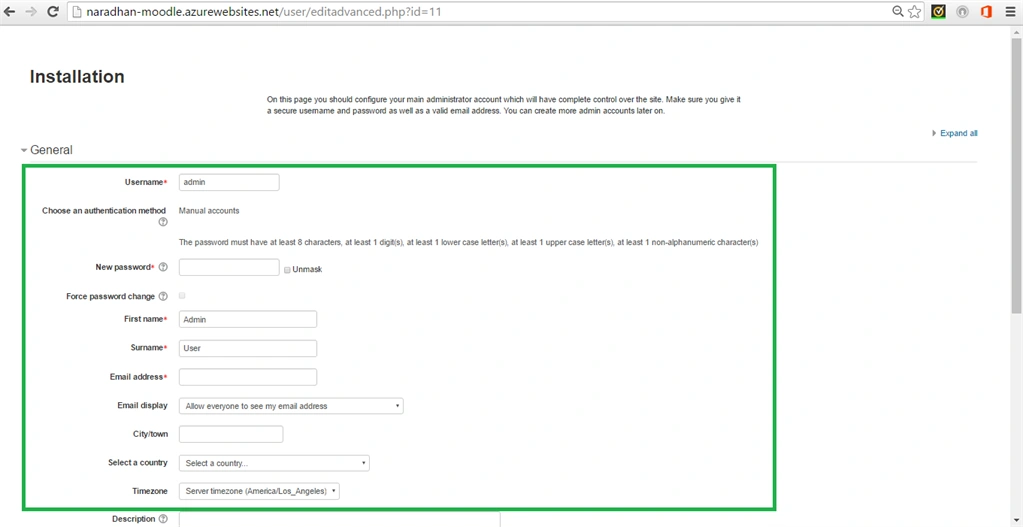
Step 10 - Configure the administrator account control and click install button,
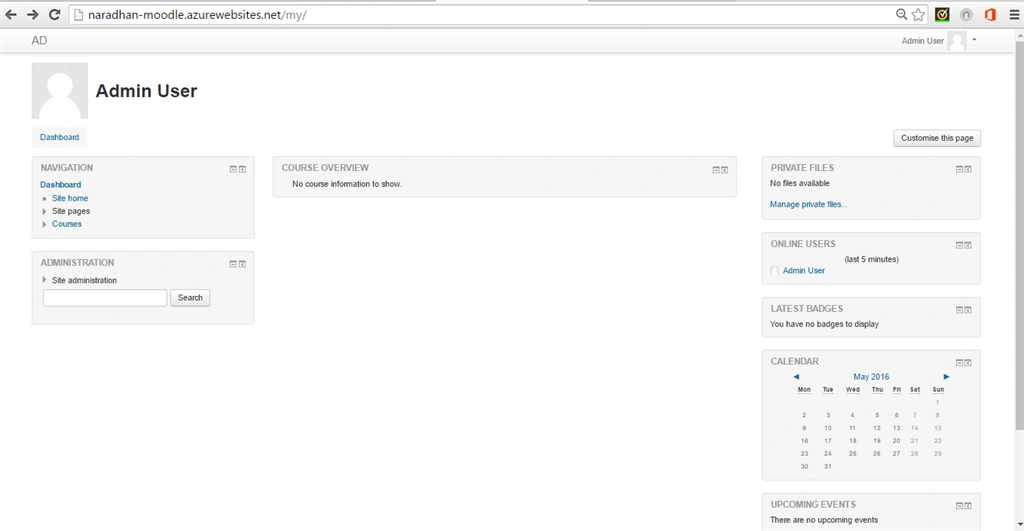
Step 11 - After installation the moodle dashboard appears as shown below.
SubashPosted Aug 2, 2016, 12:36 AM
Good
Abdul Rasheed Feroz KhanPosted May 20, 2016, 6:31 AM
nice
Prasanna MuraliPosted May 14, 2016, 9:32 AM
Thank you
Mohammed AshrafPosted May 11, 2016, 7:14 AM
Nice..
Prasanna MuraliPosted May 9, 2016, 12:37 PM
Thank you sir
Kuppurasu NagarajPosted May 9, 2016, 12:16 PM
Nice Sharing..