
I have created a custom list named “K2 Workflow Tutorials” in which a K2 workflow will be created for moving a list item. The item will be moved to the custom list named “K2 Workflow List”. Please refer to my previous article to create a K2 workflow in SharePoint 2013 Online.
Go to K2 designer, drag and drop a Move List Item step from the List Item workflow steps in the ribbon interface.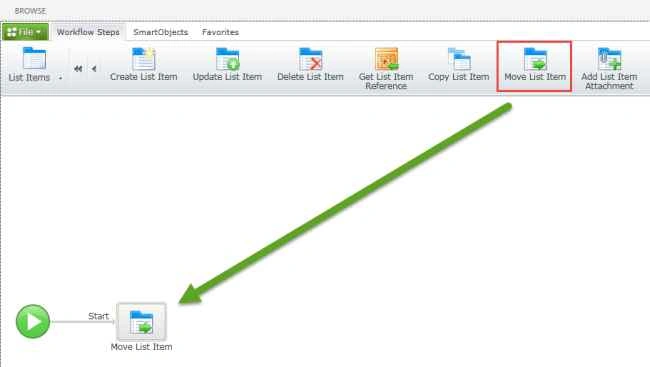
Specify a list item that must be moved and then click the Next button.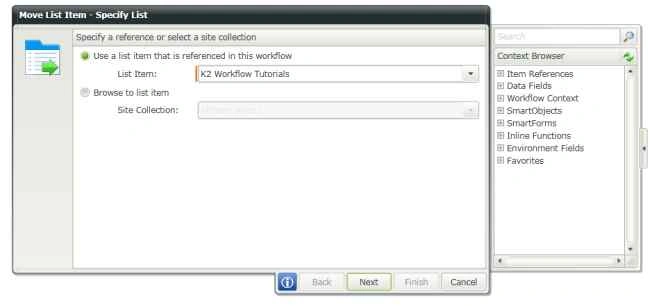
Specify the destination to where to move the list item and then click the Next button.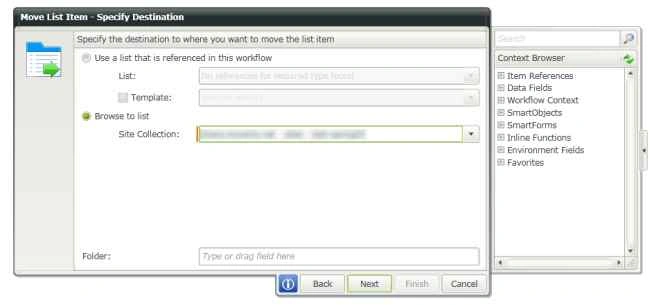
Specify the destination list and then click the Next button.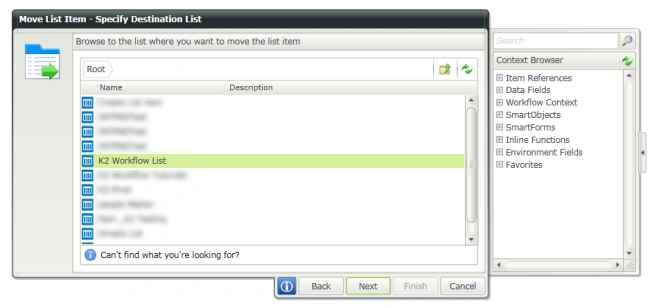
Specify the properties for the list item and then click the Finish button.
Note: I have only a “Title” field in the custom list because of which properties are not displayed.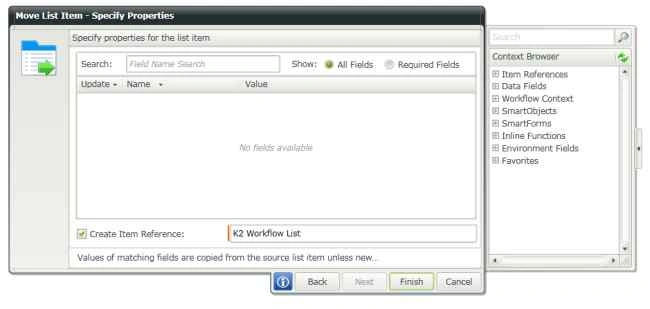
Deploy the workflow. Create a list item in “K2 Workflow Tutorials”. After a few minutes the workflow will be completed and the list item will be moved to the “K2 Workflow List” list.

Move List Item using K2 Workflow in SharePoint 2013 Online
Join the conversation! Your thoughts help the community grow.
Sign in to leave a comment
It is the same account you read, post and publish with — and you will come straight back to this page.
Kumaresh RajalingamPosted Mar 24, 2016, 10:02 AM
Nice share sir
Vaikesh K PPosted Aug 25, 2015, 1:40 AM
Nice Share
Karthikeyan KPosted Aug 23, 2015, 11:24 PM
Good one sir...
Gopi ChandPosted Aug 23, 2015, 1:56 PM
Good one sir
Gowtham KPosted Aug 23, 2015, 1:41 PM
Nice Share
Santhakumar MunuswamyPosted Aug 23, 2015, 11:33 AM
Thanks for Nice article
Mohammed IbrahimPosted Aug 23, 2015, 9:46 AM
nice information
Sibeesh VenuPosted Aug 23, 2015, 3:46 AM
Nice Share
RakeshPosted Aug 23, 2015, 3:31 AM
Nice share sir
Rajeesh MenothPosted Aug 23, 2015, 2:40 AM
Thanks for sharing sir