

Introduction
As we know, nowadays clients want applications not only in the English language, but also in their own language, if they don't know Englisjh.
So it's very important for software engineers to know how to develop applications in multiple languages.
So I have decided to write an article on Multi Language Applications in Angular.
In this article we will try to learn step by step demonstration how to create this with a step by step demonstration.
As we know Angular is a complete java script language framework.
NGX-Translate is provided, and used for internationalization library for Angular. With the help of this we will internationalize the Angular app in multiple languages.
What is Internationalization?
Internationalization is the process of designing and preparing your app to be usable in different languages.
Localization is the process of translating your internationalized app into specific languages for particular locales.
– angular.io
In this article I will try to cover following things,
- Prerequisites
- Create Angular App
- ngx-translate
- TranslateService
- Language Switcher
- TranslatePipe
Prerequisites
- Angular CLI
- Latest version of Node and NPM
- Any IDE, For example VS Code, or Visula Studio
Create Angular App
Before creating your new application you can check your angular CLI version and node version using the following command:
Simply just enter below in the command line,
- ng --version OR ng v OR ng -v
Using the above command not only the Angular version but also the Node version is mentioned. For Node only use this command: node -v you will see this image.
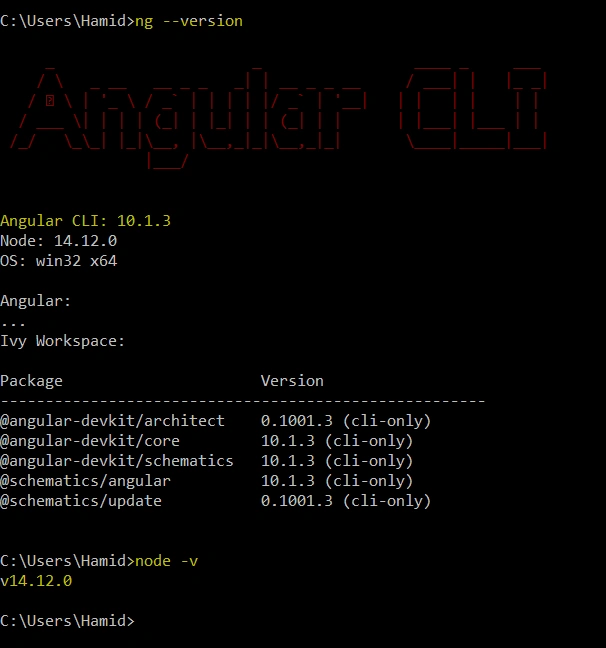
If you have not installed, then please install the command as below
- npm install -g @angular/cli
After that run this command to create your application:
- ng new test-app
- # Would you like to add Angular routing? No
- # Which stylesheet format would you like to use? CSS
Now you need to move on your directive project so please use this command,
cd test-app
After creating your project, structure would be like the image below,
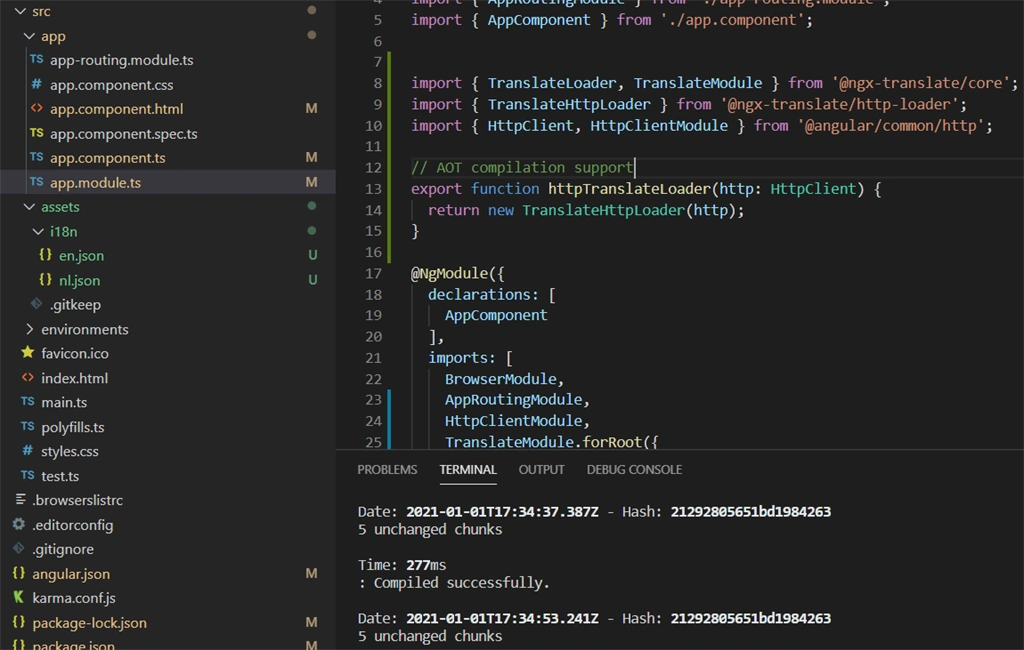
If you want to install bootstrap to make your form a little more beautiful then please use this command for installing bootstrap.
npm install bootstrap
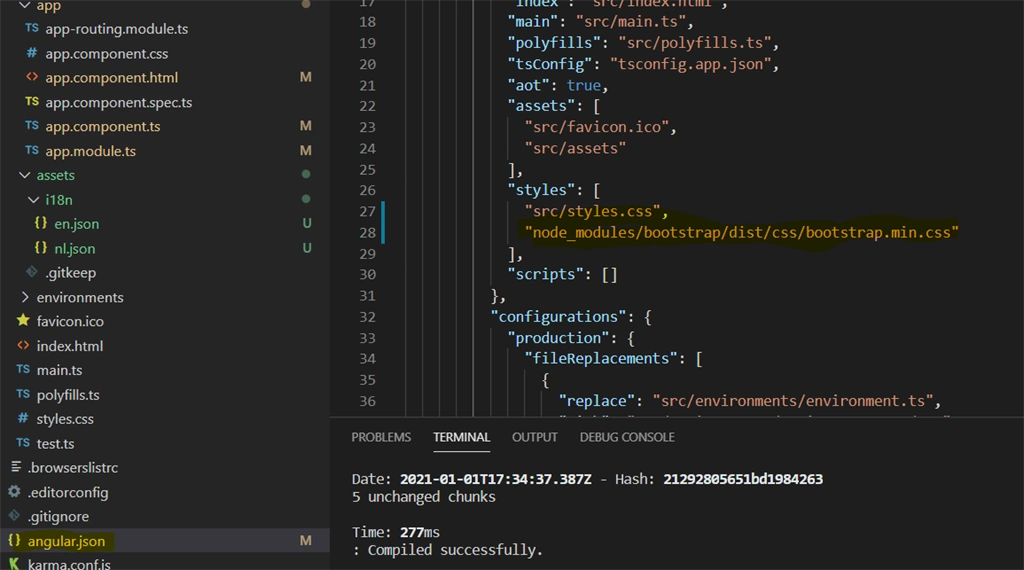
After installing bootstrap add the Bootstrap CSS path in angular.json file like below
- "styles": [
- "src/styles.css",
- "node_modules/bootstrap/dist/css/bootstrap.min.css"
- ]
Please refer to the image below,
Now you have done your basic app, so for testing just run the following command to check if your application is running properly,
ng serve --open
ngx-translate
Now for translating the application nun the following command to install the ngx-translate packages in your application
- npm i @ngx-translate/core --save
- npm i @ngx-translate/http-loader --save
Here we have installed 2 packages, the responsibility of the above packages are as follows:
The @ngx-translate/core package includes the required services, pipe, and directives, to convert the content in your expected languages and @ngx-translate/http-loader packege service aids in fetching the translation files from a webserver.
Now import and register the TranslateModule in app.module.ts file
- import { BrowserModule } from '@angular/platform-browser';
- import { NgModule } from '@angular/core';
- import { AppComponent } from './app.component';
- import { TranslateLoader, TranslateModule } from '@ngx-translate/core';
- import { TranslateHttpLoader } from '@ngx-translate/http-loader';
- import { HttpClient, HttpClientModule } from '@angular/common/http';
- @NgModule({
- declarations: [
- AppComponent
- ],
- imports: [
- BrowserModule,
- HttpClientModule,
- TranslateModule.forRoot({
- loader: {
- provide: TranslateLoader,
- useFactory: httpTranslateLoader,
- deps: [HttpClient]
- }
- })
- ],
- providers: [],
- bootstrap: [AppComponent]
- })
- export class AppModule { }
- // AOT compilation support
- export function httpTranslateLoader(http: HttpClient) {
- return new TranslateHttpLoader(http);
- }
TranslateService
For the translation you have to create language specific file in assets folder as suggested.
Open the assets folder and create “i18n” folder inside of it. In “i18n” folder, you have to add lang.json files along with the country code.
For example en.json, ar.json, fr.json etc. and data would be in key-value pair format.
en.json example,
Aamir MalikPosted Apr 15, 2023, 8:02 AM
Multi language transation not working in lazy load module