

Introduction
In this article, we are going to cover how to access the JSON web token (jwt) and also to protect our routes by the JSON web token.
Have you ever thought about the process of authentication? What lies under the layers of abstraction and complexity? Nothing out of the ordinary. It's a method of encrypting data and generating a one-of-a-kind token that users can use to identify themselves. Your identity is verified with this token. It will verify your identity and grant you access to a variety of services. If you don't recognize any of these words, don't worry, I'll explain everything below.
Setup
Before we get started into this we should have few things installed in our machine.
Prerequisites & Dependencies
Create a new folder with project name (NodeAuthAPI) and open the same folder in Visual Studio Code (VS Code)
Run the following command to initialize our package.json file.
- npm init --yes
Install all our remaining dependencies
- npm install express jsonwebtoken
- npm install -g nodemon
Why these Dependencies?
express - running on the server (Port number)
jsonwebtoken - This will be used to sign and verify Json web tokens.
nodemon - will use this to restart our server automatically whenever we make changes to our files.
Create a file named index.js inside the project.
Project Structure
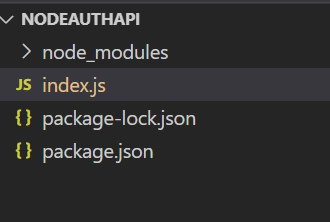
Let's import the packages in index.js file
- const express = require("express");
- const jwt = require("jsonwebtoken");
- const app = express();
- app.listen(5000,()=>console.log('listening on port 5000'));
Run the command in the terminal - nodemon to check the output
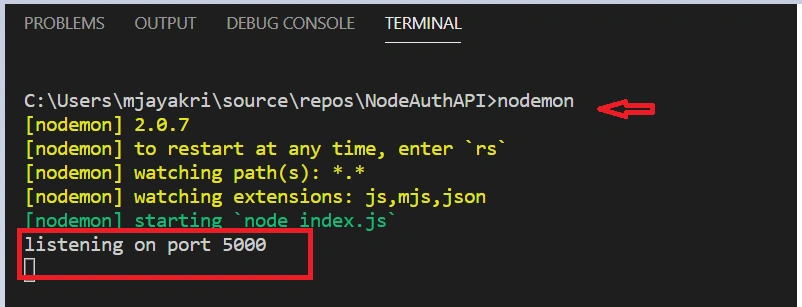
Create a simple get method to check the output in Postman.
index.js
- app.get('/api',(req, res) => {
- res.json({
- message: 'Welcome to the API!',
- });
- });
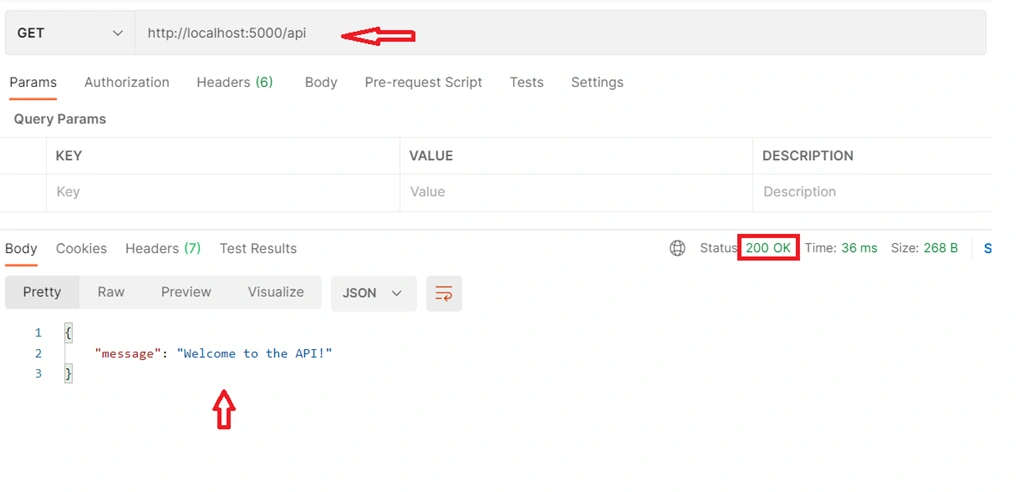
So it is confirmed that our get method is working as expected, Now configure the jwt setup to check with the actual authentication mechanism. Create a post API Login Method with Mock username and Email and also i have setup the token expiration seconds in the same method.
- app.post('/api/Login',(req, res) => {
- //Mock user
- const user ={
- username: 'jk',
- email: '[email protected]'
- }
- jwt.sign({user:user},'secretkey',{expiresIn: '30s'},(err,token)=>{
- res.json({token})
- })
- })
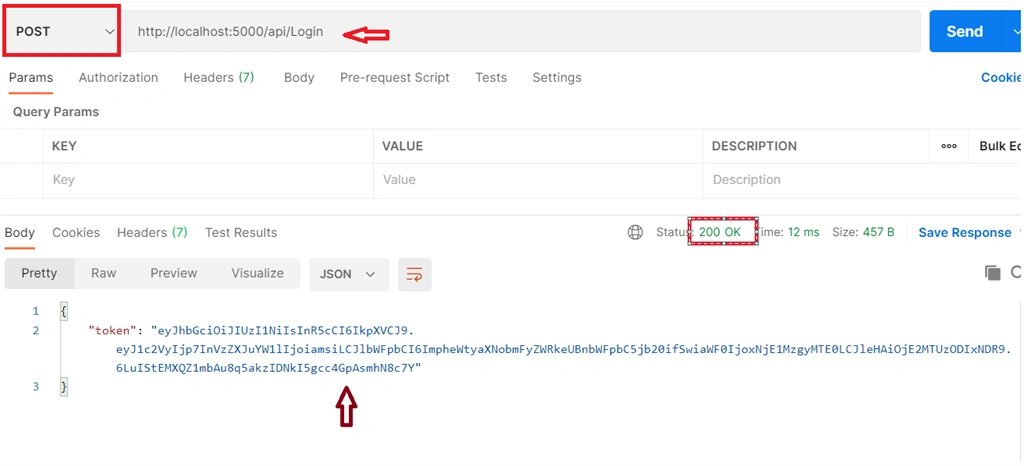
The token is generated with basic credentials, Now we need to validate another API with this token to access the credentials.
Create a function and verify the token which will be passed as a header
Sample Authorization : Bearer <your token>
- //Access token
- //Authorization : Bearer <access token>
- //Verify Token
- function verifyToken(req, res,next) {
- //Get Auth header value
- const bearerHearder = req.headers['authorization'];
- //check if bearer is undefined
- if(typeof bearerHearder != 'undefined'){
- //split at the space
- const bearer = bearerHearder.split(' ');
- //Get the token from array
- const bearerToken = bearer[1];
- // set the token
- req.token = bearerToken;
- //Next middleware
- next();
- }else{
- //Forbidden
- res.sendStatus(403);
- }
- }
- // Post to Validate the API with jwt token
- app.post('/api/validate',verifyToken,(req, res)=>{
- jwt.verify(req.token,'secretkey',(err,authData)=>{
- if(err){
- res.sendStatus(403);
- }else{
- res.json({
- message: 'Validated',
- authData
- });
- }
- });
- });
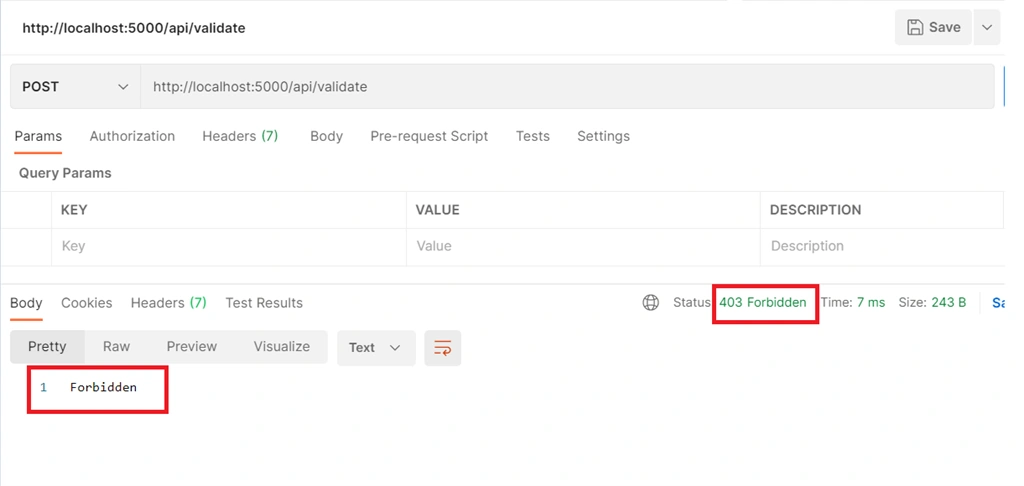
If you are trying to access the validate API without passing the token it will give us 403 Forbidden because of unauthorized access.
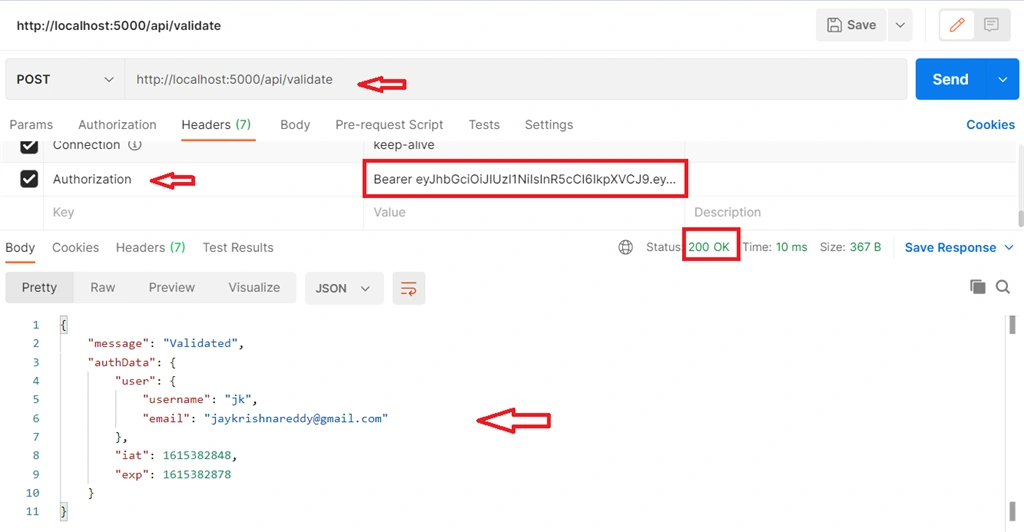
Now let's get the token first by accessing the Login API and then pass the same token as the header in the Validate API to get the access and as well as result.
Note
After 30 sec the token will expire because we defined the expiration time in code, we need to get the token again by accessing the login API
Thanks for reading this article, Hope you got a clear picture in understanding this Node.js API Authentication with jwt.
...Keep learning !!!
Anup SamantaPosted May 31, 2024, 6:45 AM
This is really outstanding explanation. Thanks a lot !!!!!!
Boe RitzhaPosted Dec 23, 2021, 10:48 AM
How much refresh token is needed?