

Introduction
This is the article which continuation of the CI/CD implementation for simple web application using Azure DevOps - Part 1, explains how to implement CI/CD (Continues Integration and Continues Delivery) for a simple web application using Azure DevOps. In the previous article, we have covered until the pipeline configuration for a simple web API application. In this article, we will cover the remaining portion of CI/CD.
What is Release Pipeline in Azure DevOps?
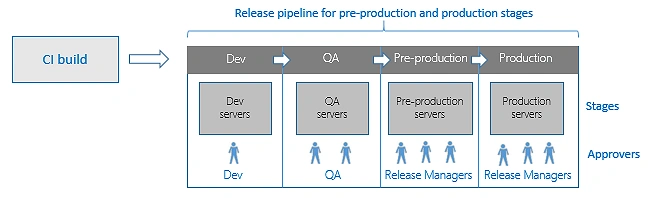
Release pipelines in Azure Pipelines and Team Foundation Server (TFS 2015.2 and later) help your team continuously deliver software to your customers at a faster pace and with lower risk. You can fully automate the testing and delivery of your software in multiple stages all the way to production, or set up semi-automated processes with approvals and on-demand deployments. For more details, release pipeline management.
Step 1
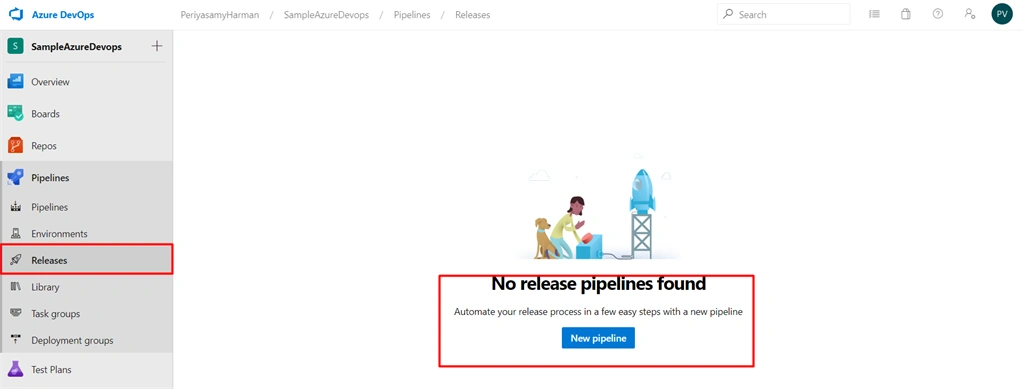
So, as of now, we have configured pipeline settings. Let's move to release the pipeline configuration. Click the release menu from the left side menu bar and click on Create a New Release Pipeline.
Step 2
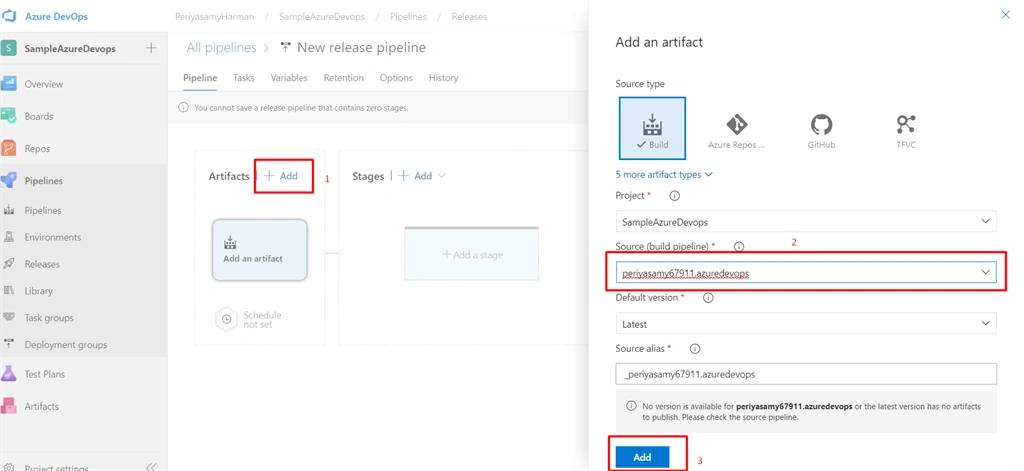
You will be redirected to release pipeline page, there you can configure artifacts and stages. An artifact is a deployable component of your application. It is typically produced through a Continuous Integration or a build pipeline. So let's configure artifacts like below. You can see the source (build pipeline) in the below screenshot. There you have to select our corresponding pipeline.
Step 3
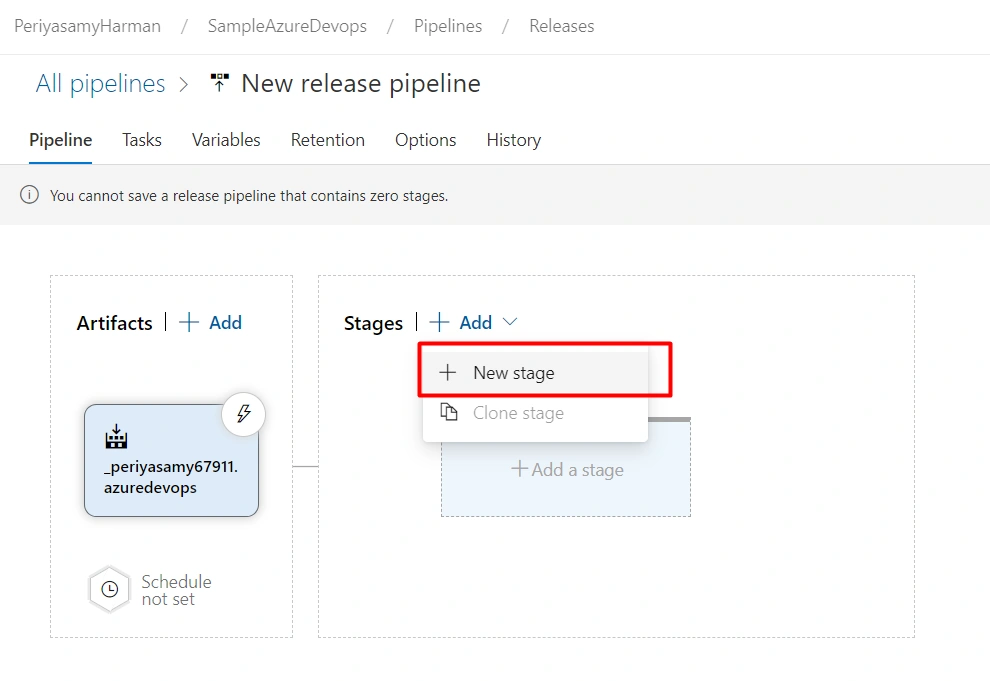
The next step is to configure the release stages. Stages are a collection of related jobs, such as the “Build”, “Test”, or “Deploy.” I used stages to build my application, and then target the deployment to multiple environments like (Dev, QA, Staging, Production). To add a new stage, click add a stage button shown in the below screenshot.
Step 4
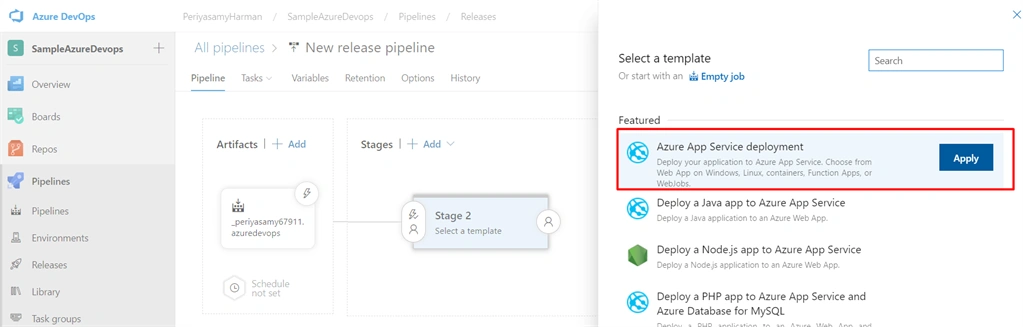
Next, we have to select an appropriate deployment service. There are multiple services available to deploy our application. As of now, I am going with Azure App Service Deployment.
Step 5
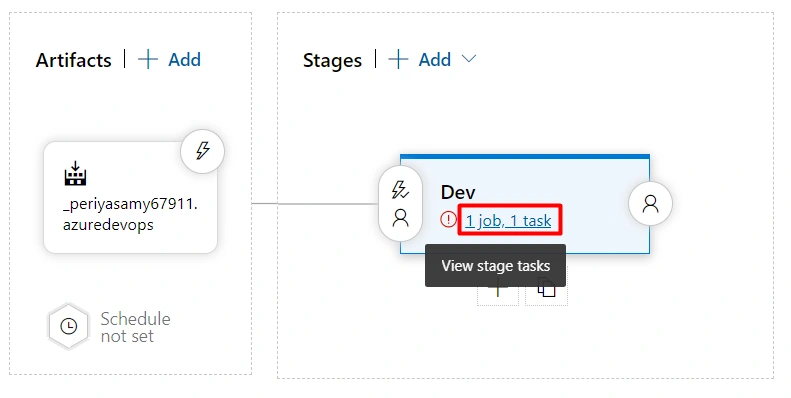
In the next step, you have to configure agent jobs and tasks for the particular stage. So, click on the stage that we have created and configure the stage configuration.
Step 6
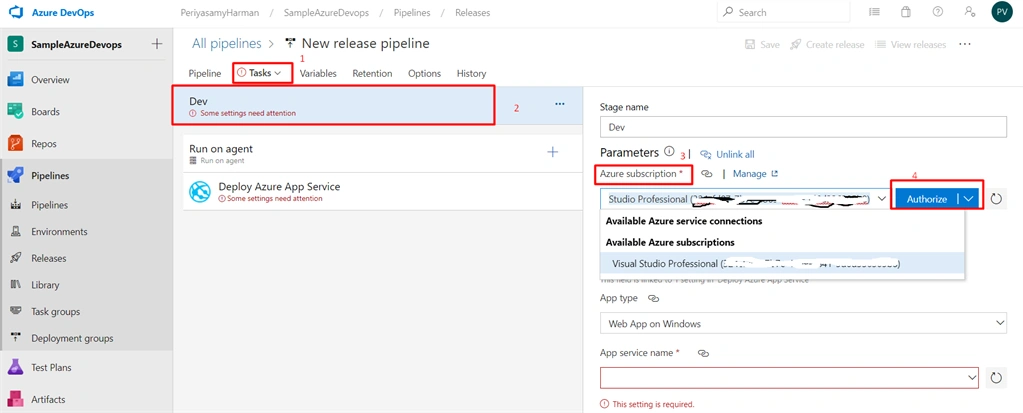
Here you can configure jobs and tasks. Let's do a task configuration like below (as we selected Azure Service). Once you select Azure subscription, then click the Authorize button.
Step 7
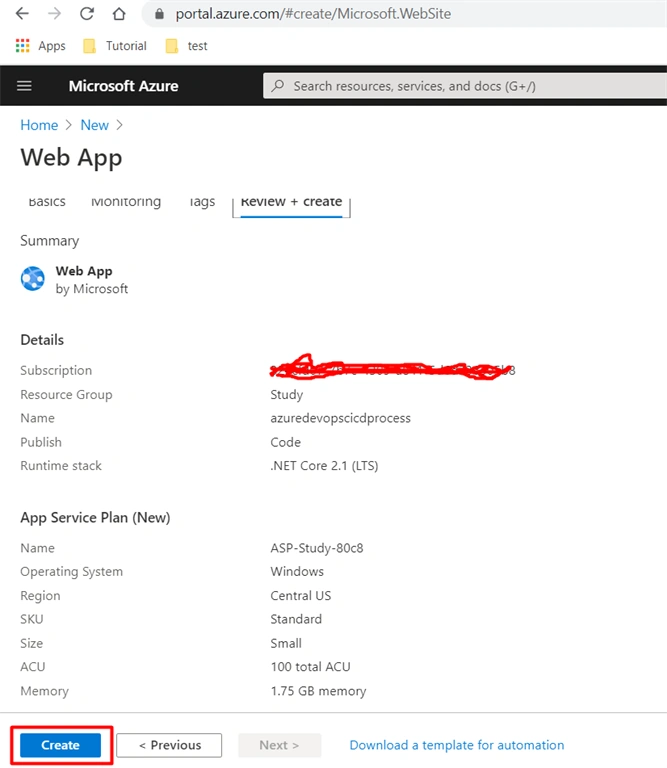
You can see that we don't have an app service name listed out. It is because we haven't created an Azure app service for this application. To do that, we need to login to portal.azure.com and create it.
Note
Application URL https://azuredevopscicdprocess.azurewebsites.net
Step 8
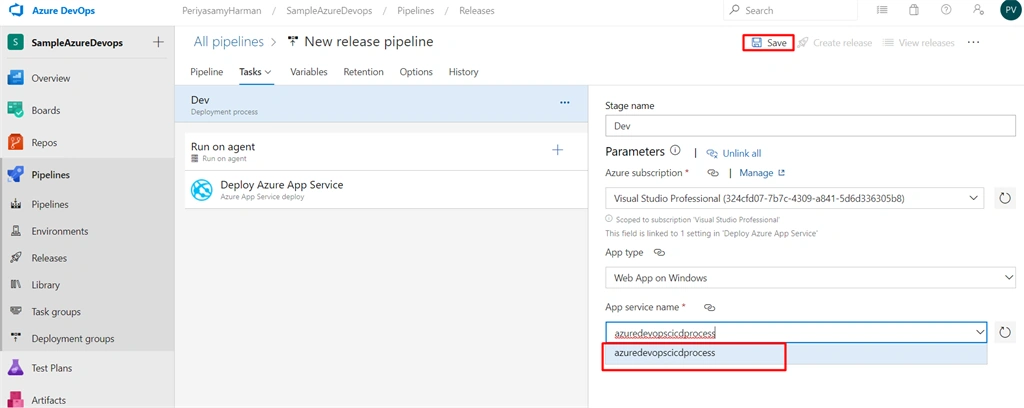
Now we can refresh the App Service field and select the app service name that we created and hit save.
Step 9
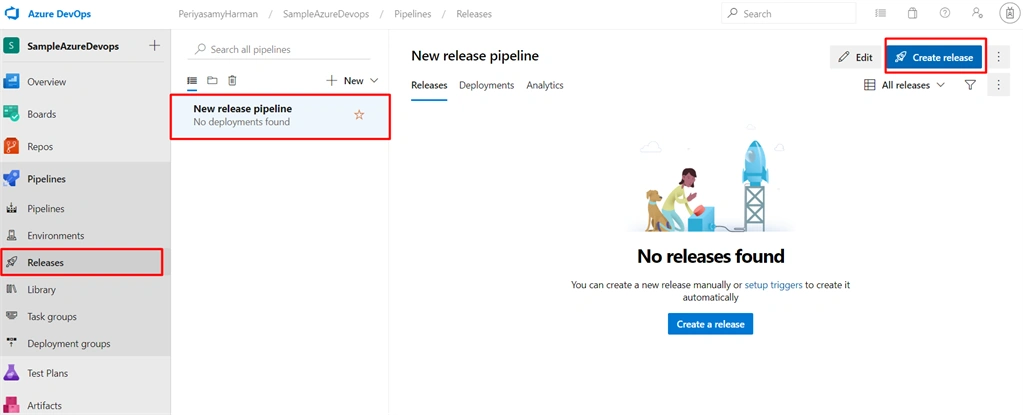
Once the release configuration has completed, we can create a release pipeline and deploy it. To do that, click the create release button and select the appropriate settings.
Step 10
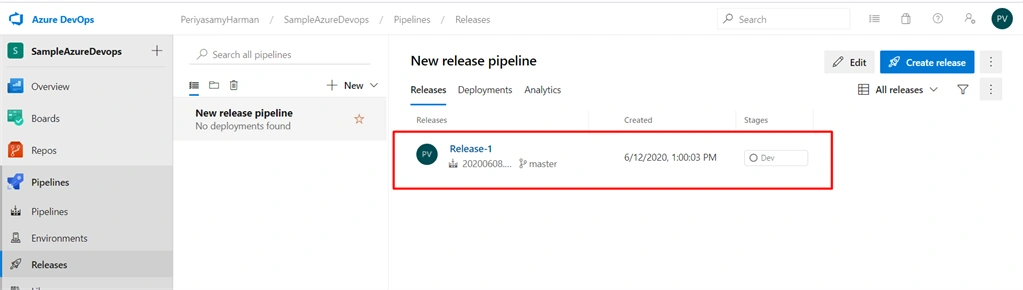
Once the release pipeline is created, we can see the following screen with the created release. It is not yet deployed since we went with manual deployment.
Step 11
To trigger an automatic deployment, we have to configure a few settings in the release pipeline. So let's do that. Go to the release pipeline and edit it like shown below.
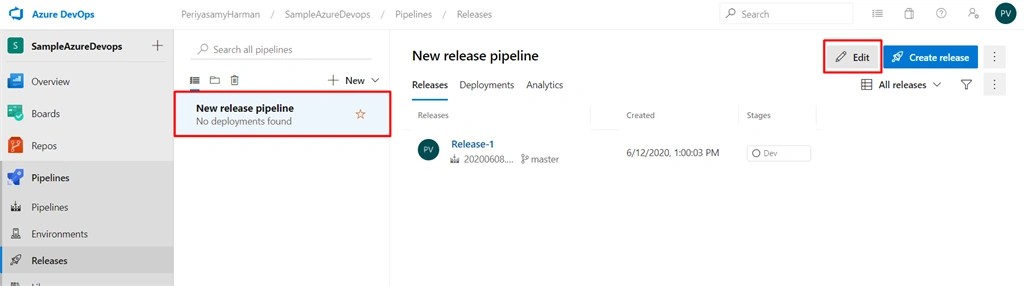
You can see the following release pipeline screen and enable the continuous deployment trigger.
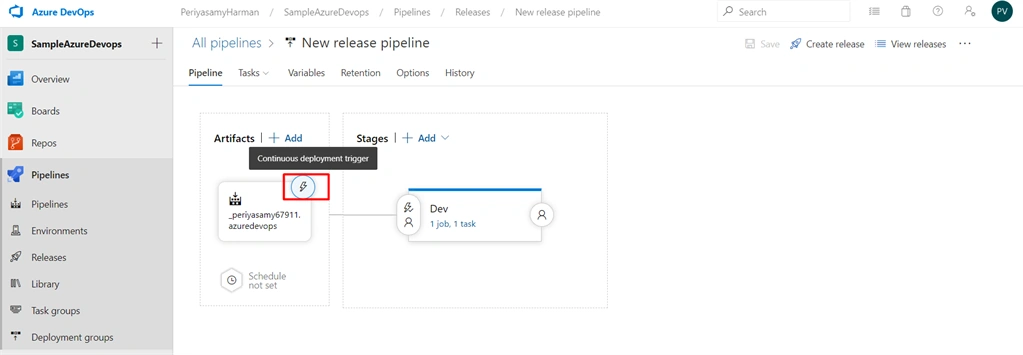
Step 12
Next, you can enable automatic trigger deployment. Still, you can find more options like the pull request trigger and branch-based automatic trigger deployment. As of now, we are enabling the automatic trigger deployment option only, and the rest of them, leaving as is.
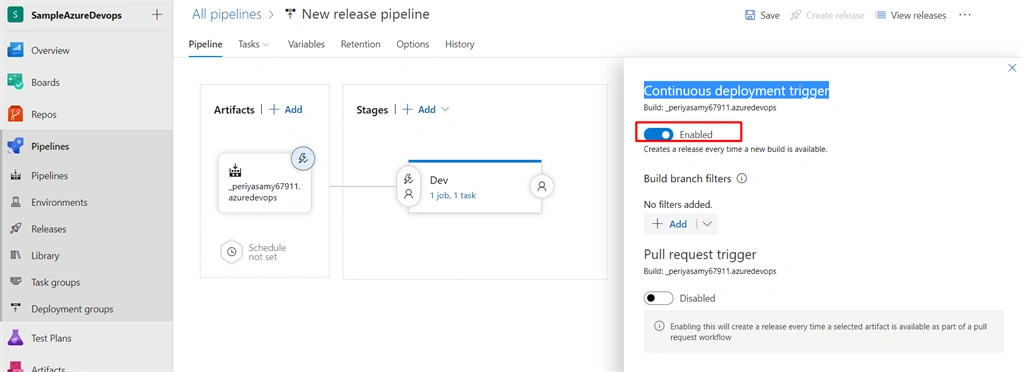
Note
If you want any pre and post-deployment access conditions, you can configure them on the screen itself.
Step 13
That's it, great we are almost done. Let's try it in action by checking the code from Visual Studio.
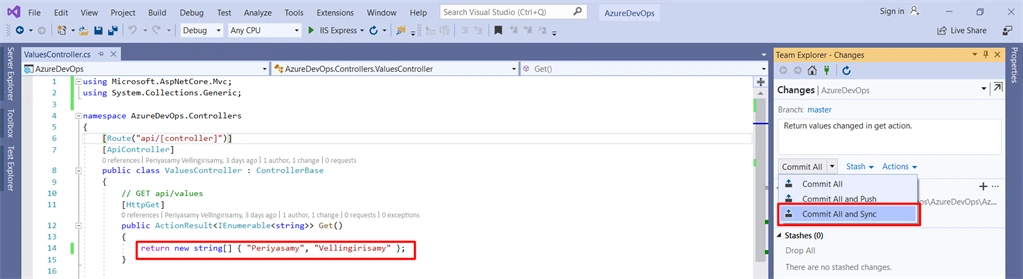
So, once you check-in the code, the pipeline will be automatically built like below.
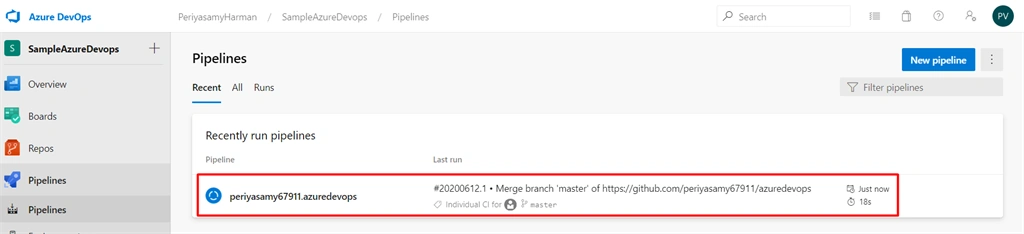
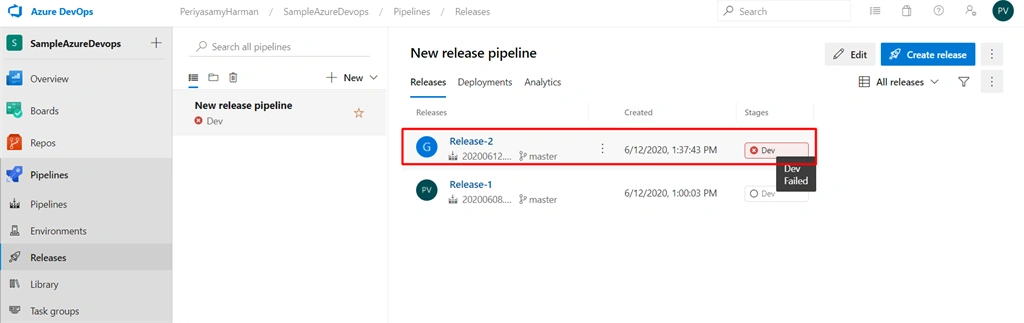
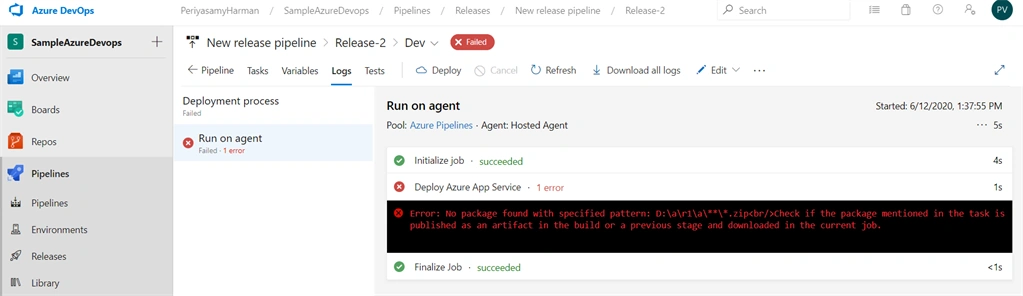
After the pipeline succeeded, navigate to the release menu. Oops, here release-2 is failing. Let's investigate the log to find out the issue. To do that, click on the Release-2 section.
Configuration Error
Step 14
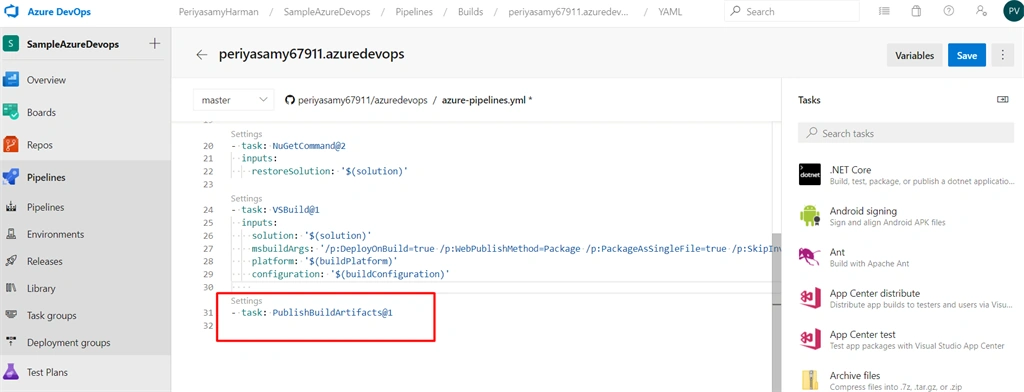
To fix this issue, we have to edit the pipeline configuration as shown below. Go to the pipeline edit setting and add the below script in the YAML file and hit save. Once you click the save button, the pipeline will automatically be built and release also will be triggered.
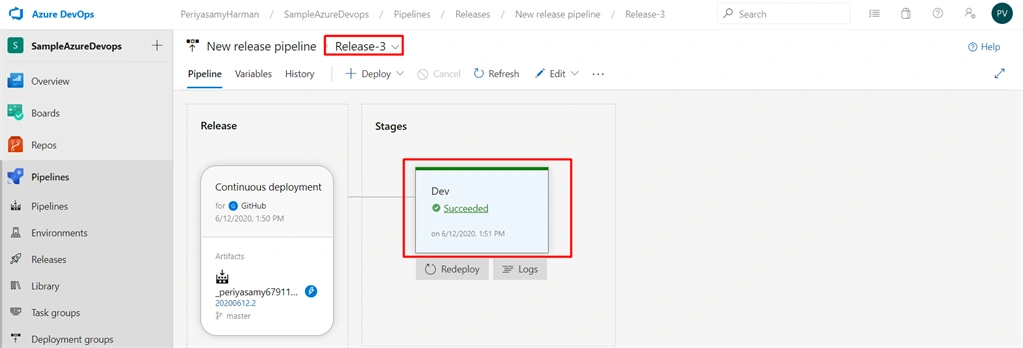
Yes, the release has successfully completed. You can see the below result.
Step 15
Let's see the result in the hosted URL. Navigate to the below URL.

Summary
So, whenever you check the code into a particular configured branch of a particular source repository (GitHub), Azure DevOps automatically performs the CD process and deploys our application, making it easy. Azure DevOps has a lot of features. As of now, I have explained the basic steps to achieve CI/CD.
I hope this was helpful to you. Enjoy ;)
Bose NagarajanPosted Jun 28, 2021, 7:58 AM
Awesome!!!