
Why Use Prepareforsegue Method
In this article, we will learn how to create and implement prepareforsegue in iPhone applications. Basically, this is a method used when you use the table view and you need it when the user clicks on each cell -- it moves on the next View Controller. For this purpose we use this method.
Creating a Simple Project
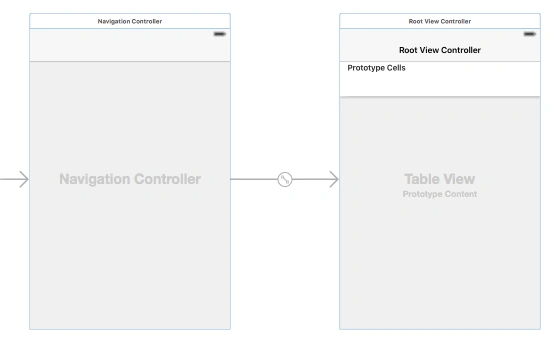
Open the Xcode editor and choose the Single View Application and create the project; after that you will see in the Main.Storyboard file there is one ViewController, delete this ViewController and in the object library search Navigation Controller and drag and drop it into Main.Storyboard file and now set the Navigation Controller to “Is Initial View Controller”.
Set Up Table View Cell
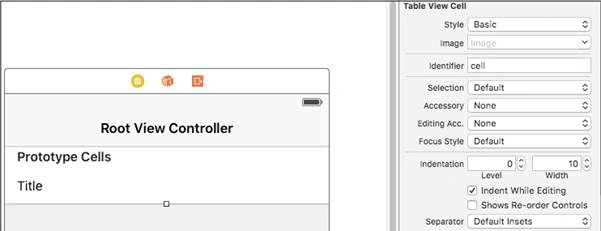
Now click on table view cell and you see that in your table view cell the identifier is blank, now write “cell” in an identifier textbox. Then select the style “Basic”.
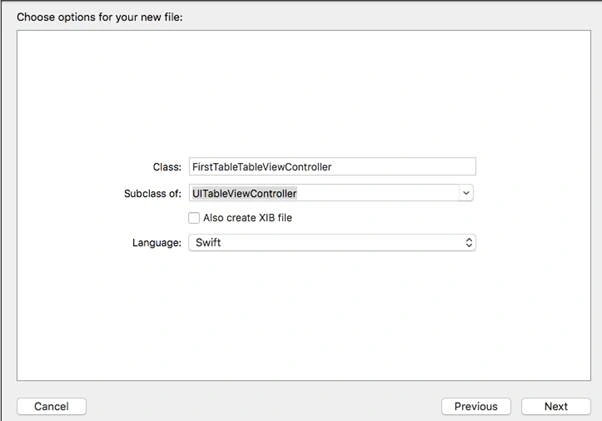
After that create a New File and select the Cocoa Touch Class and then click next and then give a class name and extend from UITableViewController and then press next and click on create -- now your Controller file is ready,
Assign Class to FirstViewController
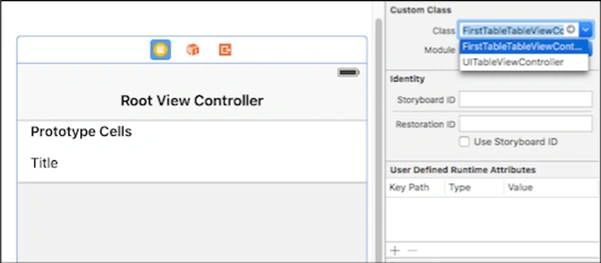
Now go the Main.Storyboard section and click on Root View Controller and assign the class which is now called “FirstTableViewController”.
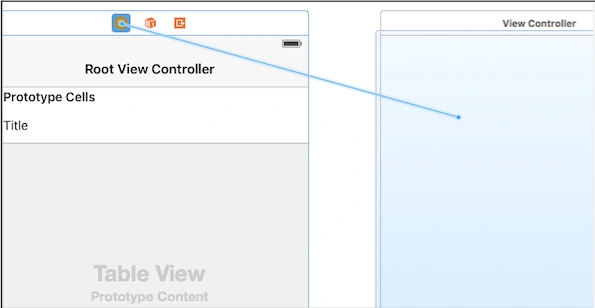
Now drag and drop the new ViewController in Main.Storyboard file and connect the Root View Controller to Next ViewController -- click on the yellow button, press Ctrl button and click on the Next View Controller and choose the ManualSegue “Show”.
Set Up Segue
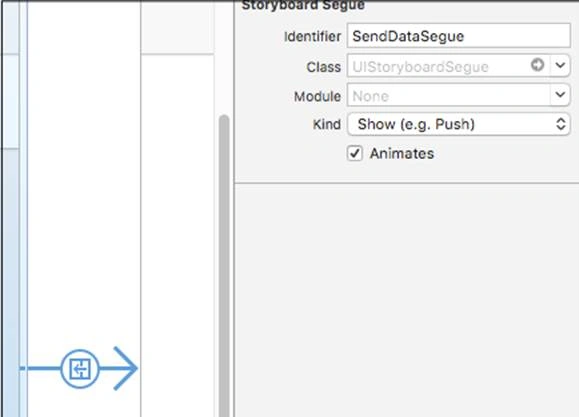
Now click on the circle which appears between the two View Controllers and set the name of the segue identifier, I set the name of the identifier “SendDataSegue”.
Create A second ViewController
Now create a second ViewController with the same procedure of FirstViewController -- now I give the name of the class “SecondViewController” and extend with the subclass “UIViewController” and then create a class.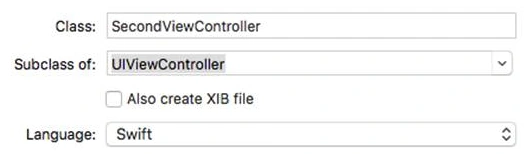
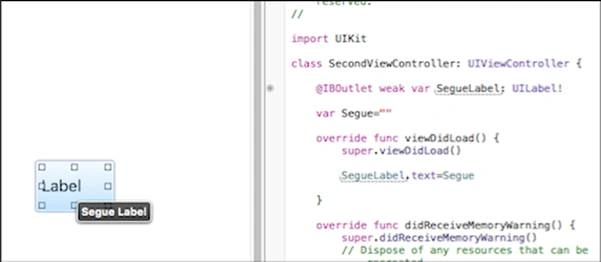
Now go the Second ViewController and bind the class “SecondViewController” as in the previous procedure for FirstViewController, and then drag a label and drop it into the second ViewController and choose the Assistant Mode in the left side. Open the the Second ViewController and in the left side open the SecondViewController class, then click on it while pressing the Ctrl button and drag it into the right class and choose the label name. I chose the label name “SegueLabel”.
Set Up FirstTableViewController
Now go to the the FirstTableViewController file and set the following code in it.

Passing Values Using PrepareForSegue In iOS App
Join the conversation! Your thoughts help the community grow.
Sign in to leave a comment
It is the same account you read, post and publish with — and you will come straight back to this page.
Shobana JPosted Jul 7, 2016, 7:24 AM
Nice one
Vignesh ManiPosted Jul 6, 2016, 4:21 PM
Nice
kalu singh raoPosted Jul 5, 2016, 4:39 AM
Nice...