

Introduction
In this article, we will see how to implement a cascading dropdown in PowerApps and save it back to the SharePoint list.
We will create an example for employee information and we will have two dropdowns: country and state. We want to filter state dropdown based on the country dropdown selection. Let's start with step-by-step implementation.
Demo
Create SharePoint lists as below:
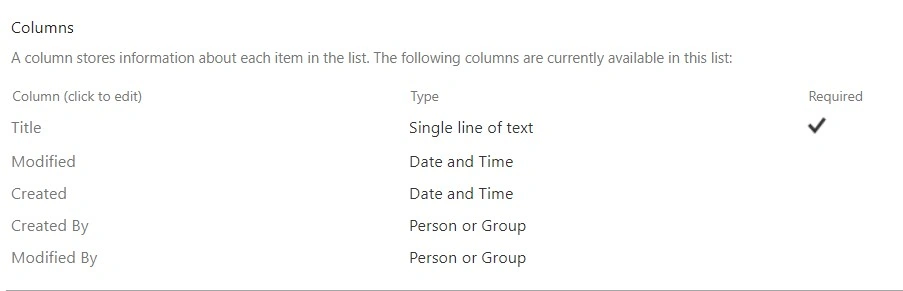
- Create a list called Country with the below field:
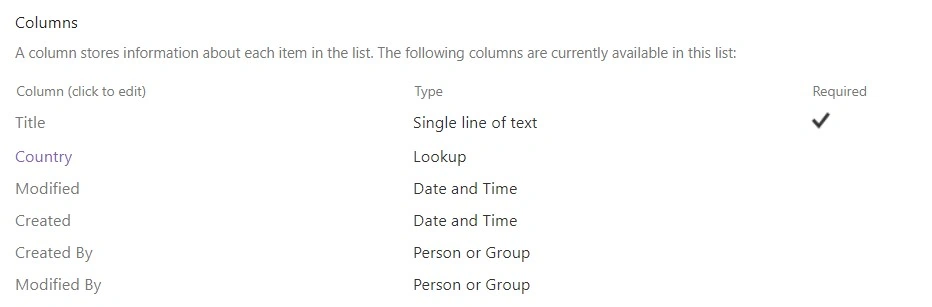
- Create a list called State with the below fields:
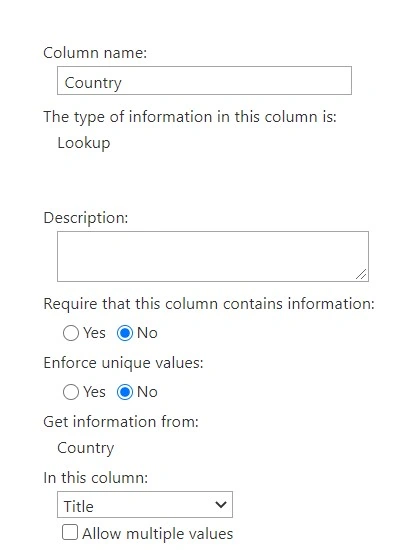
- Set the Country Lookup column as shown below:
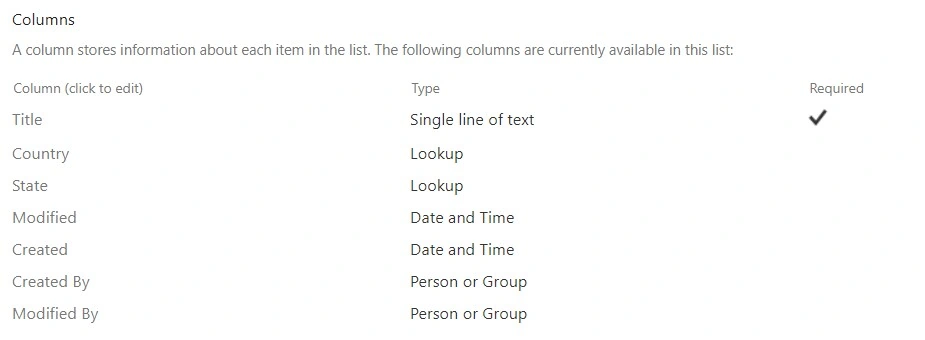
- Create a list called Employees with the below fields:
- Set the Country Lookup as created above in State List.
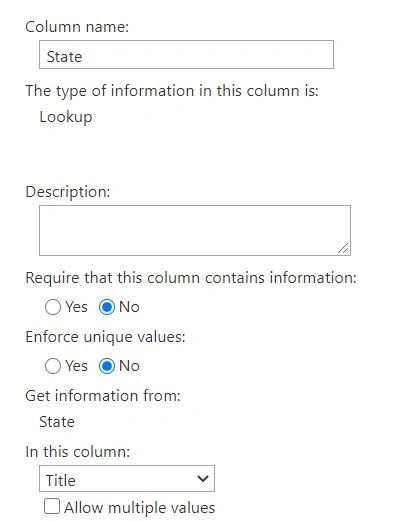
- Set the State Lookup as below:
Let's start the PowerApps Implementation step by step:
- Move to the PowerApps
- Go to the Create > Canvas app from blank
-
Give App name and select format
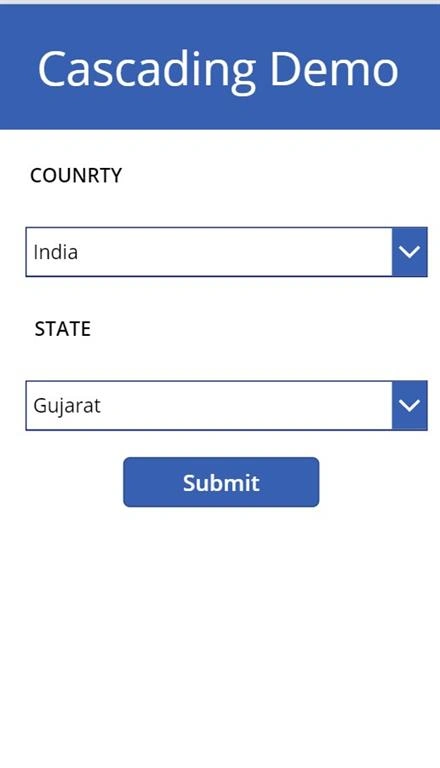
Now we will add the required controls (Labels, Dropdowns, and button) in our PowerApps as shown below:
Add the required Data sources as below:
- Go to the View on top ribbon > Select Data source > Search SharePoint > Add connection > Connect to the SharePoint Site > Select lists (Country ,State and Employees).
Map data source with Dropdowns:
- Select Country Dropdown - Set Items Property as shown below:

- Select State Dropdown - Set Items Property as shown below:

Now we will save the record in SharePoint list as shown below.
Select the Submit button - Set OnSelect Property as shown below:
- Patch(
- Employees,
- Defaults(Employees),
- {
- Title: "test",
- Country: {
- '@odata.type': "#Microsoft.Azure.Connectors.SharePoint.SPListExpandedUser",
- Id: ddCountry.Selected.ID,
- Value: ddCountry.Selected.Title
- },
- State: {
- '@odata.type': "#Microsoft.Azure.Connectors.SharePoint.SPListExpandedUser",
- Id: ddState.Selected.ID,
- Value: ddState.Selected.Name
- }
- }
- );
- Notify("Record Saved Successfully!!!");
Refer to this article to learn how to use the Patch function in PowerApps.

Output
Summary
In this article, we have seen how to create a cascading dropdown in PowerApps with a demo application.
I hope you like this article, share it with others. Give your valuable feedback and suggestions in the comments section below.
Sharing is caring!!!
shaik ashikPosted Aug 18, 2020, 1:59 AM
May I know what is the use of '@odata.type': "#Microsoft.Azure.Connectors.SharePoint.SPListExpandedUser",