

Introduction
Parts
- Arduino Mega 2560
- Pulse sensor
- Hookup Wires
Pulse sensor
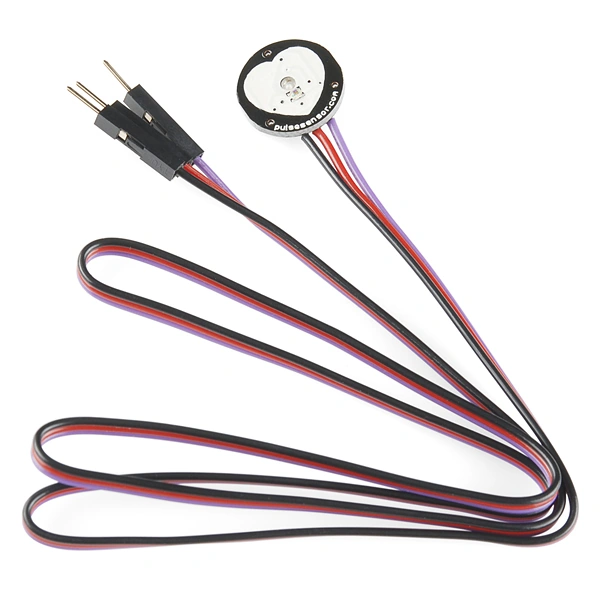
Figure 1: Pulse Sensor
- Pulse Sensor is a plug-and-play heart-rate sensor for Arduino Mega 2560
- It can be used to check the pulse in our bodies.
- It can be used by students, artists, and developers.
Connection
In the pulse sensor, they can have the 3 pins,
- The first can be a negative pin connected to the Gnd of the Arduino Mega 2560.
- The second can be a positive pin connected to the 5V of the Arduino Mega 2560.
- The third can be an input pin connected to the Analog pin A0 of the Arduino Mega 2560.
Programming
- int pulsePin = 0; // Pulse Sensor purple wire connected to analog pin 0
- int blinkPin = 13; // pin to blink led at each beat
- int fadePin = 5; // pin to do fancy classy fading blink at each beat
- int fadeRate = 0; // used to fade LED on with PWM on fadePin
- // these variables are volatile because they are used during the interrupt service routine!
- volatile int BPM; // used to hold the pulse rate
- volatile int Signal; // holds the incoming raw data
- volatile int IBI = 600; // holds the time between beats, must be seeded!
- volatile boolean Pulse = false; // true when pulse wave is high, false when it's low
- volatile boolean QS = false; // becomes true when Arduino finds a beat.
- void setup()
- {
- pinMode(blinkPin, OUTPUT); // pin that will blink to your heartbeat!
- pinMode(fadePin, OUTPUT); // pin that will fade to your heartbeat!
- Serial.begin(115200); // we agree to talk fast!
- interruptSetup(); // sets up to read Pulse Sensor signal every 2mS
- }
- void loop()
- {
- sendDataToProcessing('S', Signal); // send Processing the raw Pulse Sensor data
- if (QS == true)
- { // Quantified Self flag is true when arduino finds a heartbeat
- fadeRate = 255; // Set 'fadeRate' Variable to 255 to fade LED with pulse
- sendDataToProcessing('B', BPM); // send heart rate with a 'B' prefix
- sendDataToProcessing('Q', IBI); // send time between beats with a 'Q' prefix
- QS = false; // reset the Quantified Self flag for next time
- }
- ledFadeToBeat();
- delay(20); // take a break
- }
- void ledFadeToBeat()
- {
- fadeRate -= 15; // set LED fade value
- fadeRate = constrain(fadeRate, 0, 255); // keep LED fade value from going into negative numbers!
- analogWrite(fadePin, fadeRate); // fade LED
- }
- void sendDataToProcessing(char symbol, int data)
- {
- Serial.print(symbol); // symbol prefix tells Processing what type of data is coming
- Serial.println(data); // the data to send culminating in a carriage return
- }
- Check the pulse in the monitor / smart mobile.
- When the pulse is normal the LED blinks.
- We can monitor the pulse with the correct data and symbols.
Output
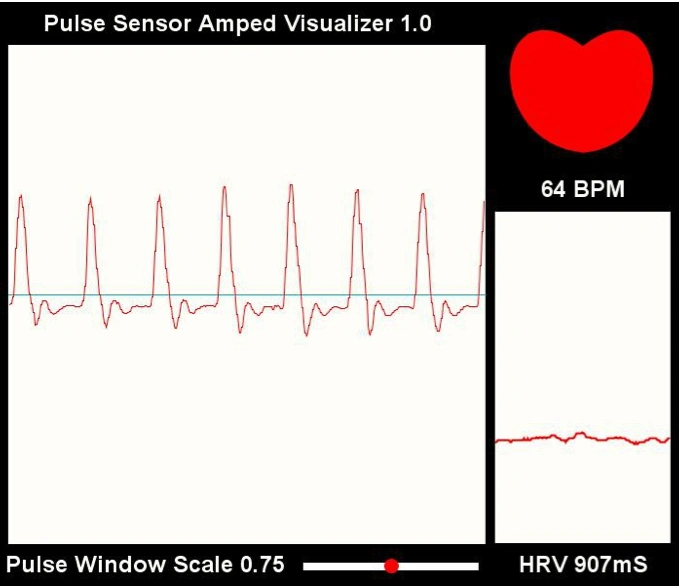
Figure 2: Output
Read more articles on Arduino:
Sr KarthigaPosted May 25, 2016, 8:30 AM
thank you prashant sir
Prashant VermaPosted Mar 10, 2016, 2:11 AM
well explained
Prashant VermaPosted Mar 10, 2016, 2:11 AM
nice
Sr KarthigaPosted Feb 29, 2016, 7:43 PM
thank you asfend sir
Asfend YarPosted Feb 29, 2016, 2:20 PM
nice
Seyedmostafa HosseiniPosted Feb 29, 2016, 10:56 AM
Thank you. Was wondering if the download file is removed? Unable to download.
Sr KarthigaPosted Feb 23, 2016, 7:38 PM
Thank you santhakumar sir
Santhakumar MunuswamyPosted Feb 23, 2016, 2:12 PM
Thanks for nice article
Sr KarthigaPosted Feb 22, 2016, 7:40 PM
thank you vignesh mani sir
Sr KarthigaPosted Feb 22, 2016, 7:40 PM
thank you ehhsan sir
Sr KarthigaPosted Feb 22, 2016, 7:40 PM
thank you gowtham sir
Sr KarthigaPosted Feb 22, 2016, 7:40 PM
thank you raja sir
Sr KarthigaPosted Feb 22, 2016, 7:39 PM
Thank you kumaresh sir
Sr KarthigaPosted Feb 22, 2016, 7:39 PM
thank you shubham sir
Sr KarthigaPosted Feb 22, 2016, 7:39 PM
Thank you sibeesh sir
Vignesh ManiPosted Feb 22, 2016, 5:47 PM
Good one
Ehsan SajjadPosted Feb 22, 2016, 1:58 PM
very nice
Gowtham KPosted Feb 22, 2016, 12:02 PM
Good One
Raja TPosted Feb 22, 2016, 9:05 AM
Nice, Thanks for sharing
Kumaresh RajalingamPosted Feb 22, 2016, 4:16 AM
Nice share
Shubham KumarPosted Feb 22, 2016, 4:12 AM
another interesting article nice
Sibeesh VenuPosted Feb 22, 2016, 3:47 AM
Nice Share