

This article will display the action “Office 365 new blog post”. Using this action you can publish blog posts through a simple action on Nintex.
Here, we will see how to configure this action and use it for our work.
Let’s see the implementation of this functionality.
Let’s see the implementation of this functionality.
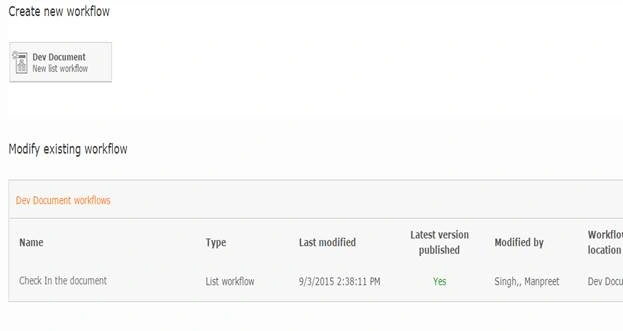
- I have created a document library “Dev Document”. In Dev Document, click on the Library tab on the top ribbon and click on Nintex Workflows.

- You will see the following screen, to create a new workflow.
- Click below “Create new workflow”.
- You will come to the design phase of the Nintex Workflows.
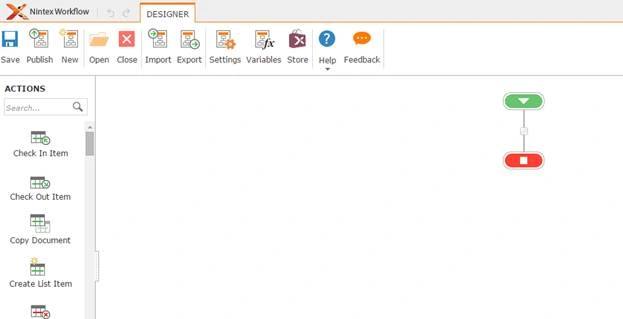
- Add the action, “Office 365 new blog post” action by right clicking on the workflow or by dragging and dropping it from the left toolbox.
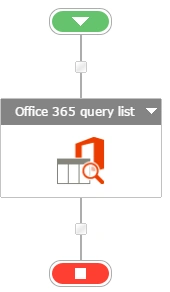
- Now, let’s configure it.
- When you double click on the action, the following screen opens up.
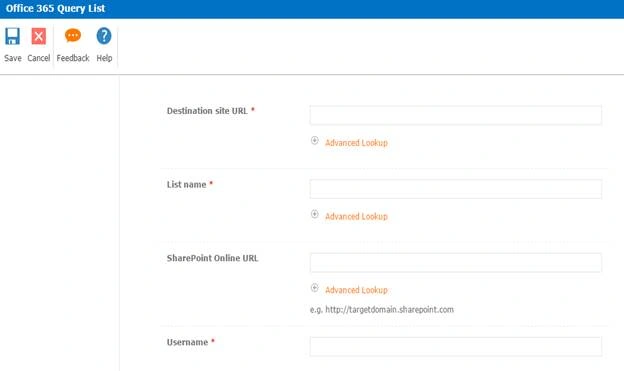
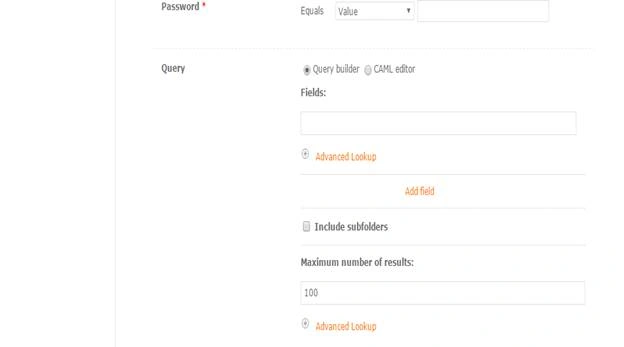
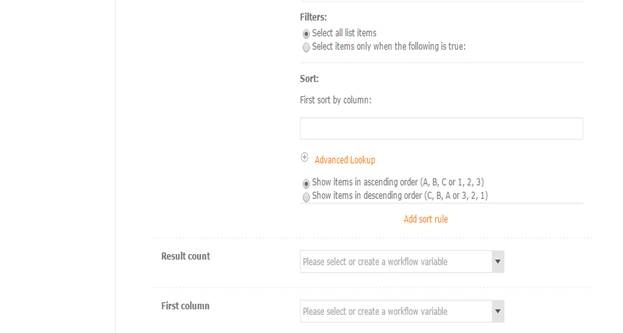
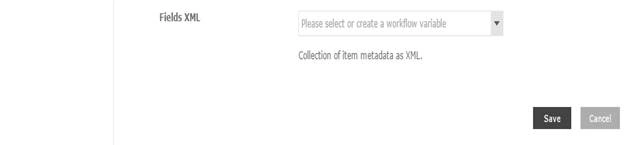
Configuration
- Destination site URL: Provide the site URL.
- List Name: Specify the name of the list.
- SharePoint Online URL: Provide the site URL.
- Username: Provide the site user name.
- Password: Specify the password.
- Query:
Here you can call the list based on the Query Builder or the CAML editor.
- Include Sub-folders: Select if you want to add the query to be looped under the sub-folder items.
- Maximum Number of results: You can specify the max number of results based on the criteria as in top 10 or 100.
- Filters: You can filter the result based on your criteria.
- Sort: You can sort the results based on ascending or descending order.
- Include Sub-folders: Select if you want to add the query to be looped under the sub-folder items.
- Result Count: Here you can add a variable to store the count of the query results.
- First Column: Here you can add a variable to store the first column value.
- Fields XML: Here you can add a variable to store the collection of item metadata as XML.
- Now, we have configured our workflow. Let’s go publish it and use it.
- Click on Publish on the left corner of the ribbon of Nintex Designer.

- You will see the screen, as shown below.
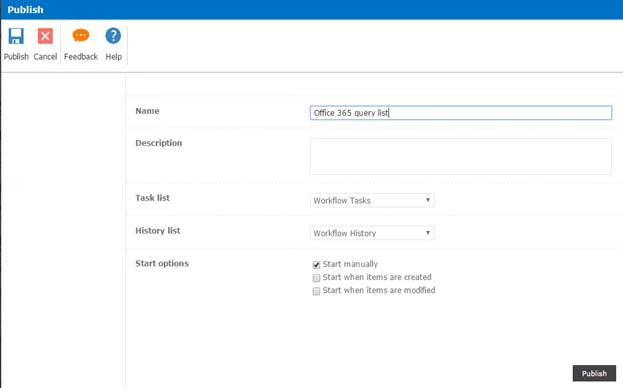
- Give your Workflow a name and description.
- Choose your task list where it should store the tasks; it will be Workflow Tasks by default.
- Choose your history list where it should store the history logs; it will be Workflow History by default.
- You have 3 start options:
- You can either start your workflow manually.
- Or you can start your workflow automatically when an item is created. (I will select this option)
- Or you can start your workflow automatically when an item is modified.
- Click on Publish
- Your workflow will get published.
Once you have configured, the workflow will query the list and fetch you the desired result based on the criteria. This result can be used for various purposes.
So, in this article, we saw how to query lists using the action "Office 365 query list in SharePoint Online and Office 365", using Nintex Workflows. We will see more new articles on the actions of Nintex Workflows in the succeeding articles. Until then, keep learning!
Tarun DPosted Aug 18, 2016, 2:05 AM
Nice one. Thanks for sharing..
Vignesh ManiPosted Aug 17, 2016, 7:50 AM
Nice