

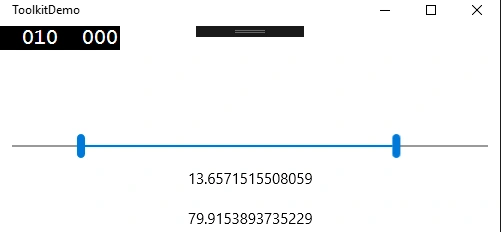
Windows 10 UWP Community toolkit is a collection of a helper class, custom controls and Application services. The Range Selector Control has two slider that allows the user to select a range of values. Let’s see the steps how to add and use range selector control in your app.
Create a new Windows 10 UWP project or open your existing project. Right click on your project and select Manage NuGet Packages. Search for Microsoft.Toolkit.UWP.UI.Controls and install it, as shown below: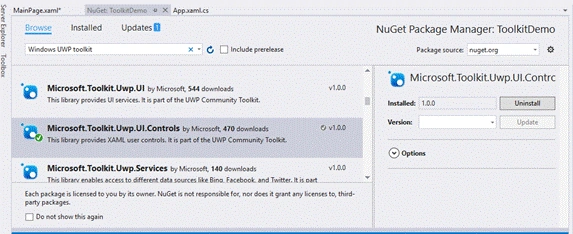
This will add Microsoft.Toolkit.Uwp.UI.Controls.dll in 'References' of your project, as shown below: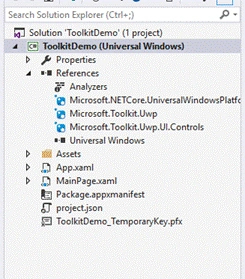
Add the toolkit reference in your XAML pages, using the code, given below:
XAML
xmlns:UWPToolkit="using:Microsoft.Toolkit.Uwp.UI.Controls"
Now, open your XAML page and write the code, given below:
- <StackPanel VerticalAlignment="Center" Orientation="Vertical">
- <UWPToolkit:RangeSelector RangeMin="0" RangeMax="40" ValueChanged="Selector_ValueChanged" Minimum="0" Maximum="100" x:Name="Selector"></UWPToolkit:RangeSelector>
- <TextBlock Padding="10" HorizontalAlignment="Center" x:Name="MinValue" Text=""></TextBlock>
- <TextBlock Padding="10" HorizontalAlignment="Center" x:Name="MaxValue" Text="" />
- </StackPanel>
- private void Selector_ValueChanged(object sender, RangeChangedEventArgs e)
- {
- if (e.ChangedRangeProperty == RangeSelectorProperty.MinimumValue) {
- MinValue.Text = e.NewValue.ToString();
- } else {
- MaxValue.Text = e.NewValue.ToString();
- }
- }
Delpin Susai RajPosted Aug 28, 2016, 2:32 AM
Nice
Samira RajabiPosted Aug 27, 2016, 2:00 AM
Hi, thanksThe problem was solved friends