

Incoming email is a very useful feature in SharePoint Servers, wherein it enables the document libraries to receive and store emails. This is also a pre-requisite for enabling lazy approvals in Nintex workflows that empower users to take quick actions on workflows through emails using pre-defined key phrases.
You may find many related posts on the internet but each one of them would be tackling only a portion of this. I had to spend quite a lot of time to put the pieces together and find only the absolute necessities, avoiding any overkill. So, I thought of posting this comprehensive guide that walks you through the end-to-end procedure. Hopefully, this will save you some time and effort if you have a similar need.
I performed this on the SharePoint 2013 Server but the same procedure could be applied to 2016 and 2019 as well.
This feature is safe to use for internal user emails. If you would like your SharePoint document library to receive external users, be sure to check your corporate policies.
The configuration can be divided into three parts…
- Part 1: Configure SMTP service on the SharePoint Server
- Part 2: Configure Incoming Email on SharePoint via Central Admin
- Part 3: Configure Send connector in Exchange Server
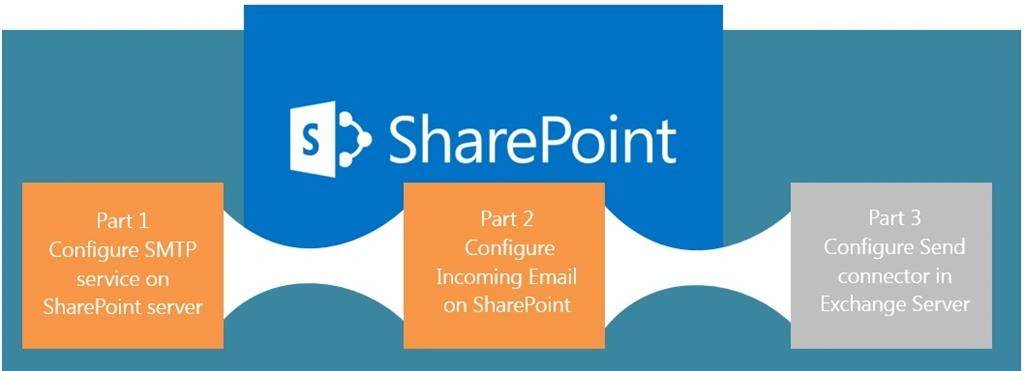
In this article, we are covering Parts 1 and 2 and I will have part 3 covered in the next article.
The below procedure is applicable to SharePoint 2013, SharePoint 2016, and SharePoint 2019
This article describes how to configure incoming emails for SharePoint Server. This article also describes how to install and configure the SMTP service to enable the incoming emails.
When an incoming email is enabled, SharePoint sites can receive and store email messages and attachments in the lists and libraries. This article describes two scenarios - one basic and one advanced. The basic scenario applies to a single-server farm environment and is recommended if you want to use default settings. The advanced scenario applies to a single-server farm or a multiple-server farm and contains several advanced options from which to choose.
Install SMTP Service on each WFE server
- Log in to WFE servers using Farm account.
- Click on Administrative Tools >>Server Manager.
- Go to Add Roles and Features.
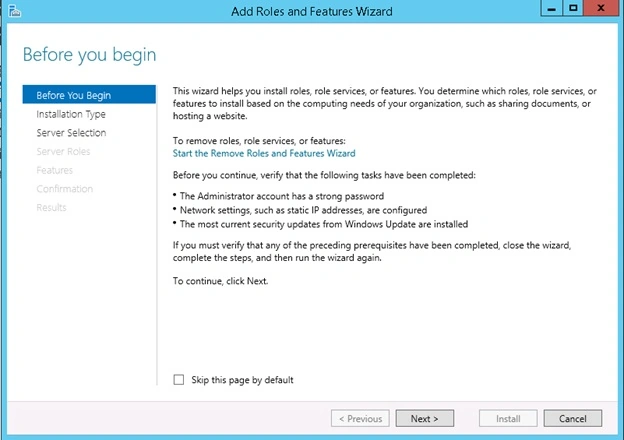
Click Next (with Role-based or Feature-based option selected).
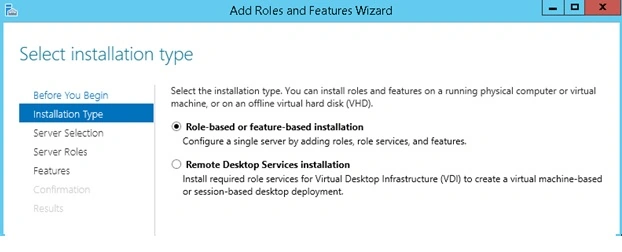
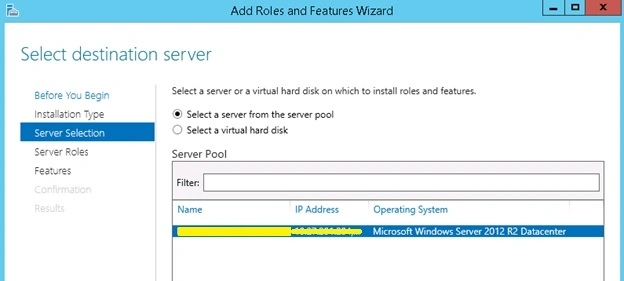
Go to Features and select SMTP Server.
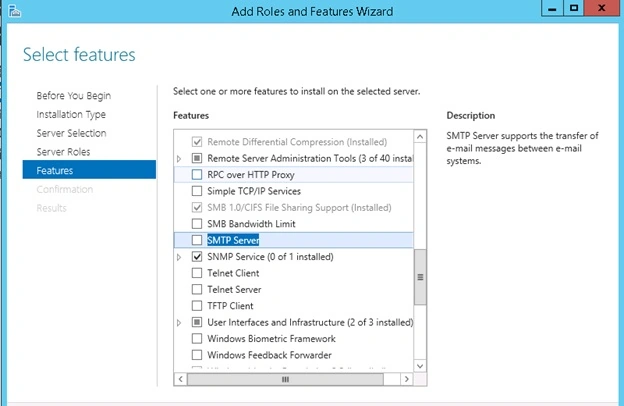
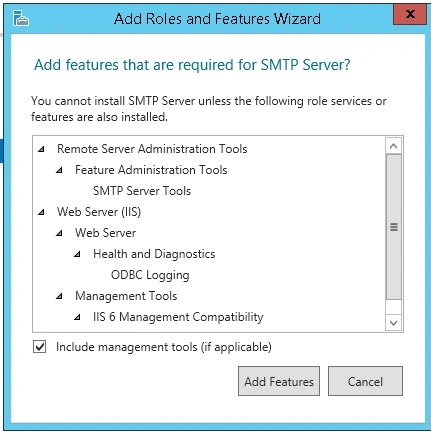
In the wizard that pops up, click on Add Features. Make sure that the Include Management Tools checkbox is checked.
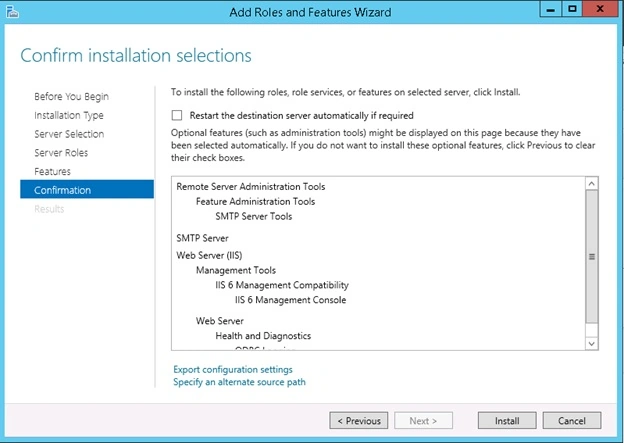
Do not select “Automatically Restart”, click Install.
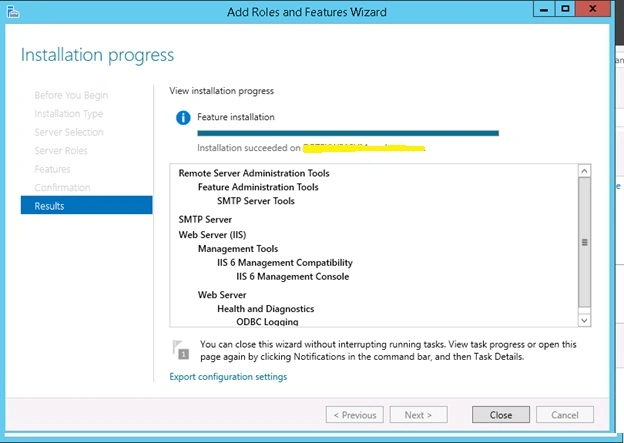
Click on Close.
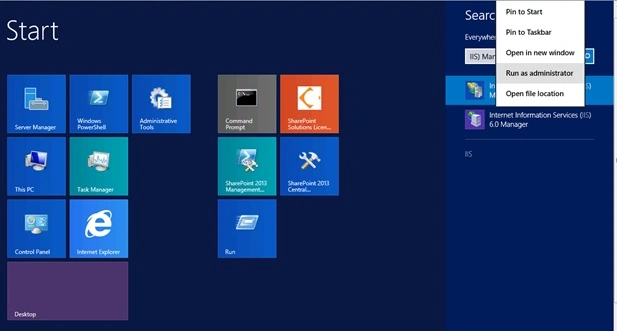
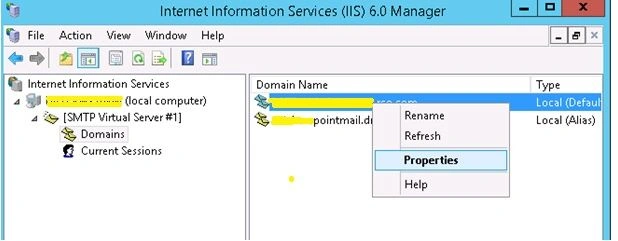
Go to Desktop Search and type IIS. You should see the IIS 6.0 Manager. Run as Admin.
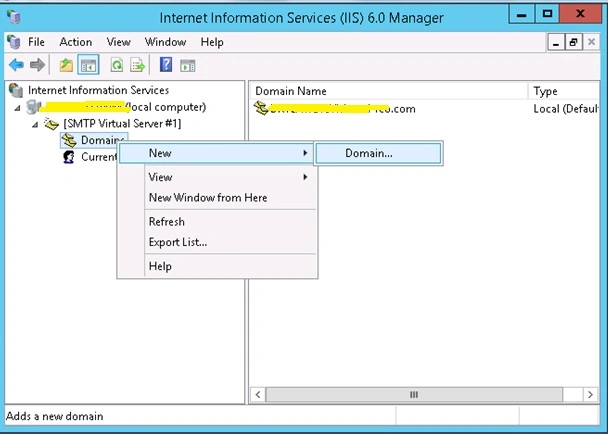
Expand SMTP Virtual Server and add New Domain…
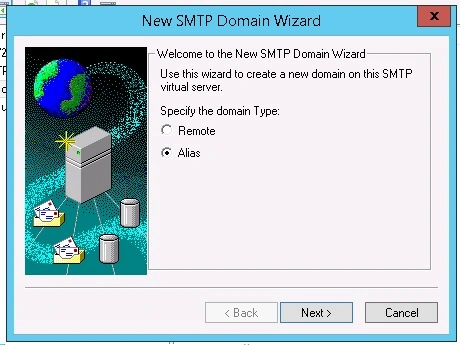
Select Alias and click Next.
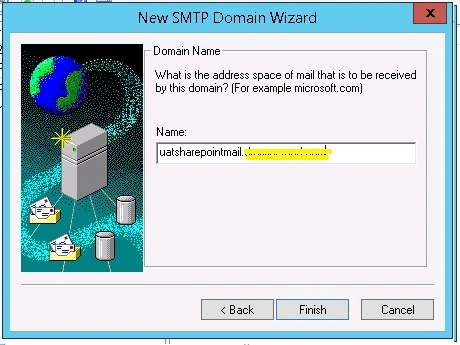
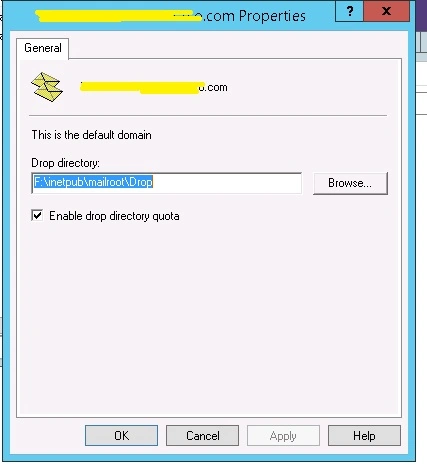
Enter the address space to match with the Exchange Send connector for this farm.
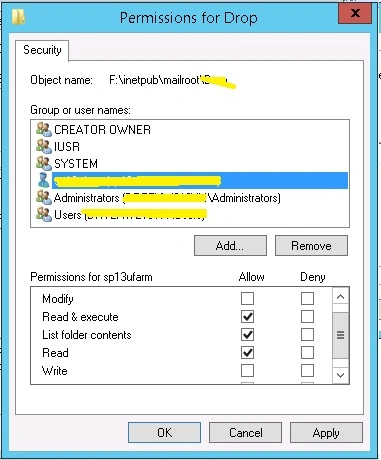
On F: drive, create Drop folder under this path F:\inetpub\mailroot\<Folder>
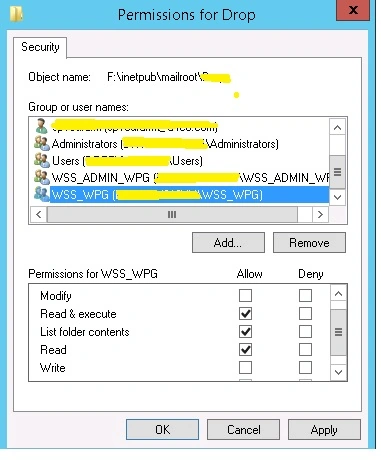
Go to the Security on the Drop folder and edit the farm account and add Read & Execute permissions to it, add the WSS_ADMIN_WPG account with Full Control and add WSS_WPG account with "Read & Execute" permissions.
Important: Repeat the process on the other WFE server as well.
- Launch CA http://<CentralAdmin>8888.
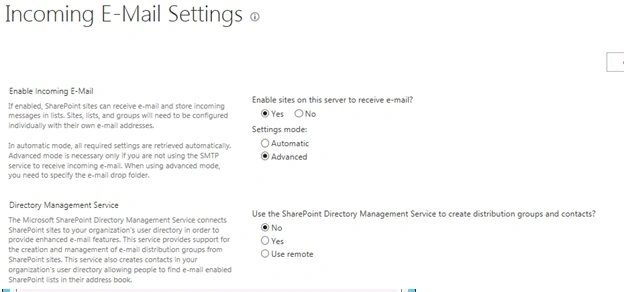
- Go to Incoming Email Settings under System Settings.
- Set Enable Sites on this Server to receive an email to ‘Yes’.
- Settings mode to ‘Advanced’.
- Leave use SharePoint Directory Management Service at ‘No’.
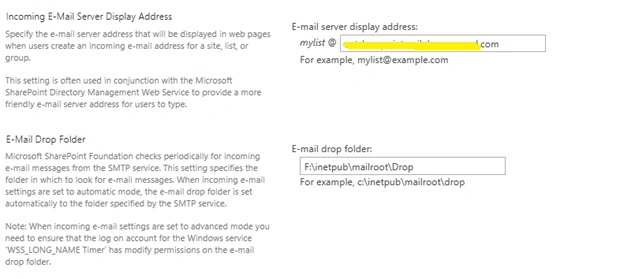
- In the Email Server Display Address box, type sharepointmail.<company>.com.
- Email drop folder : F:\inetpub\mailroot\folder.
Naveen KumarPosted Jan 25, 2024, 6:40 PM
Where is the article for configure the exchange service
Manpreet SinghPosted Jan 9, 2019, 2:19 PM
Informative Article !
Vijai Anand RamalingamPosted Dec 26, 2018, 11:30 PM
Nice one:-)