

Introduction
We have used Microsoft Paint so many times to reduce the quality of HQ images. Either it may be of any digital camera or any DSLR. We ususally don't share a high-quality image on Facebook or any social media. We will now create a C# application to reduce the quality of images.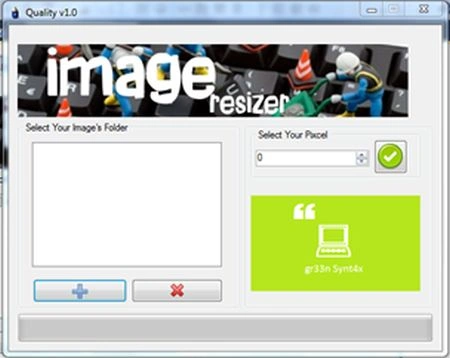
Background
In the background, we will use a .NET class, dialog boxes, text boxes, progress bars, numeric up down and defiantly, buttons. In addition, you may use some icons and header images.
User Interface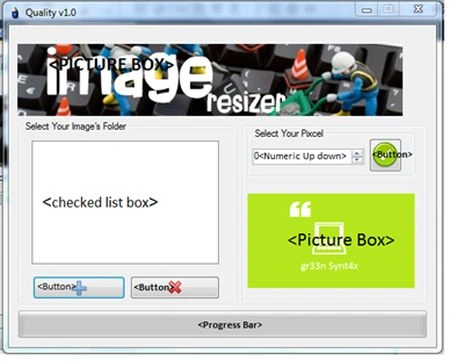
List of Controls
- Check Box List
- 3 Buttons
- 2 Picture box
- 1 Numeric Up Down
- 1 Progress Bar
- 2 Group Box
C# Back End Code
Step 1
We will first code the Add Button (+) on that given snapshot.
Note: It will pop up the "Folder Dialogue ", from where we can select the image's folder.
So, in the Add Button's Event, we will write::
if (folderBrowserDialog1.ShowDialog() == DialogResult.OK)
// Execute when OK is Pressed in Dialogue Box.
{
checkedListBox1.Items.Clear();
// CLEAR THE SELECTED ITEMS
foreach (string fileName in Directory.GetFiles(folderBrowserDialog1.SelectedPath))
{
// SHOW ALL THE FILES IN THAT SELECTED FOLDER
FileInfo fiInfo = new FileInfo(fileName);
// Object of FileInfo class, as it determines every details of Image.
if (fiInfo.Extension.ToLower() == ".jpg" || fiInfo.Extension.ToLower() == ".jpeg")
// Execute only for JPEG Images
checkedListBox1.Items.Add(fileName);
}
}
progressBar1.Maximum = checkedListBox1.Items.Count;
// Set the Maximum value for Progress Bar
}
Step 2
When the user selects an item in the Check Box list, it will raise the event CheckBoxList1_SlectedItemIndexChange.
When we select an item then a Picture Box will show that specific Image.
Try // If any exception occurs
{
pictureBox2.ImageLocation = checkedListBox1.SelectedItem.ToString();
// Let picture Box name is pictureBox2
}
catch
{
// Nothing happen
}
Mehmet DemirPosted Feb 29, 2020, 3:57 PM
Great work
Gomathi PalaniswamyPosted Oct 22, 2013, 8:39 AM
very useful