

Introduction
This article explains how to create a Registration Form in a Windows Forms application using Swing in Java. The NetBeans IDE is used to create this application.
Registration Form in Windows Forms application
For creating this application, we need the following files:- Java file
- SQL file
- odjbc.jar file
- NetBeans IDE
1. Java File
This Java file is necessary for writing the code. In this file we use Swing components to create a registration form with password validation.
What we can do
First we can import several packages.javax.swing.*;
java.awt.*;
java.awt.event.*;
java.sql.*;
The Swing package is used for the Swing components. All Swing components are defined within this package. The AWT package provides an event handling mechanism, in other words it deals with events like "Button Click". The SQL package creates the JDBC connection.
B. Extends the JFrame components and implements the ActionListener.
Syntax
class EmpSearchApp extends JFrame implements ActionListener
C. Now Declare following components
JLabel l1, l2, l3, l4, l5, l6, l7, l8;
JTextField tf1, tf2, tf5, tf6, tf7;
JButton btn1, btn2;
JPasswordField p1, p2;D. Now declare Frame components in a default constructor.
Syntax
- RegistrationFormApp()
- {
- ...
- ...
- try{
- //JDBC CODE
- }Catch(Exception ex)
- {
- System.out.println(ex)
- }
- ...
- }
D. Add an ActionListener for the button clicked event
- public void actionPerformed(ActionEvent e)
- {
- ...
- ...
- }
E. Create main method and run the constructor
Finally, create a main method and run the constructor as in the following:
- public static void main(String arr[])
- {
- new RegistrationFormApp();
- }
This JAR file provides a way to set up a Java connection with an Oracle Database. Since the JDBC connection is provided by the Oracle Server vendor, we need to import this JAR file to our library folder.
3. reg.sql table
For fetching records we need a database table; for that we create an "emp" table in our "sandeep" database.
reg.sql
- create table emp
- (
- name varchar2(30), email varchar2(40),
- pass varchar2(30), count varchar2(30),
- state varchar2(30), phone number(15)
- );
Now let's start creating this app. Use the following procedure to do that in the NetBeans IDE.
Step 1
Open the NetBeans IDE.

Step 2
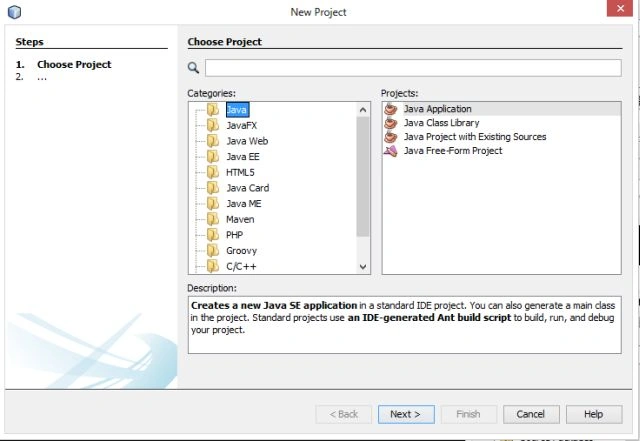
Choose "Java" -> "Java application" as shown below
Step 3
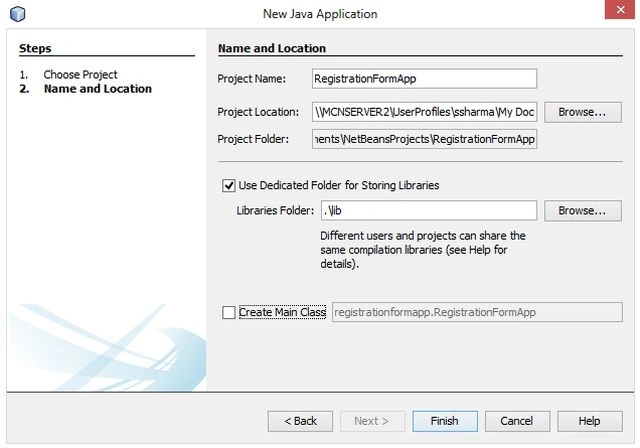
Type your project name as "RegistrationFormApp" as in the following and click on "finish".
Step 4
Create a new Java Class "Registration" and write the following there.
Registration.java
- import javax.swing.*;
- import java.awt.*;
- import java.awt.event.*;
- import java.sql.*;
- public class Registration extends JFrame implements ActionListener
- {
- JLabel l1, l2, l3, l4, l5, l6, l7, l8;
- JTextField tf1, tf2, tf5, tf6, tf7;
- JButton btn1, btn2;
- JPasswordField p1, p2;
- Registration()
- {
- setVisible(true);
- setSize(700, 700);
- setLayout(null);
- setDefaultCloseOperation(JFrame.EXIT_ON_CLOSE);
- setTitle("Registration Form in Java");
- l1 = new JLabel("Registration Form in Windows Form:");
- l1.setForeground(Color.blue);
- l1.setFont(new Font("Serif", Font.BOLD, 20));
- l2 = new JLabel("Name:");
- l3 = new JLabel("Email-ID:");
- l4 = new JLabel("Create Passowrd:");
- l5 = new JLabel("Confirm Password:");
- l6 = new JLabel("Country:");
- l7 = new JLabel("State:");
- l8 = new JLabel("Phone No:");
- tf1 = new JTextField();
- tf2 = new JTextField();
- p1 = new JPasswordField();
- p2 = new JPasswordField();
- tf5 = new JTextField();
- tf6 = new JTextField();
- tf7 = new JTextField();
- btn1 = new JButton("Submit");
- btn2 = new JButton("Clear");
- btn1.addActionListener(this);
- btn2.addActionListener(this);
- l1.setBounds(100, 30, 400, 30);
- l2.setBounds(80, 70, 200, 30);
- l3.setBounds(80, 110, 200, 30);
- l4.setBounds(80, 150, 200, 30);
- l5.setBounds(80, 190, 200, 30);
- l6.setBounds(80, 230, 200, 30);
- l7.setBounds(80, 270, 200, 30);
- l8.setBounds(80, 310, 200, 30);
- tf1.setBounds(300, 70, 200, 30);
- tf2.setBounds(300, 110, 200, 30);
- p1.setBounds(300, 150, 200, 30);
- p2.setBounds(300, 190, 200, 30);
- tf5.setBounds(300, 230, 200, 30);
- tf6.setBounds(300, 270, 200, 30);
- tf7.setBounds(300, 310, 200, 30);
- btn1.setBounds(50, 350, 100, 30);
- btn2.setBounds(170, 350, 100, 30);
- add(l1);
- add(l2);
- add(tf1);
- add(l3);
- add(tf2);
- add(l4);
- add(p1);
- add(l5);
- add(p2);
- add(l6);
- add(tf5);
- add(l7);
- add(tf6);
- add(l8);
- add(tf7);
- add(btn1);
- add(btn2);
- }
- public void actionPerformed(ActionEvent e)
- {
- if (e.getSource() == btn1)
- {
- int x = 0;
- String s1 = tf1.getText();
- String s2 = tf2.getText();
- char[] s3 = p1.getPassword();
- char[] s4 = p2.getPassword();
- String s8 = new String(s3);
- String s9 = new String(s4);
- String s5 = tf5.getText();
- String s6 = tf6.getText();
- String s7 = tf7.getText();
- if (s8.equals(s9))
- {
- try
- {
- Class.forName("oracle.jdbc.driver.OracleDriver");
- Connection con = DriverManager.getConnection("jdbc:oracle:thin:@mcndesktop07:1521:xe", "sandeep", "welcome");
- PreparedStatement ps = con.prepareStatement("insert into reg values(?,?,?,?,?,?)");
- ps.setString(1, s1);
- ps.setString(2, s2);
- ps.setString(3, s8);
- ps.setString(4, s5);
- ps.setString(5, s6);
- ps.setString(6, s7);
- ResultSet rs = ps.executeQuery();
- x++;
- if (x > 0)
- {
- JOptionPane.showMessageDialog(btn1, "Data Saved Successfully");
- }
- }
- catch (Exception ex)
- {
- System.out.println(ex);
- }
- }
- else
- {
- JOptionPane.showMessageDialog(btn1, "Password Does Not Match");
- }
- }
- else
- {
- tf1.setText("");
- tf2.setText("");
- p1.setText("");
- p2.setText("");
- tf5.setText("");
- tf6.setText("");
- tf7.setText("");
- }
- }
- public static void main(String args[])
- {
- new Registration();
- }
- }
You need to add a JAR file named "ojdbc.jar" to set up the database connection.
Step 5
Now our application is ready to run.
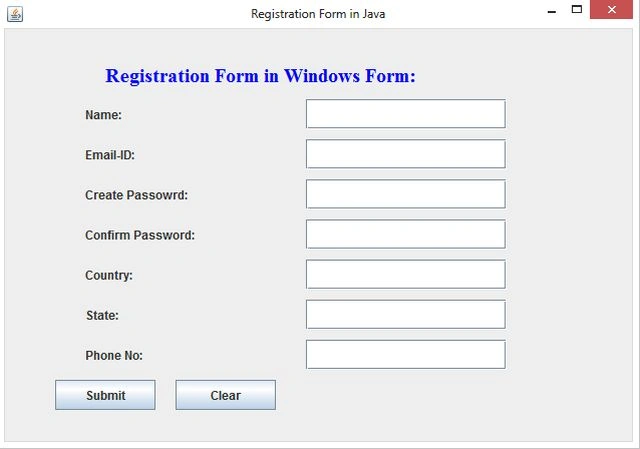
Right-click on the project menu then select "Run". The following output will be generated.
Step 6
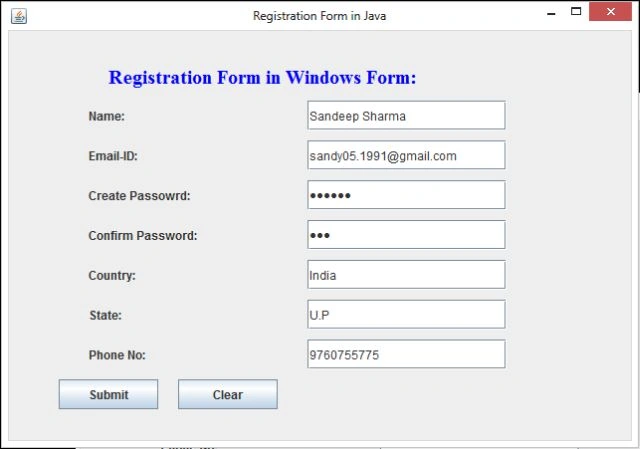
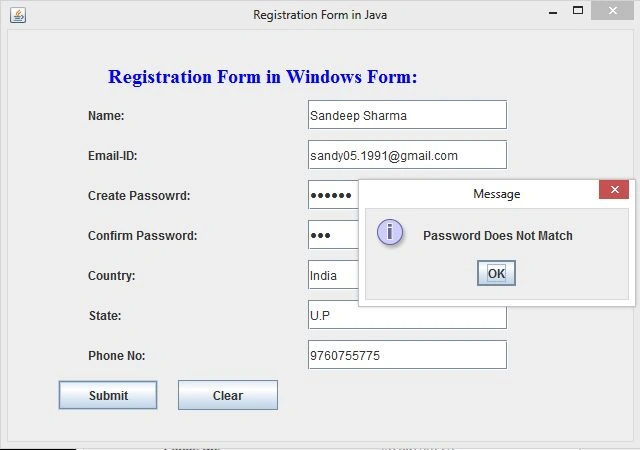
Now we provide a password validation in this application so first check for that. For checking password validation we provide an incorrect password first, as in the following figure.
Step 7
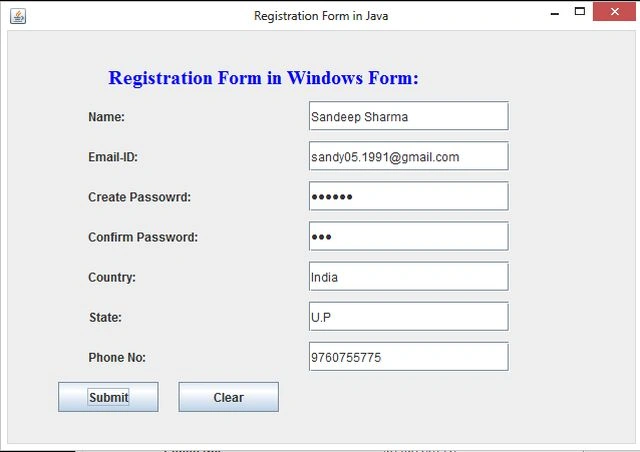
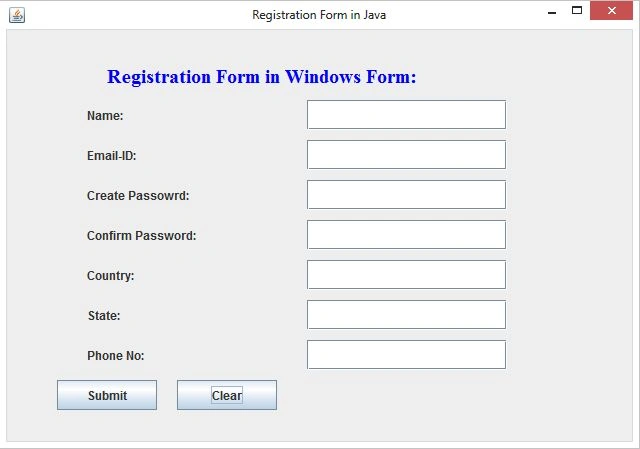
We have used a "clear" button so now check whether its working or not!
After clicking on the "clear" button the contents will be cleared as in the following.
Step 8
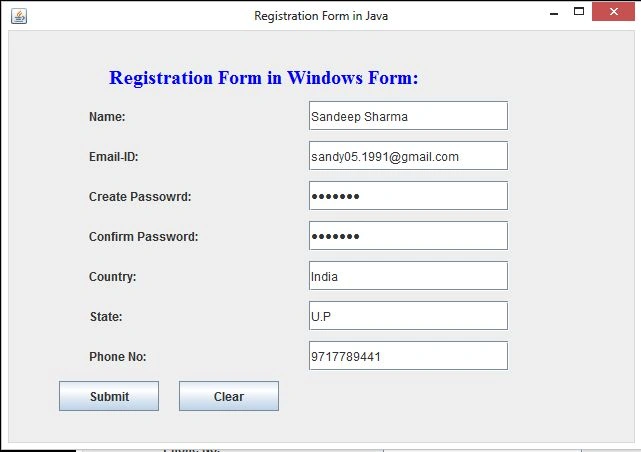
Now provide a correct entity and clicked on submit.
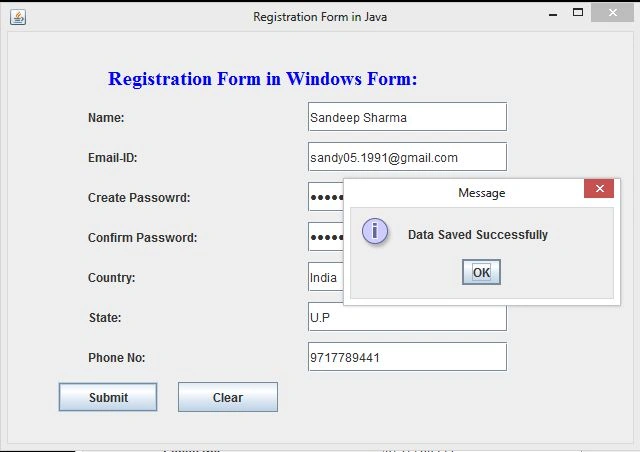
Step 9
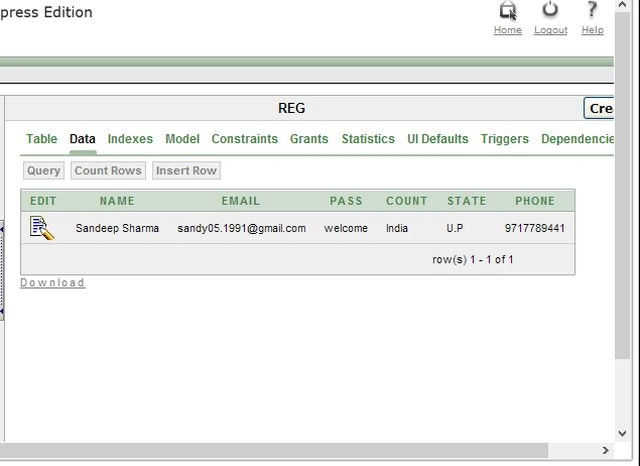
If you want to be sure that the data was saved in the database
Then open the "Oracle Home Page" and login with your "username" and "password" then open "Object Explorer" then open the "reg" table; the following data exists over there.
Bhavesh ValentinoPosted Mar 16, 2018, 10:16 AM
Can you send me your no so that I can talk to you I have little doubts and I need it urgently so
Bhavesh ValentinoPosted Mar 16, 2018, 10:15 AM
Hi sandeep how to see my username and password that I typed I want to see it reg but first where should I go
Logan MosesPosted Aug 6, 2017, 1:27 PM
How do I import my text to the text area from which was stored in notepad?
amnish kaurPosted Jun 21, 2017, 2:51 PM
I want to know how can i update information without using jtable
Skvamsi AkellaPosted Jul 25, 2016, 11:46 AM
After submit the button how to display the form details and print it as report instead of getting message as data saved successfully
Sandeep SharmaPosted Mar 21, 2016, 1:29 PM
Check your query and its implementation.
Charmy gargPosted Mar 14, 2016, 11:58 AM
java.sql.SQLException: Query does not return results--- getting this error what to do?
Sawan BarnwalPosted Aug 18, 2015, 6:40 AM
how can I sort my Table's Data in netbeans project
Bharathi KandikuppaPosted Mar 26, 2015, 1:41 PM
java.sql.SQLException: No ResultSet was produced how to solve this
swatiPosted Mar 24, 2015, 2:08 AM
i want to do valisation on textfield like empty textfield ,only alphabets and all...i tried using lostfocus but i works sometimes only..on which event we shld write code for validation...i tried writing user defined functn and calling it in main using object but it does not work...plz help..