

Introduction
Related Items is a new site column introduced in SharePoint 2013. By default this column is available in the tasks list. This column is used to store the related items that are required for an item. Navigate to the tasks list, click on the "List" tab in the ribbon interface. Click on "List Settings". You can find a new column called "Related items" under the Columns section as shown in Figure 1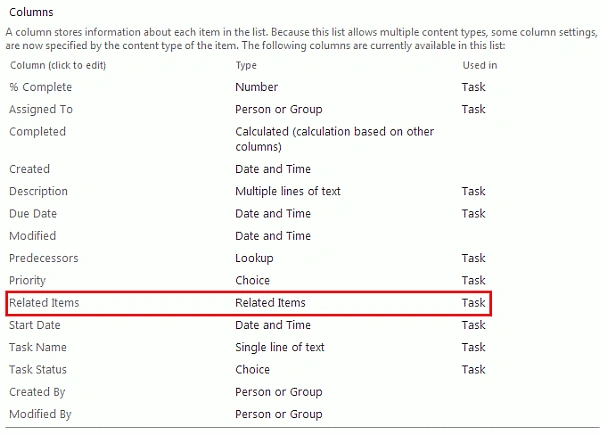
Figure 1: Columns in the tasks list
Add Related Items
Generally this column will not be available in the new and edit form. Only in the display form it will be available. Navigate to the Tasks list in the SharePoint 2013 site. Click on a new item to add a new task. You will not be able to see the column in the new form as shown in Figure 2.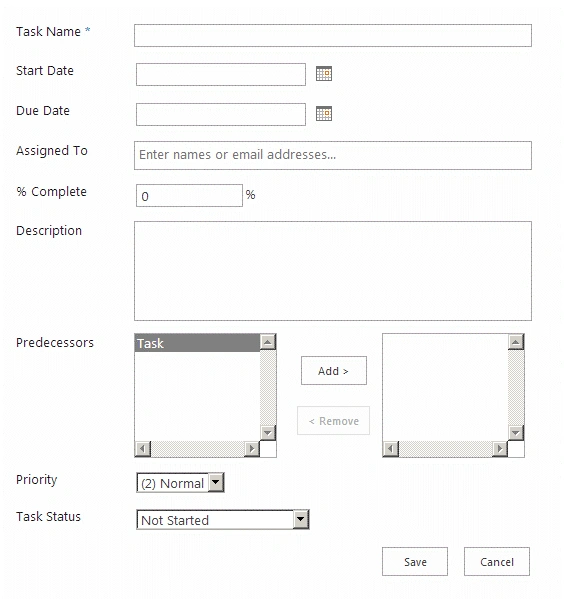
Figure 2: New form
Similarly select an item and edit it.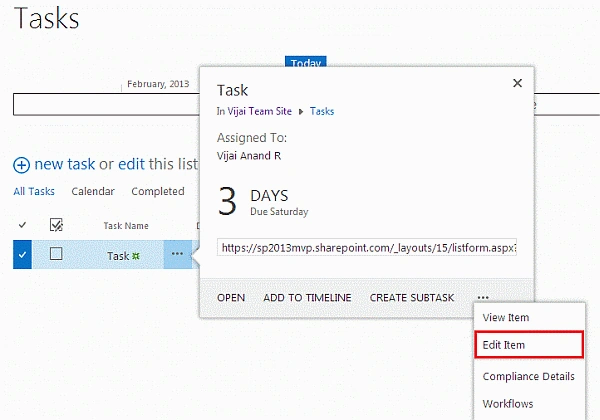
Figure 3: Edit item
In the edit form also you will not be able to see the related items column as shown in Figure 4.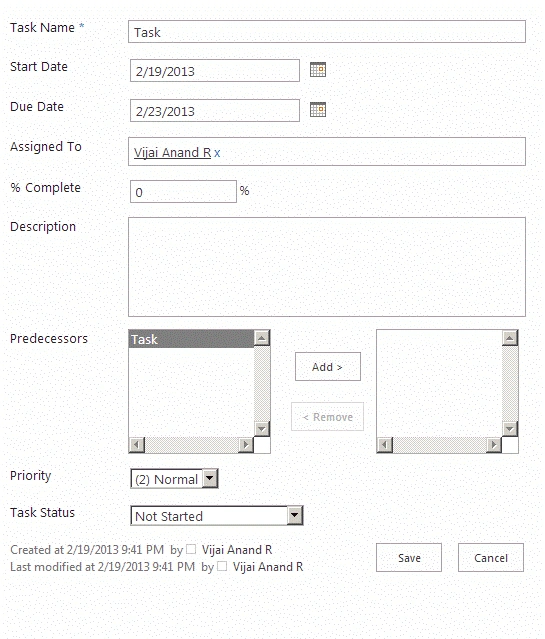
Figure 4: Edit form
Select an item and view it.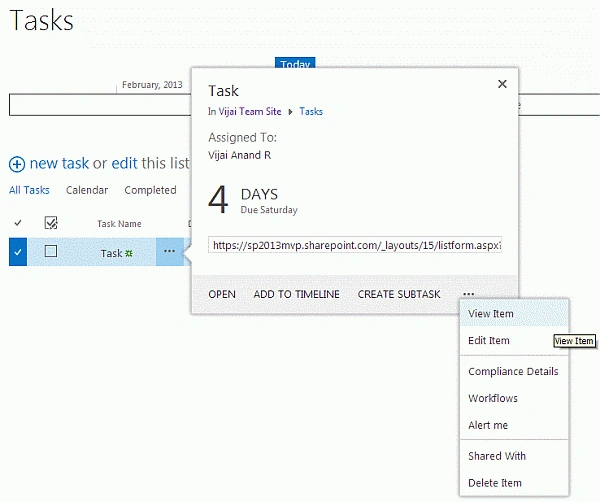
Figure 5: View Item
In the display form you will be able to see the related items column as shown in Figure 6.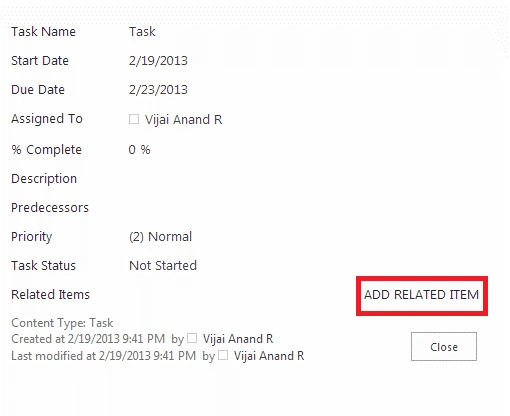
Figure 6: Display form
Click on "ADD RELATED ITEM". Select the item to be added and then click on "Insert".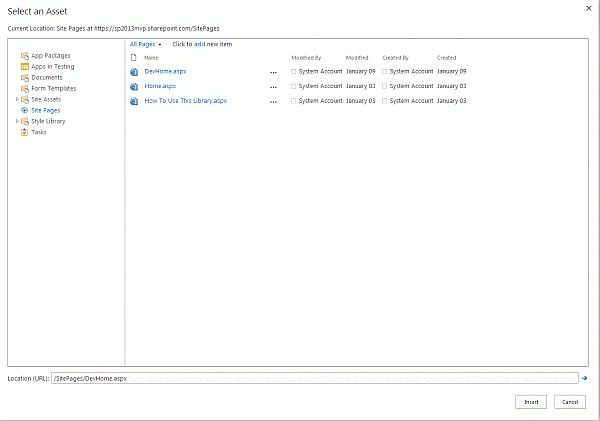
Figure 7: Select the item
You can add multiple items to the related items (one by one not as a multiple selection).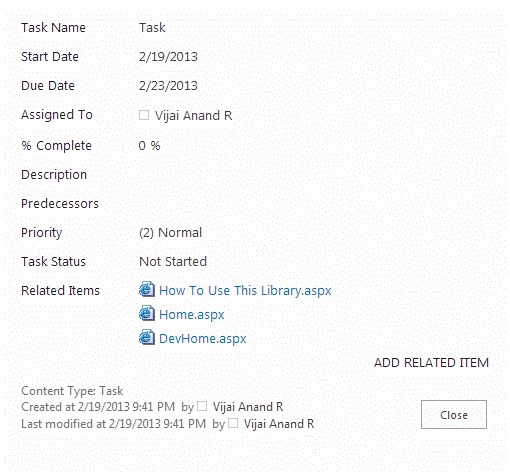
Figure 8: Multiple related items added
Once the related items are added click on the "Close" button.
_Hidden Group:
The Related Items column is available under the _Hidden group. Navigate to the SharePoint 2013 site. Click on "Site Settings". Click on "Site content types" under Web Designer Galleries section. Click on "Task available" under the List Content Types. Click on "Related Items" under the columns section.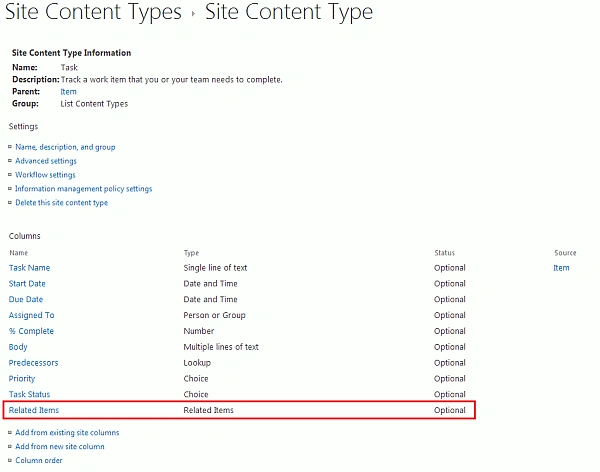
Figure 9: Task content type
Click on "Edit site column". 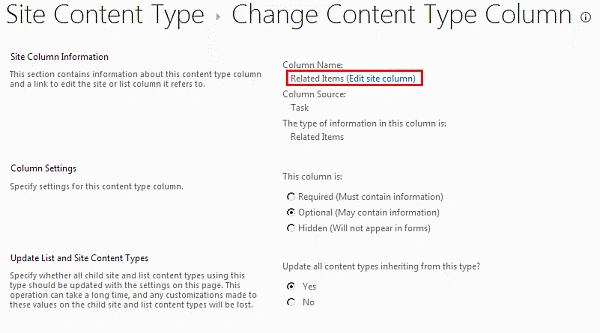
Figure 10: Edit site column
This column belongs to the _Hidden group.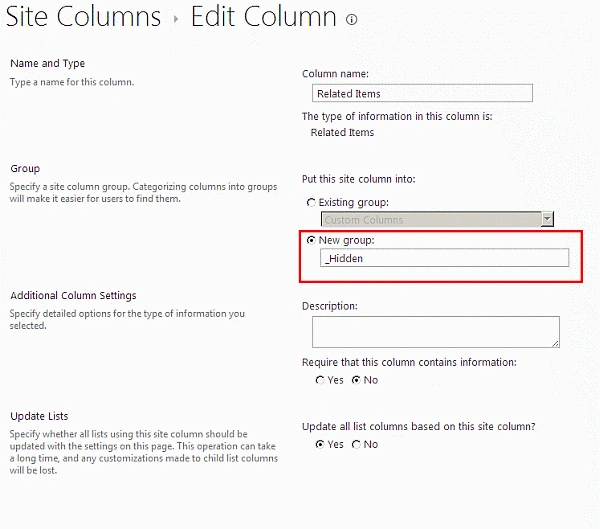
Figure 11: _Hidden group
To use the related items column in the custom list or any other list, change the group from _Hidden to some other group as shown in Figure 12: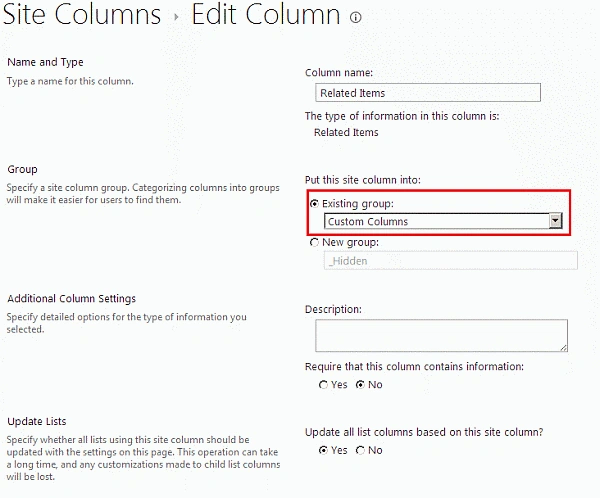
Figure 12: Change the group
Click on Ok. Now you will be able to see the column visible under Custom Columns in the Site Columns page as shown in Figure 13.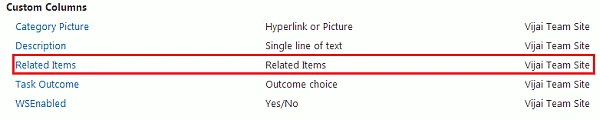
Figure 13: Related Items column visible under Custom Columns group.
Add Related Items column in custom list:
I have a custom list called "Custom List". Click on the "List" tab in the ribbon interface. Click on "List Settings". Click on "Add from existing columns" under the Columns section. Add the related items column to the custom list. 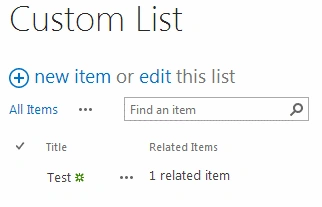
Figure 14: Related Items column in custom list.
Summary
Thus in this article you have seen about a new site column, Related Items, in SharePoint 2013.
Join the conversation! Your thoughts help the community grow.