

Overview
With release management in Visual Studio, we can configure, approve and deploy our applications for any environment. Create automated deployment orchestrations for each environment no matter how complex the configuration. Delivering our software more frequently and easily to an environment allows your testers to get to work validating your system and keeps your stakeholders involved in giving feedback.
There are the following three components in release management:
- Release Management Server
- Release Management Client
- Deployment Agent
Prerequisites
Download “Release management for Visual Studio 2013 with update 2 RC”. It includes a RM Server, a RM Client and a deployment agent. Install RM Server and RM Client in the build machine and deployment agents in the target servers where we will deploy the application.
RM Client
The RM client is a WPF application and is used to configure various settings in the RM server and RM Service. The important roles of the RM client are:
- Release management configuration
- Building release pipeline
- Define release template
- Trigger Kick off release
In the RM client we must configure the TFS Connection, servers, stage types, environment and so on. The following sections describe what must be done prior to the release and finally triggering the automated application release.
TFS Connection
We should create TFS connections to connect with various team project collections. We can connect to any version of TFS. The following screen shows the TFS connection page.
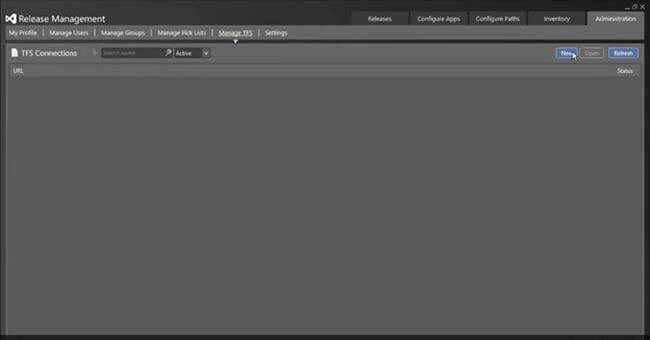

Provide the TFS URL, project collection name and we should provide a user account to set the identity of the connection. This account is used in release management to talk to the Team Foundation Server. The user identity can be set in the “connect as” section shown in the preceding screen.
NB: Before using the service user for RM/TFS integration, we should add the user/group into TFS by running the following command in a Visual Studio command prompt.
Where RMTFSINT is the Account name, Team Foundation Service Accounts is the group that the service accounts belongs to and http://localhost:8080/tfs is the TFS URL.

After providing the account name and word, click on the verify link as shown above.

Stage Types and Technology Types


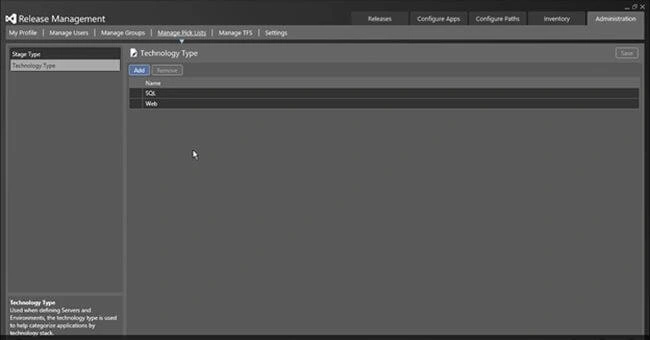
Technology Types
Technology types are not used anywhere in release but this is metadata and it's used to categorize and organize things.
Servers and Environments
Servers
From the configure paths Home page, go to the servers page as shown below. Before adding servers here, we should deploy a deployment agent in the server. We can add the server manually or scan for servers where we deployed the deployment agent already using the new button on the top right corner as shown below.
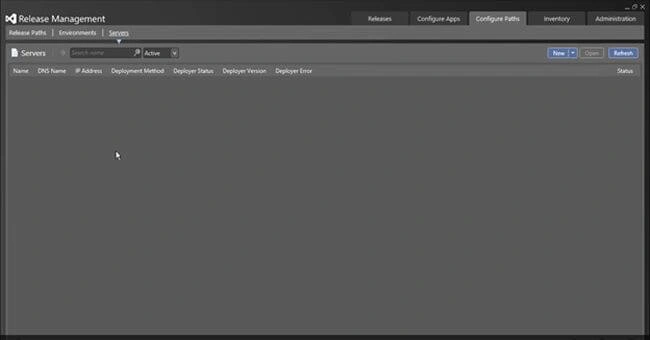
Scan for new will provide the following pop-up if the deployment agent was installed in the server that is accessible.

Environments
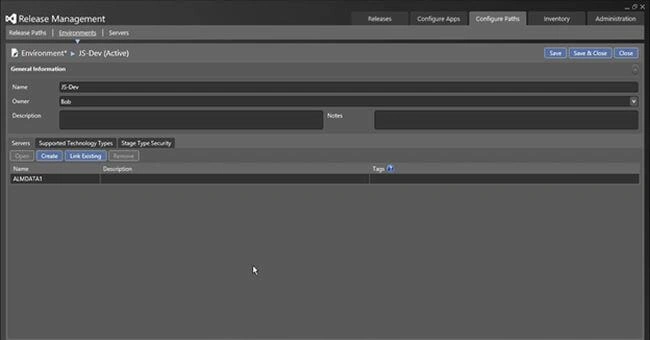
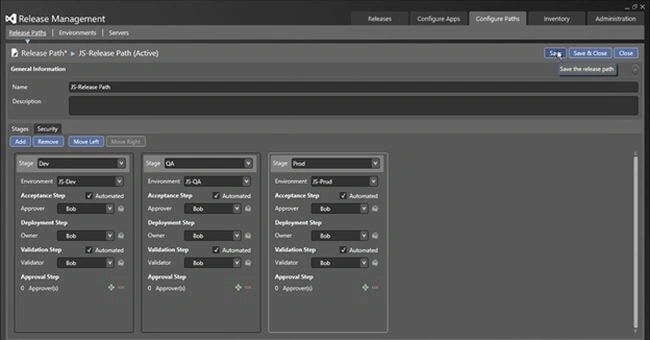
In release paths, we can create various stages of the deployment and link a corresponding environment and define required work flows. We are able to define the security of the release path as well.
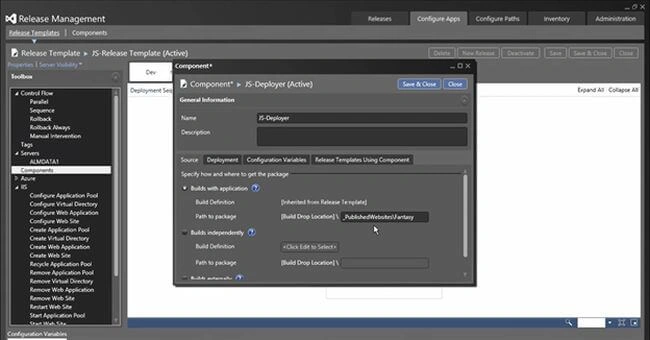
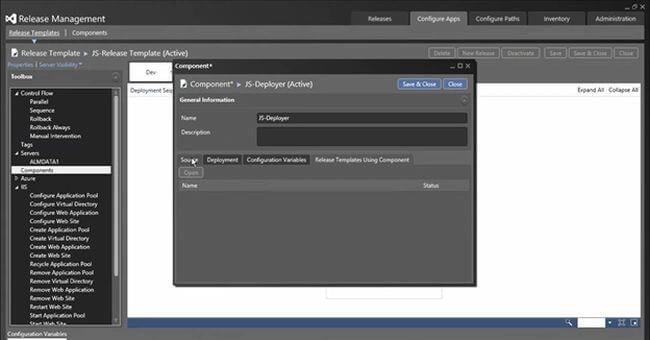
Components
Here we can select various build options and specify the location of the build drop location.
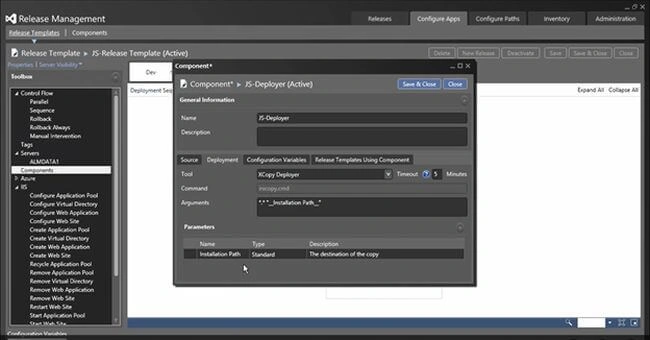
We can select the tool to deploy the application. In the following screen the XCopy deployer is selected and that is used to simply copy the files to the destination. The installation path is the argument that we need to provide when we add it in the release template.
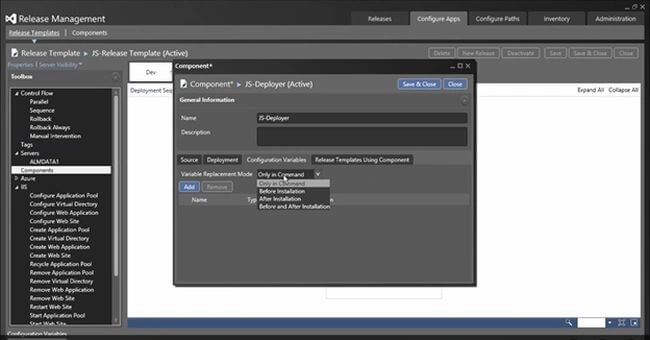
Configuration variables are important when we handle complex scenarios like doing some actions before installation, after installation and so on.
A release template using a component will list the release templates where this component is used.
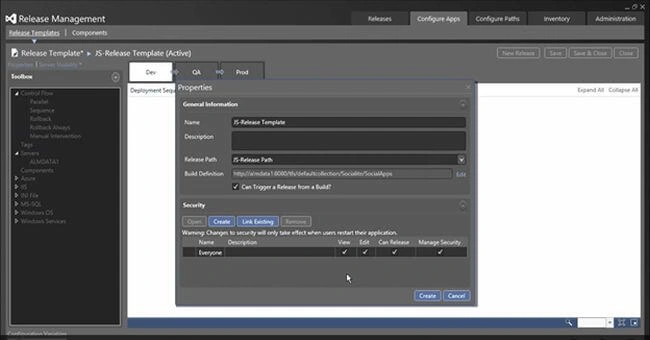
Release template is the blueprint of the release. Here we should select the release path and build definition from TFS.


- We should select the release template for the release.
- The Target stage defines, up to what stage this release can go. We can restrict the release to production or QA for this release, if needed.
- Build should be selected here and it is from the drop folder. The drop folder we already defined in the component and the component is added to the release template.
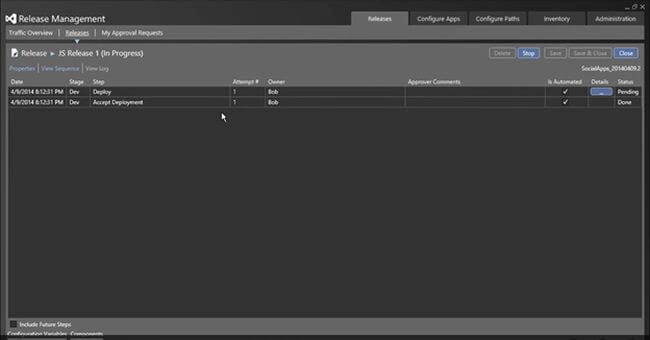
We can click start, if we are done with the release or it can be saved as a Draft. The release kick-off will happen if we click Start here. See the following screen with a release is in progress.
Conclusion
Release management for Visual Studio 2013 provides a great platform to automate the release process including an approval processes. I hope this article helps you to configure your RM environment.
Thank you for reading.
Join the conversation! Your thoughts help the community grow.