

Before reading this article, please go through the articles, given below-
- Introduction To Universal Windows Platform (UWP) App Development Using Windows 10 And Visual Studio 2015
- How to add UWP ToolKit controls in Universal Application Development With XAML AND C#
The Rotator Tile Control is an Item Control which rotates through a set of items, one-by-one. It enables you to show multiple items of data in a live-tile like way.
Reading this article, you can learn how to use UWP Tool Kit Control - Rotator Tile Control in Universal Windows apps development with XAML and Visual C#.
The important tools required to develop UWP are-
- Windows 10 (Recommended)
- Visual Studio 2015 Community Edition (It is a free software available online)
Now, we can discuss step by step app development.
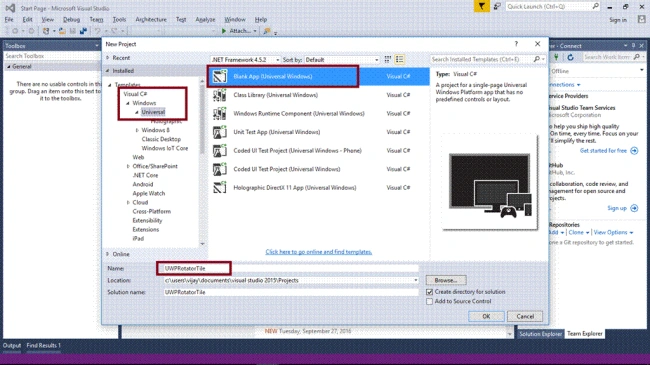
Step 1- Open Visual Studio 2015 -> Start -> New Project-> Select Universal (under Visual C#->Windows)-> Blank app -> Give the suitable name for your app (UWPRotatorTile)->OK.
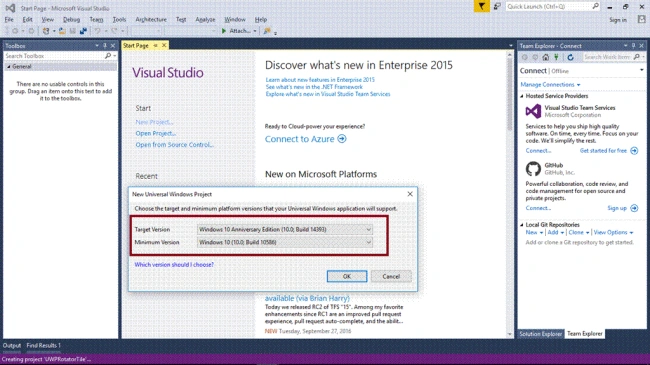
Step 2 - Choose the target and minimum platform version for your Windows app. Afterwards, the project creates App.xaml and MainPage.xaml.
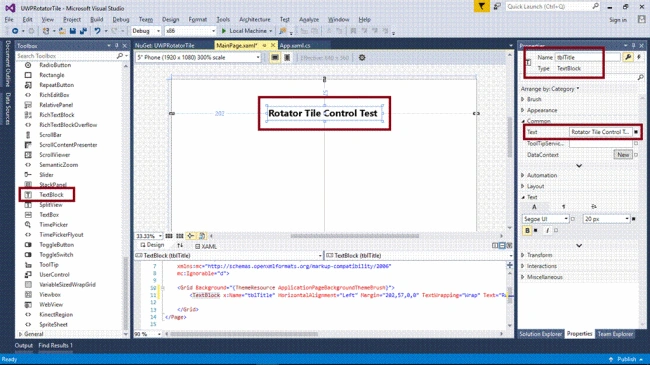
To add UWPToolKit Control, please refer the link, given below-
Step 4 - Add images in the Assets folder, images for Rotator Tile Control, as given below-

Step 5 - Add the Xaml code, given below to create the data template for UWP RotatorTile Control.
- <Page.Resources>
- <DataTemplate x:Key="photos">
- <Grid Background="White">
- <Image Source="{Binding IName}" Width="250" Height="150" HorizontalAlignment="Center" VerticalAlignment="Center" Stretch="UniformToFill" />
- </Grid>
- </DataTemplate>
- </Page.Resources>
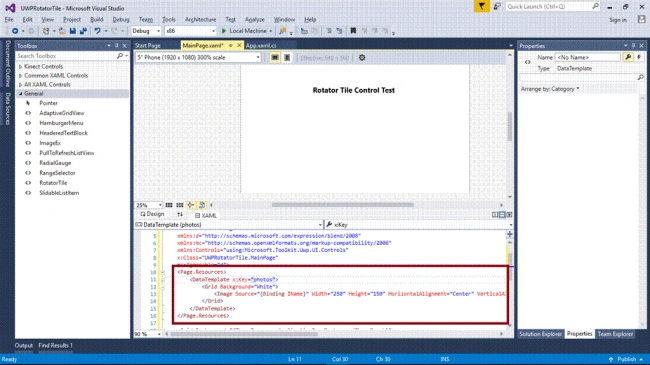
Step 6 - Add UWP Tool Kit Name Space in Mainpage.xaml.
xmlns:Controls="using:Microsoft.Toolkit.Uwp.UI.Controls"
Add RotatorTile Control from Tool Kit and set the Name, ItemTemplate properties.
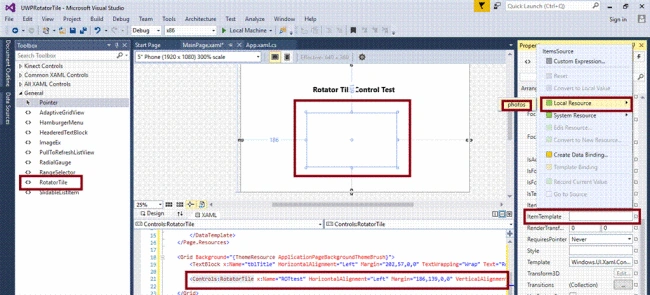
Note- Automatically, the code, given below, will be generated in XAML code view, while we are done in the design view.
- <Page xmlns="http://schemas.microsoft.com/winfx/2006/xaml/presentation" xmlns:x="http://schemas.microsoft.com/winfx/2006/xaml" xmlns:local="using:UWPRotatorTile" xmlns:d="http://schemas.microsoft.com/expression/blend/2008" xmlns:mc="http://schemas.openxmlformats.org/markup-compatibility/2006" xmlns:Controls="using:Microsoft.Toolkit.Uwp.UI.Controls" x:Class="UWPRotatorTile.MainPage" mc:Ignorable="d">
- <Page.Resources>
- <DataTemplate x:Key="photos">
- <Grid Background="White">
- <Image Source="{Binding IName}" Width="250" Height="150" HorizontalAlignment="Center" VerticalAlignment="Center" Stretch="UniformToFill" />
- </Grid>
- </DataTemplate>
- </Page.Resources>
- <Grid Background="{ThemeResource ApplicationPageBackgroundThemeBrush}">
- <TextBlock x:Name="tblTitle" HorizontalAlignment="Left" Margin="202,57,0,0" TextWrapping="Wrap" Text="Rotator Tile Control Test" VerticalAlignment="Top" Height="29" Width="239" FontWeight="Bold" FontSize="20" />
- <Controls:RotatorTile x:Name="ROTtest" HorizontalAlignment="Left" Margin="186,139,0,0" VerticalAlignment="Top" Width="250" Height="150" ItemTemplate="{StaticResource photos}" />
- </Grid>
- </Page>
- using System.Collections.ObjectModel;
- public class MenuItem {
- public string IName {
- get;
- set;
- }
- }
- public sealed partial class MainPage: Page {
- public MainPage() {
- this.InitializeComponent();
- ObservableCollection < MenuItem > items = new ObservableCollection < MenuItem > ();
- items.Add(new MenuItem() {
- IName = "ms-appx:///Assets//01.jpg"
- });
- items.Add(new MenuItem() {
- IName = "ms-appx:///Assets//02.jpg"
- });
- items.Add(new MenuItem() {
- IName = "ms-appx:///Assets//03.jpg"
- });
- items.Add(new MenuItem() {
- IName = "ms-appx:///Assets//04.jpg"
- });
- items.Add(new MenuItem() {
- IName = "ms-appx:///Assets//05.jpg"
- });
- items.Add(new MenuItem() {
- IName = "ms-appx:///Assets//06.jpg"
- });
- ROTtest.ItemsSource = items;
- }
- }
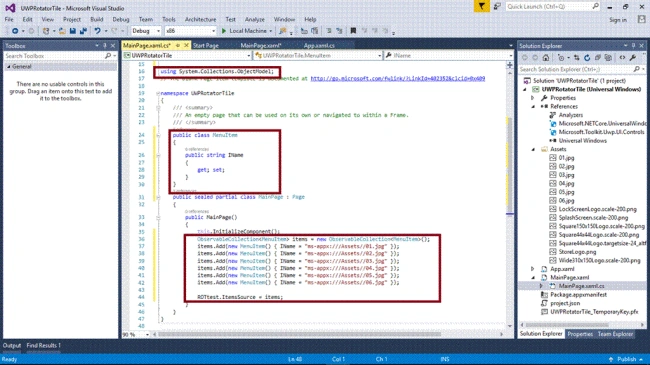
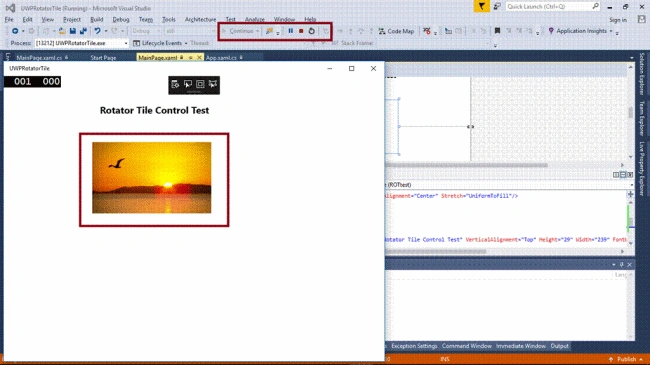
Step 8- Deploy your app in Local Machine and the output of UWPRotatorTile app is-
First Tile Item Display in RotatorTile
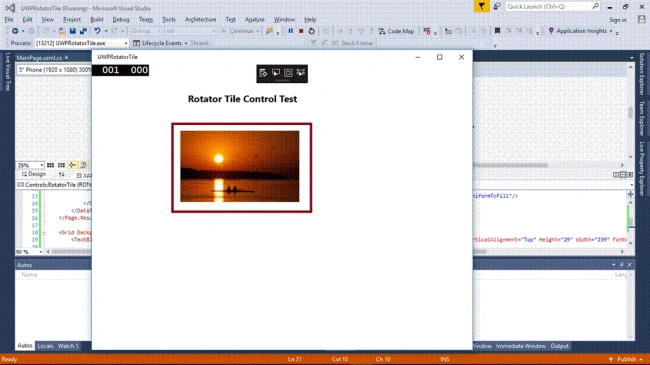
Other Item in RotatorTile after the rotation
Summary - Now, you have successfully tested UWP Tool Kit – RotatorTile Control in Visual C# - UWP environment.
Join the conversation! Your thoughts help the community grow.