

Introduction
In today’s digital landscape, securing sensitive data during transmission is more critical than ever. While HTTPS provides a secure channel, adding an extra layer of encryption at the application level can significantly enhance security. This article walks you through a robust encryption-decryption strategy using AES and RSA, implemented on the frontend with Angular and backend with .NET Core.
Solution Overview
Part 1. Encrypting the Payload on the Frontend.
- Generate a dynamic AES Key.
- Encrypt the API Payload using AES Key.
- Encrypt the AES KEY using the RSA Public Key.
- Prepare the new encrypted payload.
- { Encrypted AES Key, Encrypted Payload }
- Pass this new payload to the backend.
Part 2. Decrypting the Payload on the Backend.
- Decrypt the AES Key using the RSA Private key.
- Decrypt the payload using the AES Key.

Part 1. Encrypting the Payload on the Frontend (Angular)
Step 1.1. Define a service for AES Encryption.
In this step, we will define a service in an Angular application that we will use 1.) To generate a dynamic AES key & 2.) To encrypt the payload/data using AES encryption.
In order to generate a dynamic AES key and to perform AES encryption, we will use the crypto-js library. Angular doesn't include built-in cryptographic utilities, so the crypto-js library is often used for cryptographic operations.
Now, install crypto-js in your application using the below cli command.
npm i crypto-js
After successfully installing crypto-js, create a service within your application named aes-encryption.service.ts. Add a function to generate a dynamic AES key and another function to encrypt the data.
import { Injectable } from "@angular/core";
import * as CryptoJS from 'crypto-js';

@Injectable({
    providedIn: "root"
})
export class AESEncryptionService {

    constructor() { }

    // Generate a random 256 bit AES key
    generateAESKey(){
        // Generate a random 256-bit (12-byte) key
        const secretKey = CryptoJS.lib.WordArray.random(12);
        // Convert the key to a string if needed
        const secretKeyString = secretKey.toString(CryptoJS.enc.Hex);
        return secretKeyString;
    }

    // Encrypt the pain text
    encryptUsingAES256(plain_data,key) {
        const secretKey = CryptoJS.enc.Utf8.parse(key);
        const encrypted_string = CryptoJS.AES.encrypt(JSON.stringify(plain_data), secretKey, {
            mode: CryptoJS.mode.ECB,
            padding: CryptoJS.pad.Pkcs7
          }).toString();
        return encrypted_string;
    }
}
Step 1.2. Generate RSA Private & Public Key.
To implement RSA encryption, we will need a Private & Public Key. The private key and public key are two parts of a cryptographic key pair used in asymmetric encryption.To generate RSA keys you can use opneSSL library.
How to generate RSA keys?
I have explained the steps in my other article, which you can refer to by clicking the link below.
Or you can also use any online available tools to generate the keys.
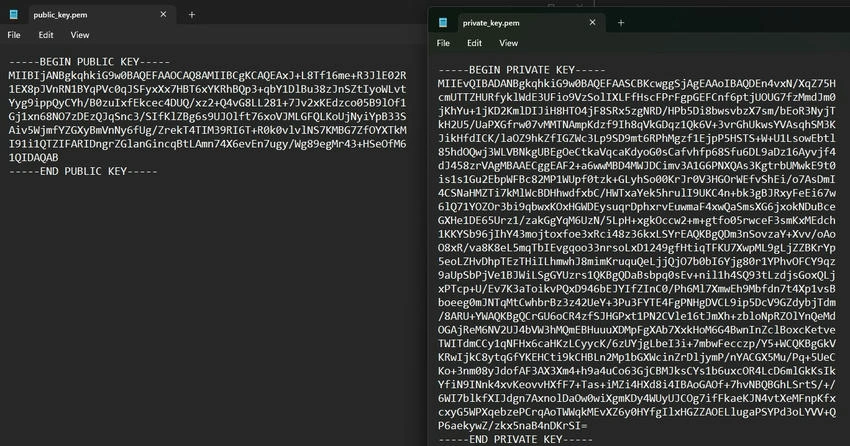
As a result of this site, you will have two files, save both files with you,
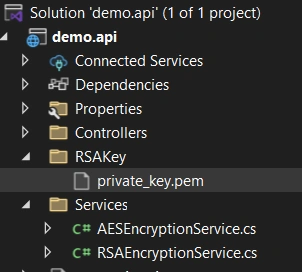
- private_key.pem: Contains the RSA private key (Note - We will use this file later in our .NET solution for decryption)
- public_key.pem: Contains the RSA public key.

Step 1.3. Define a service for RSA Encryption.
In this step, we will define a service that we will use to encrypt the AES key using RSA encryption with the help of the RSA public key that we have generated in Step 1.2.
In order to implement RSA encryption, we will use jsencrypt. This library allows you to encrypt data on the client side using a public key, which can then be decrypted on the server side using the corresponding private key.
Now, install jsencrypt in your application using the below cli command.
npm i jsencrypt
After successfully installing jsencrypt, create a service within your application named rsa-encryption.service.ts.
Now, let's add a variable named publicKey & copy the content of the file 'public_key.pem' (generated in Step 1.2) in this variable and add a function which will encrypt the data using this public key.
import { Injectable } from '@angular/core';
import { JSEncrypt } from 'jsencrypt';

@Injectable({
    providedIn: 'root',
})
export class RSAEncryptionService {

    $encrypt: any; // JSEncrypt Instance

    publicKey: string = `-----BEGIN PUBLIC KEY-----
MIIBIjANBgkqhkiG9w0BAQEFAAOCAQ8AMIIBCgKCAQEAxJ+L8Tf16me+R3JlE02R
1EX8pJVnRN1BYqPVc0qJSFyxXx7HBT6xYKRhBQp3+qbY1DlBu38zJnSZtIyoWLvt
Yyg9ippQyCYh/B0zuIxfEkcec4DUQ/xz2+Q4vG8LL281+7Jv2xKEdzco05B9lOf1
Gj1xn68NO7zDEzQJqSnc3/SIfKlZBg6s9UJOlft76xoVJMLGFQLKoUjNyiYpB33S
Aiv5WjmfYZGXyBmVnNy6fUg/ZrekT4TIM39RI6T+R0k0vlvlNS7KMBG7ZfOYXTkM
I91i1QTZIFARIDngrZGlanGincqBtLAmn74X6evEn7ugy/Wg89egMr43+HSeOfM6
1QIDAQAB
-----END PUBLIC KEY-----`;

    constructor() {
        this.$encrypt = new JSEncrypt();
     }

    encryptWithPublicKey(plaintext: string): string {
        this.$encrypt.setPublicKey(this.publicKey);
        var cypherText = this.$encrypt.encrypt(plaintext);
        return cypherText;
    }
}
Step 1.4. Implement Encryption & Pass Encrypted Data To Server
Now, we have created services for AES & RSA encryption. Let's use these services to implement the client-side encryption.
- In your Component, import the following services.
- AESEncryptionService: To encrypt the formData using AES encryption.
- RSAEncryptionService: To encrypt the AES key using RSA encryption.
- AppService: To make an HTTP call and pass data to the server (I have not added code for AppService, please create the same if you don't have it already in your solution).
- Define a method to capture the data.
- Finally, define a method to perform the required encryption and call your service to pass the final payload to the backend server.
import { Component} from '@angular/core';
import { AESEncryptionService } from './Services/aes-encryption.service';
import { RSAEncryptionService } from './Services/rsa-encryption.service';
import { AppService } from './Services/app.service';

@Component({
  selector: 'my-app',
  templateUrl: './app.component.html',
  styleUrls: [ './app.component.css' ]
})
export class AppComponent  {

  constructor(private appService: AppService,
    private aes_encryptionSvc: AESEncryptionService,
    private rsa_encryptionSvc: RSAEncryptionService) { }

    //** Note - This is a sample code, Define your business logic to capture or prepare data */
    onSubmitButtonClick(){
      const _data = {
        Name: "sandeep nandey",
        Email: "[email protected]",
        Contact: "9876543210",
        Address: "Address Field-1, Landmark, City, State - Pincode"
      }
      this.submitForm(_data);
    }

    // Submit Form Data
    submitForm(formData) {

      // 1. Generate Dynamic AES KEY
      const _KEY = this.aes_encryptionSvc.generateAESKey();

      // 2. Encrypt the formData using AES Key
      const encrypted_formData :any = this.aes_encryptionSvc.encryptUsingAES256(formData,_KEY);

      // 3. Encrypt the AES KEY using RSA Public Key
      const aesKey: any = {AESKey: _KEY};
      const encrypted_aesKey = this.rsa_encryptionSvc.encryptWithPublicKey(JSON.stringify(aesKey));

      // 4. Prepare the new payload (Encrypted formData, Encrypted _KEY)
      var final_payload = {
        Data:encrypted_formData,
        Key:encrypted_aesKey
      }

      // 5. Pass this new payload to Server
      this.appService.submitData(final_payload).subscribe((d: any) => {
          if (d && d.Result) {
            console.log("Success - " + d.Result)
        }
      }, _error => {
        console.log(_error)
      });
    }
}
Join the conversation! Your thoughts help the community grow.