

In this article we will discuss about the set up security to control user access to parts of a Visual Studio LightSwitch Application 2011.
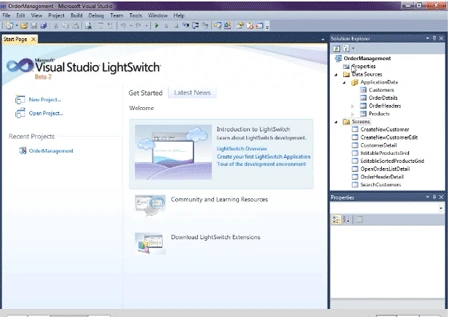
First of all we create tables and their corresponding screens in the LightSwitch Application. For creating tables and screens in LightSwitch Application, Please visit this link "http://www.c-sharpcorner.com/1/274/visual-studio-lightswitch-2011.aspx".Step 1: Now go to properties.
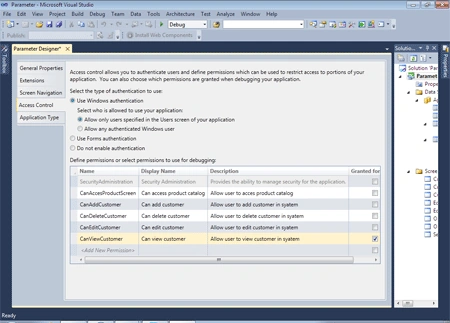
Step 2: Click access control->Click user windows authentication->Click allow users specified in the users screen of your application->Write name, display name, description likes as a below image.
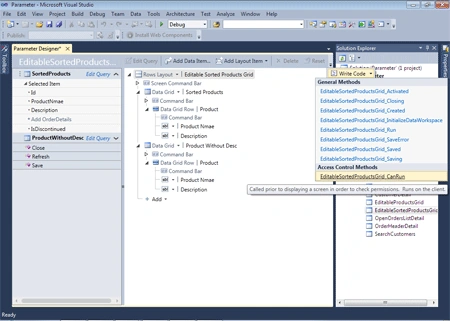
Step 3: Open EditableSortedProductsGrid screen->Select write code->Click EditableSortedProductsGrid_CanRun->Now write the below code.
using
System;
using
System.Linq;
using System.IO;
using
System.IO.IsolatedStorage;
using
System.Collections.Generic;
using
Microsoft.LightSwitch;
using
Microsoft.LightSwitch.Framework.Client;
using
Microsoft.LightSwitch.Presentation;
using
Microsoft.LightSwitch.Presentation.Extensions;
namespace
LightSwitchApplication
{
public partial
class Application
{
partial void
EditableSortedProductsGrid_CanRun(ref
bool result)
{
// Set result to the desired field value
result = this.User.HasPermission(Permissions.CanAccesProductScreen);
}
}
}
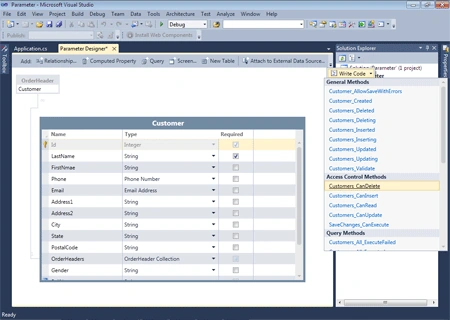
Step 4: Open customer table->Select write code->Click Customers_CanDelete, Customers_CanInsert, Customers_CanRead, Customers_CanUpdate->Now write the below code.
using
System;
using
System.Collections.Generic;
using
System.Linq;
using
System.Text;
using
Microsoft.LightSwitch;
using
Microsoft.LightSwitch.Security.Server;
namespace
LightSwitchApplication
{
public partial
class
ApplicationDataService
{
partial void
Customers_CanDelete(ref
bool result)
{
result = this.Application.HasPermission(Permissions.CanDeleteCustomer);
}
partial void
Customers_CanInsert(ref
bool result)
{
result = this.Application.HasPermission(Permissions.CanAddCustomer);
}
partial void
Customers_CanRead(ref
bool result)
{
result = this.Application.HasPermission(Permissions.CanViewCustomer);
}
partial void
Customers_CanUpdate(ref
bool result)
{
result = this.Application.HasPermission(Permissions.CanEditCustomer);
}
}
}
Step 5: Open SearchCustomer screen->Select write code->Click SearchCustomer_CanRun->Now write the below code.
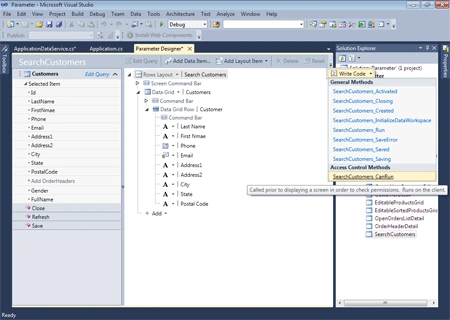
using
System;
using
System.Linq;
using System.IO;
using
System.IO.IsolatedStorage;
using
System.Collections.Generic;
using
Microsoft.LightSwitch;
using
Microsoft.LightSwitch.Framework.Client;
using
Microsoft.LightSwitch.Presentation;
using
Microsoft.LightSwitch.Presentation.Extensions;
namespace
LightSwitchApplication
{
public partial
class Application
{
partial void
EditableSortedProductsGrid_CanRun(ref
bool result)
{
// Set result to the desired field value
result = this.User.HasPermission(Permissions.CanAccesProductScreen);
}
partial void
SearchCustomers_CanRun(ref
bool result)
{
// Set result to the desired field value
result = this.User.HasPermission(Permissions.CanViewCustomer);
}
}
}
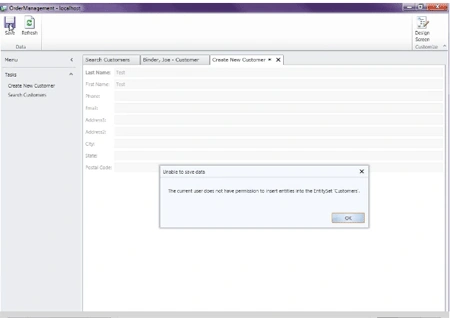
Step 6: Run application->Open create new customer->Fill data->Save->Ok.
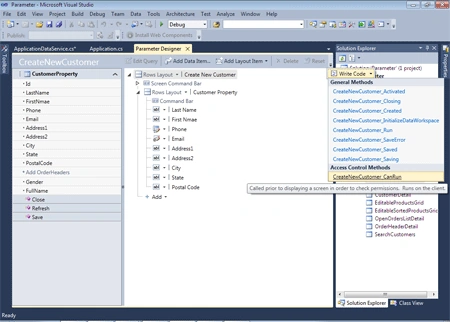
Step 7: Open CreateNewCustomer screen->Select write code->Click CreateNewCustomer_CanRun->Now write the below code.
using
System;
using
System.Linq;
using System.IO;
using
System.IO.IsolatedStorage;
using
System.Collections.Generic;
using
Microsoft.LightSwitch;
using
Microsoft.LightSwitch.Framework.Client;
using
Microsoft.LightSwitch.Presentation;
using
Microsoft.LightSwitch.Presentation.Extensions;
namespace
LightSwitchApplication
public partial
class Application
{
partial void
EditableSortedProductsGrid_CanRun(ref
bool result)
{
// Set result to the desired field value
result = this.User.HasPermission(Permissions.CanAccesProductScreen);
}
partial void
SearchCustomers_CanRun(ref
bool result)
{
// Set result to the desired field value
result = this.User.HasPermission(Permissions.CanViewCustomer);
}
partial void
CreateNewCustomer_CanRun(ref
bool result)
{
// Set result to the desired field value
result = this.User.HasPermission(Permissions.CanAddCustomer);
}
}
}
Step 8: Open SerchCustomer screen->command Bar->Add..->Right click->Select Edit CanExecuteCode->Now write the below code.
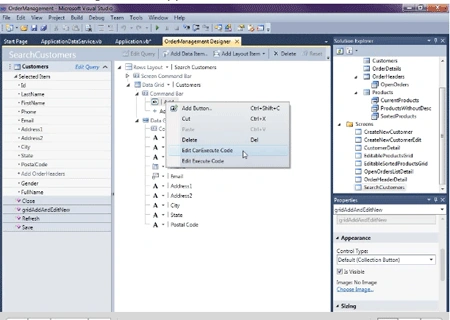
using
System;
using
System.Linq;
using System.IO;
using
System.IO.IsolatedStorage;
using
Microsoft.LightSwitch;
using
Microsoft.LightSwitch.Framework.Client;
using
Microsoft.LightSwitch.Presentation;
namespace
LightSwitchApplication
{
public partial
class
SearchCustomers
{
partial void
gridAddAndEditNew_CanExecute(ref
bool result)
{
// Write your code here.
result = this.Application.HasPermission(Permissions.CanAddCustomer);
}
}
}
Step 9: Run application-> + sign will not work->Now go to properties->Application type->Publish->Next->Next->Write path (where do you want the application file to be placed )->Next->Next->Enter user name->Next->Next->Next->Publish.
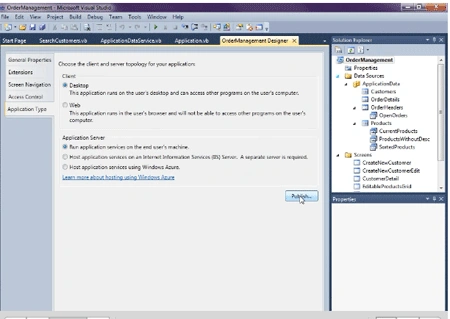
Step 10: Open the path where you placed the application file->Double click on setup.exe->Click install.
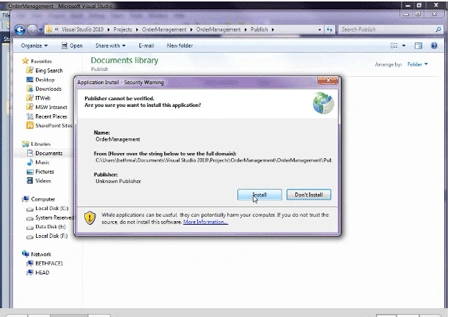
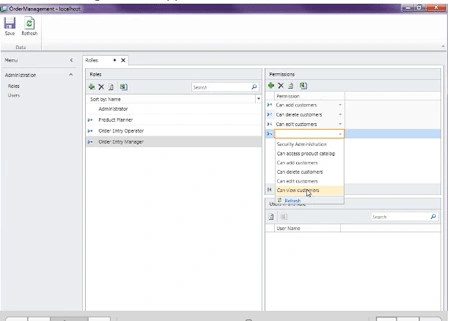
Step 11: Click Roles->Click + sign in roles->Fill data->Now click + sign in Permission->Select data->Save.
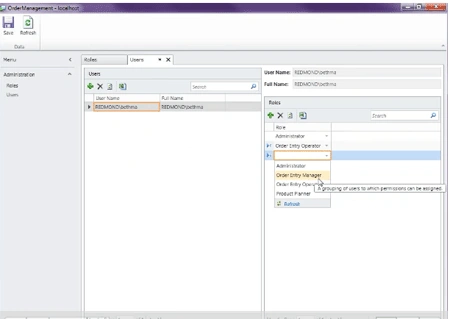
Step 12: Click users->Click + sign in Roles->Select data->Close window.
Step 13: Now open order management->Click CreateNewCustomer->Fill data->Save->Close window.
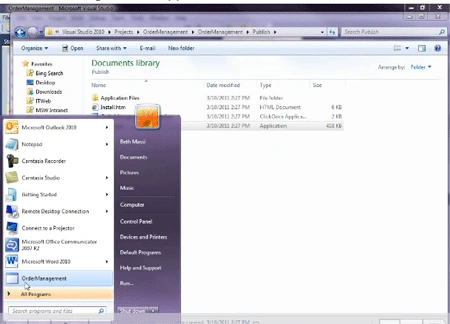
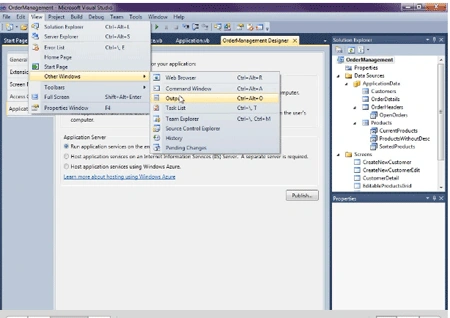
Step 14: Now go to view->Other windows->Output->Access control->Click use form authentication.
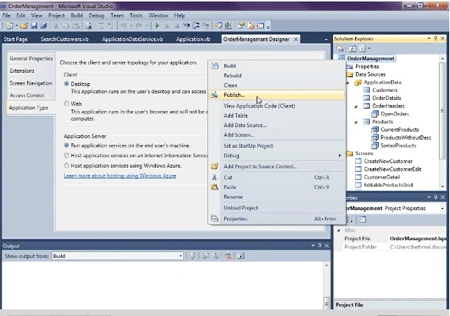
Step 15: Right click on OrderManagement->Publish->Client configuration->Next->Next->Next->Next->Click yes create application administrator->Enter user name, full name, word->Next->Next->Next->Publish.
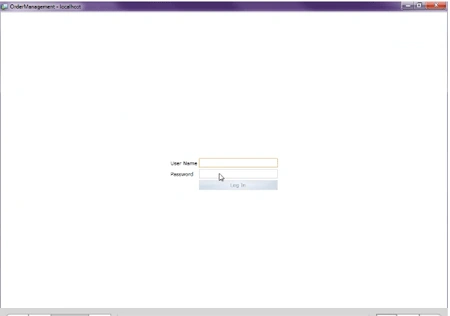
Step 16: Double click on setup.exe in the source path then open the login window->Enter user name and word.
Summary
Using this article one can easily apply the authentication in the LightSwitch application. This article is very useful for authentication in LightSwitch.
Join the conversation! Your thoughts help the community grow.