

In this article, we will explore the different means by which we can enable multi-factor authentication in Microsoft 365 (also known as Office 365), such as Security Defaults, Conditional Access and per person MFA.
Introduction and Background
Multi factor authentication (MFA) is a much-needed security feature for any cloud tenant or cloud-based applications. Relying singularly and entirely on passwords leaves your accounts susceptible to threats. Passwords can be weakly selected words, or commonly used across websites, etc.
MFA provides that added layer of security towards authentication. Multi-factor authentication is a simple process where users are authenticated by an additional step of verification such as a face unlock via your connected phone, or an SMS on your mobile number. A combination of strong password and MFA verification provides an excellent security to your online accesses to cloud applications and services.
Different means of configuring MFA
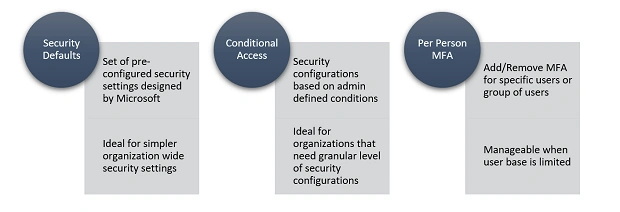
- Security Defaults
Set of pre-configured security settings designed by Microsoft
Ideal for simpler organization wide security settings
- Conditional Access
Security configurations based on admin defined configurations
Ideal for organizations or tenants, that need granular level of control for their security configurations
- Per person MFA
Add or remove MFA for specific users or group of users
Manageable and ideal when user base in tenant is limited.
Enable MFA by means of Security Defaults
Step 1
Sign into Microsoft 365 Admin Center from this URL https://admin.microsoft.com/
Step 2
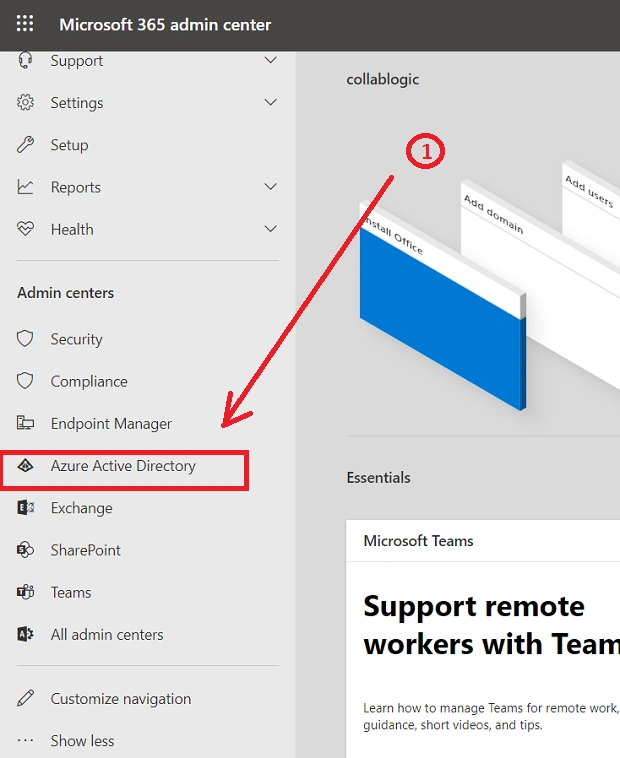
Click on Azure Active Directory under Admin Centres
Step 3
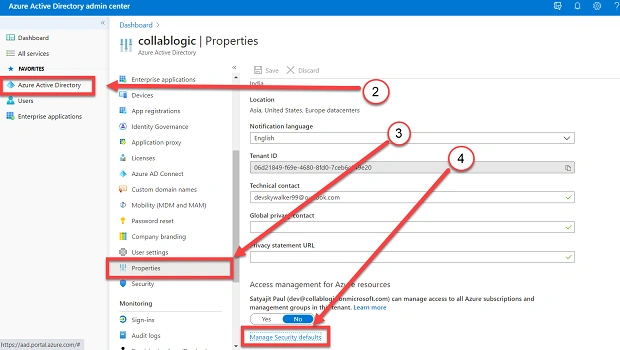
Click on Azure Active Directory from the Azure Portal you are redirected to.
Step 4
Click on Properties
Step 5
Click on Manage Security Defaults
Step 6
Enable the Security Defaults – Select Yes. Click on Save.
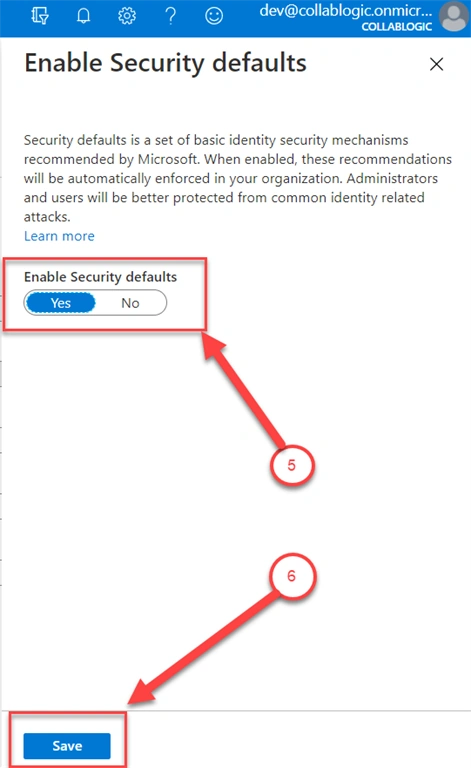
This will enable MFA for your tenant by means of Security Defaults.
Enable MFA by means of Conditional Access
The steps below outline how to enable MFA using Conditional Access. It must be however noted that, before enabling any Conditional Access, Security Defaults must be disabled.
Step 1
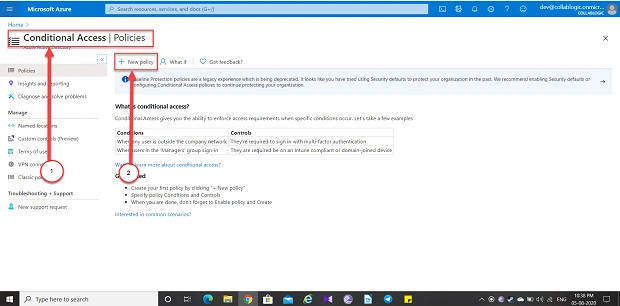
Go to Conditional Access from this link
Step 2
Click on New Policy
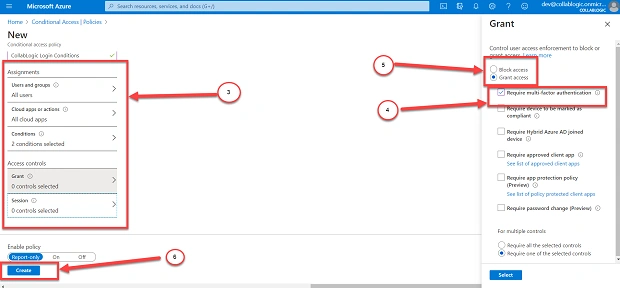
Step 3
Enter the desired policy Assignments and Conditions
Step 4
In the Grant section, check the box Require multi-factor authentication, and click on select.
Step 5
Finish this process, by clicking on Create on the Enable policy.
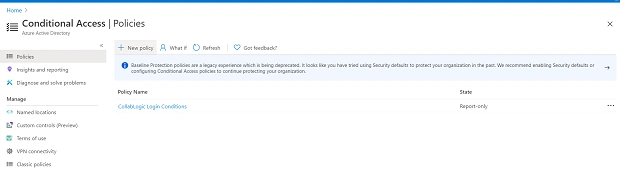
This will enable MFA for your tenant. The newly created Policy will appear as shown in the screenshot below.
Enable MFA by means of Per Person MFA
The steps below outline how to enable MFA using per person configuration.
Step 1
Log in to the Microsoft 365 Admin centre from here
Step 2
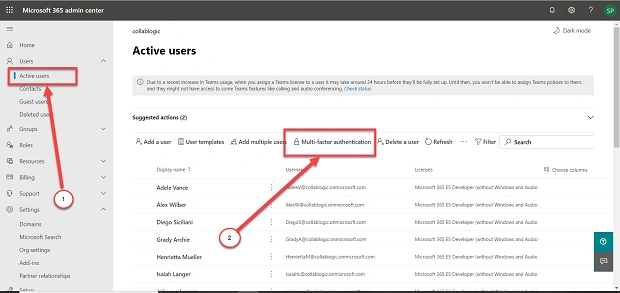
From the Users section click on Active Users, and then click on Multi Factor Authentication. This will open the bulk update screen
Step 3
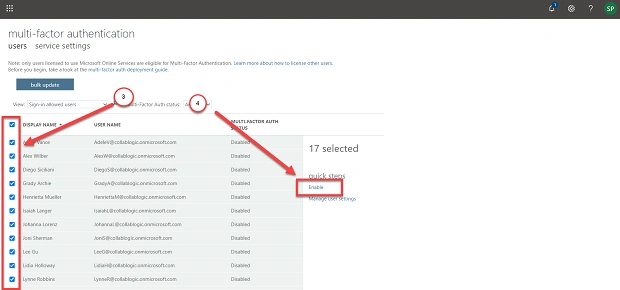
From the next screen, select any user or group of users for whom you wish to enable the MFA.
Step 4
After the users are selected, click on Enable.
Step 5
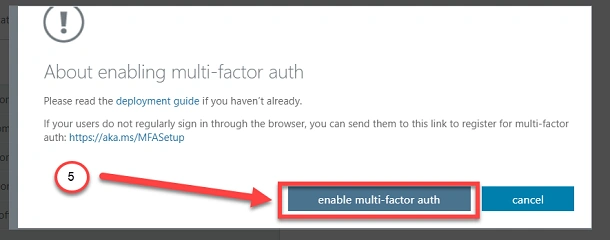
The previous action will prompt for a confirmation screen. Click on Enable multi-factor auth, to enable the MFA for the selected users
This concludes the steps for enabling MFA by per person.
Summary
In this article, we explored the various means available to Microsoft 365 admins for enabling multi-factor authentication for their tenant’s users. We also had a look at the importance of additional security for cloud tenants and how MFA serves this purpose.
Thank you for stopping by! This article can also be found in my personal blog - Collablogic
Join the conversation! Your thoughts help the community grow.