

Introduction
- Android Studio version 2.1.3
If you want to create volume, vibrate, and silent mode in switch control, follow the below steps.
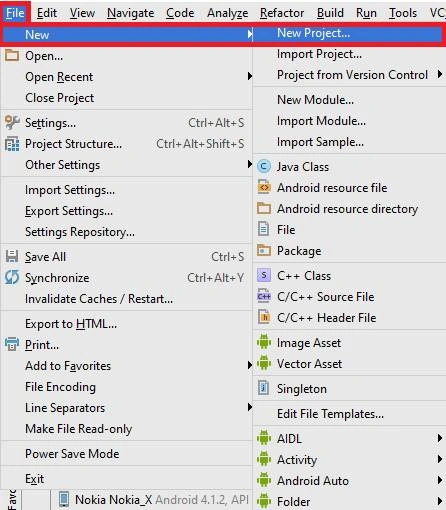
Step 1 Open Android Studio and choose File >> New >> NewProject.
 Step 2
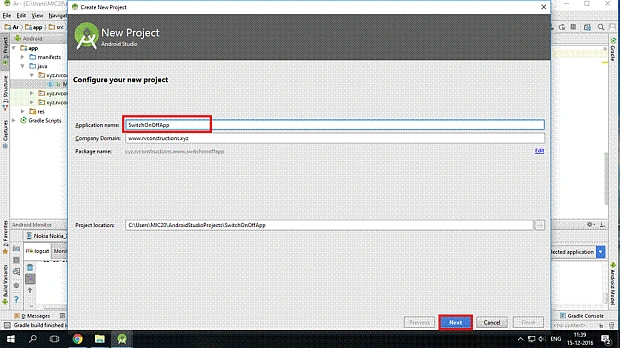
Here, enter your application name and select the location where your project should be stored. Then, click the NEXT button.
Step 2
Here, enter your application name and select the location where your project should be stored. Then, click the NEXT button.
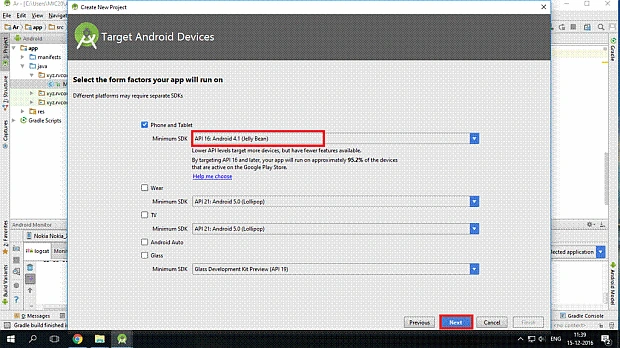
 Now, select the minimum version of Android for which you want to target the Android Devices.
 Step 3
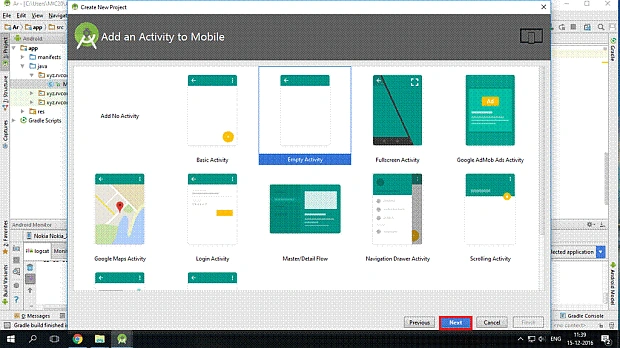
On the next screen, add the activity of your choice, Empty in our case, and click the Next button.
Step 3
On the next screen, add the activity of your choice, Empty in our case, and click the Next button.
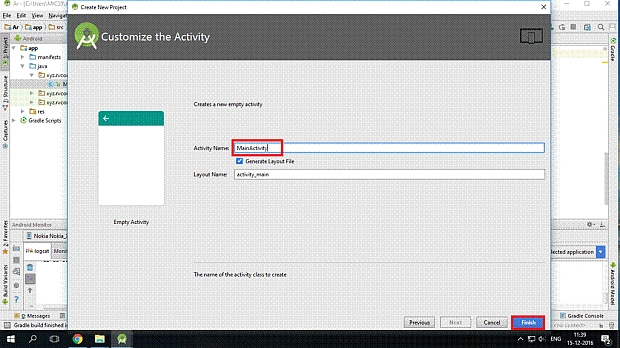
 Now, we write the activity name and click Finish.
  Step 4
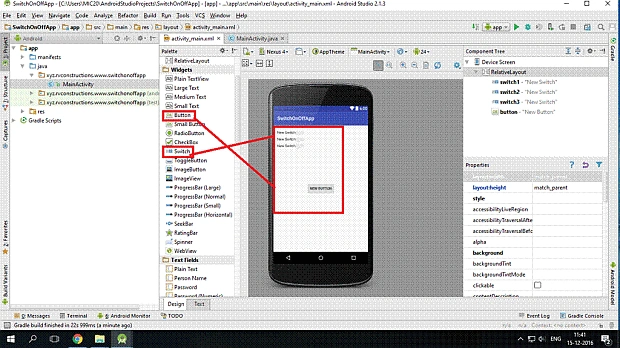
Now, open your project and go to activity_main.xml. Afterward, build the design with the help of drag and drop method, like dragging the Switch and Button tools .
Step 4
Now, open your project and go to activity_main.xml. Afterward, build the design with the help of drag and drop method, like dragging the Switch and Button tools .
 Step 5
Now, go to the source panel and write the XML code.
Activity_mai.xml code
Step 5
Now, go to the source panel and write the XML code.
Activity_mai.xml code
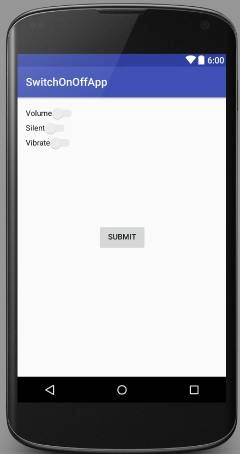
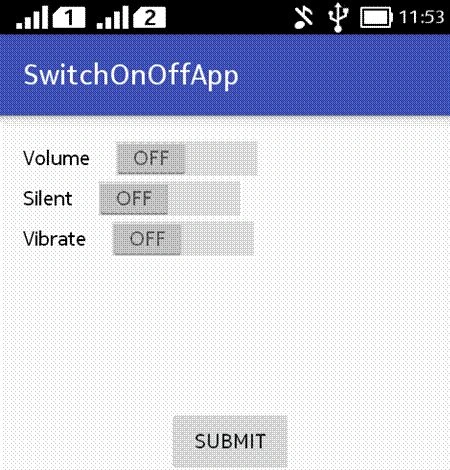
Now, we can see the Graphical User Interface design.
- <?xml version="1.0" encoding="utf-8"?>
- <RelativeLayout xmlns:android="http://schemas.android.com/apk/res/android" xmlns:tools="http://schemas.android.com/tools" android:layout_width="match_parent" android:layout_height="match_parent" android:paddingBottom="@dimen/activity_vertical_margin" android:paddingLeft="@dimen/activity_horizontal_margin" android:paddingRight="@dimen/activity_horizontal_margin" android:paddingTop="@dimen/activity_vertical_margin" tools:context="xyz.rvconstructions.www.switchonoffapp.MainActivity">
- <Switch android:layout_width="wrap_content" android:layout_height="wrap_content" android:text="Volume" android:id="@+id/vlm" android:layout_alignParentTop="true" android:layout_alignParentLeft="true" android:layout_alignParentStart="true" />
- <Switch android:layout_width="wrap_content" android:layout_height="wrap_content" android:text="Silent" android:id="@+id/slt" android:layout_below="@+id/vlm" android:layout_alignParentLeft="true" android:layout_alignParentStart="true" />
- <Switch android:layout_width="wrap_content" android:layout_height="wrap_content" android:text="Vibrate" android:id="@+id/vbt" android:layout_below="@+id/slt" android:layout_alignParentLeft="true" android:layout_alignParentStart="true" />
- <Button android:layout_width="wrap_content" android:layout_height="wrap_content" android:text="Submit" android:id="@+id/button" android:layout_centerVertical="true" android:layout_centerHorizontal="true" />
- </RelativeLayout>
- package xyz.rvconstructions.www.switchonoffapp;
- import android.support.v7.app.AppCompatActivity;
- import android.os.Bundle;
- import android.view.Menu;
- import android.view.MenuItem;
- import android.view.View;
- import android.widget.Button;
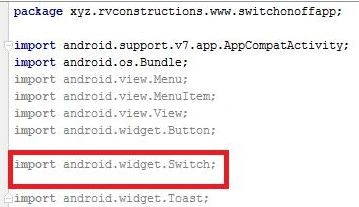
- import android.widget.Switch;
- import android.widget.Toast;
- public class MainActivity extends AppCompatActivity {
- Switch Switch1, Switch2, Switch3;
- Button submit;
- @Override
- protected void onCreate(Bundle savedInstanceState) {
- super.onCreate(savedInstanceState);
- setContentView(R.layout.activity_main);
- Switch1 = (Switch) findViewById(R.id.vlm);
- Switch2 = (Switch) findViewById(R.id.slt);
- Switch3 = (Switch) findViewById(R.id.vbt);
- submit = (Button) findViewById(R.id.button);
- submit.setOnClickListener(new View.OnClickListener() {
- @Override
- public void onClick(View view) {
- String statusSwitch1, statusSwitch2, statusSwitch3;
- if (Switch1.isChecked())
- statusSwitch1 = Switch1.getTextOn().toString();
- else
- statusSwitch1 = Switch1.getTextOff().toString();
- if (Switch2.isChecked())
- statusSwitch2 = Switch2.getTextOn().toString();
- else
- statusSwitch2 = Switch2.getTextOff().toString();
- if (Switch3.isChecked())
- statusSwitch3 = Switch3.getTextOn().toString();
- else
- statusSwitch3 = Switch2.getTextOff().toString();
- Toast.makeText(getApplicationContext(), "Volume :" + statusSwitch1 + "\n" + "Silent :" + statusSwitch2 + "\n" + "Vibrate :" + statusSwitch3, Toast.LENGTH_LONG).show(); // display the current state for switch's
- }
- });
- }
- @Override
- public boolean onOptionsItemSelected(MenuItem item) {
- int id = item.getItemId();
- if (id == R.id.action_bar) {
- return true;
- }
- return super.onOptionsItemSelected(item);
- }
- }
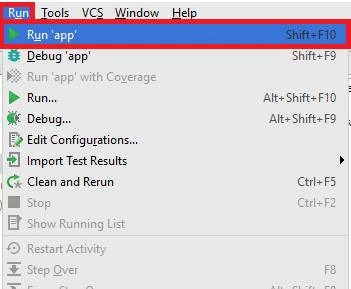
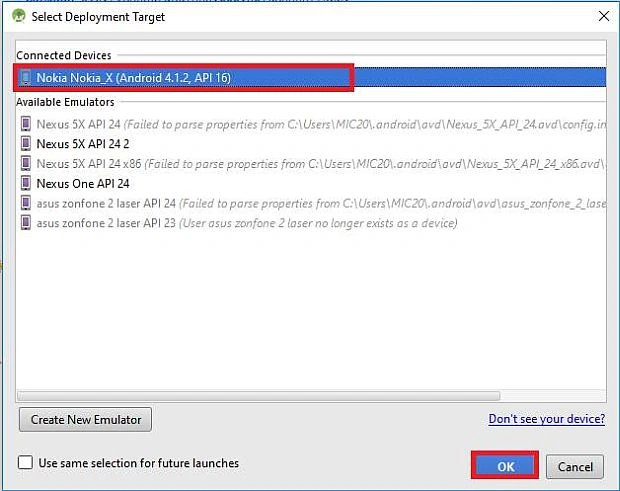
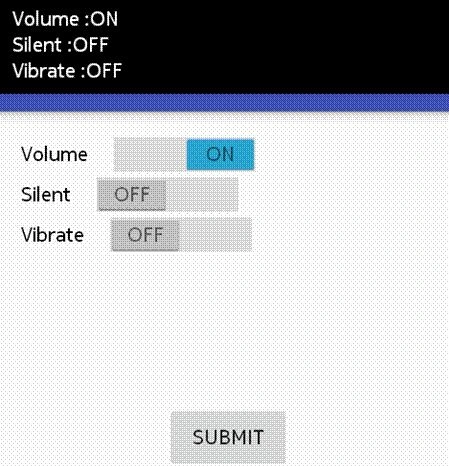
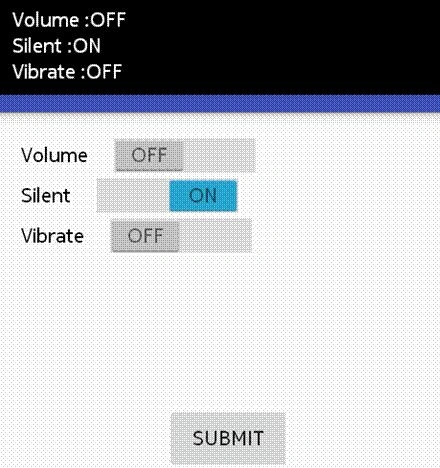
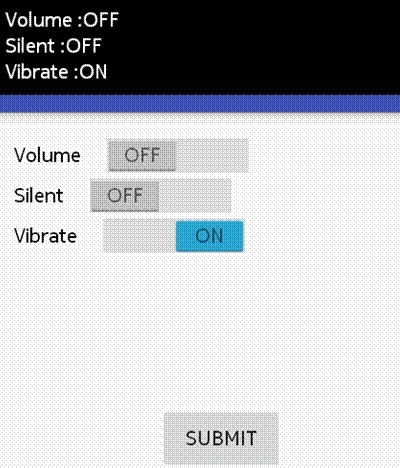
Finally, you can see the output, as shown below.
Join the conversation! Your thoughts help the community grow.