

Introduction
This article describes how to create a permission and write code to set permissions for the command using LightSwitch in Visual Studio 2012.
Here, we will learned how to define a permission for our application. The permission can be assigned to a user or a group of users.
Permission in LightSwitch for Commands
1. Creating a permission in LightSwitch
Step 1
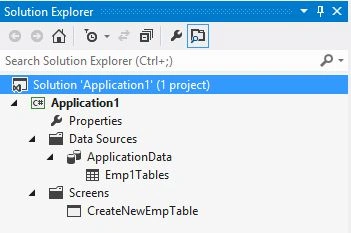
Open the Solution Explorer in LightSwitch Visual Studio 2012.
Image 1
Step 2
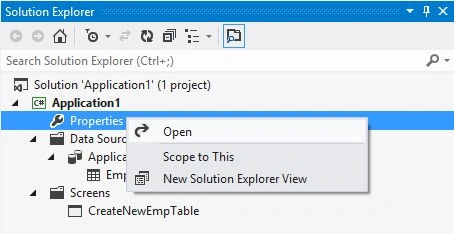
In the Solution Explorer double-click or right-click and select "Properties".
Image 2
Step 3
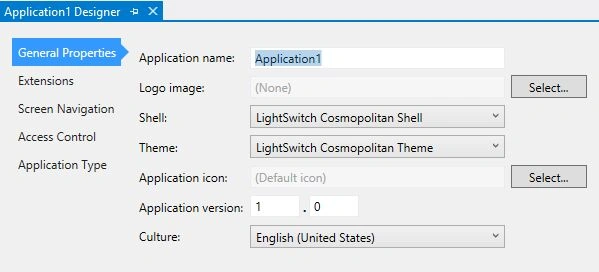
The Application Designer will appear.
Image 3
Step 4
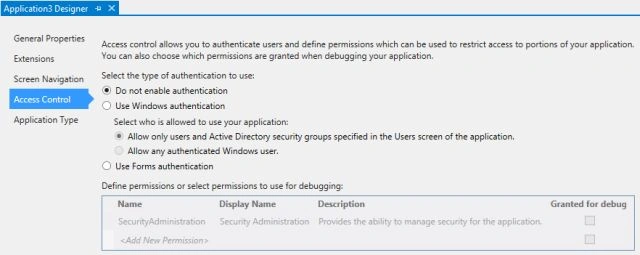
Choose the "Access control" option in the application designer.
Image 4
Step 5
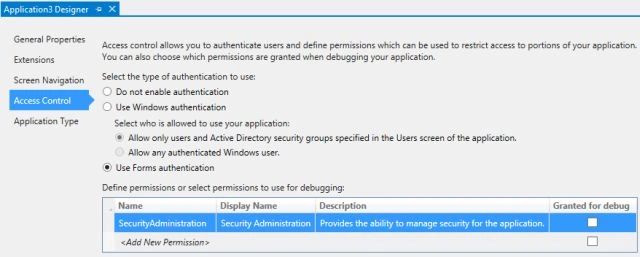
Select the type of authentication to use and in this "Use form authentication".
Image 5
Step 6
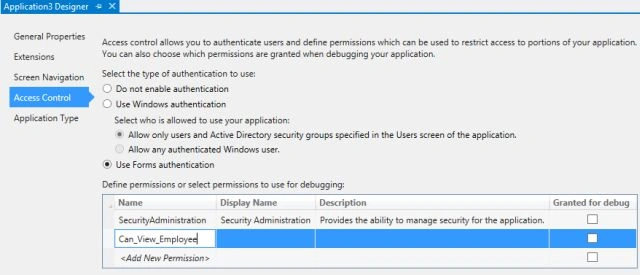
In the "Define permissions or select permissions to use for debugging" node click on "<Add New Permission>" and then type "Can_View_Employee" under "Name".
Image 6
Step 7
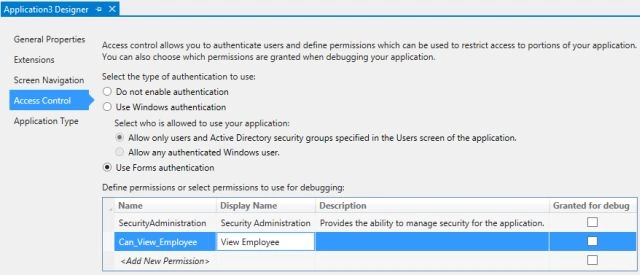
Similarily, under the "Display Name" column type "View Employee".
Image 7
Step 8
And in the same manner under the "Description column" type "Provide access to the employee screen".
Image 8

2. Writing code to set permissions for the command
Step 1
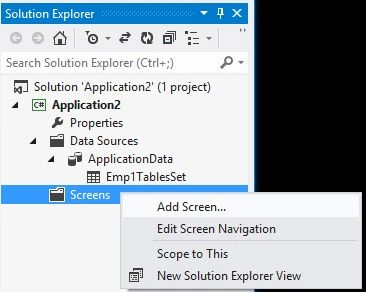
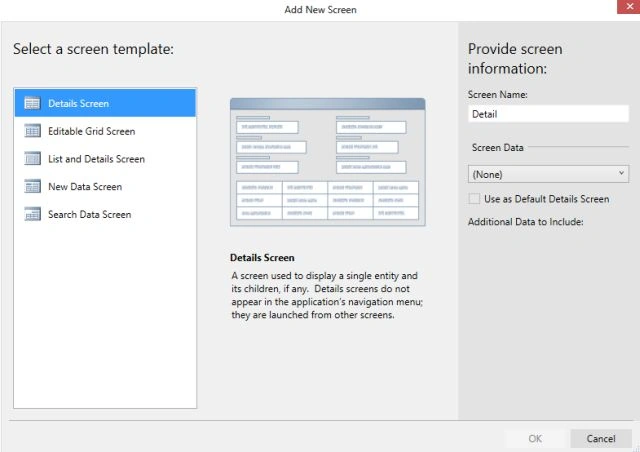
In the Solution Explorer we will "Add Screen".
Image 1
Step 2
"Add New Screen" will appear.
Image 2
Step 3
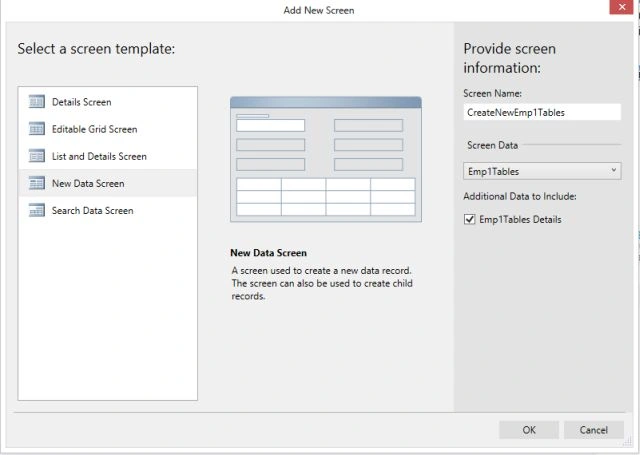
Now we will select a screen template as "New Data Screen" and in the screen data we will select "Emp1Tables" and click "OK".
Image 3
Step 4
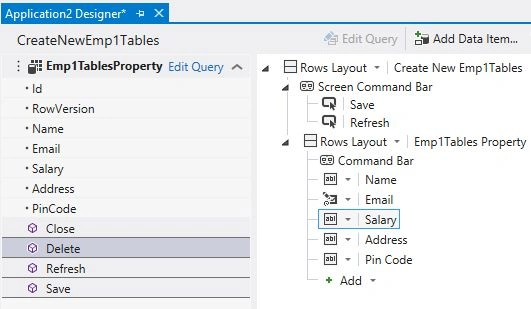
The Screen Designer will appear for the "Screen".
Image 4
Step 5
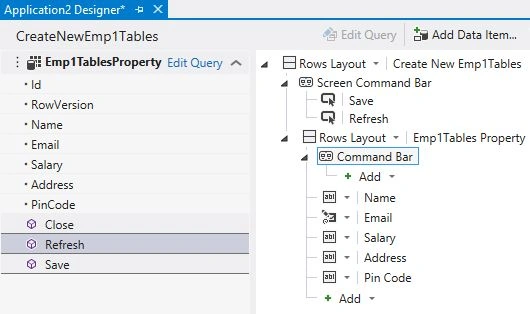
In the Screen Designer, expand "Command Bar". We will have an "Add" option under the Command Bar.
Image 5
Step 6
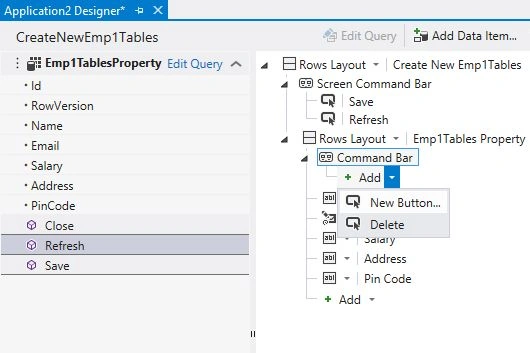
Click on the Add option to will see a drop down list consisting of an Add Button and Delete option.
Image 6
Step 7
Click on "New Button" option, a Dialog Box will appear.
Image 7
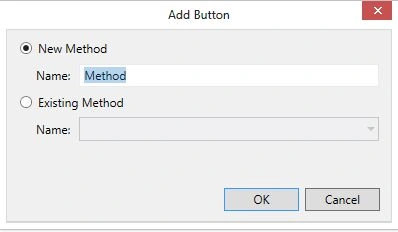
Step 8
Write the Name in "New Method" and click "OK." Here I have used "Delete" as Name.
Image 8
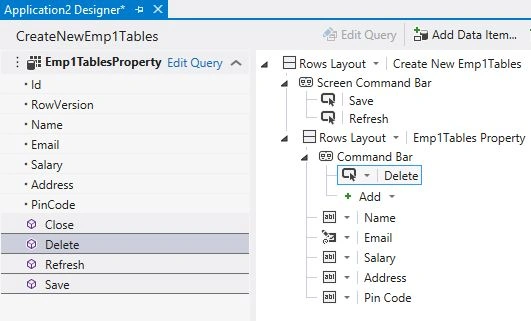
Step 9
Right-click on the ButtonName (Delete) and then choose "ButtonName_CanExecute", where ButtonName is the name of the command.
Image 9
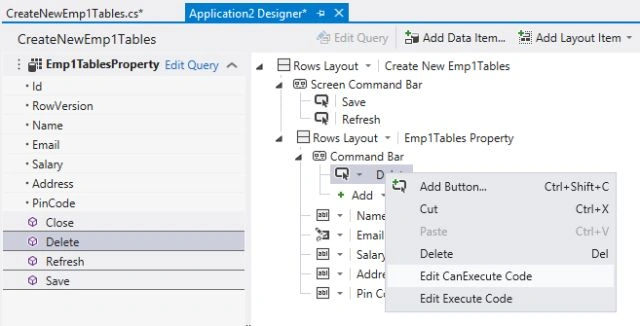
Step 10
In the "Delete_CanExecute" method write the code that you want to enter, as in the following:
using System;
using System.Linq;
using System.IO;
using System.IO.IsolatedStorage;
using System.Collections.Generic;
using Microsoft.LightSwitch;
using Microsoft.LightSwitch.Framework.Client;
using Microsoft.LightSwitch.Presentation;
using Microsoft.LightSwitch.Presentation.Extensions;
namespace LightSwitchApplication
{
public partial class CreateNewEmp1Tables
{
partial void CreateNewEmp1Tables_InitializeDataWorkspace(global::System.Collections.Generic.List<global::Microsoft.LightSwitch.IDataService> saveChangesTo)
{
// Write your code here.
this.Emp1TablesProperty = new Emp1Tables();
}
partial void CreateNewEmp1Tables_Saved()
{
// Write your code here.
this.Close(false);
Application.Current.ShowDefaultScreen(this.Emp1TablesProperty);
}
partial void Delete_CanExecute(ref bool result)
{
// Write your code here.
}
}
}
Join the conversation! Your thoughts help the community grow.