

In this article, you will learn how to setup and start the SharePoint 2013 User Profile Service.
Start the User Profile Service
- Open "Central Administration".
- Login with the account that was used to install the SharePoint.
- This account must have dbcreate and securityadmin server roles on the SQL Server {SQL Server 2012 Name}.
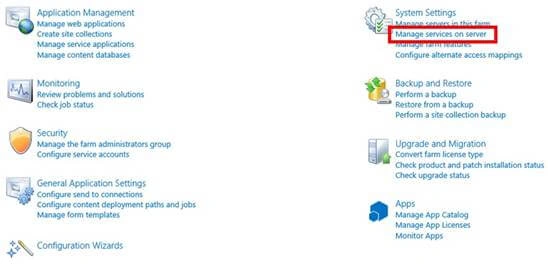
- Click “Manage services on server”, under “System Settings”.
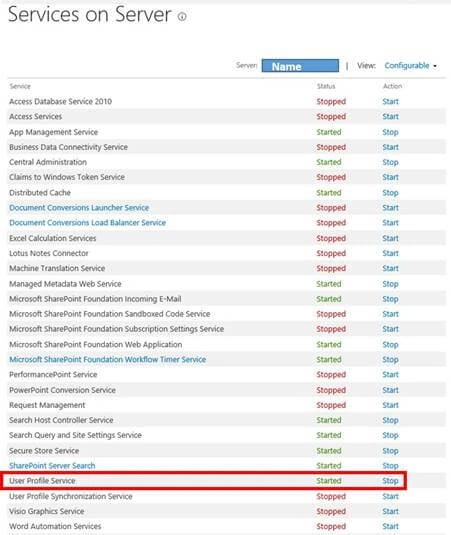
- Find "User Profile Service".
- Click "Start" on the right.
Create the User Profile Service (UPS) Application
- Open "Central Administration".
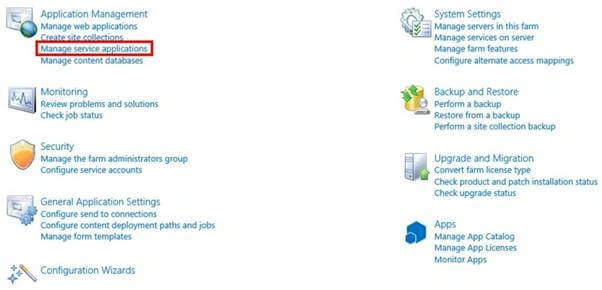
- Click “Manage service applications” under “Application Management”.
- Click “New”.
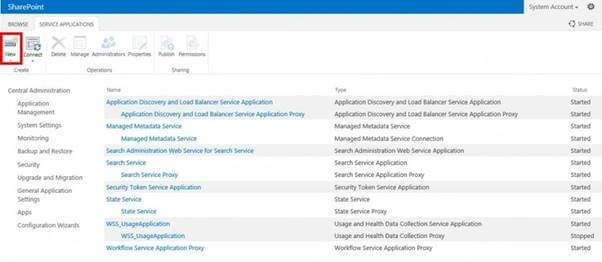
- Select "User Profile Service Application".
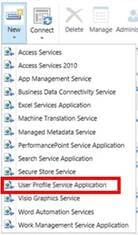
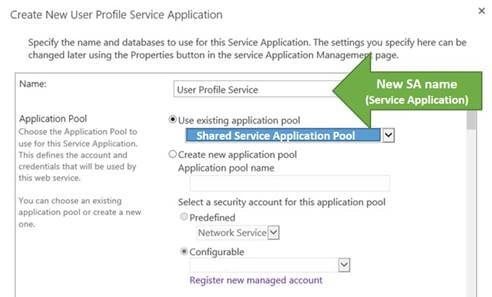
- Fill in the related fields.
(If I haven't mentioned the field, it has the default settings).
- Name - User Profile Service
- Application Pool - Use existing application pool: Shared Services
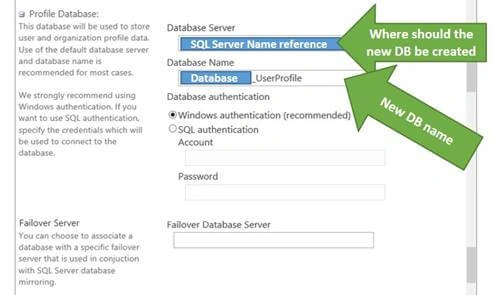
- Profile Database
- Database Server - {SQL Server 2012 Name}
- Database Name - {Database}_UserProfile
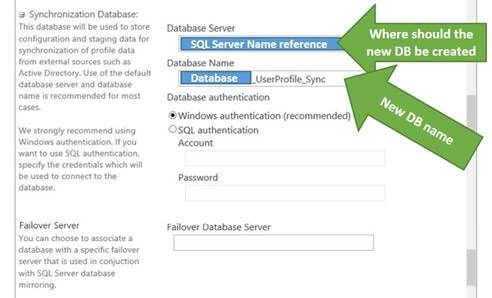
- Synchronization Database
- Database Server - {SQL Server 2012 Name}
- Database Name - {Database}_UserProfile_Sync
- Social Tagging Database
- Database Server - {SQL Server 2012 Name}
- Database Name - {Database}_UserProfile_Social
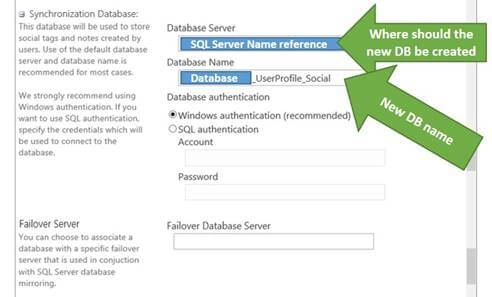
- Profile Synchronization Instance - {SharePoint Server Name}(default - current server)

- My Sites. If you don't have any site, you can leave it blank, as default.
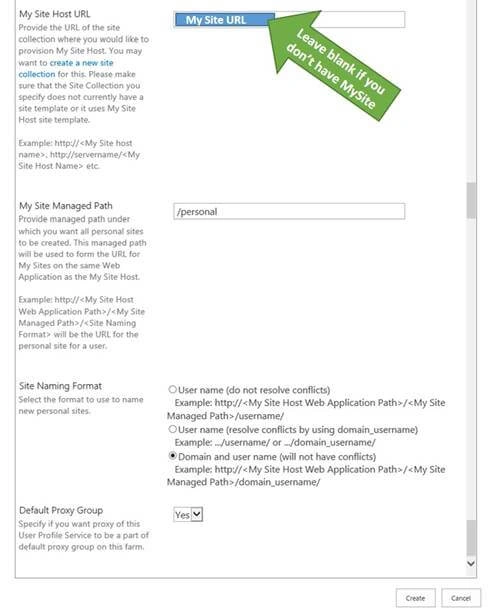
- Click "Create".
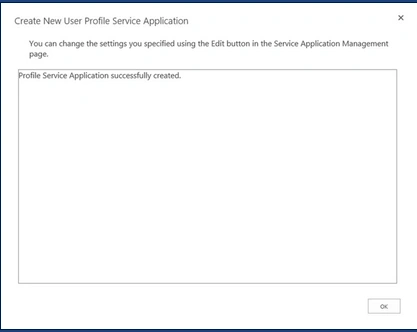
- Click "OK".
Start the User Profile Synchronization Service
Make sure the SPFarm account has local admin access to the SharePoint Server the UPS synchronization will be running on. This then needs to be removed once the synchronization is complete.
- Open "Central Administration".
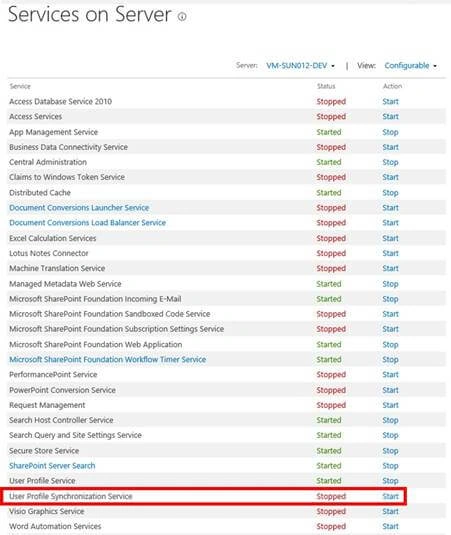
- Click “Manage services on server”, under “System Settings”.
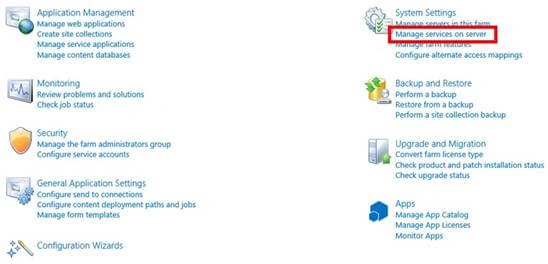
- Find "User Profile Synchronization Service".
- Click "Start" on the right.
- Fill in the Share Point Farm account.
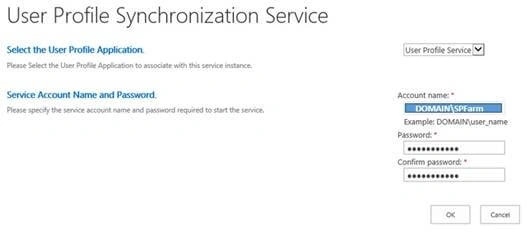
- Click "OK".
Reset the IIS
- Open "Command Prompt" as Administrator.
- Type and enter: iisreset.
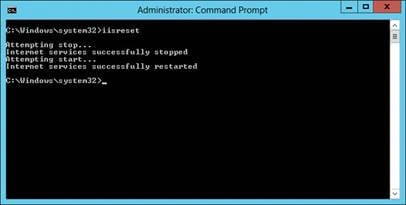
- Close "Command Prompt".
Create the Profile Synchronization Connection
- Open "Central Administration".
- Click “Manage service applications”, under “Application Management”.
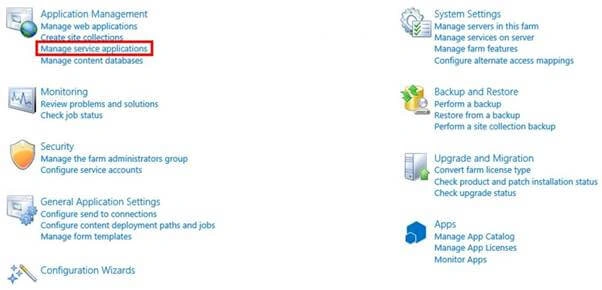
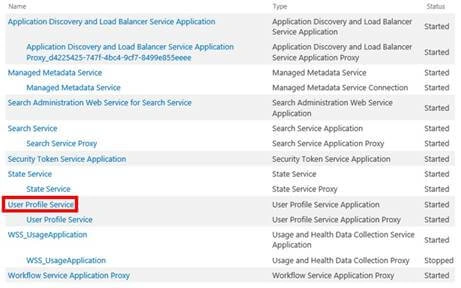
- Find and Select "User Profile Service".
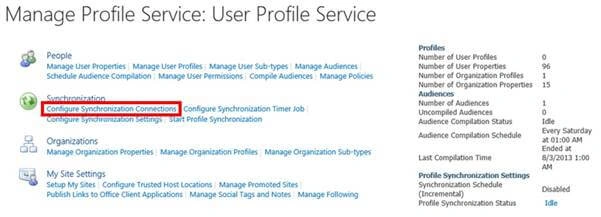
- Click "Configure Synchronization Connection" under Synchronization.
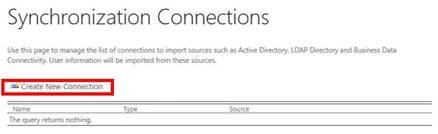
- Click "Create New Connection".
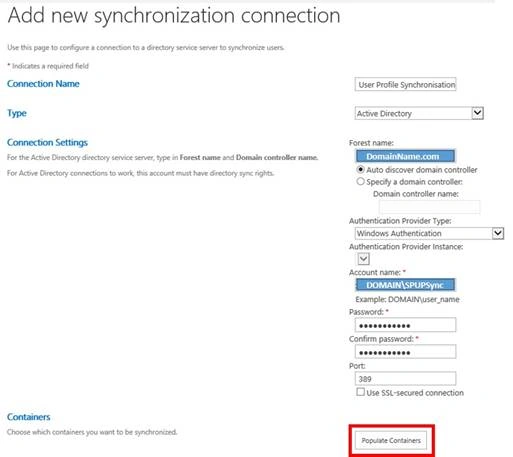
- Fill in the related fields
(If I haven't mentioned the field, i have left in the default settings.) - Connection Name - User Profile Synchronisation
- Forest name - {DomainName.com} or {DomainName.local}
- Account Name - Share Point UPSync account
This account must have "Directory replication rights" in AD (active directory) - Click "Populate Container"
- Select the User Accounts you want to add
- Click "OK"
Start the Profile Synchronization for the first time
- Open "Central Administration".
- Click “Manage service applications”, under “Application Management”.
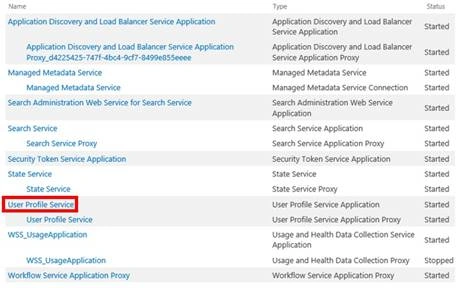
- Find and Select "User Profile Service".
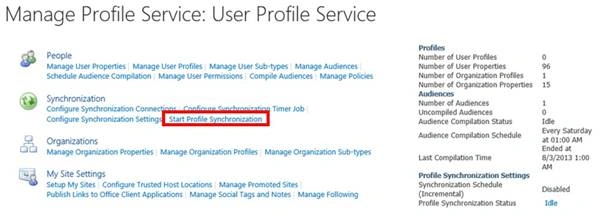
- Click "Start Profile Synchronization", under Synchronization.
- Select "Start Full Synchronization".
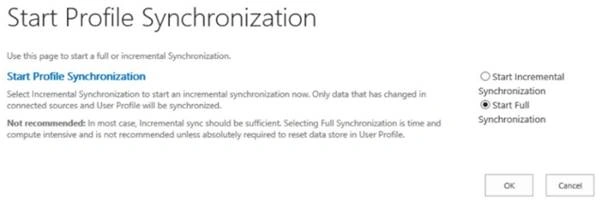
- Click "OK".
This will take a few minutes.
Join the conversation! Your thoughts help the community grow.