

In this article we will see how to create a List Definition using:
- SharePoint user interface
- Visual Studio 2010
Why we need List Definitions?
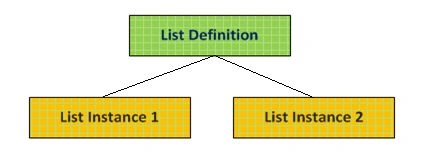
We need to have List Definitions for creating multiple list instances from it. This is the best way if we are dealing with capturing data of the same column types.
The built-in list definitions of SharePoint serve the same purpose. Example: Contact List, Task List etc. Similarly depending on your project domain it might be a good idea to turn common list formats into list definitions so that you can create multiple instances easily.
For example: a Computer Configuration list definition could be created for later creation of actual lists like Desktops and Laptops.
Scenario
In this example we are trying to capture a Computer Configuration list definition. The following are the field information it should contain:
|
Field |
Description |
|
Manufacturer |
Text Field |
|
Model |
Text Field |
|
CPU Make |
Choice Field with values of Intel, AMD, Other |
|
CPU Speed |
Number Field with Speed in GHz |
|
RAM Size |
Number Field with Size in GB |
|
Price |
Number Field representing Price |
|
Description |
More information on the other peripherals |
Solution 1: Creating List Definition using SharePoint user interface
Step 1: Create a new List
Open a SharePoint site and create a new list named Desktops. You can start with a Custom list.
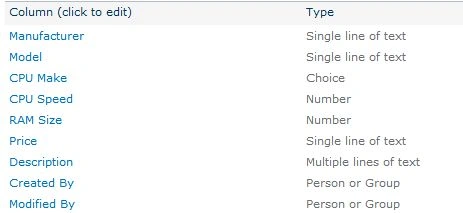
The following are the list columns after creation:
The following is the List in Default View:

Step 2: Template the List
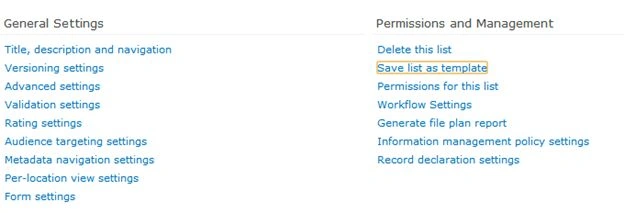
Now we can proceed with creation of a List Definition using the List Template feature of SharePoint. Go to List Settings and click on the Save list as a template link.
In the dialog that appears, enter the name of the template; for example: Computer Configuration Template.
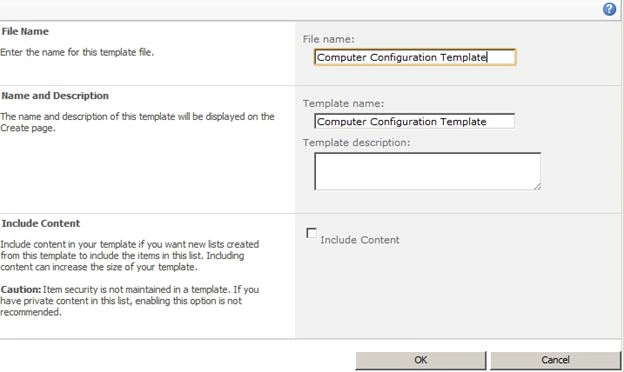
You can leave the checkbox Include Content as unchecked. Click the OK button after entering the details. You will get the following message:
Step 3: Visit the Gallery
The newly created template is stored inside the gallery. Clicking the link from the above screen, you can view it.

You can also access the list template gallery from: Site Actions > Site Settings > Galleries

Step 4: Create a new List from a Template
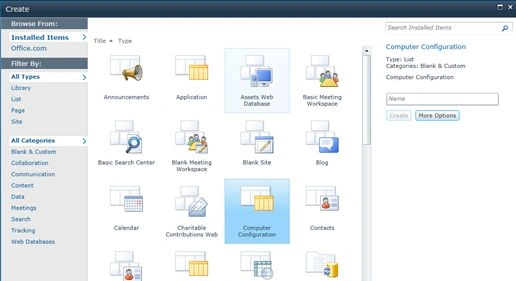
Now we are ready to test the above template. Try creating a new List (Lists > Create) and in the selection dialog you will see the new template as shown below:

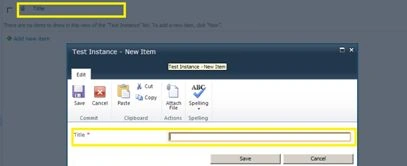
Now you can create multiple list instances from this template. You can also upload this template to another SharePoint site for creating list instances using it.
Solution 2: Creating List Definition using Visual Studio 2010
For proceeding with this part you need the SharePoint Developer Tools for Visual Studio 2010. I hope you already have this installed; else you can download it from here.
Step 1: Create the Project
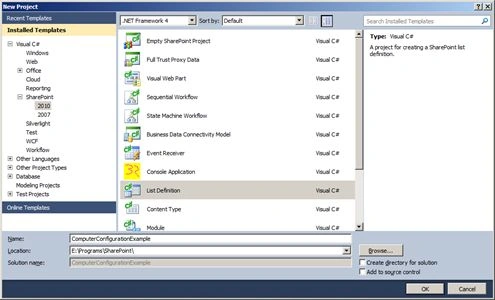
Open Visual Studio and create a new project from the List Definition template:
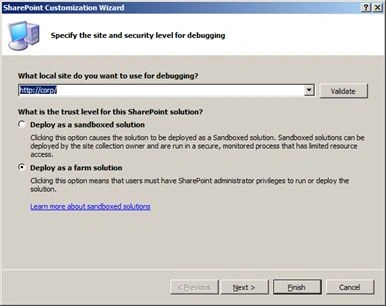
In the next page select the farm solution option:
In the next page enter the details as shown below and click the Finish button.

Please note that you need to derive it from a Custom List since we are going to create custom columns for the List Definition.
Now inside the Solution Explorer you can rename the List Definition name to ComputerConfiguration.
About the XML files
As you can see there are 2 XML files for the List Definition:
- Elements.xml
- Schema.xml
The Elements.xml contains general information about the List Definition like the Name, Description, Quick Launch etc. The Schema.xml as the name implies contains the actual metadata information about the List Definition.
The following is the XML content of Elements.xml:
<?xml version="1.0" encoding="utf-8"?>
<Elements xmlns="http://schemas.microsoft.com/sharepoint/">
<!-- Do not change the value of the Name attribute below. If it does not match the folder name of the List Definition project item, an error will occur when the project is run. -->
<ListTemplate
Name="ComputerConfiguration"
Type="10000"
BaseType="0"
OnQuickLaunch="TRUE"
SecurityBits="11"
Sequence="410"
DisplayName="Computer Configuration"
Description="Computer Configuration"
Image="/_layouts/images/itgen.png"/>
</Elements>
You can modify the above List Definition to change the Display Name and Description.
Step 2: Create the Fields for List Definition
The field information for the List is already mentioned in the beginning of the article. Please have a look at it before we proceed.
Field and FieldRef
For adding a List Definition we must use the following tags:
-
Field
-
FieldRef
The Field tag is used to represent new field information like the Name, Display Name, ID, Type etc. The FieldRef tag is used to refer to an existing field using the name.
Open the Schema.xml and add the following fields:

Gowtham RajamanickamPosted Apr 26, 2016, 8:48 AM
good one..
Mahesh BabueditedPosted Mar 12, 2013, 4:09 AMEdited Mar 12, 2013, 4:10 AM
Hi Jean Paul, Thanks for your article..its very nice to understand difference between list defination creation in visual studio and from sharepint portal... i have one doubt here..when we create list defination from visual studio we have to provide field IDs to create columns..so how can we know field Ids..Please let me know..Its look like combination of numbers and letters..so how can we produce these Field ID's manually..