

In this article we will explore Web Parts, one of the important extensible tools in SharePoint. We can use Visual Studio to create Web Parts.
What are Web Parts?
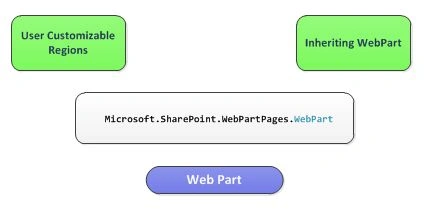
Web Parts are user-customizable regions in a SharePoint web page. It is an ASP.NET custom control which inherits from Microsoft.SharePoint.WebPartPages.WebPart. A Web Part needs the following to work with:
- WebPartZone
- WebPartManager
We can create a Web Part using the following ways:
- Inside SharePoint
- Using Visual Studio
Creating Web Part using Visual Studio
Now we can try creating a Web Part using Visual Studio 2010. Create a new Visual Web Part project from the SharePoint 2010 templates.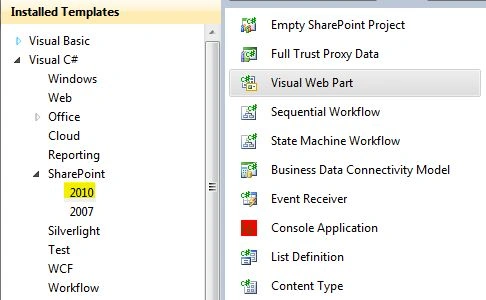
In the next page select the site and click the Finish button.
Inside the Solution Explorer, open the Visual Web Part User Control. This control represents the User Interface of the web part.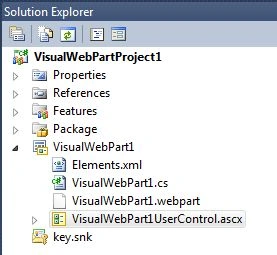
Add a label and change the text of it.
Building
Now build the project and once it succeeds, use the Deploy option of project.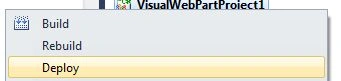
Wait for a few minutes and our Web Part gets deployed into the SharePoint site.
Steps in Manual Deployment
Following are the steps in manual deployment:
- Create Web Part
- Sign the Assembly
- Copy to bin/GAC folder
- Add to SafeControl list of web application
To help us, Visual Studio does all this for us.
Viewing the Web Part
For viewing the web part, use the Edit Page from any page and access the Add Web Part dialog.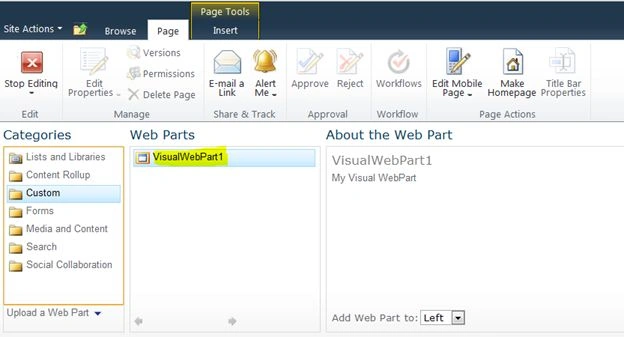
Inside the Custom category we will see the newly created web part. Click on the Add button and you will see the web part as shown below.
Rendering Web Part
The rendering of the web part is done by the class named VisualWebPart1. You can see the CreateChildControls() method inside it.
protected override void CreateChildControls()
{
Control control = Page.LoadControl(_ascxPath);
Controls.Add(control);
}
Here the User Control (ASCX) is rendered to the web part using the Controls.Add() method.
Note: In this example we have just used the label control. We can also use the other ASP.NET controls ins web parts.
Kinds of Web Parts
There are 2 kinds of web parts:
- Classic Web Parts (Add new item > Web part)
- Visual Web Parts (Add new item > Visual Web part)
Tool Parts
Along with the web part, we can associate specific controls in the properties area of the web part. The Edit Web part command brings the Tool window on the right side.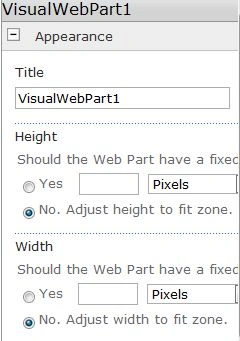
If we add a custom control or property into the above area it is called as Tool Part.
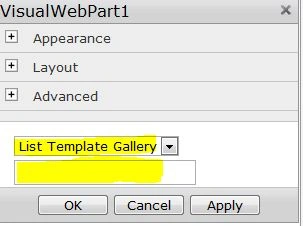
- We are experimenting with adding a Tool part consisting of following controls:
Drop Down List with existing List Names - Text Box control to capture the Customer Name
The following are the activities involved:
- Add a CustomerName property inside Web Part
- Create a custom class inheriting ToolPart
- Render Controls inside ToolPart
The following are the modifications in the VisualWebPart class:
public override ToolPart[] GetToolParts()
{
ToolPart[] allToolParts = new ToolPart[3];
WebPartToolPart standardToolParts = new WebPartToolPart();
CustomPropertyToolPart customToolParts = new CustomPropertyToolPart();
allToolParts[0] = standardToolParts;
allToolParts[1] = customToolParts;
allToolParts[2] = new MyToolPart();
return allToolParts;
}
protected override void Render(HtmlTextWriter writer)
{
base.Render(writer);
writer.Write(CustomerName);
}

Mahesh BabuPosted Dec 4, 2012, 8:37 AM
Hi Jean Paul..Could you please provide full source code for this..